The office holiday party was in six hours and I’d completely forgotten. My coworkers were the type who brought homemade gingerbread houses and seven-layer dip from scratch. I had a block of cream cheese, a carton of eggnog I’d bought on a whim, and a box of store-bought ginger snaps that were definitely past their prime. I stood in my kitchen at 7 AM, still in my pajamas, staring at these random ingredients like they might magically arrange themselves into something impressive. Honestly, I almost called in sick.
But then I remembered my grandmother’s rule: when you’re in a pinch, make a cheesecake. It sounds fancy, but it’s basically just stirring things together and letting the oven do the work. I crushed those sad ginger snaps into crumbs, mixed them with butter, and prayed. The filling was even simpler—eggnog, cream cheese, a few eggs. I poured it in, crossed my fingers, and shoved it in the oven while I got ready for work. Let me tell you, the smell that filled my apartment was nothing short of a Christmas miracle.
I brought that slightly cracked, hastily cooled cheesecake to the party, fully expecting it to be an afterthought next to the elaborate desserts. You know that feeling when you bring something simple and it ends up being the first thing to disappear? That was this cake. People were asking for the recipe before they’d even finished their first slice. The gingerbread crust was perfectly spiced, and the eggnog filling was so creamy it practically melted. I stood there, sheepish, explaining that I’d made it in a panic with pantry leftovers. They didn’t believe me. Maybe you’ve been there—the accidental win that feels way better than a planned one. That’s how this Cozy Eggnog Cheesecake with Gingerbread Crust was born, and it’s been my holiday go-to ever since.
Why You’ll Love This Recipe
This isn’t just another holiday dessert—it’s the one that will save your sanity when you’re short on time but still want to impress. I’ve tested this recipe at three different holiday gatherings (and one very impromptu cookie swap), and it never fails. Here’s why it works so well:
- Quick & Easy: Comes together in under 30 minutes of active prep time. The oven does the heavy lifting, so you can wrap presents or actually enjoy your eggnog while it bakes.
- Simple Ingredients: No fancy grocery store runs. You probably have most of these in your fridge and pantry right now—cream cheese, eggs, eggnog, and ginger snaps.
- Perfect for Holiday Parties: It’s a showstopper that slices beautifully and feeds a crowd. Great for Christmas dinner, office parties, or even a cozy night in when you need something sweet.
- Crowd-Pleaser: I’ve served this to kids, grandparents, and that one friend who “doesn’t like cheesecake.” Every single person went back for seconds. It’s that good.
- Unbelievably Delicious: The texture is silky and rich, with just the right amount of spice from the gingerbread crust. It’s comfort food in dessert form—the kind that makes you close your eyes after the first bite.
What makes this recipe different from all the other eggnog cheesecakes out there? It’s the crust. Using real ginger snaps (not just gingerbread cookie dough) gives it that deep, molasses-y warmth that pairs perfectly with the creamy, spiced filling. Plus, I’ve perfected the balance so it’s not too sweet—just rich enough to feel indulgent without putting you in a sugar coma. It’s comfort food reimagined: festive, fast, and with the same soul-soothing satisfaction as something you’d spend all day on.
What Ingredients You Will Need
This recipe uses simple, wholesome ingredients to deliver that cozy holiday flavor without any fuss. Most of these are pantry staples or easy to find at any grocery store during the holiday season.
For the Gingerbread Crust
- 2 cups ginger snap cookie crumbs (about 200g) – I recommend using store-bought ginger snaps for convenience. Look for brands like Nabisco or Anna’s for the best spice blend. If you’re feeling ambitious, you can make your own, but honestly, the store-bought ones work perfectly here.
- 1/4 cup granulated sugar (50g) – Just enough to sweeten the crust without overpowering the ginger.
- 6 tablespoons unsalted butter, melted (85g) – Use salted butter if that’s all you have, just reduce the added salt in the filling by a pinch.
- 1/4 teaspoon ground cinnamon – Adds extra warmth to the crust. (Freshly ground is nice, but pre-ground works fine.)
- Pinch of salt – Balances the sweetness and enhances the spices.
For the Eggnog Cheesecake Filling
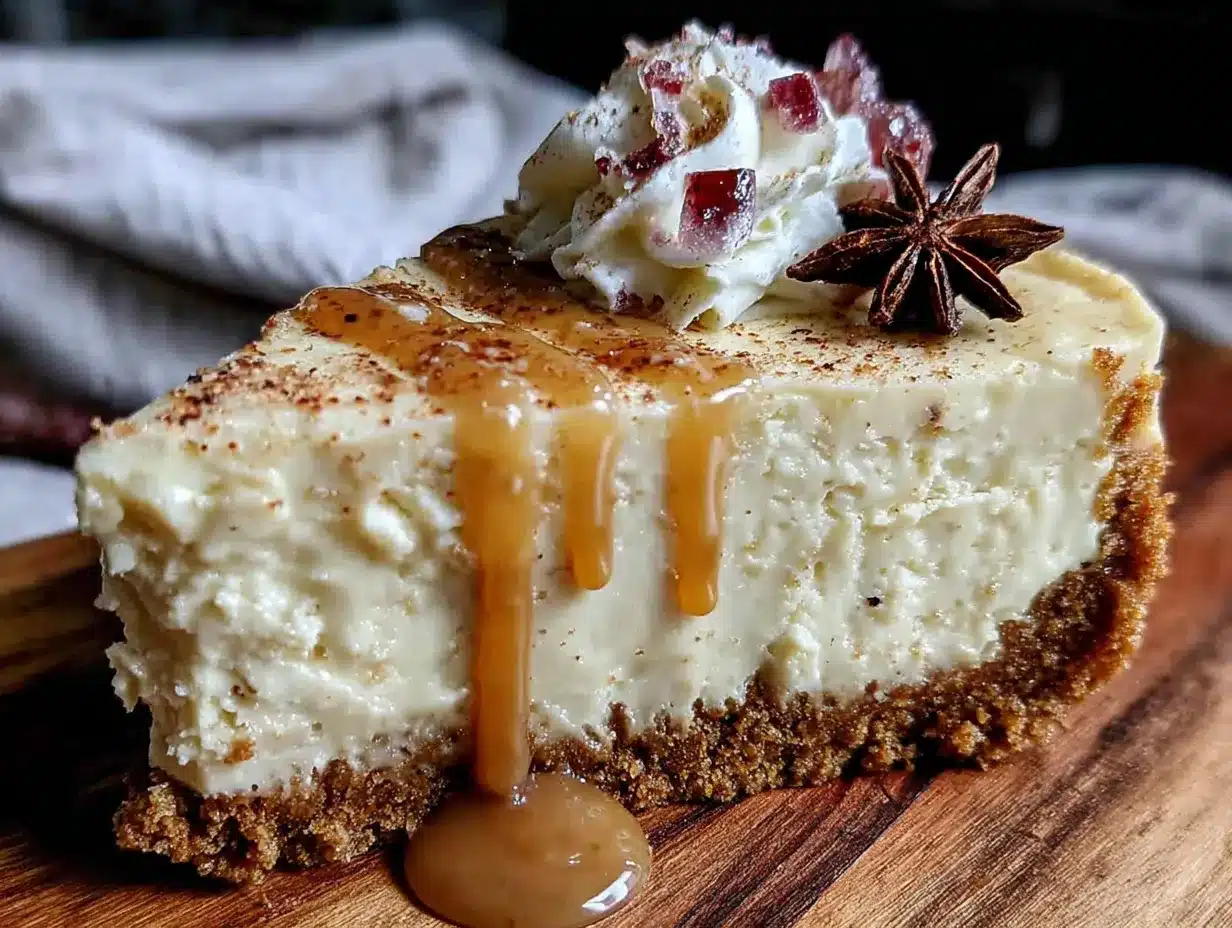
- 24 ounces cream cheese, softened (680g) – Full-fat is non-negotiable here. Low-fat cream cheese will make the filling grainy. Let it sit at room temperature for at least 30 minutes before starting.
- 1 cup granulated sugar (200g) – Standard white sugar works best. Don’t use brown sugar—it’ll make the filling too dense.
- 3 large eggs, room temperature – Cold eggs can cause the batter to curdle. Leave them on the counter for 20 minutes before using.
- 1 cup eggnog (240ml) – Use a good quality eggnog. I prefer full-fat eggnog for the creamiest texture, but low-fat works in a pinch. Avoid “light” eggnog—it has too much water and will make the cheesecake runny.
- 1 teaspoon vanilla extract – Pure vanilla extract is best, but imitation works fine.
- 1/2 teaspoon ground nutmeg – Freshly grated is amazing, but pre-ground is perfectly fine. (Adds that classic eggnog flavor.)
- 1/2 teaspoon ground cinnamon – For that warm, cozy spice profile.
- 1/4 teaspoon ground cloves – Just a hint—too much can overpower the other flavors.
- 2 tablespoons all-purpose flour (16g) – This helps stabilize the cheesecake and prevents cracks. You can substitute with cornstarch for a gluten-free option.
Substitution Notes: If you’re dairy-free, use a high-quality dairy-free cream cheese (like Kite Hill or Violife) and a plant-based eggnog. The texture will be slightly less creamy, but still delicious. For a gluten-free version, use gluten-free ginger snaps—they’re widely available now. And if you can’t find eggnog? You can make a quick substitute by mixing 1 cup whole milk with 1/2 teaspoon vanilla, 1/4 teaspoon nutmeg, and 1 tablespoon sugar. It won’t be exactly the same, but it’ll work in a pinch.
Equipment Needed
You don’t need a fancy kitchen to make this cheesecake. Here’s what you’ll need:
- 9-inch springform pan – This is essential for easy removal. If you don’t have one, you can use a deep-dish pie plate, but slices will be trickier to serve.
- Food processor or rolling pin – For crushing the ginger snaps. A food processor makes it quick and even, but a rolling pin and a zip-top bag work just as well. (I’ve done both—the rolling pin method is oddly satisfying.)
- Electric mixer (hand or stand) – A hand mixer is fine, but a stand mixer makes the process even easier. You can mix by hand with a whisk, but your arm will get a workout.
- Large mixing bowls – One for the crust, one for the filling.
- Rubber spatula – For scraping down the sides of the bowl and smoothing the filling.
- Measuring cups and spoons – Accurate measurements are key for baking.
- Aluminum foil – For wrapping the springform pan to prevent water from seeping in during the water bath.
- Large roasting pan or baking dish – For the water bath. It should be big enough to hold your springform pan.
- Cooling rack – Helps the cheesecake cool evenly.
Budget-Friendly Tip: If you don’t own a springform pan, check your local thrift store. I found mine for $3 and it’s still going strong after five years. Also, you can skip the water bath by placing a pan of hot water on the oven rack below the cheesecake—it’s not as foolproof, but it works.
Preparation Method
Let’s make this Cozy Eggnog Cheesecake with Gingerbread Crust step by step. Don’t rush—cheesecake is forgiving, but taking your time pays off.
Step 1: Preheat and Prep
Preheat your oven to 325°F (160°C). Grease the bottom and sides of a 9-inch springform pan with butter or non-stick spray. This will help the crust stay put and make cleanup easier. Set the pan aside.
Step 2: Make the Gingerbread Crust
Place the ginger snaps in a food processor and pulse until you have fine crumbs. If you’re using a rolling pin, put the cookies in a zip-top bag, seal it, and crush them until no large pieces remain. You should have about 2 cups of crumbs. Transfer them to a medium bowl, then add the sugar, cinnamon, and salt. Pour in the melted butter and stir with a fork until the mixture looks like wet sand. It should hold together when you squeeze a handful.
Press the crumb mixture firmly into the bottom of the prepared springform pan. Use the bottom of a measuring cup or a flat glass to press it down evenly. Don’t press it up the sides—this is a single-layer crust. Pop the pan in the fridge for 15 minutes while you prepare the filling. (This helps the crust set and prevents it from crumbling when you cut slices.)
Step 3: Start the Filling
In a large mixing bowl, beat the softened cream cheese with an electric mixer on medium speed until smooth and fluffy—about 2 minutes. Scrape down the sides and bottom of the bowl with a rubber spatula. Add the sugar and beat for another minute until fully combined. The mixture should look light and creamy.
Step 4: Add the Eggs
Add the eggs one at a time, beating on low speed after each addition just until the yolk disappears. Over-mixing at this stage can incorporate too much air, which leads to cracks. Don’t rush—let each egg fully incorporate before adding the next.
Step 5: Add the Eggnog and Flavorings
With the mixer on low, slowly pour in the eggnog, vanilla extract, nutmeg, cinnamon, and cloves. Mix until just combined. The batter should be smooth and slightly thick. If it looks curdled, your cream cheese was too cold—don’t panic. Just keep mixing on low; it’ll come together.
Step 6: Add the Flour
Sprinkle the flour over the batter and mix on low until just incorporated. This step helps stabilize the cheesecake and gives it that perfect silky texture. Scrape down the bowl one final time to make sure everything is evenly mixed.
Step 7: Assemble and Bake
Pour the filling over the chilled crust. Use a spatula to smooth the top into an even layer. Gently tap the pan on the counter a few times to release any air bubbles. Wrap the bottom and sides of the springform pan tightly with two layers of aluminum foil—this prevents water from leaking in during the water bath.
Place the wrapped pan in a large roasting pan. Pour hot water into the roasting pan until it reaches about halfway up the sides of the springform pan. Carefully transfer the whole setup to the preheated oven. Bake for 55-65 minutes, or until the edges are set and the center still jiggles slightly when you gently shake the pan. It will continue to cook as it cools.
Step 8: Cool and Chill
Turn off the oven and crack the door open. Let the cheesecake sit in the oven for 1 hour—this gradual cooling helps prevent cracks. After an hour, remove the pan from the water bath and set it on a cooling rack. Let it cool completely at room temperature (about 2 hours). Once cool, cover the pan with plastic wrap and refrigerate for at least 6 hours, but overnight is best. The flavors meld together and the texture becomes perfectly creamy.
Cooking Tips & Techniques
I’ve made this cheesecake about a dozen times now, and I’ve learned a few things the hard way. Here’s what I wish I’d known from the start:
- Room temperature ingredients are non-negotiable. Cold cream cheese and eggs will give you a lumpy batter that won’t bake evenly. I’ve forgotten this step twice—once in a hurry—and both times the cheesecake cracked. Set everything out 30 minutes before you start.
- Don’t over-mix the filling. I know it’s tempting to beat it until it’s super fluffy, but that adds too much air. Air bubbles expand in the oven and cause cracks. Mix on low speed and stop as soon as everything is combined.
- The water bath is your friend. I skipped it once because I was lazy, and the cheesecake came out dry and cracked. The steam from the water bath keeps the oven humid, which helps the cheesecake bake evenly and stay creamy. If you’re worried about water leaking, double-wrap the pan with foil.
- Let it cool slowly. Sudden temperature changes are the #1 cause of cracks. That’s why I leave it in the oven with the door cracked. If you’re in a rush, you can skip this step, but expect a few surface cracks. They’re cosmetic—the cheesecake will still taste amazing.
- Use a sharp knife for clean slices. Run your knife under hot water, wipe it dry, then slice. Clean the blade between cuts for picture-perfect pieces. I learned this after my first attempt looked like a demolition site.
Variations & Adaptations
This recipe is wonderfully flexible. Here are a few ways to make it your own:
- Gluten-Free Version: Use gluten-free ginger snaps for the crust. The filling is naturally gluten-free if you substitute the flour with cornstarch or arrowroot powder. I’ve tested this with Bob’s Red Mill gluten-free ginger snaps, and it works beautifully.
- Dairy-Free Version: Swap the cream cheese for a high-quality dairy-free alternative, use vegan butter for the crust, and choose a plant-based eggnog. The texture will be slightly softer, but the flavor is still fantastic. I recommend Kite Hill cream cheese—it’s the closest to the real thing.
- Spiced-Up Version: Add 1/2 teaspoon of ground ginger to the filling for an extra kick. Or stir in 1/4 cup of finely chopped crystallized ginger for little bursts of sweetness and heat.
- Chocolate Twist: Melt 4 ounces of dark chocolate and swirl it into the filling before baking. The chocolate pairs surprisingly well with the eggnog and gingerbread flavors.
- Mini Cheesecakes: Use a muffin tin with paper liners instead of a springform pan. Press the crust into the bottom of each liner, fill with batter, and bake for 18-22 minutes. Perfect for parties where everyone wants their own little dessert.
I once made a version with a pecan-gingerbread crust for Thanksgiving, and it was a hit. Just swap 1/2 cup of the ginger snap crumbs for finely chopped pecans. The crunch adds a lovely texture.
Serving & Storage Suggestions
This cheesecake is best served chilled, straight from the fridge. The texture is at its creamiest when it’s cold. Here’s how to make it shine:
- Serving Temperature: Remove the cheesecake from the fridge about 15 minutes before serving. This takes the chill off without making it too soft. Slice with a hot, dry knife for clean edges.
- Presentation: Top each slice with a dollop of whipped cream, a sprinkle of nutmeg, and a small ginger snap cookie for garnish. A drizzle of caramel sauce or a dusting of cinnamon also works beautifully.
- Complementary Beverages: Serve with a cup of hot coffee, spiced chai, or—of course—a glass of eggnog. For an adult twist, pair it with a bourbon or rum-spiked coffee.
- Storage: Cover the cheesecake tightly with plastic wrap or store it in an airtight container in the refrigerator. It will keep for up to 5 days. The flavors actually deepen after a day or two, so don’t be afraid to make it ahead.
- Freezing: This cheesecake freezes beautifully. Wrap individual slices (or the whole cheesecake) tightly in plastic wrap, then in aluminum foil. Freeze for up to 2 months. To thaw, transfer to the refrigerator overnight. Do not thaw at room temperature—it will get watery.
- Reheating: Cheesecake is best served cold, but if you prefer it slightly warm, pop a slice in the microwave for 10-15 seconds. Just don’t overdo it, or it will lose its structure.
Nutritional Information & Benefits
Let’s be real—this is a decadent dessert. But it’s made with real ingredients, and that counts for something. Here’s the approximate nutritional breakdown per slice (based on 12 servings):
- Calories: ~380
- Fat: 24g
- Carbohydrates: 34g
- Protein: 8g
- Sugar: 22g
- Sodium: 320mg
Health Highlights: The cream cheese provides a good amount of calcium and protein, while the eggs add essential amino acids and vitamin D. Eggnog itself is rich in vitamins A and B12, and the spices (cinnamon, nutmeg, cloves) are packed with antioxidants that help fight inflammation. Sure, it’s not a health food, but it’s a treat made with whole ingredients—no artificial flavors or preservatives here.
Dietary Considerations: This recipe contains gluten (from the ginger snaps), dairy (from the cream cheese and eggnog), and eggs. For gluten-free and dairy-free options, see the variations section above. It’s also relatively low in sodium compared to many store-bought desserts.
Conclusion
This Cozy Eggnog Cheesecake with Gingerbread Crust is more than just a holiday dessert—it’s the kind of recipe that becomes a tradition. It’s the one you’ll make when you’re short on time but want to feel like you pulled off something magical. It’s the one your friends will ask for year after year, the one that reminds you that sometimes the best things come from a little bit of panic and a whole lot of heart.
I love how forgiving this recipe is. It doesn’t demand perfection—it just asks for a little patience and a few simple ingredients. And honestly, that’s what the holidays should be about. Not stress, not competition, but the joy of sharing something delicious with the people you care about. Whether you’re serving it at a fancy dinner party or sneaking a slice in your pajamas at midnight, this cheesecake delivers every single time.
Now I want to hear from you! Have you tried this recipe? Did you add your own twist? Drop a comment below and let me know how it turned out. And if you loved it, share this post with a friend who needs a little holiday cheer. Happy baking, and may your kitchen smell like gingerbread and joy!
Frequently Asked Questions
Can I use homemade gingerbread cookies for the crust?
Absolutely! If you have leftover gingerbread cookies from decorating, crush them up and use them instead of store-bought ginger snaps. Just note that homemade cookies tend to be softer, so your crust might be a little less crisp. Bake the crust for 10 minutes at 350°F (175°C) before adding the filling to help it set.
Why did my cheesecake crack?
Cracks happen for a few reasons: over-mixing the batter, baking at too high a temperature, or cooling it too quickly. To avoid cracks, mix on low speed, use a water bath, and let the cheesecake cool gradually in the oven with the door cracked. If it does crack, don’t worry—just cover it with whipped cream or a dusting of powdered sugar. No one will ever know.
Can I make this cheesecake without a water bath?
Yes, but it’s riskier. Place a pan of hot water on the oven rack below the cheesecake to create steam. This helps mimic the humid environment of a water bath. Your cheesecake might still crack, but the flavor will be the same. If you’re in a pinch, go for it—I’ve done it before and it still tasted amazing.
How do I know when the cheesecake is done baking?
The edges should be set and slightly puffed, but the center should still jiggle when you gently shake the pan. It should look like a firm Jell-O—not liquid, but not completely solid. If the center is still sloshy, give it another 5-10 minutes. Remember, it will continue to cook as it cools.
Can I use low-fat eggnog or cream cheese?
I don’t recommend it. Low-fat versions have a higher water content, which can make the cheesecake runny or grainy. Full-fat ingredients give you that rich, creamy texture that makes cheesecake so indulgent. If you’re watching calories, consider making smaller slices instead of swapping ingredients.
Pin This Recipe!
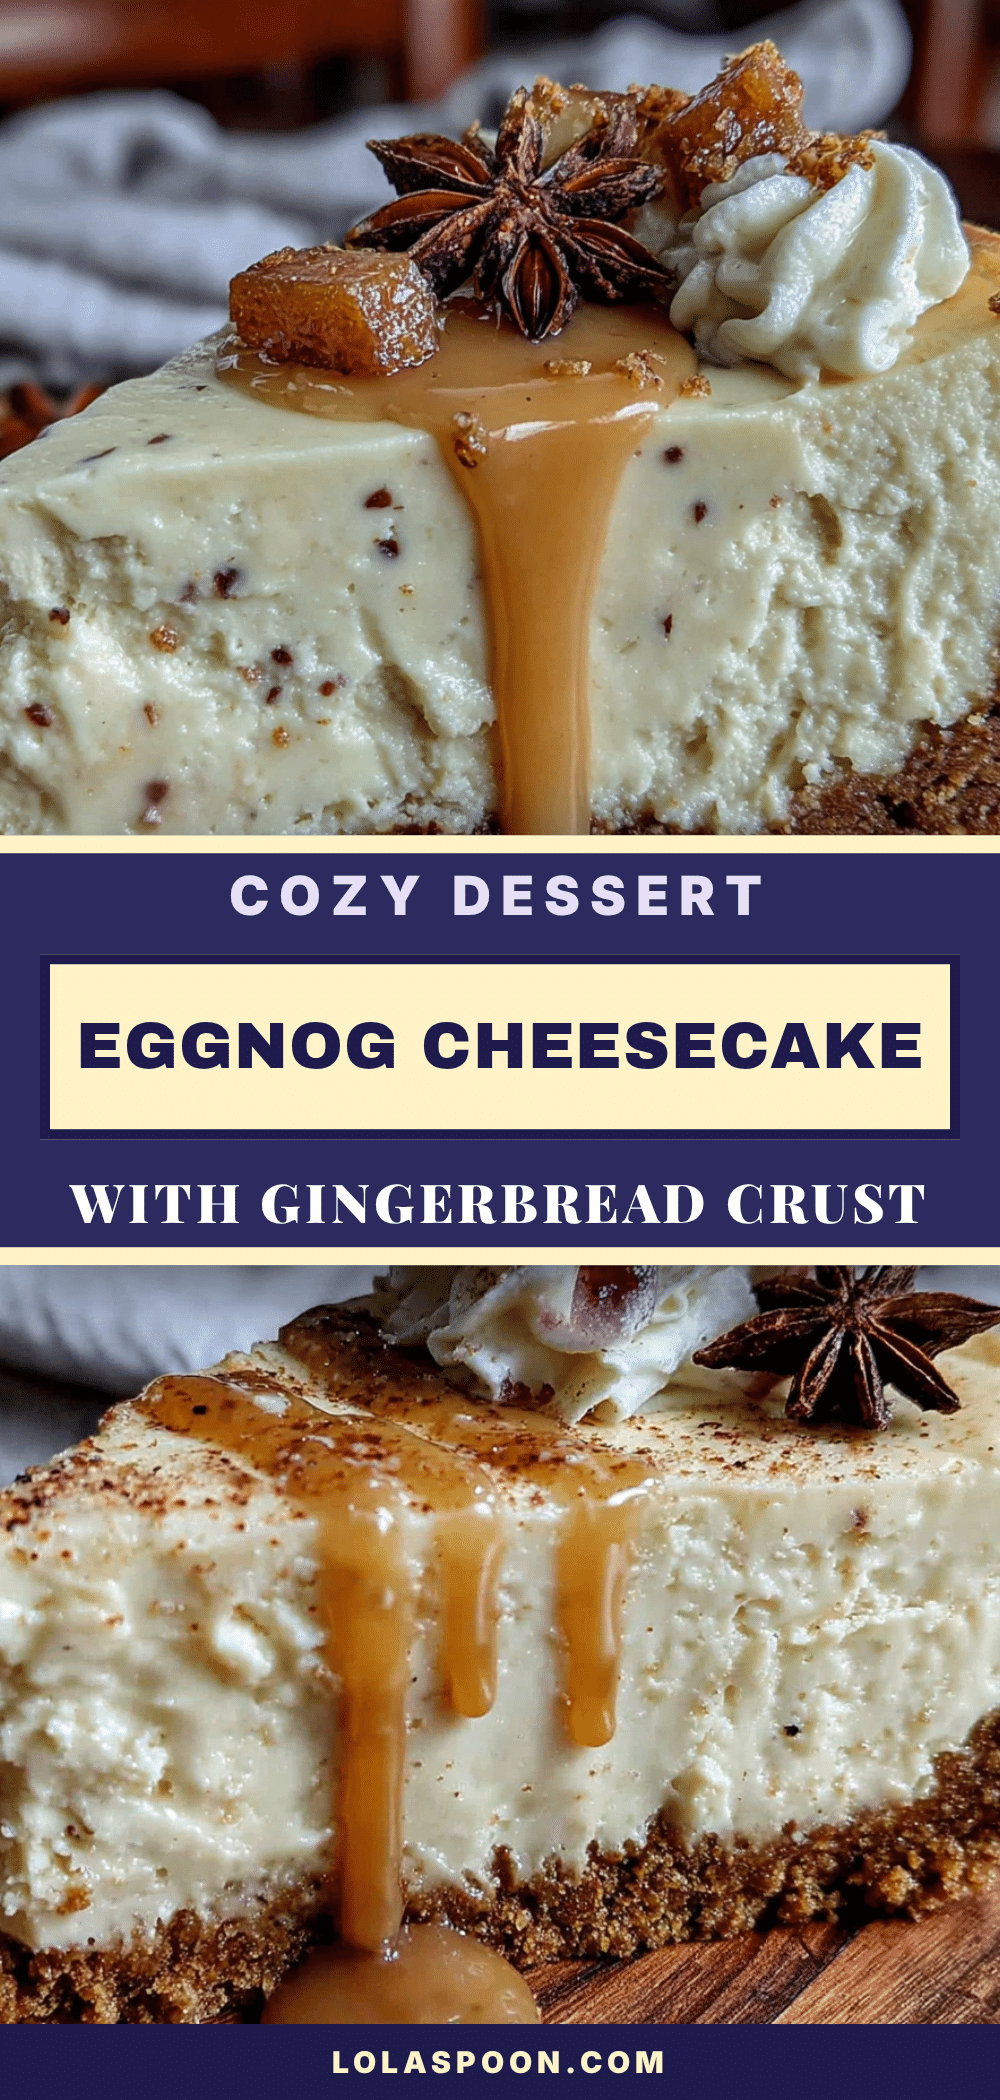
Cozy Eggnog Cheesecake with Gingerbread Crust
A quick and easy holiday dessert featuring a creamy eggnog cheesecake filling with a spiced gingerbread crust. Perfect for impressing guests with minimal effort.
- Prep Time: 30 minutes
- Cook Time: 55-65 minutes
- Total Time: 8 hours 30 minutes (includes cooling and chilling)
- Yield: 12 servings 1x
- Category: Dessert
- Cuisine: American
Ingredients
- 2 cups ginger snap cookie crumbs (about 200g)
- 1/4 cup granulated sugar (50g)
- 6 tablespoons unsalted butter, melted (85g)
- 1/4 teaspoon ground cinnamon
- Pinch of salt
- 24 ounces cream cheese, softened (680g)
- 1 cup granulated sugar (200g)
- 3 large eggs, room temperature
- 1 cup eggnog (240ml)
- 1 teaspoon vanilla extract
- 1/2 teaspoon ground nutmeg
- 1/2 teaspoon ground cinnamon
- 1/4 teaspoon ground cloves
- 2 tablespoons all-purpose flour (16g)
Instructions
- Preheat oven to 325°F (160°C). Grease the bottom and sides of a 9-inch springform pan with butter or non-stick spray.
- Make the crust: Pulse ginger snaps in a food processor until fine crumbs. Alternatively, crush in a zip-top bag with a rolling pin. Transfer to a bowl, add sugar, cinnamon, and salt. Pour in melted butter and stir until mixture resembles wet sand.
- Press crumb mixture firmly into the bottom of the prepared pan. Refrigerate for 15 minutes.
- In a large bowl, beat softened cream cheese with an electric mixer on medium speed until smooth and fluffy, about 2 minutes. Add sugar and beat for another minute.
- Add eggs one at a time, beating on low after each addition just until yolk disappears.
- With mixer on low, slowly pour in eggnog, vanilla, nutmeg, cinnamon, and cloves. Mix until just combined.
- Sprinkle flour over batter and mix on low until just incorporated. Scrape down bowl.
- Pour filling over chilled crust. Smooth top with a spatula. Tap pan on counter to release air bubbles. Wrap bottom and sides of pan tightly with two layers of aluminum foil.
- Place wrapped pan in a large roasting pan. Pour hot water into roasting pan until it reaches halfway up the sides of the springform pan.
- Bake for 55-65 minutes, until edges are set and center still jiggles slightly.
- Turn off oven and crack door open. Let cheesecake sit in oven for 1 hour.
- Remove pan from water bath and cool completely on a rack (about 2 hours). Cover with plastic wrap and refrigerate for at least 6 hours, preferably overnight.
Notes
Room temperature ingredients are essential for a smooth batter. Use a water bath to prevent cracks. Cool slowly in the oven to avoid cracking. For clean slices, run a knife under hot water and wipe dry between cuts.
Nutrition
- Serving Size: 1 slice
- Calories: 380
- Sugar: 22
- Sodium: 320
- Fat: 24
- Carbohydrates: 34
- Protein: 8
Keywords: eggnog cheesecake, gingerbread crust, holiday dessert, easy cheesecake, Christmas dessert


