This was supposed to be a slow-braised Sunday dinner. I had the wine out, the fresh thyme, even a fancy Dutch oven I’d been wanting to break in. But it was a Tuesday, I’d forgotten to defrost anything, and my neighbor had just texted that her kid’s bus was late and could I grab her mail? So there I was, staring at a pack of chicken thighs, a half-used stick of butter, and about twenty minutes before I needed to be somewhere else. I grabbed the wrong skillet—a beat-up nonstick instead of my precious cast iron—and just started cooking. What came out was nothing like the plan. And honestly? It was better.
That first sizzle when the butter hit the hot pan, with those garlic cloves I’d smashed in a hurry, filled my whole kitchen with this smell that stopped me mid-panic. I wasn’t making a masterpiece. I was making dinner. But when I sat down with that golden, crispy-skinned thigh and let the garlicky butter soak into some crusty bread, I knew I’d stumbled onto something. Maybe you’ve been there—the day when the recipe you had in your head falls apart, but what you end up with is exactly what you needed. This Cozy Garlic Butter Chicken Thighs in 20 Minutes is that recipe. It’s the one I keep making, not because I planned it, but because it worked when nothing else did.
Why You’ll Love This Recipe
I’ve tested this Cozy Garlic Butter Chicken Thighs in 20 Minutes more times than I care to admit—different pans, different butter brands, even a disastrous attempt with margarine (don’t do it). It’s the kind of recipe that proves you don’t need fancy techniques to get a restaurant-worthy meal on the table. Here’s why it’s become my go-to:
- Quick & Easy: From fridge to plate in under 20 minutes. No marinating, no complicated steps, just straightforward cooking that fits into even the craziest weeknight.
- Simple Ingredients: You probably have everything already—chicken thighs, butter, garlic, salt, pepper, and maybe some fresh herbs if you’re feeling fancy. No special grocery trips required.
- Perfect for Cozy Nights: This is the dinner you want when the weather turns cold, or you’ve had a rough day, or you just need something that feels like a hug on a plate.
- Crowd-Pleaser: My picky-eating nephew asked for seconds, and my health-conscious sister asked for the recipe. It’s that rare dish that makes everyone happy.
- Unbelievably Delicious: The contrast between the crispy, golden skin and the tender, juicy meat, all bathed in that rich garlic butter sauce—it’s next-level comfort food that tastes like you spent hours in the kitchen.
What makes this different from every other chicken thigh recipe? It’s the technique. By searing the skin first and finishing with a butter baste, you get that perfect crunch without drying out the meat. The garlic infuses the butter without burning, creating a sauce that’s pure gold. This isn’t just another version—it’s the version that makes you close your eyes after the first bite.
What Ingredients You Will Need
This recipe uses simple, honest ingredients to deliver big flavor without the fuss. Most of these are pantry staples you probably already have on hand.
- Chicken Thighs (4-6, bone-in, skin-on): The bone keeps the meat juicy, and the skin crisps up beautifully. I prefer organic or free-range when I can find them—the flavor is noticeably richer. If you only have boneless, reduce cooking time by about 3-4 minutes per side.
- Unsalted Butter (4 tablespoons): Use unsalted so you can control the salt level. I’ve tried this with salted butter and it’s fine, but the sauce can get too salty. Kerrygold or any European-style butter gives a richer flavor, but regular butter works great too.
- Garlic (6-8 cloves, smashed): Fresh garlic is non-negotiable here. Pre-minced stuff from a jar will burn and turn bitter. Smash each clove with the flat of your knife—it releases the oils without making tiny pieces that burn in the hot butter.
- Salt (1 teaspoon, plus more for seasoning): I use kosher salt for its clean flavor and easy pinchability. Diamond Crystal is my go-to, but any kosher salt works.
- Black Pepper (½ teaspoon, freshly ground): Freshly ground pepper makes a real difference here. The pre-ground stuff just doesn’t have the same punch.
- Fresh Thyme (4-5 sprigs): Adds an earthy, slightly floral note that pairs beautifully with the garlic butter. Dried thyme works in a pinch (use ½ teaspoon), but fresh really shines here.
- Chicken Broth (¼ cup): This deglazes the pan and creates the base for your sauce. Low-sodium is best so you can control the salt. Homemade broth is amazing if you have it, but boxed is totally fine.
- Optional Garnishes: Fresh parsley, chopped (for color and freshness), and lemon wedges (for a bright squeeze at the end that cuts through the richness).
Substitution Tips: Need a dairy-free option? Use ghee instead of butter—it has a similar rich flavor and high smoke point. For a lower-fat version, you can use 2 tablespoons of butter and 2 tablespoons of olive oil, but you’ll lose some of that luxurious sauce.
Equipment Needed
You don’t need a professional kitchen to pull off this Cozy Garlic Butter Chicken Thighs in 20 Minutes. Here’s what you’ll need:
- A Large Skillet (10-12 inches): Cast iron is my first choice—it holds heat evenly and gives you that perfect sear. But a heavy-bottomed stainless steel or nonstick pan works fine. Just avoid thin pans that create hot spots.
- Tongs: For flipping the chicken without piercing the skin. I’ve used forks in a pinch, but tongs are so much better for keeping that crispy skin intact.
- A Sharp Knife: For smashing the garlic cloves and any last-minute herb chopping. A chef’s knife or a sturdy paring knife works.
- A Cutting Board: Preferably one that won’t slide around. I put a damp paper towel under mine for stability.
- A Small Bowl: For holding your smashed garlic and herbs while you work. Makes the process smoother.
- A Meat Thermometer (Optional but Recommended): Takes the guesswork out of doneness. Chicken thighs are done at 165°F, but I pull them at 160°F and let carryover cooking finish the job.
Budget-Friendly Tip: If you don’t have a cast iron skillet, a good nonstick pan from a department store will set you back about $20 and work perfectly. Just don’t use metal utensils on it.
Preparation Method

Let me walk you through making this Cozy Garlic Butter Chicken Thighs in 20 Minutes. I’ve made this so many times I could do it in my sleep, and these steps are designed to get you that perfect result on your first try.
- Pat the chicken dry (2 minutes): Take your chicken thighs out of the package and pat them thoroughly dry with paper towels. This is the most important step—wet skin won’t crisp up. Let them sit on a plate while you get everything else ready. I usually do this first so the surface air-dries a bit while I prep.
- Season generously (1 minute): Sprinkle both sides of the chicken with salt and pepper. Don’t be shy—the skin needs a good coating. I use about ½ teaspoon of salt per side, but go with your gut. Let the seasoned chicken rest while you heat the pan.
- Heat the skillet (2 minutes): Place your skillet over medium-high heat and let it get hot. You want it hot enough that a drop of water sizzles and evaporates immediately. Add 1 tablespoon of the butter and swirl to coat the pan. It should melt and foam immediately—that’s your signal.
- Sear the chicken skin-side down (5-6 minutes): Place the chicken thighs in the pan, skin-side down, being careful not to crowd them. You should hear a satisfying sizzle. Let them cook undisturbed for 5-6 minutes. I know it’s tempting to peek, but don’t move them! The skin needs that uninterrupted contact to get golden and crispy. You’ll know it’s ready when the edges look deep golden brown and the skin releases easily from the pan.
- Flip and cook the other side (4-5 minutes): Using your tongs, flip each thigh over. The skin side should be a beautiful deep golden color. Cook for another 4-5 minutes, until the other side is browned and the chicken is almost cooked through. If your thighs are on the larger side, give them an extra minute.
- Add garlic and thyme (1 minute): Reduce the heat to medium-low. Push the chicken to one side of the pan and add the remaining 3 tablespoons of butter, the smashed garlic cloves, and the fresh thyme sprigs. Let the butter melt and foam, then tilt the pan slightly so the butter pools. Use a spoon to baste the chicken with the garlic butter for about 30 seconds. The garlic should be fragrant but not browning—if it starts to darken, remove the pan from heat briefly.
- Deglaze the pan (1 minute): Pour in the chicken broth. It will sizzle and steam—that’s good! Use a wooden spoon or spatula to scrape up any browned bits from the bottom of the pan. Those bits are pure flavor. Let the sauce bubble for about 30 seconds to reduce slightly. The broth will mix with the butter to create a silky, savory sauce.
- Check for doneness (30 seconds): If you have a meat thermometer, insert it into the thickest part of a thigh (avoiding the bone). You’re looking for 165°F. If it’s not quite there, let the chicken cook in the sauce for another minute or two. If it’s done, move on to the next step.
- Rest and serve (2 minutes): Remove the pan from heat. Transfer the chicken to a serving platter, pouring the garlic butter sauce over the top. Let it rest for 2 minutes before serving—this lets the juices redistribute so every bite is moist and tender. Discard the thyme sprigs (the leaves will have fallen off into the sauce).
Pro Tip: If you want extra-crispy skin, after flipping the chicken, try this trick: carefully pour off all but about a tablespoon of the rendered fat from the pan before adding the butter and garlic. Your skin will stay crackly-crisp even after saucing.
Cooking Tips & Techniques
I’ve made this Cozy Garlic Butter Chicken Thighs in 20 Minutes at least thirty times, and I’ve learned a few things the hard way. Here are my best tips to save you from my mistakes.
The biggest mistake I made: The first time I tried this, I used pre-minced garlic from a jar. It burned almost instantly in the hot butter, turning bitter and acrid. The whole sauce was ruined. Now I always smash fresh cloves—they release flavor slowly and infuse the butter without burning.
Don’t crowd the pan. If you’re cooking more than 4 thighs, do it in batches. Overcrowding traps steam and prevents that golden crust from forming. Your chicken will be gray and sad instead of crispy and gorgeous. I learned this when I tried to cook 6 thighs in a 10-inch pan—total disaster.
Let the chicken come to room temperature. Take the thighs out of the fridge 15 minutes before cooking. Cold chicken lowers the pan temperature and can lead to uneven cooking. I set mine on the counter while I prep my other ingredients.
Master the butter baste. When you add the butter and garlic, tilt the pan so the butter pools on one side. Use a large spoon to scoop it up and drizzle it over the chicken. This keeps the meat moist and infuses it with that garlicky flavor. Do this for about 30 seconds—any longer and the garlic might burn.
Timing is everything. Start your rice or vegetables before you begin the chicken. A 20-minute meal means everything should be ready at the same time. I usually start my rice, then begin the chicken, and by the time the chicken rests, the rice is done.
Variations & Adaptations
This recipe is incredibly flexible. Here are some ways I’ve adapted it for different moods and dietary needs:
Lemon Herb Version: Add the zest of one lemon and a tablespoon of fresh rosemary along with the garlic. Squeeze half a lemon over the finished dish. The brightness cuts through the richness beautifully—I make this version in spring when I’m craving something lighter.
Spicy Kick: Add ½ teaspoon of red pepper flakes along with the garlic, or throw in a sliced fresh chili. The heat plays wonderfully with the buttery sauce. My husband loves this version—he says it wakes up the whole dish.
Creamy Garlic Butter: After deglazing with broth, stir in ¼ cup of heavy cream. Let it simmer for a minute until thickened. You get a luscious, creamy sauce that’s incredible over mashed potatoes. I save this for special occasions when I want something extra indulgent.
Dairy-Free Adaptation: Swap the butter for a high-quality vegan butter (I like Miyoko’s) or use ghee, which is technically butter but has the lactose removed. The flavor changes slightly but it’s still delicious. My dairy-sensitive friend requests this version all the time.
Herb Swap: No thyme? Use rosemary, oregano, or sage. Each gives a different character to the dish. Rosemary is more piney and aromatic, oregano adds an Italian flair, and sage brings an earthy, almost peppery note. I’ve tried them all and they each work beautifully.
Serving & Storage Suggestions
This Cozy Garlic Butter Chicken Thighs in 20 Minutes is best served hot, straight from the pan. But here’s how to make the most of it, whether you’re eating it now or saving it for later.
Serving Temperature and Presentation: Serve the chicken hot, with the garlic butter sauce spooned over the top. I like to arrange the thighs on a warm platter and pour the sauce over them, then garnish with fresh parsley and a few lemon wedges. The contrast of the golden chicken, green herbs, and bright yellow lemon is gorgeous.
What to Serve With It: This dish pairs beautifully with almost anything. Mashed potatoes are the classic choice—they soak up that garlic butter sauce like a dream. Buttered rice, crusty bread for dipping, or simple roasted vegetables also work wonderfully. For a lighter option, try a crisp green salad with a lemony vinaigrette to cut through the richness. If you’re in the mood for something equally cozy, you might love this crispy garlic chicken for another weeknight favorite.
Storage Instructions: Leftover chicken keeps in an airtight container in the refrigerator for up to 3 days. The flavors actually meld and deepen overnight, so leftovers can be even better the next day. Store the sauce separately if you can, or pour it over the chicken—it will solidify slightly when cold but reheat beautifully.
Reheating Methods: The best way to reheat is in a skillet over medium-low heat with a splash of chicken broth or water to loosen the sauce. Cover the pan and let it heat through for about 5 minutes. The microwave works in a pinch, but it can dry out the chicken and make the skin soggy. If you’re in a hurry, microwave in 30-second bursts, covered with a damp paper towel.
Freezing Instructions: You can freeze the cooked chicken and sauce together in a freezer-safe container for up to 3 months. Thaw overnight in the refrigerator, then reheat gently on the stovetop. The skin won’t be as crispy after freezing, but the flavor will still be fantastic.
How Flavors Develop: The garlic mellows and becomes sweeter as it sits, and the thyme infuses more deeply into the sauce. I actually prefer the leftovers for lunch the next day—the chicken is somehow even more tender, and the sauce has this incredible depth.
Nutritional Information & Benefits
While this Cozy Garlic Butter Chicken Thighs in 20 Minutes is definitely an indulgence, it also offers some surprising nutritional benefits. Here’s a rough breakdown per serving (based on 4 servings, using bone-in, skin-on thighs):
| Nutrient | Amount Per Serving |
|---|---|
| Calories | 420 |
| Protein | 32g |
| Fat | 30g |
| Saturated Fat | 12g |
| Carbohydrates | 3g |
| Fiber | 0g |
| Sugar | 1g |
| Sodium | 680mg |
Health Benefits: Chicken thighs are an excellent source of protein, which supports muscle health and keeps you feeling full. They also contain B vitamins, particularly niacin and B6, which are important for energy metabolism. Garlic, beyond its incredible flavor, has been studied for its potential immune-boosting and anti-inflammatory properties. And while butter is high in saturated fat, it also provides fat-soluble vitamins like A, D, and E.
Dietary Considerations: This recipe is naturally gluten-free, low-carb, and keto-friendly. For a lower-fat option, you can remove the skin before eating (though you’ll lose that crispy texture). If you’re watching your sodium, use low-sodium broth and reduce the added salt. As always, consult with a healthcare provider about your specific dietary needs.
My Personal Take: I believe in balance. This dish is rich and satisfying, and it’s perfect for those nights when you need comfort food. Pair it with a big green salad or some roasted vegetables, and you’ve got a meal that nourishes both body and soul.
Conclusion
This Cozy Garlic Butter Chicken Thighs in 20 Minutes started as a happy accident, but it’s become one of my most-requested recipes. It proves that you don’t need hours in the kitchen or a long list of ingredients to create something truly special. Sometimes the best dishes come from the moments when everything goes wrong—when you’re distracted, when you grab the wrong pan, when you just need dinner on the table fast.
What I love most about this recipe is how it adapts to whatever you need it to be. It’s weeknight fast but fancy enough for company. It’s indulgent but can be lightened up. It’s simple but never boring. And that garlic butter sauce? I could drink it straight from the pan—and I won’t judge you if you do too.
I’d love to hear how this recipe turns out for you. Did you add your own twist? Did it save a crazy weeknight dinner? Drop a comment below and let me know. And if you’re looking for another quick and comforting meal, this one-pot creamy Tuscan chicken has a similar feel with an Italian twist. Happy cooking, friend. You’ve got this.
Frequently Asked Questions
Can I use chicken breasts instead of thighs?
You can, but I don’t recommend it for this recipe. Chicken breasts cook faster and can dry out before the skin crisps up. If you must use breasts, go for bone-in, skin-on, and reduce the cooking time by about 2 minutes per side. Check the internal temperature early—you want 165°F.
How do I keep the garlic from burning?
The key is to add the garlic after you’ve flipped the chicken and reduced the heat to medium-low. Smashed cloves (not minced) also help because they’re larger and take longer to burn. If you see the garlic starting to darken, remove the pan from the heat immediately.
Can I make this in an air fryer?
Yes, but it’s a different dish. Season the chicken, then air fry at 375°F for 12-15 minutes, flipping halfway through. While it cooks, melt the butter with smashed garlic and thyme in a small saucepan. Pour the garlic butter over the cooked chicken. You won’t get the same pan sauce, but it’s still delicious.
How do I get the skin extra crispy?
Start with very dry chicken (pat it with paper towels and let it air-dry for 10 minutes). Use a hot pan and don’t move the chicken for the first 5 minutes. After flipping, pour off excess rendered fat before adding the butter. Some people even sprinkle a tiny pinch of baking powder on the skin—it helps with browning.
What if I don’t have fresh thyme?
Dried thyme works in a pinch—use about ½ teaspoon. Other dried herbs like rosemary or oregano also work. But honestly, fresh herbs make a noticeable difference here. If you’re buying fresh thyme for this recipe, you can use the leftovers in this roasted garlic herb potatoes—it’s a perfect side dish.
Pin This Recipe!
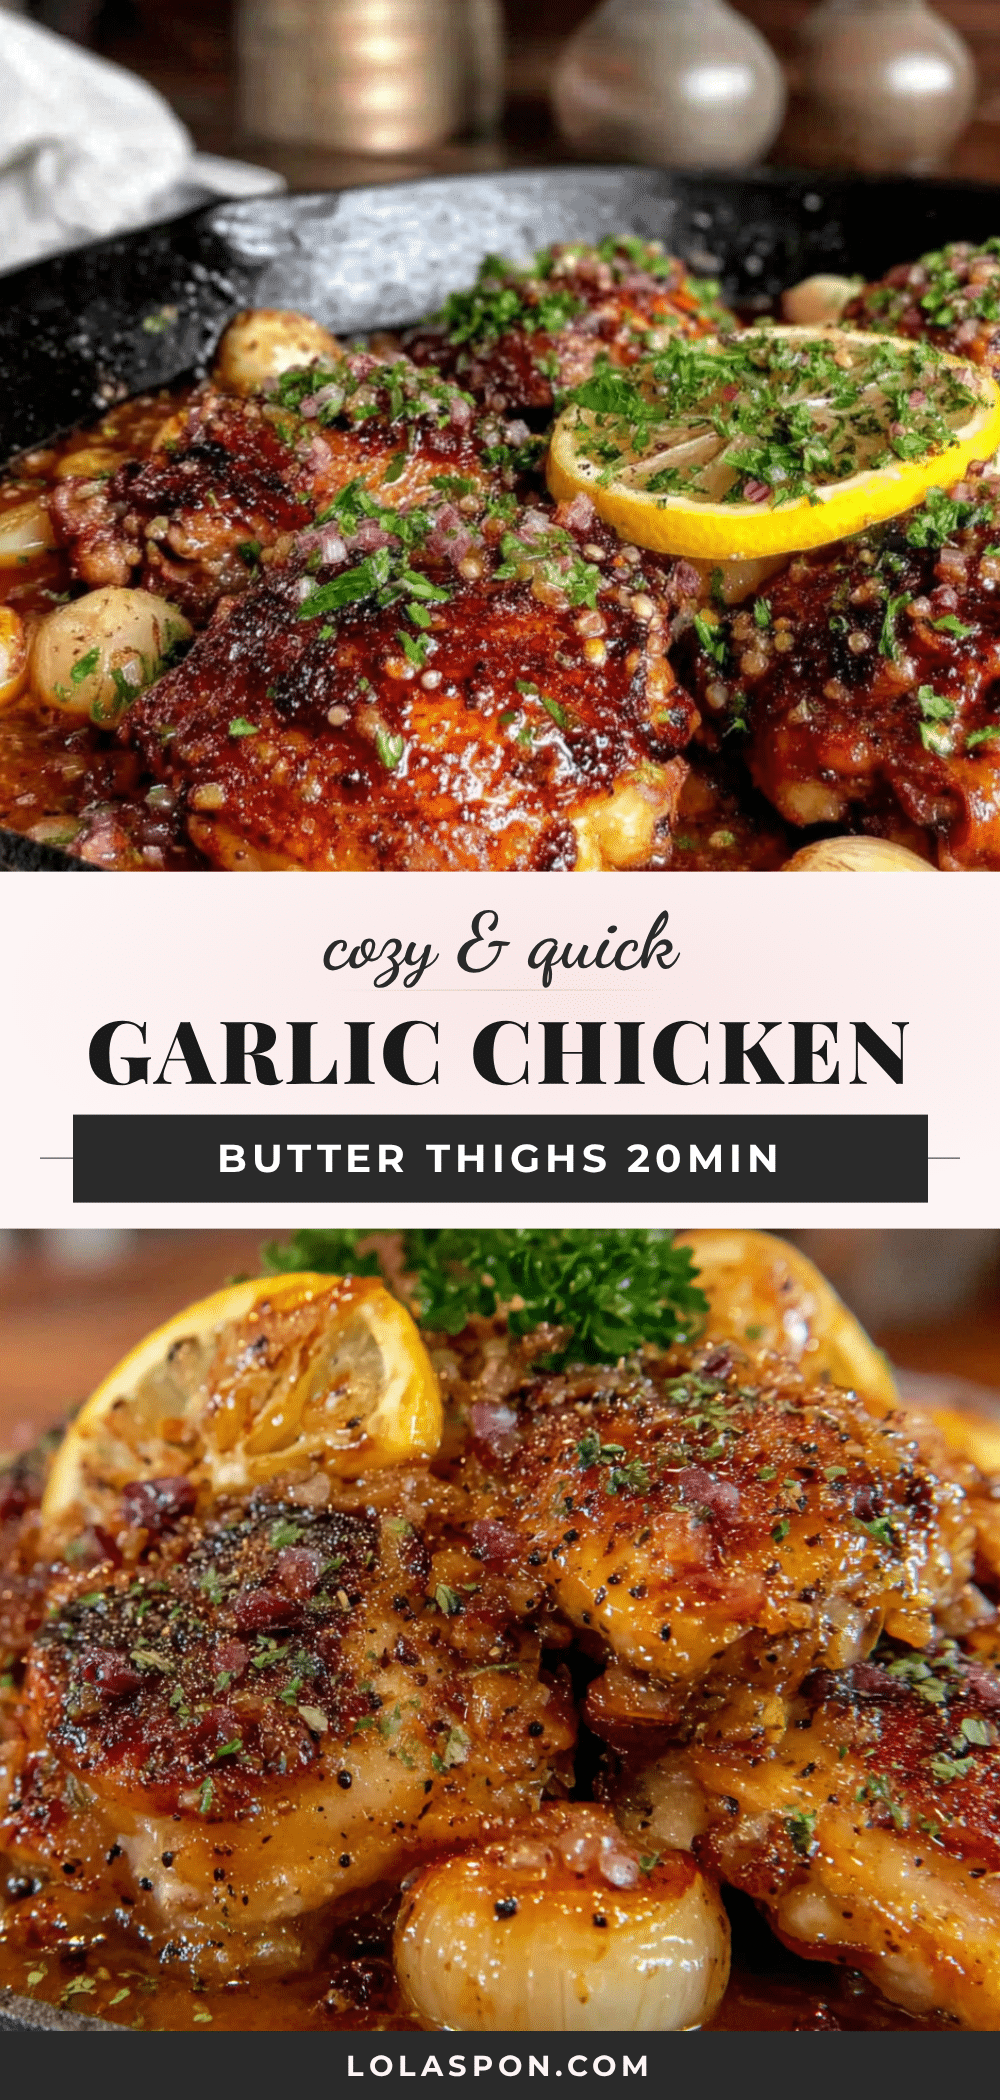
Cozy Garlic Butter Chicken Thighs in 20 Minutes

A quick and easy weeknight dinner featuring crispy-skinned chicken thighs bathed in a rich garlic butter sauce. Ready in just 20 minutes with simple ingredients, this cozy dish is perfect for busy nights when you need comfort food fast.
- Prep Time: 5 minutes
- Cook Time: 15 minutes
- Total Time: 20 minutes
- Yield: 4 servings 1x
- Category: Main Course
- Cuisine: American
Ingredients
- 4–6 bone-in, skin-on chicken thighs
- 4 tablespoons unsalted butter
- 6–8 garlic cloves, smashed
- 1 teaspoon kosher salt, plus more for seasoning
- ½ teaspoon freshly ground black pepper
- 4–5 sprigs fresh thyme
- ¼ cup low-sodium chicken broth
- Fresh parsley, chopped (optional, for garnish)
- Lemon wedges (optional, for serving)
Instructions
- Pat the chicken thighs dry with paper towels. Let them sit on a plate while you prep.
- Season both sides of the chicken generously with salt and pepper.
- Heat a large skillet (10-12 inches) over medium-high heat. Add 1 tablespoon of butter and swirl to coat the pan.
- Place the chicken skin-side down in the hot skillet. Cook undisturbed for 5-6 minutes, until the skin is deep golden brown and releases easily from the pan.
- Flip the chicken and cook for another 4-5 minutes, until the other side is browned and the chicken is almost cooked through.
- Reduce heat to medium-low. Push chicken to one side of the pan. Add remaining 3 tablespoons butter, smashed garlic cloves, and fresh thyme sprigs. Let butter melt and foam, then tilt the pan and baste the chicken with the garlic butter for about 30 seconds.
- Pour in the chicken broth. Use a wooden spoon to scrape up any browned bits from the bottom of the pan. Let the sauce bubble for about 30 seconds to reduce slightly.
- Check for doneness: internal temperature should reach 165°F (74°C) in the thickest part of the thigh.
- Remove pan from heat. Transfer chicken to a serving platter and pour the garlic butter sauce over the top. Let rest for 2 minutes before serving. Discard thyme sprigs. Garnish with fresh parsley and lemon wedges if desired.
Notes
Pat chicken very dry for crispy skin. Use smashed garlic cloves, not minced, to prevent burning. For extra-crispy skin, pour off excess rendered fat after flipping chicken. Let chicken come to room temperature before cooking for even cooking. Start rice or vegetables before beginning chicken so everything finishes at the same time.
Nutrition
- Serving Size: 1 thigh with sauce
- Calories: 420
- Sugar: 1
- Sodium: 680
- Fat: 30
- Saturated Fat: 12
- Carbohydrates: 3
- Protein: 32
Keywords: garlic butter chicken thighs, quick chicken dinner, crispy chicken thighs, 20 minute meal, weeknight chicken, comfort food


