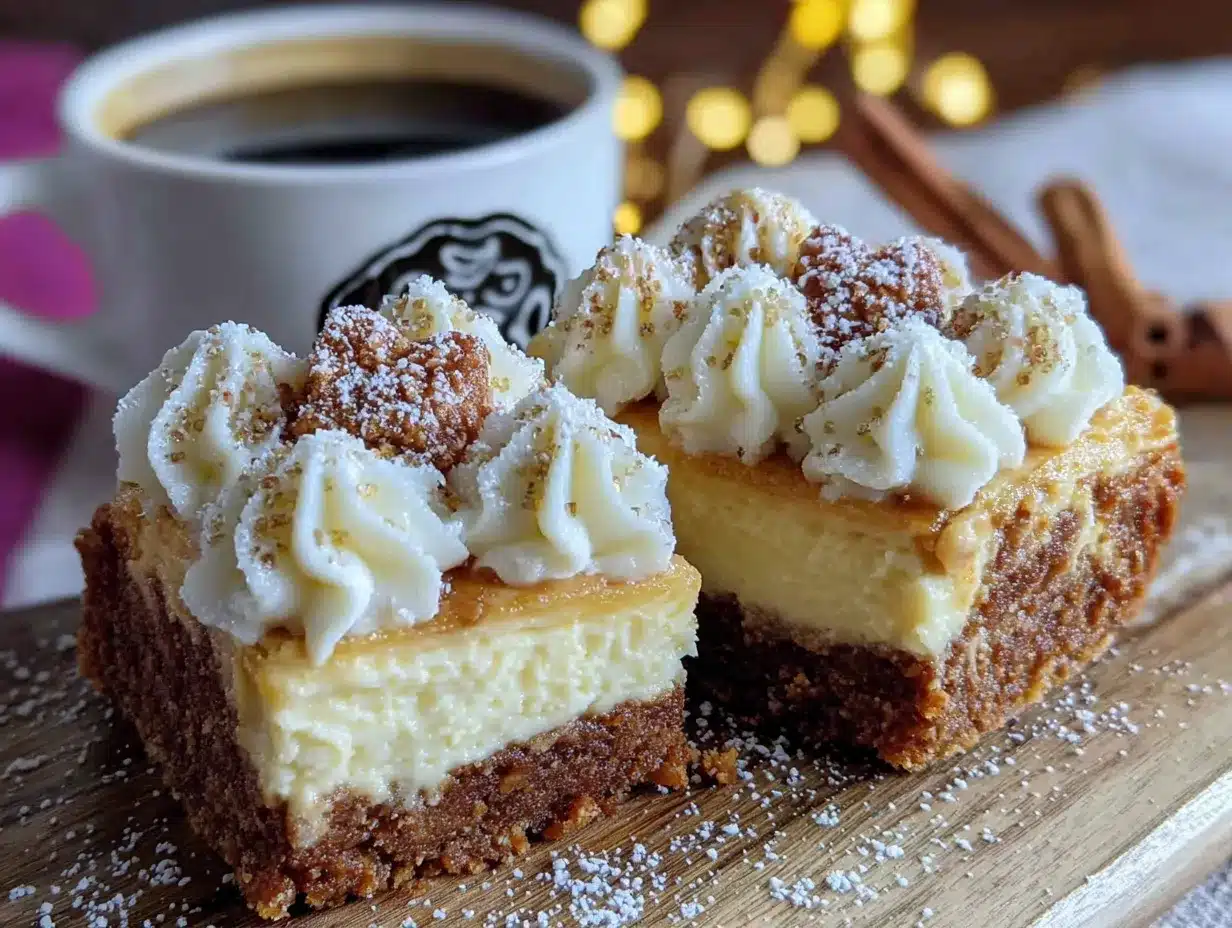
My neighbor, Mrs. Kowalski, watched me trying to balance a wobbly baking dish on my hip while fumbling for my keys. She didn’t say anything at first. Then she just appeared at my door an hour later with a plate of these perfectly layered bars, still warm, the cream cheese frosting swirled on top like fresh snow on a gingerbread roof.
I’d only moved into the building three weeks before, and honestly, I was still learning which floorboards creaked and whether the guy upstairs played drums or was just really into heavy furniture rearrangement. The gingerbread scent that followed her into my apartment was the first thing that made it feel like home. She said they were her grandmother’s recipe, adapted over decades, and she’d been making them every December for forty-two years. “You looked like you needed something cozy,” she said, and let me tell you, she wasn’t wrong.
That first bite had this unexpected thing happen—the warm spices hit first, then the tangy cream cheese cut through the sweetness, and I just stood there in my half-unpacked kitchen, eating another one before I’d even finished the first. Maybe you’ve been there, where a dessert makes you stop everything and just be present for a minute. These bars do that.
I’ve made them every year since, tweaking the crust just slightly and figuring out the trick to getting that cheesecake layer perfectly creamy without cracking. The recipe arrived through a relationship, not through a transaction, and that’s exactly how I think about it every time I pull them out of the oven. They’re the kind of dessert that makes you want to invite someone over, just so you can watch their face light up.
Why You’ll Love This Recipe
These gingerbread cheesecake bars are the holiday dessert you didn’t know you needed. They combine two beloved classics—spicy gingerbread cookies and creamy cheesecake—into one easy-to-serve bar that disappears faster than you’d expect. After testing this recipe at least seven times (someone had to eat the mistakes, right?), I can tell you exactly why it works.
- Quick & Easy: Comes together in about 40 minutes of active prep time, with no water bath required. Perfect for busy holiday baking marathons.
- Simple Ingredients: You probably have most of these in your pantry already. No weird specialty items that’ll sit in your cabinet for years.
- Perfect for Holiday Gatherings: Great for cookie swaps, Christmas brunch, or that moment when you need to bring something to your neighbor’s party and you’re out of time.
- Crowd-Pleaser: Gets rave reviews from both gingerbread purists and cheesecake lovers. My cousin who “doesn’t do cream cheese” asked for the recipe.
- Unbelievably Delicious: The texture combo is next-level—crunchy spiced crust, silky cheesecake, tangy frosting. It’s comfort food reimagined.
What makes this recipe different from the rest is the technique. Instead of a traditional graham cracker crust, we’re using a gingerbread cookie base that actually holds up to the cheesecake layer without getting soggy. The cream cheese frosting isn’t an afterthought—it’s a carefully balanced tangy counterpart that makes the spices sing. I learned the hard way that skipping the chilling step leads to a crumbly mess, so trust me on that one.
This is the kind of dessert that makes you close your eyes after the first bite. It’s perfect for impressing guests without stress, or turning a simple Tuesday night into something memorable. Honestly, it’s my most-requested holiday recipe, and I’m pretty sure it’ll become yours too.
What Ingredients You Will Need
This recipe uses simple, wholesome ingredients that work together to deliver that cozy gingerbread flavor with a creamy, tangy finish. Most of these are pantry staples, especially during the holiday season, but I’ve included notes on substitutions where they work well.
For the Gingerbread Crust
- 2 cups (250g) all-purpose flour – Spoon and level for accuracy; don’t scoop directly from the bag
- 1/2 cup (100g) packed dark brown sugar – Light brown works too, but dark gives deeper molasses flavor
- 1/4 cup (60ml) molasses – Use unsulphured molasses; blackstrap is too bitter here
- 1/2 cup (113g) unsalted butter, cold and cubed – Cold butter creates a flakier crust texture
- 1 large egg – Room temperature, lightly beaten
- 1 teaspoon vanilla extract – Pure vanilla, not imitation, if you can swing it
- 1 teaspoon ground ginger – Freshly ground if possible, it makes a difference
- 1 teaspoon ground cinnamon – I prefer Ceylon cinnamon for its milder, sweeter profile
- 1/2 teaspoon ground cloves – Just enough to warm things up
- 1/2 teaspoon ground nutmeg – Freshly grated is incredible here
- 1/4 teaspoon salt – Balances the sweetness and enhances spices
For the Cheesecake Layer
- 16 oz (454g) cream cheese, softened – Full-fat is non-negotiable here; low-fat changes the texture
- 1/2 cup (100g) granulated sugar – Regular white sugar keeps it light and creamy
- 2 large eggs – Room temperature, to prevent lumps
- 1 teaspoon vanilla extract – Again, pure vanilla please
- 1/4 cup (60g) sour cream – Adds tanginess and silky texture (Greek yogurt works too)
- 1 tablespoon all-purpose flour – Helps stabilize the cheesecake and prevent cracking
For the Cream Cheese Frosting
- 4 oz (113g) cream cheese, softened – Let it sit out for at least 30 minutes
- 1/4 cup (57g) unsalted butter, softened – Not melted, just soft
- 1 1/2 cups (180g) powdered sugar – Sifted if it’s lumpy
- 1/2 teaspoon vanilla extract – The good stuff
- 1-2 tablespoons heavy cream – Or milk, for thinning to spreadable consistency
Optional Garnishes
- Crushed gingerbread cookies – For texture on top
- Cinnamon sticks – For a pretty presentation
- Fresh cranberries – Adds color and tartness
I recommend Philadelphia cream cheese for best texture—it’s consistently creamy and doesn’t get grainy when baked. For the molasses, Grandma’s Original works great, but if you find Brer Rabbit at your store, grab it. And please, for the love of baking, don’t skip the sour cream in the cheesecake layer. It’s the secret to that velvety smoothness that makes these bars addictive.
Equipment Needed
You don’t need a professional bakery setup for these bars, but having the right tools makes the process smoother. Here’s what you’ll need:
- 9×13-inch baking pan – Glass or metal both work; just adjust baking time slightly for glass
- Parchment paper – For easy lifting and clean cutting lines
- Electric mixer – Handheld or stand mixer; a whisk and some elbow grease works too
- Large mixing bowls – At least two, preferably three
- Food processor – For the crust, but a pastry cutter or your fingers work too
- Spatula – Silicone is best for scraping every bit of cheesecake batter
- Sharp knife – For clean slices; run it under hot water between cuts
- Cooling rack – Lets air circulate so the bars cool evenly
- Measuring cups and spoons – Accuracy matters in baking
I used to skip the parchment paper and regretted it every time. Now I make sure to leave overhang on two sides so I can lift the whole thing out like a little brick of happiness. If you don’t have a food processor, you can mix the crust by hand—just make sure the butter is really cold and work quickly so it doesn’t soften too much.
Preparation Method
Let’s get baking. I’ve broken this down into clear steps with all the little details I wish someone had told me the first time. Take your time, and don’t rush the chilling steps—they’re not optional, I promise.
Step 1: Prepare the Pan and Preheat
Preheat your oven to 350°F (175°C). Line your 9×13-inch baking pan with parchment paper, leaving about 2 inches of overhang on the two long sides. Lightly grease the parchment with butter or non-stick spray. This seems fussy, but it’s the difference between perfect bars and a crumbly mess.
Step 2: Make the Gingerbread Crust
In a food processor, pulse together the flour, brown sugar, ginger, cinnamon, cloves, nutmeg, and salt until combined. Add the cold, cubed butter and pulse until the mixture looks like coarse sand with some pea-sized butter pieces still visible. In a small bowl, whisk together the molasses, egg, and vanilla. Pour this into the flour mixture and pulse just until a dough forms. Don’t overmix, or the crust will be tough.
Press the dough evenly into the prepared pan. I use the bottom of a measuring cup to get it really flat and even. Bake for 12-15 minutes, until the edges are just starting to brown and the center looks set. The crust will continue to bake with the cheesecake layer, so don’t overdo it here. Let it cool for 10 minutes while you make the filling.
Step 3: Make the Cheesecake Filling
In a large bowl, beat the softened cream cheese with an electric mixer on medium speed until smooth and creamy—about 2 minutes. Scrape down the sides and bottom of the bowl. Add the sugar and beat for another minute until light and fluffy. Add the eggs one at a time, beating on low after each just until incorporated. Overbeating at this stage adds too much air, which causes cracks later.
Mix in the vanilla, sour cream, and flour on low speed until just combined. The batter should be silky smooth with no lumps. If you see lumps, your cream cheese wasn’t soft enough—next time leave it out longer. Pour the filling over the warm crust and spread it evenly with a spatula.
Step 4: Bake the Cheesecake Layer
Bake at 350°F (175°C) for 25-30 minutes, until the edges are set but the center still jiggles slightly when you gently shake the pan. It will continue to set as it cools. The top should look matte, not glossy. If it’s browning too fast, tent loosely with foil in the last 5 minutes.
Remove from the oven and let cool on a wire rack for 1 hour at room temperature. Then transfer to the refrigerator and chill for at least 4 hours, preferably overnight. This is the hardest part, I know, but it’s crucial for clean slices and the right texture. The bars need to be fully cold before you add the frosting.
Step 5: Make the Cream Cheese Frosting
Once the cheesecake layer is fully chilled, make the frosting. Beat the softened cream cheese and butter together on medium speed until smooth and creamy—about 2 minutes. Add the powdered sugar gradually, beating on low to avoid a sugar cloud. Mix in the vanilla and 1 tablespoon of heavy cream. Beat on medium-high for 1-2 minutes until light and fluffy. If it’s too thick, add the second tablespoon of cream. If it’s too thin, add a bit more powdered sugar.
Step 6: Assemble and Chill
Spread the frosting evenly over the chilled cheesecake layer. I like to use an offset spatula for smooth, even coverage. If you want those pretty swirl marks, run the back of a spoon through the frosting in gentle curves. Sprinkle crushed gingerbread cookies on top if you’re feeling fancy.
Return the pan to the refrigerator for at least 30 minutes to let the frosting set. Then lift the bars out using the parchment overhang, place on a cutting board, and slice into squares with a sharp knife. Wipe the knife clean between cuts for the neatest edges.
Cooking Tips & Techniques
I’ve made these bars more times than I can count, and I’ve definitely made my share of mistakes along the way. Here’s what I’ve learned so you don’t have to repeat my errors.
Room temperature ingredients matter more than you think. Cold cream cheese creates lumps that never quite smooth out, no matter how long you beat it. Leave your cream cheese, eggs, and sour cream on the counter for at least 30 minutes before starting. I once forgot and tried to speed things up—the filling was grainy and I was sad about it for days.
Don’t overmix the cheesecake batter. I know it’s tempting to keep beating until everything looks perfect, but too much air incorporation leads to cracks during baking. Mix just until each ingredient is incorporated, then stop. The less air you beat in, the denser and creamier the final texture will be.
The water bath isn’t necessary here. Unlike traditional cheesecake, these bars are forgiving because they’re baked in a shallower pan. I’ve never used a water bath for this recipe and never had major cracking issues. Just don’t open the oven door during baking unless absolutely necessary.
Chill completely before cutting. This is the rule I break most often, and I always regret it. Warm cheesecake is soft, sticky, and impossible to cut cleanly. Four hours minimum in the fridge, and overnight is even better. For ultra-clean slices, pop the cut bars in the freezer for 15 minutes before serving.
Use a hot knife for perfect slices. Run your knife under hot water, dry it off, then make each cut. Wipe the blade clean and reheat between slices. It takes an extra minute but gives you those bakery-worthy edges that make people think you spent hours on presentation.
Variations & Adaptations
One of the best things about this recipe is how adaptable it is. Here are some variations I’ve tried and loved:
Gluten-Free Version
Swap the all-purpose flour in both the crust and the cheesecake layer with a high-quality gluten-free all-purpose blend. I’ve had good results with King Arthur Measure for Measure. The crust will be slightly more crumbly, so press it firmly into the pan and chill for an extra 15 minutes before baking.
Spiced Chai Twist
Add 1 teaspoon of chai spice blend to the crust and 1/2 teaspoon to the cheesecake batter. The cardamom and black pepper notes in chai pair beautifully with the gingerbread spices. I tried this on a whim last December and it’s become my second-favorite version.
Pumpkin Gingerbread Bars
Replace the sour cream in the cheesecake layer with 1/4 cup pumpkin puree and add 1/2 teaspoon pumpkin pie spice. Reduce the sugar by 2 tablespoons since pumpkin adds sweetness. The texture will be slightly denser but incredibly moist and flavorful.
Vegan Adaptation
Use vegan cream cheese (Tofutti or Violife work well), vegan butter, and a flax egg (1 tablespoon ground flaxseed + 3 tablespoons water) in the crust. The texture won’t be identical, but it’s surprisingly close. I made these for a friend’s vegan holiday party and they disappeared before the regular ones.
White Chocolate Drizzle
Melt 1/2 cup white chocolate chips with 1 teaspoon coconut oil and drizzle over the finished bars before the frosting sets. The sweetness adds a lovely contrast to the spicy gingerbread. Just don’t skip the cream cheese frosting—the white chocolate is an addition, not a replacement.
Serving & Storage Suggestions
These bars are best served cold, straight from the refrigerator. The cheesecake layer firms up beautifully when chilled, and the flavors meld together overnight. If you prefer a softer texture, let them sit at room temperature for 10-15 minutes before serving.
For presentation, I like to arrange the bars on a white platter with a few cinnamon sticks and fresh cranberries scattered around. It’s simple but looks incredibly festive. A dusting of powdered sugar right before serving adds that snowy winter effect that photographs beautifully.
These bars pair wonderfully with a hot cup of coffee, spiced chai latte, or a glass of cold milk. For holiday gatherings, serve them alongside a warm apple cider or mulled wine for a cozy dessert spread.
Storage: Keep the bars in an airtight container in the refrigerator for up to 5 days. The flavors actually improve after day two as the spices meld with the cheesecake. I’ve never had them last longer than that because they get eaten too quickly, but theoretically they’d hold up well.
Freezing: These freeze beautifully. Wrap individual bars tightly in plastic wrap, then place in a freezer-safe bag or container. They’ll keep for up to 3 months. Thaw in the refrigerator overnight before serving. I always keep a stash in the freezer for unexpected guests or late-night cravings.
Reheating: I don’t recommend reheating these bars—they’re meant to be served cold. If you absolutely must have them warm, microwave a single bar for 10-15 seconds, but the cheesecake layer will soften significantly. The cold version is really the best way to experience them.
Nutritional Information & Benefits
Let’s be real—these are a treat, not a health food. But here’s the nutritional breakdown per bar (based on 16 servings):
| Nutrient | Amount per Bar |
|---|---|
| Calories | 385 |
| Total Fat | 22g |
| Saturated Fat | 13g |
| Cholesterol | 85mg |
| Sodium | 210mg |
| Total Carbohydrates | 42g |
| Dietary Fiber | 1g |
| Sugars | 30g |
| Protein | 6g |
On the bright side, ginger has anti-inflammatory properties, cinnamon may help regulate blood sugar, and cream cheese provides calcium and protein. The molasses contains iron and magnesium. So while these aren’t health food, they’re not completely empty calories either. Everything in moderation, right?
This recipe is not gluten-free, vegan, or low-carb in its standard form, but the variations section above offers options for different dietary needs. The bars contain dairy, eggs, and gluten. If you’re serving a crowd with dietary restrictions, the gluten-free version works well, and the vegan adaptation is surprisingly good.
Conclusion
These cozy gingerbread cheesecake bars have become my signature holiday dessert, and I think they’ll become yours too. They’ve got everything you want in a holiday treat—warm spices, creamy texture, tangy frosting, and that nostalgic gingerbread flavor that just feels like December. Plus, they’re so much easier than a full cheesecake, and way more impressive than plain cookies.
What I love most about this recipe is how it brings people together. Every time I make them, I think of Mrs. Kowalski showing up at my door with that plate, and it reminds me that the best recipes come with stories attached. I hope these bars become part of your holiday traditions, whether you’re making them for a cookie swap, a family gathering, or just because you deserve something special.
Try them and let me know how they turn out! Leave a comment below with your favorite variation, or tag me in your photos if you share them online. I love seeing your creations, and I’m always here if you have questions. Happy baking, and may your kitchen smell like gingerbread all season long!
Frequently Asked Questions
Can I use store-bought gingerbread cookies for the crust?
You can, but the texture won’t be quite the same. Homemade crust holds together better and has a deeper spice flavor. If you’re short on time, crush about 2 cups of gingerbread cookies and mix with 4 tablespoons melted butter, then press into the pan and bake for 8 minutes.
Why did my cheesecake layer crack?
Cracks usually happen from overmixing the batter (too much air) or overbaking. Make sure you mix just until ingredients are combined, and pull the bars out when the center still jiggles slightly. Sudden temperature changes can also cause cracking, so let them cool gradually on the counter before refrigerating.
Can I make these bars ahead of time?
Absolutely! These are actually better made a day ahead. Prepare the bars completely, including the frosting, and store them in the refrigerator. The flavors meld and develop overnight, and they’ll be perfectly set for slicing. They’ll keep well for up to 5 days.
How do I get clean, neat slices?
Chill the bars for at least 4 hours, preferably overnight. Use a sharp knife and run it under hot water between each cut, drying it off before slicing. Wipe the blade clean after every cut. For the absolute cleanest edges, freeze the bars for 15-20 minutes before cutting.
Can I reduce the sugar in this recipe?
You can reduce the sugar in the cheesecake layer by up to 1/4 cup without major texture changes. The crust needs the sugar for structure, so I don’t recommend reducing it there. The frosting can handle about 1/4 cup less powdered sugar, but it won’t be as thick or pipeable. Keep in mind that sugar also affects texture and browning, so changes will impact the final result.
Pin This Recipe!
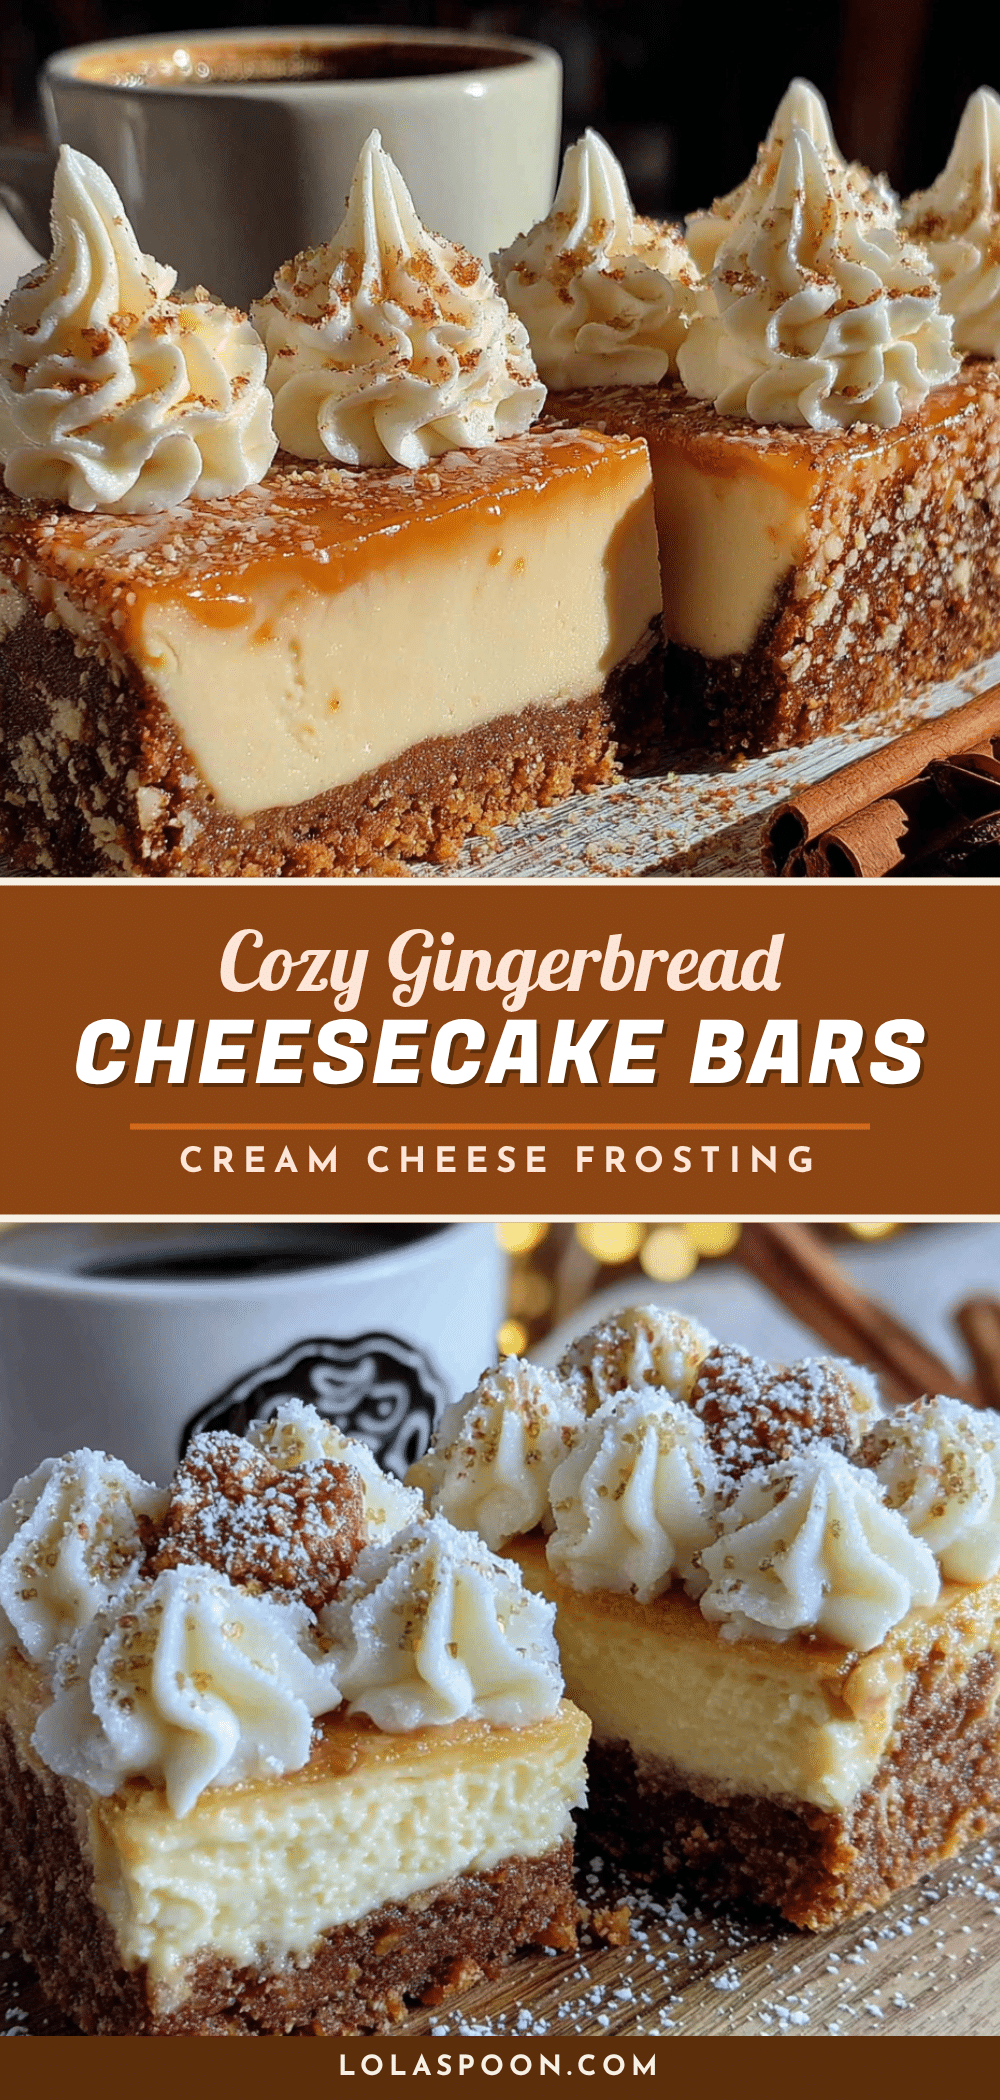
Cozy Gingerbread Cheesecake Bars – Easy Holiday Dessert
These gingerbread cheesecake bars combine spicy gingerbread cookies and creamy cheesecake into one easy-to-serve bar. With a crunchy spiced crust, silky cheesecake layer, and tangy cream cheese frosting, they’re the perfect holiday dessert that disappears fast.
- Prep Time: 40 minutes
- Cook Time: 40 minutes
- Total Time: 5 hours 20 minutes (includes chilling)
- Yield: 16 servings 1x
- Category: Dessert
- Cuisine: American
Ingredients
- 2 cups (250g) all-purpose flour
- 1/2 cup (100g) packed dark brown sugar
- 1/4 cup (60ml) molasses
- 1/2 cup (113g) unsalted butter, cold and cubed
- 1 large egg
- 1 teaspoon vanilla extract
- 1 teaspoon ground ginger
- 1 teaspoon ground cinnamon
- 1/2 teaspoon ground cloves
- 1/2 teaspoon ground nutmeg
- 1/4 teaspoon salt
- 16 oz (454g) cream cheese, softened
- 1/2 cup (100g) granulated sugar
- 2 large eggs
- 1 teaspoon vanilla extract
- 1/4 cup (60g) sour cream
- 1 tablespoon all-purpose flour
- 4 oz (113g) cream cheese, softened
- 1/4 cup (57g) unsalted butter, softened
- 1 1/2 cups (180g) powdered sugar
- 1/2 teaspoon vanilla extract
- 1–2 tablespoons heavy cream
- Crushed gingerbread cookies (optional)
- Cinnamon sticks (optional)
- Fresh cranberries (optional)
Instructions
- Preheat oven to 350°F (175°C). Line a 9×13-inch baking pan with parchment paper, leaving overhang on two long sides. Lightly grease parchment.
- Make the gingerbread crust: In a food processor, pulse flour, brown sugar, ginger, cinnamon, cloves, nutmeg, and salt. Add cold cubed butter and pulse until mixture resembles coarse sand with some pea-sized butter pieces. In a small bowl, whisk molasses, egg, and vanilla. Pour into flour mixture and pulse just until dough forms. Press evenly into prepared pan. Bake 12-15 minutes until edges just brown. Cool 10 minutes.
- Make the cheesecake filling: Beat softened cream cheese with electric mixer on medium until smooth (2 minutes). Add sugar and beat 1 minute until light and fluffy. Add eggs one at a time, beating on low after each. Mix in vanilla, sour cream, and flour on low until just combined. Pour over warm crust and spread evenly.
- Bake at 350°F (175°C) for 25-30 minutes until edges are set but center jiggles slightly. Cool on wire rack 1 hour at room temperature, then refrigerate at least 4 hours (preferably overnight).
- Make the cream cheese frosting: Beat softened cream cheese and butter on medium until smooth (2 minutes). Gradually add powdered sugar, beating on low. Mix in vanilla and 1 tablespoon heavy cream. Beat on medium-high 1-2 minutes until light and fluffy. Add more cream if needed.
- Spread frosting over chilled cheesecake layer. Garnish with crushed gingerbread cookies if desired. Refrigerate at least 30 minutes. Lift bars out using parchment, slice into squares with a sharp knife (run under hot water between cuts).
Notes
Room temperature ingredients are crucial for smooth cheesecake. Don’t overmix the batter to avoid cracks. Chill completely before cutting for clean slices. Use a hot knife for perfect edges. Bars keep in refrigerator up to 5 days or freeze up to 3 months.
Nutrition
- Serving Size: 1 bar
- Calories: 385
- Sugar: 30
- Sodium: 210
- Fat: 22
- Saturated Fat: 13
- Carbohydrates: 42
- Fiber: 1
- Protein: 6
Keywords: gingerbread cheesecake bars, holiday dessert, easy cheesecake bars, gingerbread dessert, cream cheese frosting, Christmas baking