Hand me that cookie sheet, and I’ll tell you about the afternoon that changed my whole approach to baking with kids. I was at my neighbor’s house—she’s this older woman named Rosa who grows the most incredible rosemary in her backyard—and her three grandkids were running circles around her kitchen. She watched me trying to keep my own little ones entertained with a store-bought decorating kit, and she didn’t say anything at first. Then she pulled out a bag of flour and said, “You’re overthinking it. Let them get their hands dirty.”
Honestly, I was nervous. I mean, the thought of hand-print cookies sounded adorable, but also like a recipe for disaster. Flour everywhere, tears over broken cookie wings, the whole nine yards. But Rosa just laughed and showed me this simple trick for making turkey cookies using the kids’ actual hands. No fancy cutters, no stress—just dough, sprinkles, and a whole lot of giggling.
That afternoon, my three-year-old pressed his chubby hand into the dough for the first time, and the look on his face when he saw the shape? Pure magic. We made a mess, sure. There was icing on the ceiling fan somehow, and I definitely forgot to chill the dough long enough. But those imperfect, lopsided turkeys? They were the best things we’d ever baked together. You know that feeling when something just clicks, and you realize the chaos was worth it? That’s exactly what these cookies are about.
These cozy hand turkey sugar cookies for kids aren’t just a Thanksgiving activity—they’re a memory in the making. And honestly, they’ve become our go-to for any day that needs a little warmth and creativity. Whether it’s a rainy afternoon or a holiday gathering, this recipe stays with you because it’s not about perfection. It’s about flour-covered little hands and the proud “Look what I made!” that follows.
Why You’ll Love This Recipe
Let me tell you why this recipe has earned a permanent spot in my baking rotation. After testing it with my own kids, my niece’s playgroup, and even a classroom full of wiggly second-graders, I can say with confidence—it works every single time.
- Quick & Easy: From start to finish, you’re looking at about 45 minutes, including chill time. Perfect for those moments when the kids suddenly announce they want to bake. Right now.
- Simple Ingredients: You probably have everything in your pantry already. Butter, sugar, flour, eggs—the basics. No weird specialty items that require a trip to three different stores.
- Perfect for Rainy Days & Holidays: These cookies are a lifesaver when you need a screen-free activity that actually keeps kids engaged. Great for Thanksgiving prep, snow days, or just a Tuesday that feels a little flat.
- Crowd-Pleaser: I’ve yet to meet a kid who doesn’t light up when they see their own handprint turned into a turkey. And adults? They can’t resist grabbing one (or three) from the plate.
- Unbelievably Delicious: This isn’t just about the activity—the cookies themselves are soft, buttery, and just sweet enough. The sugar cookie base is honestly the best I’ve ever made, and I’ve tried a lot.
What makes these different from every other handprint cookie out there? It’s the technique. Instead of struggling with sticky dough that rips apart, I use a slightly firmer dough that holds the handprint shape beautifully. Plus, I’ve figured out the perfect baking time so the fingers don’t get too dark while the palm bakes through. This isn’t just another version—it’s my best version, tested through many, many batches of lopsided turkeys.
These cookies are the kind that make you close your eyes after the first bite. They’re comfort food reimagined—simple enough for little hands to help with, but satisfying enough that you won’t feel like you’re eating cardboard just to be nice. Perfect for impressing grandparents without stressing yourself out, or turning a regular afternoon into something your kids will talk about for weeks.
What Ingredients You Will Need
This recipe uses simple, wholesome ingredients to deliver soft, buttery cookies that hold their shape perfectly. Most of these are pantry staples, which means you can whip up a batch whenever the mood strikes.
For the Sugar Cookie Dough
- Unsalted butter, softened (1 cup / 226g) – I always use unsalted so I can control the salt level. Let it sit out for about 30 minutes before starting. Trust me, cold butter makes for lumpy dough.
- Granulated sugar (1 cup / 200g) – Regular white sugar gives these cookies that classic sweet flavor and tender texture.
- Large egg (1, room temperature) – Helps bind everything together. If you forgot to take it out of the fridge, pop it in a bowl of warm water for 5 minutes.
- Vanilla extract (1 teaspoon) – Pure vanilla makes a difference here. I like Nielsen-Massey, but any brand works.
- All-purpose flour (2 ½ cups / 312g) – Spoon and level your flour for the best results. Scooping directly from the bag packs in too much and makes the dough dry.
- Baking powder (1 teaspoon) – Gives the cookies just a little lift without making them puff up too much.
- Salt (½ teaspoon) – Balances the sweetness. Don’t skip it!
For the Royal Icing
- Powdered sugar (2 cups / 240g) – Sift it if you can; it makes the icing smoother.
- Meringue powder (2 tablespoons) – This is what gives royal icing that nice, hard finish. You can find it at most craft stores or online.
- Warm water (3-4 tablespoons) – Add slowly. You want a consistency that’s thick enough to hold shape but thin enough to spread.
- Food coloring – Gel colors work best. I use Wilton brand for vibrant shades without thinning the icing.
For Decorating
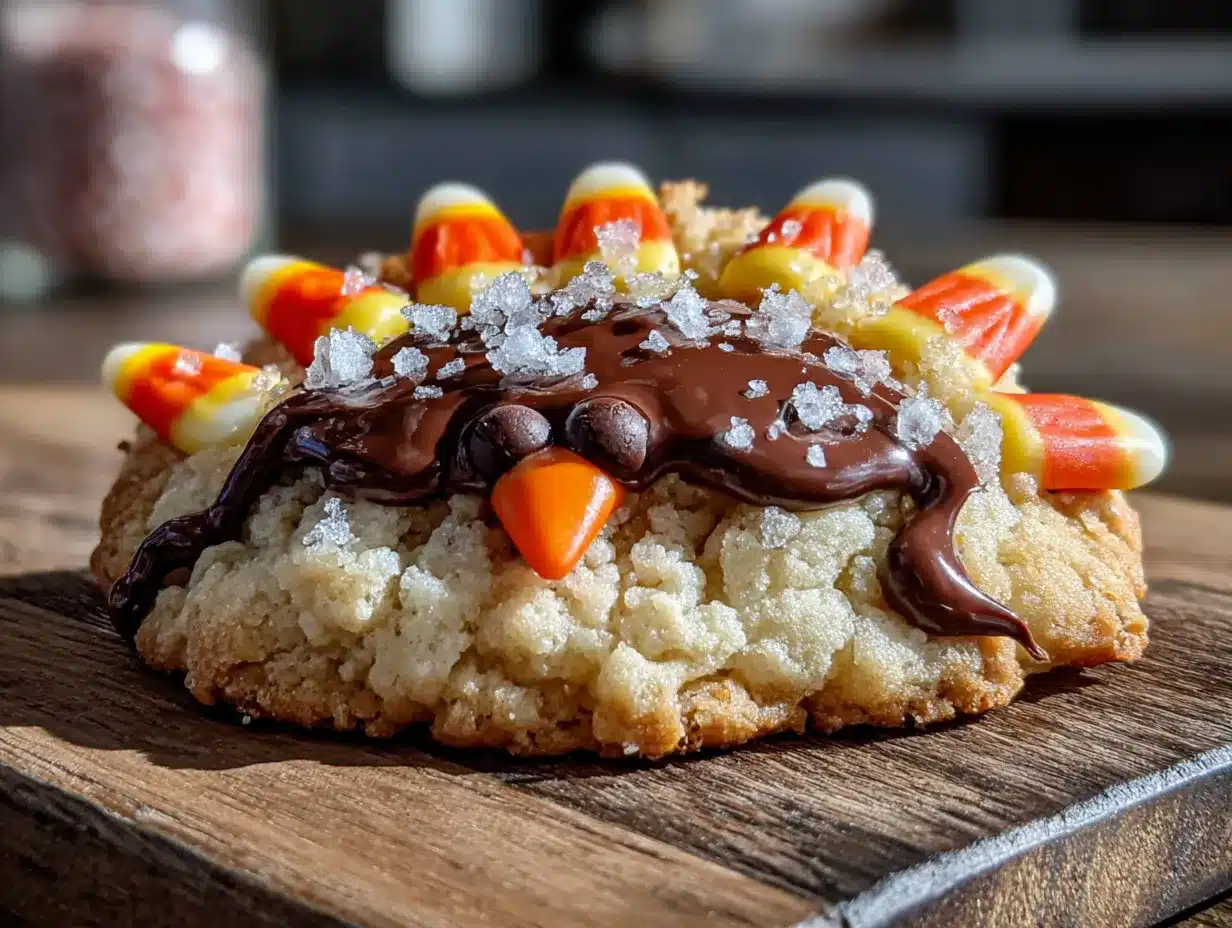
- Candy corn (about 20 pieces) – These make perfect turkey feathers! You’ll need 3-4 per cookie.
- Candy eyes (about 20) – Those little white and black dots you find in the baking aisle.
- Orange sprinkles or small orange candies – For the turkey’s beak.
- Red icing or red candy – A tiny dot for the wattle (that red dangly bit under the beak).
- Assorted sprinkles – For the feathers. Let the kids go wild here.
For the best texture, I really recommend using a kitchen scale for the flour. I know it’s an extra step, but it makes a huge difference in how the dough handles. If you don’t have one, fluff your flour with a spoon, then spoon it into your measuring cup and level it off with a knife.
Equipment Needed
You don’t need a lot of fancy gear for this recipe, which is part of why I love it. Here’s what you’ll want to have on hand:
- Mixing bowls – One large, one medium. Glass or metal works best.
- Electric mixer – Handheld or stand mixer both work. I use my KitchenAid, but honestly, a good whisk and some elbow grease will do the job too.
- Baking sheets – Two standard-sized ones. Light-colored metal sheets give the most even browning.
- Parchment paper – Non-negotiable. It prevents sticking and makes cleanup a breeze.
- Rolling pin – A regular rolling pin is fine. If you have a French-style pin without handles, even better for feeling the dough thickness.
- Plastic wrap – For chilling the dough.
- Sharp knife or bench scraper – For cutting around the handprints.
- Piping bags or squeeze bottles – For the royal icing. If you don’t have these, a zip-top bag with the corner snipped off works perfectly.
- Cooling rack – Lets air circulate so your cookies cool evenly.
For the handprint part, just make sure your child’s hands are clean and dry. I learned the hard way that lotion or sticky fingers make the dough… interesting.
Preparation Method
Alright, let’s get to the fun part. Here’s how to make these cozy hand turkey sugar cookies for kids, step by step.
- Make the cookie dough. In a large bowl, beat the softened butter and granulated sugar together until light and fluffy—about 2-3 minutes with an electric mixer on medium speed. Scrape down the sides of the bowl. Add the egg and vanilla extract, then beat until combined. It should look smooth and slightly glossy.
- Mix the dry ingredients. In a separate medium bowl, whisk together the flour, baking powder, and salt. Gradually add this to the wet mixture, mixing on low speed until a soft dough forms. Don’t overmix! Stop as soon as the flour disappears. The dough should be soft but not sticky.
- Chill the dough. Flatten the dough into a disc about 1-inch thick, wrap it tightly in plastic wrap, and refrigerate for at least 30 minutes. This step is crucial—chilled dough is much easier to work with and holds the handprint shape better. I usually chill mine for an hour if I have the time.
- Preheat the oven. Set your oven to 350°F (175°C). Line two baking sheets with parchment paper.
- Roll out the dough. On a lightly floured surface, roll the dough to about ¼-inch thickness. Don’t go thinner than that, or the cookies will be too fragile. Use gentle, even pressure with your rolling pin.
- Make the handprints. Here’s the magical part. Gently press your child’s clean, dry hand into the dough. Press firmly enough to leave a clear impression, but not so hard that you press through to the counter. For younger kids, you might need to help guide their hand down evenly. If the dough starts to stick, dust their hand with a tiny bit of flour.
- Cut around the handprints. Using a sharp knife or bench scraper, carefully cut around each handprint, leaving about ½ inch of dough around the edges. Don’t worry about making it perfect—the rustic shape is part of the charm. Transfer each handprint cookie to the prepared baking sheet, spacing them about 2 inches apart.
- Bake the cookies. Bake for 8-10 minutes, or until the edges are just barely golden. The centers should still look pale and slightly soft. For the record, my first batch came out a little dark on the fingertips, so keep an eye on those last 2 minutes. Let the cookies cool on the baking sheet for 5 minutes, then transfer them to a wire rack to cool completely.
- Make the royal icing. In a medium bowl, whisk together the powdered sugar and meringue powder. Add 3 tablespoons of warm water and beat with an electric mixer on medium speed until stiff peaks form—about 5-7 minutes. If the icing is too thick, add more water a teaspoon at a time. If it’s too thin, add more powdered sugar. You want it thick enough to hold its shape when piped.
- Divide and color the icing. Separate the icing into small bowls. I usually make one batch brown for the turkey body, orange for the beak, and red for the wattle. For the feathers, let the kids pick their favorite colors. Use gel food coloring for the most vibrant results—a little goes a long way.
- Decorate the cookies. This is where the real fun begins. Pipe a thin layer of brown icing over the palm and thumb area of each cookie—this is the turkey’s body. Before the icing sets, press on candy eyes, an orange sprinkle for the beak, and a tiny red dot for the wattle. For the feathers, arrange 3-4 candy corn pieces on the fingers, pointing outward. Let the kids add sprinkles however they like. There’s no wrong way to do this.
- Let the icing set. Allow the decorated cookies to sit at room temperature for about 1-2 hours, until the icing is completely hard. This is the hardest part for impatient little bakers, but it’s worth the wait.
One thing I learned the hard way: don’t skip the chilling step. I was in a hurry once and tried to work with warm dough, and let’s just say the handprints looked more like blobs. A little patience goes a long way here.
Cooking Tips & Techniques
After making these cozy hand turkey sugar cookies for kids more times than I can count, I’ve picked up a few tricks that make the process smoother and the results better.
Get the dough temperature right. This is the number one thing that trips people up. If the dough is too warm, the handprint will blur and the cookies will spread in the oven. If it’s too cold, it’s hard to press the hand in evenly. Aim for that sweet spot where the dough is firm but not rock hard. If you’ve chilled it longer than an hour, let it sit at room temperature for 5-10 minutes before rolling.
Use a light touch for handprints. You want a clear impression, but pressing too hard will flatten the dough unevenly. Think of it like giving a gentle high-five to the dough. For really little kids, I sometimes press their hand down for them, guiding their fingers to spread out naturally.
Bake in batches. Don’t crowd the baking sheet. These cookies need room to breathe, or they’ll spread into each other. I bake no more than 4-6 handprint cookies per sheet, depending on size.
Watch the edges. The thin parts of the handprint—the fingers—will bake faster than the thicker palm area. If the fingertips start looking too dark before the palm is done, you can tent the cookie sheet with aluminum foil for the last 2 minutes of baking.
Make extra dough. Trust me on this one. Kids change their minds about which hand they want to use, or they want to make multiple prints. I always make a double batch so there’s plenty of room for creativity. Plus, the extra dough keeps in the fridge for up to 3 days.
Royal icing troubleshooting. If your icing is too runny, it will slide right off the cookies. If it’s too thick, it won’t spread smoothly. The perfect consistency is like thick toothpaste—it holds its shape but spreads with a little encouragement. And always cover your icing bowl with a damp paper towel when you’re not using it, or it will develop a crust.
I once forgot to add the meringue powder to my royal icing, and the cookies stayed sticky for hours. Not my finest moment, but hey, we learn from our mistakes, right?
Variations & Adaptations
One of the best things about this recipe is how easily you can adapt it. Here are some variations I’ve tried and loved.
Gluten-Free Version: Swap the all-purpose flour with a 1:1 gluten-free baking flour blend. I’ve had great results with Bob’s Red Mill. The dough might be a little more delicate, so handle it gently. Everything else stays the same.
Vegan Option: Use vegan butter (I like Earth Balance) and a flax egg (1 tablespoon ground flaxseed mixed with 3 tablespoons water, let sit for 5 minutes). For the royal icing, replace the meringue powder with aquafaba—the liquid from a can of chickpeas. Use 3 tablespoons of aquafaba instead of the water and meringue powder. It works surprisingly well!
Different Holiday Shapes: Who says turkeys are just for Thanksgiving? Use the same handprint technique to make reindeer at Christmas (add antlers with pretzel sticks), bunnies at Easter (add long ears with extra dough), or even spooky bats for Halloween (cut the handprint with the fingers pointing down and add wings).
Flavor Twists: Add 1 teaspoon of lemon zest to the dough for a bright, citrusy flavor. Or try ½ teaspoon of almond extract along with the vanilla—it gives the cookies a subtle, nutty taste that pairs beautifully with the sweetness.
No-Icing Option: If you’re short on time or patience, skip the royal icing altogether. Bake the handprint cookies plain, then dust them with powdered sugar. Or drizzle them with a simple glaze made from 1 cup powdered sugar and 2 tablespoons milk. The kids can still add sprinkles before the glaze sets.
Mini Handprints: For toddlers with tiny hands, this is adorable. Just use a smaller amount of dough and adjust the baking time down by 1-2 minutes. They make perfect little bite-sized treats.
My personal favorite variation? I once made these with cinnamon sugar sprinkled on top before baking. The warm spice added such a cozy flavor that we now make them that way every fall.
Serving & Storage Suggestions
These cozy hand turkey sugar cookies for kids are best served at room temperature, once the icing has fully set. The contrast between the soft, buttery cookie and the firm, sweet icing is just perfect.
For a festive presentation, arrange the cookies on a large platter with the turkey feathers fanning out. Add some fall leaves or mini pumpkins around the plate for extra charm. I like to serve them alongside warm apple cider or a cup of hot chocolate for the ultimate cozy afternoon treat.
These cookies also make wonderful gifts. Package them in a clear cellophane bag tied with a ribbon, and attach a tag that says “Handmade with love by [child’s name].” Grandparents absolutely lose their minds over these.
Storage: Keep the decorated cookies in an airtight container at room temperature. They’ll stay fresh for up to 5 days, though honestly, they rarely last that long in my house. Layer them between sheets of parchment paper to prevent the icing from sticking together.
Freezer Instructions: You can freeze the undecorated baked cookies for up to 3 months. Just place them in a single layer in a freezer-safe container with parchment between layers. When you’re ready to decorate, thaw them at room temperature for about 30 minutes, then ice as usual. The royal icing doesn’t freeze well, so always add that after thawing.
One thing I’ve noticed: the cookies actually taste even better the next day. The flavors meld together, and the texture softens just a bit. So if you can resist eating them all right away, you’re in for a treat.
Nutritional Information & Benefits
Let’s be real—these are sugar cookies, so they’re not exactly health food. But they do have a few redeeming qualities!
Per cookie (based on a medium-sized handprint with icing and decorations):
- Calories: Approximately 180-220
- Fat: 8g
- Carbohydrates: 28g
- Protein: 2g
- Sugar: 18g
The butter provides a small amount of vitamin A, and the egg adds a bit of protein. Plus, there’s the emotional and mental health benefit of spending quality time in the kitchen with your kids. Baking together builds confidence, teaches following directions, and creates positive memories—and that’s good for everyone.
For those with dietary concerns, the gluten-free and vegan variations above work beautifully. And if you’re watching sugar intake, you can reduce the icing or skip it altogether. The cookies themselves are sweet enough to enjoy plain.
As always, these cookies contain dairy (butter), eggs, and gluten. If you’re baking for a group with allergies, be sure to check all your ingredient labels and use the appropriate substitutions.
From my perspective, these cookies are about balance. We eat nourishing meals most of the time, and then we make room for treats like this. Life is too short not to enjoy a handprint turkey cookie every now and then.
Conclusion
These cozy hand turkey sugar cookies for kids are more than just a recipe—they’re a tradition waiting to happen. They’re the kind of activity that turns a regular afternoon into something your kids will remember for years. The laughter, the flour on the floor, the proud little faces holding up their creations—that’s what this is all about.
I hope you’ll give this recipe a try, and I hope you’ll make it your own. Use different colors, try different decorations, let the kids go wild. There’s no wrong way to make these cookies, and that’s the beauty of it. The imperfections are what make them special.
I’d love to hear how your handprint turkeys turn out! Drop a comment below and tell me about your baking adventure. Did your kids love it? Did you discover a new favorite variation? Share a photo if you can—I always get so excited seeing your creations.
Until next time, happy baking, and remember: the messier the kitchen, the better the memories.
Frequently Asked Questions
Can I make the dough ahead of time?
Absolutely! The dough can be refrigerated for up to 3 days. Just wrap it tightly in plastic wrap and let it sit at room temperature for 10 minutes before rolling. You can also freeze the dough for up to 3 months—just thaw it overnight in the refrigerator before using.
My dough is too sticky to work with. What should I do?
Don’t panic! This usually means the dough needs more chilling time. Pop it back in the fridge for 15-20 minutes. If it’s still sticky after that, dust your rolling surface and your child’s hand with a little extra flour. Just don’t go overboard, or the cookies will be dry.
How do I get a clean handprint without the dough tearing?
The key is having the dough at the right temperature—chilled but not rock hard. Also, make sure your child’s hand is completely dry. If the dough starts to stick, gently loosen it with a thin spatula before lifting the hand. For very young kids, I sometimes lightly flour their hand first.
Can I use store-bought cookie dough instead?
You can, but the results won’t be the same. Store-bought dough is usually softer and spreads more in the oven, which means your handprints might lose their shape. If you’re in a pinch, look for a refrigerated sugar cookie dough that’s labeled “cut-out” style—it holds its shape better.
My royal icing isn’t getting stiff. What’s wrong?
This usually means you’ve added too much water. Try adding more powdered sugar, one tablespoon at a time, until the icing reaches the right consistency. Also, make sure you’re beating it long enough—royal icing needs a good 5-7 minutes of mixing to develop those stiff peaks.
Pin This Recipe!

Cozy Hand Turkey Sugar Cookies: Easy Kids’ Recipe

These adorable handprint turkey sugar cookies are the perfect Thanksgiving activity for kids. Made with a soft, buttery sugar cookie base and decorated with royal icing and candy corn, they create lasting memories in the kitchen.
- Prep Time: 15 minutes
- Cook Time: 10 minutes
- Total Time: 45 minutes (including 30 minutes chill time)
- Yield: 12-16 cookies 1x
- Category: Dessert
- Cuisine: American
Ingredients
- 1 cup (226g) unsalted butter, softened
- 1 cup (200g) granulated sugar
- 1 large egg, room temperature
- 1 teaspoon vanilla extract
- 2 ½ cups (312g) all-purpose flour
- 1 teaspoon baking powder
- ½ teaspoon salt
- 2 cups (240g) powdered sugar
- 2 tablespoons meringue powder
- 3–4 tablespoons warm water
- Gel food coloring (brown, orange, red, and assorted colors)
- About 20 pieces candy corn
- About 20 candy eyes
- Orange sprinkles or small orange candies
- Red icing or red candy
- Assorted sprinkles
Instructions
- Make the cookie dough: In a large bowl, beat the softened butter and granulated sugar together until light and fluffy—about 2-3 minutes with an electric mixer on medium speed. Scrape down the sides of the bowl. Add the egg and vanilla extract, then beat until combined. It should look smooth and slightly glossy.
- Mix the dry ingredients: In a separate medium bowl, whisk together the flour, baking powder, and salt. Gradually add this to the wet mixture, mixing on low speed until a soft dough forms. Don’t overmix! Stop as soon as the flour disappears. The dough should be soft but not sticky.
- Chill the dough: Flatten the dough into a disc about 1-inch thick, wrap it tightly in plastic wrap, and refrigerate for at least 30 minutes. This step is crucial—chilled dough is much easier to work with and holds the handprint shape better. I usually chill mine for an hour if I have the time.
- Preheat the oven: Set your oven to 350°F (175°C). Line two baking sheets with parchment paper.
- Roll out the dough: On a lightly floured surface, roll the dough to about ¼-inch thickness. Don’t go thinner than that, or the cookies will be too fragile. Use gentle, even pressure with your rolling pin.
- Make the handprints: Gently press your child’s clean, dry hand into the dough. Press firmly enough to leave a clear impression, but not so hard that you press through to the counter. For younger kids, you might need to help guide their hand down evenly. If the dough starts to stick, dust their hand with a tiny bit of flour.
- Cut around the handprints: Using a sharp knife or bench scraper, carefully cut around each handprint, leaving about ½ inch of dough around the edges. Don’t worry about making it perfect—the rustic shape is part of the charm. Transfer each handprint cookie to the prepared baking sheet, spacing them about 2 inches apart.
- Bake the cookies: Bake for 8-10 minutes, or until the edges are just barely golden. The centers should still look pale and slightly soft. Let the cookies cool on the baking sheet for 5 minutes, then transfer them to a wire rack to cool completely.
- Make the royal icing: In a medium bowl, whisk together the powdered sugar and meringue powder. Add 3 tablespoons of warm water and beat with an electric mixer on medium speed until stiff peaks form—about 5-7 minutes. If the icing is too thick, add more water a teaspoon at a time. If it’s too thin, add more powdered sugar. You want it thick enough to hold its shape when piped.
- Divide and color the icing: Separate the icing into small bowls. I usually make one batch brown for the turkey body, orange for the beak, and red for the wattle. For the feathers, let the kids pick their favorite colors. Use gel food coloring for the most vibrant results—a little goes a long way.
- Decorate the cookies: Pipe a thin layer of brown icing over the palm and thumb area of each cookie—this is the turkey’s body. Before the icing sets, press on candy eyes, an orange sprinkle for the beak, and a tiny red dot for the wattle. For the feathers, arrange 3-4 candy corn pieces on the fingers, pointing outward. Let the kids add sprinkles however they like. There’s no wrong way to do this.
- Let the icing set: Allow the decorated cookies to sit at room temperature for about 1-2 hours, until the icing is completely hard. This is the hardest part for impatient little bakers, but it’s worth the wait.
Notes
Don’t skip the chilling step—warm dough will cause handprints to blur. For best results, use a kitchen scale for the flour. If fingertips start browning too quickly, tent the baking sheet with aluminum foil for the last 2 minutes. Royal icing should be like thick toothpaste consistency. Cover icing bowl with a damp paper towel when not in use to prevent crusting.
Nutrition
- Serving Size: 1 cookie
- Calories: 200
- Sugar: 18
- Sodium: 95
- Fat: 8
- Saturated Fat: 5
- Carbohydrates: 28
- Protein: 2
Keywords: hand turkey cookies, sugar cookies, Thanksgiving cookies, kids baking, handprint cookies, turkey cookies, easy cookie recipe


