This was supposed to be a simple Tuesday night dinner. You know the kind—ground beef in the pan, some rice on the stove, a few bell peppers staring at me from the crisper drawer. I had a plan. A boring, predictable plan. But then my toddler decided it was the perfect moment to “help” by dumping an entire bag of shredded mozzarella into the mixing bowl. Not on top. Not next to the bowl. Inside it. I stood there, spatula in hand, staring at this mountain of cheese mixed into my seasoned meat, and I felt that familiar kitchen panic rising.
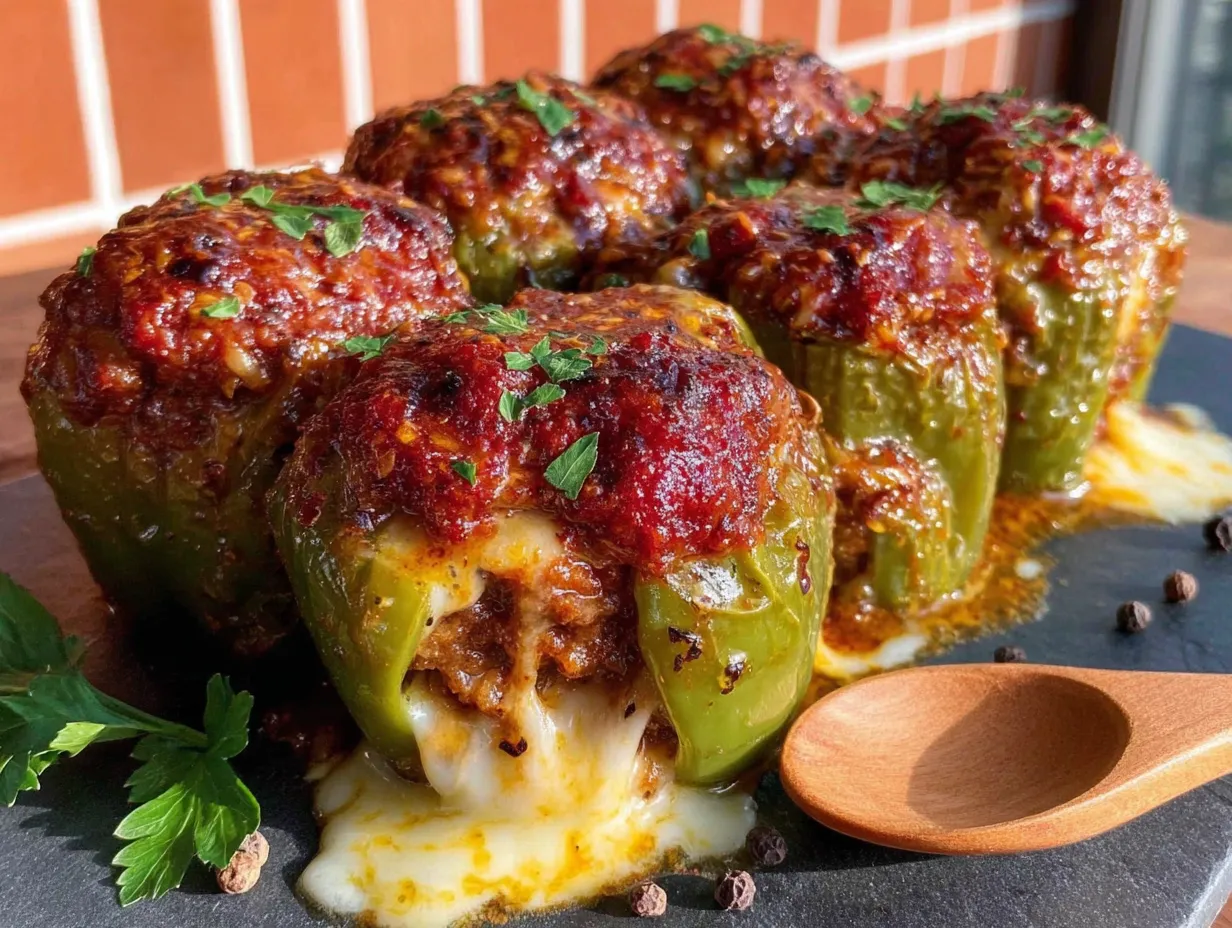
I almost scooped it out. Honestly, I had my fingers ready to pick out the clumps. But my son was so proud of his “cooking,” and I just couldn’t ruin that little face. So I left it. I stuffed the peppers, piled even more cheese on top, and threw them in the oven fully expecting a greasy, cheesy mess. What came out of that oven was nothing like the plan—and better. The cheese didn’t just melt; it formed these gorgeous, stretchy ribbons that draped over the peppers like little mummy wraps. The filling was creamy, rich, and way more satisfying than my original version. I mean, I accidentally created something that looked like it belonged at a Halloween party and tasted like a hug.
Maybe you’ve been there—the moment a recipe goes sideways and you just roll with it. That’s how these Cozy Mummy Stuffed Peppers with Gooey Cheese Ribbons were born. They’re proof that sometimes the best dishes come from the moments you almost gave up. I’ve made them every October since, and honestly, they’ve become a year-round comfort meal in our house. Let me show you why.
Why You’ll Love This Recipe
These aren’t your average stuffed peppers. They’re the kind of meal that makes you close your eyes after the first bite. Here’s why they’ll become a staple in your kitchen:
- Quick & Easy: From fridge to table in under 45 minutes. Perfect for those chaotic weeknights when you need something hearty without the fuss.
- Simple Ingredients: No fancy grocery trips needed. Ground beef, rice, bell peppers, cheese, and a few pantry staples—that’s it. You likely have everything right now.
- Perfect for Halloween (or Any Cozy Night): The cheese ribbons make these look like adorable little mummies. They’re a hit at Halloween parties, but honestly, they’re just as good for a rainy Tuesday in January.
- Crowd-Pleaser: Kids love the gooey cheese and fun presentation. Adults love the rich, savory filling. It’s a rare dinner that makes everyone happy.
- Unbelievably Delicious: The combination of seasoned beef, tender rice, and that blanket of melted cheese is pure comfort food magic. The texture is incredible—soft peppers, hearty filling, and those stretchy cheese ribbons.
What makes these different from every other stuffed pepper recipe? It’s the cheese. Most recipes sprinkle a little on top and call it a day. Here, the cheese is woven into the filling and piled high, creating those signature gooey ribbons that make each bite an experience. It’s comfort food reimagined—faster, cheesier, but with the same soul-soothing satisfaction. Perfect for impressing guests without stress, or turning a simple meal into something memorable.
What Ingredients You Will Need
This recipe uses simple, wholesome ingredients to deliver bold flavor and satisfying texture without the fuss. Most of these are pantry staples, so you can whip these up anytime the craving hits.
For the Filling
- 1 lb ground beef (I prefer 80/20 for flavor, but lean works too)
- 1 cup cooked white rice (leftover rice works great here—day-old is even better)
- 1 small onion, finely diced (about ½ cup)
- 3 cloves garlic, minced
- 1 can (15 oz) diced tomatoes, drained (fire-roasted adds a lovely smoky note)
- 1 teaspoon dried oregano
- 1 teaspoon smoked paprika
- ½ teaspoon salt
- ¼ teaspoon black pepper
- 2 cups shredded mozzarella cheese (divided—use a block and shred it yourself for best meltability)
For the Peppers
- 4 large bell peppers (any color works—red and orange are sweetest, green is more traditional)
- 1 tablespoon olive oil (for brushing the peppers)
For the Topping
- ½ cup shredded mozzarella cheese (extra for those ribbons)
- Fresh parsley, chopped (for garnish, optional but pretty)
Ingredient Tips: I recommend using a block of whole-milk mozzarella and shredding it yourself. Pre-shredded cheese has anti-caking agents that prevent it from melting into those beautiful, stretchy ribbons we’re after. For the beef, I’ve used ground turkey and even plant-based crumbles with great results—just add a tablespoon of olive oil to keep it moist.
Equipment Needed
You don’t need a fancy kitchen to make these. Here’s what you’ll need:
- Large skillet (for browning the beef and sautéing the onion)
- Medium mixing bowl (for combining the filling)
- 9×13 inch baking dish (glass or ceramic works best)
- Sharp knife (for cutting the peppers)
- Cutting board
- Measuring cups and spoons
- Wooden spoon or spatula
- Aluminum foil (for covering the dish during baking)
Budget-Friendly Tip: If you don’t have a 9×13 dish, use a large cast-iron skillet or even a rimmed baking sheet. Just make sure the peppers fit snugly so they hold their shape. I’ve also used disposable foil pans when bringing these to potlucks—works perfectly and no cleanup!
Preparation Method
Let’s get cooking. These steps are straightforward, but I’ve added some little tricks I learned along the way.
- Preheat your oven to 375°F (190°C). This gives it time to come to temperature while you prep everything else.
- Cook the rice if you haven’t already. You’ll need 1 cup of cooked rice. I usually make it ahead—about ⅓ cup dry rice cooked in ⅔ cup water yields the perfect amount. Let it cool slightly while you work on the beef.
- Prepare the bell peppers. Slice each pepper in half lengthwise through the stem. Scoop out the seeds and membranes with a spoon. Don’t worry about keeping the stem intact—just remove it. Brush the outside of each pepper half with olive oil and place them cut-side up in your baking dish. Pro tip: If your peppers wobble, slice a tiny bit off the bottom to create a flat surface. Just don’t cut all the way through!
- Brown the beef. Heat your large skillet over medium-high heat. Add the ground beef and cook, breaking it apart with your spoon, until browned—about 5-7 minutes. Don’t drain all the fat; leave about a tablespoon for flavor. Add the diced onion and cook for 2 minutes until softened. Stir in the minced garlic and cook for 30 seconds until fragrant. Your kitchen will start smelling amazing right about now.
- Build the filling. Reduce the heat to medium. Add the drained diced tomatoes, cooked rice, oregano, smoked paprika, salt, and pepper. Stir everything together and let it cook for 2 minutes so the flavors meld. Taste it here—adjust the salt or add a pinch of red pepper flakes if you like heat.
- Add the cheese (the secret step). Remove the skillet from heat. Stir in 1 cup of the shredded mozzarella. It will start melting immediately into the warm filling. This is what creates those gooey ribbons later—the cheese is woven throughout, not just sitting on top.
- Stuff the peppers. Spoon the filling evenly into each pepper half. Pack it gently—you want it mounded slightly, not crammed. Each half should get about ½ cup of filling.
- Top with the remaining cheese. Sprinkle the remaining 1 cup of mozzarella over the stuffed peppers. Don’t be shy—pile it on. This is what creates those dramatic cheese ribbons when you pull them apart.
- Bake covered. Cover the baking dish with aluminum foil. Bake for 25 minutes. The foil traps steam and helps the peppers soften without burning the cheese.
- Uncover and finish. Remove the foil and bake for another 10-15 minutes. The cheese should be bubbly and golden in spots. The peppers should be tender when pierced with a fork—not mushy, but yielding.
- Rest before serving. Let the peppers sit for 5 minutes after coming out of the oven. This is crucial—it lets the filling set so everything doesn’t slide apart when you serve them. Plus, the cheese cools slightly and gets that perfect stretchy texture.
Sensory Cue: When you pull the foil off, you should see the cheese bubbling and the edges of the peppers looking slightly caramelized. The smell is incredible—sweet peppers, savory beef, and that toasty cheese aroma. When you cut into one, the cheese should stretch into long, glossy ribbons. That’s how you know it’s perfect.
Cooking Tips & Techniques
I’ve made these peppers more times than I can count, and I’ve learned a few things the hard way. Let me save you the trouble.
Don’t Overcook the Peppers. The biggest mistake I made early on was baking them too long. Thirty-five minutes total is usually perfect—25 covered, 10 uncovered. If you go longer, the peppers turn mushy and lose their structure. You want them tender but still holding their shape.
Shred Your Own Cheese. I cannot stress this enough. Pre-shredded cheese is coated with cellulose and starch to prevent clumping. Those same additives prevent it from melting smoothly. When you shred a block of mozzarella yourself, it melts into those gorgeous, stretchy ribbons that make this dish special. It takes two extra minutes, and it’s worth every second.
Watch Your Filling Moisture. If your diced tomatoes are very juicy, the filling can get soupy. I always drain them well—sometimes even give them a gentle squeeze. If you accidentally add too much liquid, stir in an extra tablespoon of cooked rice or breadcrumbs to absorb it.
Timing Strategy: Cook your rice while browning the beef. They take about the same time, so you can multitask. I start the rice first, then start the beef once the rice is simmering. Everything comes together seamlessly.
Consistency Tip: For the best texture, let the filling cool for a few minutes before stuffing the peppers. Hot filling can make the peppers release too much water during baking. I usually let it sit while I clean up the skillet—perfect timing.
Variations & Adaptations
This recipe is incredibly flexible. Here are some of my favorite variations:
Spicy Southwestern Version
Swap the diced tomatoes for a can of Rotel (diced tomatoes with green chiles). Add ½ teaspoon cumin and a pinch of cayenne pepper. Top with pepper jack cheese instead of mozzarella. The heat pairs beautifully with the sweet peppers.
Vegetarian Option
Replace the ground beef with 1½ cups of cooked black beans and 1 cup of corn. Use the same spices—the beans add plenty of protein and fiber. I’ve also used crumbled tofu or tempeh, but the black bean version is my favorite. It’s hearty and satisfying.
Low-Carb / Keto Friendly
Skip the rice and substitute 1 cup of riced cauliflower. Sauté it with the onion before adding the tomatoes. The texture is surprisingly similar, and the cheese helps everything hold together. My keto friends ask for this version regularly.
Cheese Ribbon Upgrade
For extra dramatic cheese ribbons, mix ½ cup of provolone or low-moisture part-skim mozzarella into the filling and use fresh mozzarella pearls for the topping. Fresh mozzarella has more moisture and creates even longer, stretchier ribbons. It’s a little pricier, but for a special occasion, it’s worth it.
Serving & Storage Suggestions
These peppers are best served warm, straight from the oven. The cheese ribbons are at their stretchiest and most dramatic right after resting. I like to serve them on a bed of simple greens or with a side of crusty bread to soak up any juices.
What to Serve With Them: A simple side salad with a tangy vinaigrette balances the richness of the cheese. Roasted vegetables—like zucchini or asparagus—also work beautifully. For a heartier meal, serve with extra rice or quinoa.
Storage: Leftover stuffed peppers keep well in an airtight container in the refrigerator for up to 4 days. The flavors actually meld together overnight and taste even better the next day. I love them for lunch—they reheat beautifully.
Reheating: The best way to reheat is in the oven at 350°F for 10-15 minutes, covered with foil to prevent the cheese from burning. The microwave works in a pinch (about 2 minutes on high), but the peppers will be softer and the cheese won’t stretch as much. If you’re reheating in the microwave, add a damp paper towel over the plate to create steam.
Freezer Instructions: These freeze wonderfully. Let the stuffed peppers cool completely, then wrap each one individually in plastic wrap and place in a freezer bag. They’ll keep for up to 3 months. To reheat, thaw overnight in the fridge and bake at 350°F for 20 minutes, covered. The texture is almost as good as fresh.
Nutritional Information & Benefits
Here’s an approximate nutritional breakdown per serving (one stuffed pepper half):
- Calories: 385
- Protein: 28g
- Fat: 22g
- Carbohydrates: 18g
- Fiber: 3g
- Sugar: 6g
These peppers are surprisingly well-balanced. The bell peppers are packed with vitamin C—more than an orange, actually. The beef provides iron and B12, while the cheese adds calcium and protein. The rice gives you steady energy without spiking your blood sugar.
Dietary Considerations: This recipe is naturally gluten-free (just check your spice blends). To make it dairy-free, use a plant-based mozzarella alternative—I’ve had good luck with cashew-based shreds. For a lower-fat option, use lean ground turkey and reduced-fat cheese, though the cheese won’t ribbon quite as dramatically.
Personal Note: I love that this meal feels indulgent but isn’t actually that heavy. It’s the kind of dinner that satisfies a comfort food craving without leaving you sluggish. That’s a win in my book.
Conclusion
These Cozy Mummy Stuffed Peppers with Gooey Cheese Ribbons started as a kitchen accident, but they’ve become one of my most requested recipes. They’re proof that sometimes the best things happen when you let go of control and just go with it. The cheese ribbons make them fun and festive, but the real magic is in that savory, comforting filling that hits all the right notes.
I hope you make these your own. Maybe you add a little heat, swap in turkey, or go all out with fresh mozzarella pearls. Whatever you do, don’t skip the part where you pile on the cheese—that’s where the joy lives. And if your toddler (or you) accidentally dumps in too much cheese? Just smile and call it a feature, not a bug.
I’d love to hear how yours turn out! Leave a comment below and tell me about your own kitchen happy accidents. Share a photo if you’re proud—I always love seeing your creations. Until next time, happy cooking, and may your cheese always be stretchy!
Frequently Asked Questions
Can I make these stuffed peppers ahead of time?
Absolutely! You can assemble the peppers completely (stuff them and top with cheese) up to 24 hours in advance. Cover and refrigerate. When you’re ready to bake, add about 10 minutes to the covered baking time since you’re starting from cold.
How do I get the cheese to ribbon instead of just melting into a blob?
The key is using freshly shredded mozzarella from a block. Pre-shredded cheese has anti-caking agents that prevent it from stretching properly. Also, don’t overbake—the cheese should be bubbly and golden, not brown and crispy. Letting the peppers rest for 5 minutes after baking helps the cheese set into those beautiful ribbons.
Can I use different colored bell peppers?
Yes! Any color works. Red and orange peppers are sweeter and milder, while green peppers have a more traditional, slightly bitter flavor. I like using a mix for visual appeal—it makes the dish look more festive.
What’s the best way to reheat leftovers without drying them out?
Oven is best. Reheat at 350°F, covered with foil, for 10-15 minutes. If you’re in a hurry, the microwave works—just cover the plate with a damp paper towel to add moisture. The peppers will be softer, but the flavor is still great.
Can I freeze these stuffed peppers?
Yes! Let them cool completely, wrap individually in plastic wrap, then place in a freezer bag. They’ll keep for up to 3 months. Thaw overnight in the fridge and reheat at 350°F for 20 minutes, covered. The texture is slightly softer than fresh, but they’re still delicious.
Pin This Recipe!
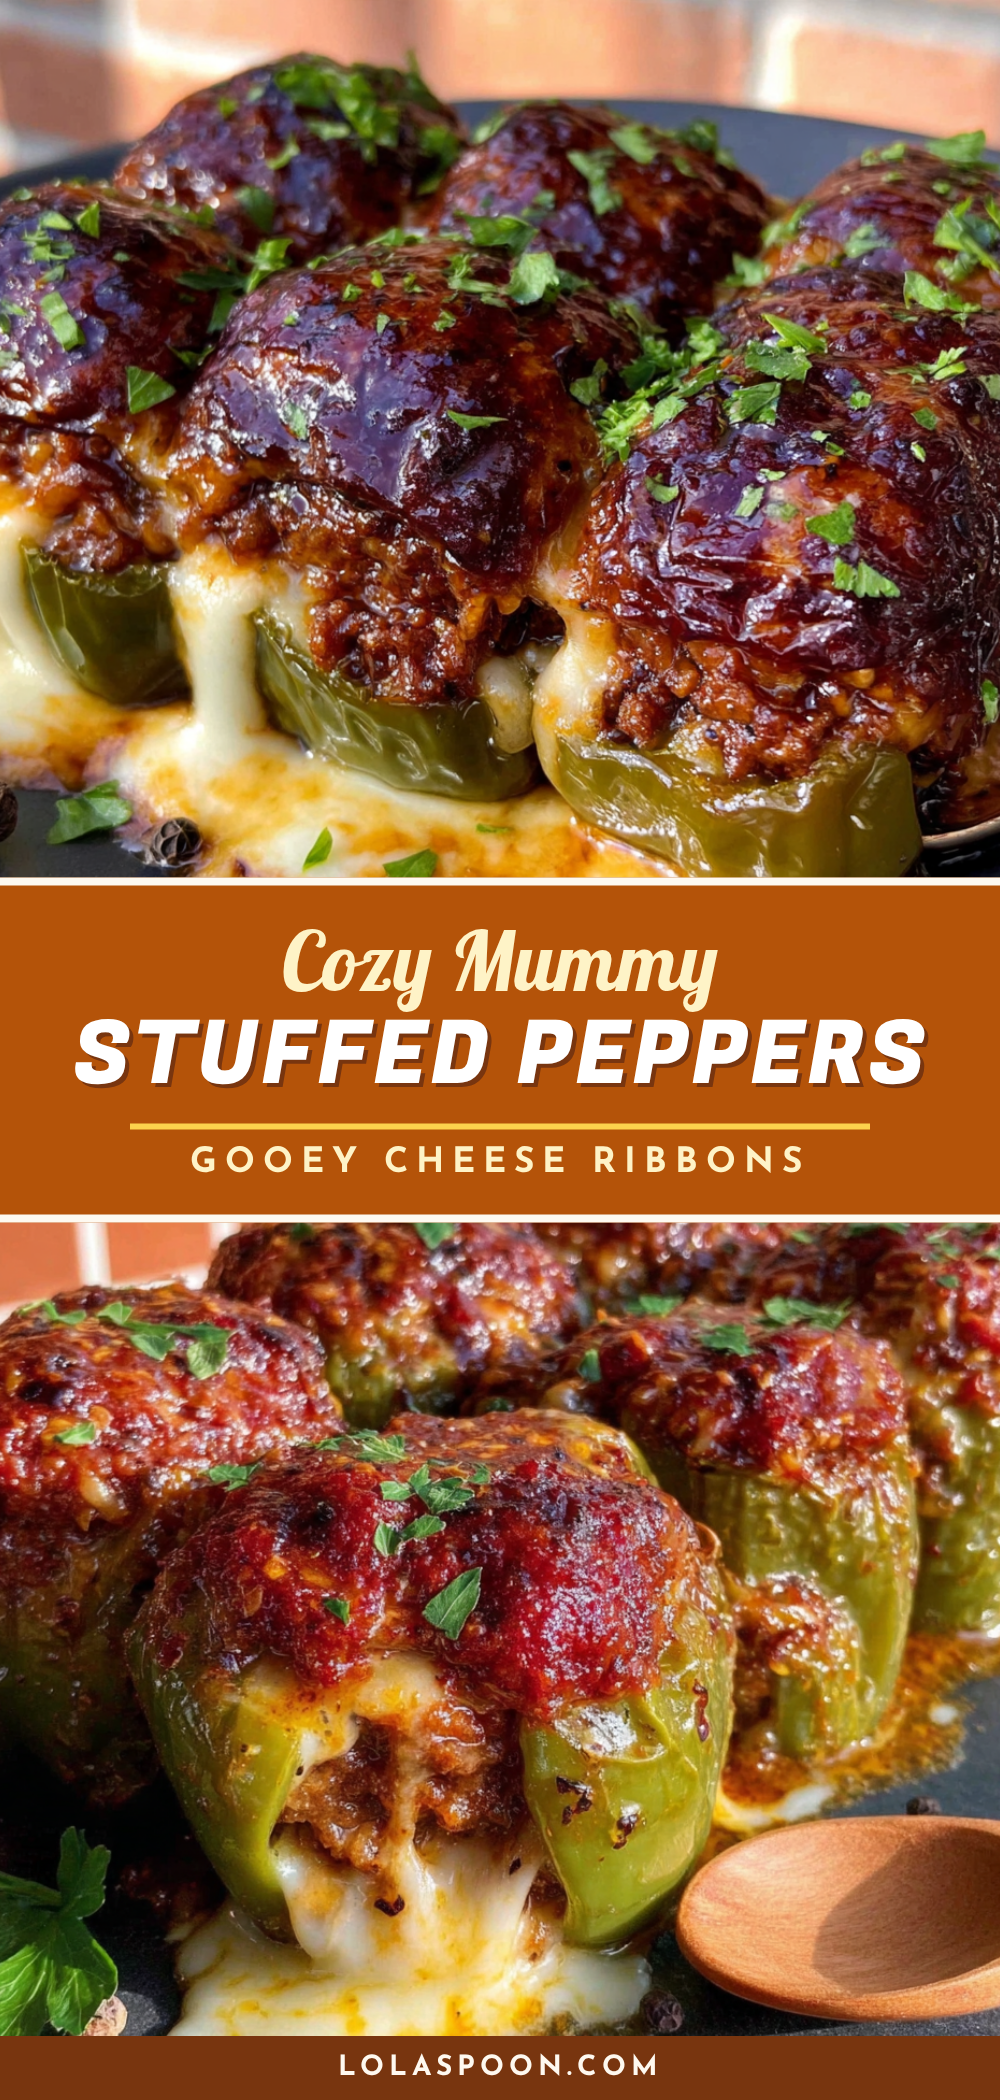
Cozy Mummy Stuffed Peppers with Gooey Cheese Ribbons
These Cozy Mummy Stuffed Peppers with Gooey Cheese Ribbons are a comforting, cheesy twist on classic stuffed peppers. With a savory beef and rice filling and stretchy mozzarella ribbons, they’re perfect for Halloween or any cozy night.
- Prep Time: 15 minutes
- Cook Time: 35 minutes
- Total Time: 50 minutes
- Yield: 8 servings 1x
- Category: Main Course
- Cuisine: American
Ingredients
- 1 lb ground beef (80/20 preferred)
- 1 cup cooked white rice
- 1 small onion, finely diced (about ½ cup)
- 3 cloves garlic, minced
- 1 can (15 oz) diced tomatoes, drained
- 1 teaspoon dried oregano
- 1 teaspoon smoked paprika
- ½ teaspoon salt
- ¼ teaspoon black pepper
- 2 cups shredded mozzarella cheese (divided)
- 4 large bell peppers (any color)
- 1 tablespoon olive oil
- ½ cup shredded mozzarella cheese (for topping)
- Fresh parsley, chopped (for garnish, optional)
Instructions
- Preheat your oven to 375°F (190°C).
- Cook the rice if you haven’t already. You’ll need 1 cup of cooked rice. Let it cool slightly.
- Prepare the bell peppers. Slice each pepper in half lengthwise through the stem. Scoop out the seeds and membranes. Brush the outside of each pepper half with olive oil and place them cut-side up in a 9×13 inch baking dish.
- Brown the beef. Heat a large skillet over medium-high heat. Add the ground beef and cook, breaking it apart, until browned (5-7 minutes). Add the diced onion and cook for 2 minutes until softened. Stir in the minced garlic and cook for 30 seconds.
- Build the filling. Reduce heat to medium. Add the drained diced tomatoes, cooked rice, oregano, smoked paprika, salt, and pepper. Stir and cook for 2 minutes.
- Add the cheese. Remove the skillet from heat. Stir in 1 cup of the shredded mozzarella until melted.
- Stuff the peppers. Spoon the filling evenly into each pepper half (about ½ cup per half).
- Top with the remaining cheese. Sprinkle the remaining 1 cup of mozzarella over the stuffed peppers.
- Bake covered. Cover the baking dish with aluminum foil. Bake for 25 minutes.
- Uncover and finish. Remove the foil and bake for another 10-15 minutes until cheese is bubbly and golden.
- Rest before serving. Let the peppers sit for 5 minutes before serving.
Notes
For best cheese ribbons, shred mozzarella from a block (not pre-shredded). Let peppers rest 5 minutes after baking for perfect stretchy texture. Can be assembled up to 24 hours ahead.
Nutrition
- Serving Size: 1 stuffed pepper hal
- Calories: 385
- Sugar: 6
- Sodium: 680
- Fat: 22
- Saturated Fat: 10
- Carbohydrates: 18
- Fiber: 3
- Protein: 28
Keywords: stuffed peppers, mummy peppers, Halloween dinner, cheesy stuffed peppers, ground beef recipe, comfort food, easy dinner


