I was standing in the middle of a blizzard in my neighbor’s driveway, snow up to my ankles, holding a half-empty carton of heavy cream. Not exactly where I expected to be on a Tuesday afternoon, but there I was, listening to my neighbor, Mr. Gable—a retired postal worker who I’d only ever seen meticulously trimming his hedges—explain why I absolutely had to stop what I was doing and make snow ice cream. He was so serious about it, too. He had this look, like he was letting me in on a secret that had been passed down through generations of Gables. Honestly, I was skeptical. Snow and cream? It sounded like something you’d dare a kid to try, not a real dessert.
But Mr. Gable wasn’t joking. He pointed to the cleanest patch of snow on his lawn—the stuff that had just fallen, not the pile near the road. “That’s the key,” he said, his voice muffled by his scarf. “Fresh, untouched snow. It’s the lightest thing you’ll ever eat.” I mean, I’d heard of snow cream before, but it always sounded like a Depression-era hack, a way to make something from nothing. I wasn’t expecting it to actually be good. But I had the cream, and he had the snow, and maybe you’ve been there—when someone is so convinced about something that you just have to play along.
So I scooped a bowl of that pristine white snow, mixed it with a little sweetened condensed milk and vanilla, and took a bite. And let me tell you, my mind was blown. It was like eating a cloud—if clouds were sweet, creamy, and tasted like a dream. The texture was impossibly light, almost fluffy, and the flavor was pure, simple comfort. I stood there in the cold, grinning like an idiot, while Mr. Gable nodded with satisfaction. That’s the recipe that stayed with me. It’s not fancy, and it’s not complicated, but it’s one of those little surprises that makes you remember that the best things often come from the most unexpected places. This is my version of that magical moment.
Why You’ll Love This Recipe
Let’s be real for a second—sometimes you just want a treat that feels indulgent without the guilt or the hours of work. This snow ice cream nails that. It’s one of those recipes that almost feels like a cheat code. You get a creamy, satisfying dessert with literally three ingredients, and it comes together in about five minutes. Five minutes! That’s less time than it takes to decide what to watch on Netflix.
- Quick & Easy: From snow to spoon in under 10 minutes. Perfect for when a craving hits out of nowhere, or when the kids are bouncing off the walls after a snow day.
- Simple Ingredients: No weird extracts, no obscure flours, no trips to a specialty store. You probably have everything in your pantry and fridge right now.
- Perfect for a Snow Day: This is the ultimate winter activity. It turns a nuisance (shoveling) into a celebration (dessert!). Great for kids and grown-ups alike.
- Crowd-Pleaser: Honestly, I’ve served this to people who turned their noses up at the idea, and they came back for seconds. It’s just so light and refreshing.
- Unbelievably Delicious: The texture is what gets everyone. It’s not icy or watery. It’s creamy, fluffy, and melts in your mouth like the softest scoop of gelato.
What makes this version different from the old recipes you might remember? It’s all about the ratio. I’ve tested this a dozen times to get the perfect balance of sweetness and creaminess without it turning into a sad, soupy puddle. It’s not just another version—it’s the best version. The kind that makes you close your eyes after the first bite and just… enjoy it. It’s comfort food at its purest, and it fits perfectly into a life where you want to eat well without feeling like you’re missing out.
What Ingredients You Will Need
This recipe is the definition of minimalism. It uses just three simple, wholesome ingredients to create something that feels surprisingly luxurious. No fuss, no muss, just pure, snowy goodness.
- 8 cups (about 500g) Fresh, Clean Snow: This is the star of the show. The quality of your snow matters a lot. You want the freshest, fluffiest snow you can find—ideally snow that has just fallen and hasn’t been touched by dirt, salt, or plows. Think of it like picking the best produce. I usually grab a large bowl and skim the top layer from a clean patch in my backyard, away from the road. Pro tip: If you have a deck or a patio table, that’s often the cleanest snow of all. Don’t use old, crusty, or icy snow—it will be too dense.
- 1 can (14 ounces / 397g) Sweetened Condensed Milk: This is your sweetener and your creaminess agent all in one. It’s thick, luscious, and adds that rich, milky flavor that makes the snow taste like a real dessert. I’ve tried this with other sweeteners, and honestly, nothing works quite as well. The condensed milk gives it that silky body. I prefer the Eagle Brand or Nestlé—they’re both reliable and give a consistent texture.
- 1 teaspoon (5ml) Pure Vanilla Extract: This is your flavor backbone. It lifts the sweetness and adds a warm, comforting note that makes the whole thing taste like a snow day hug. Please use pure vanilla extract, not imitation. The flavor difference is night and day. You can also get creative here—a little peppermint extract for a festive twist, or a splash of almond extract for a nutty undertone.
Ingredient Selection Tips: For the sweetened condensed milk, make sure you’re getting the full-fat version. The low-fat or fat-free ones have a different texture and won’t give you that same creamy result. And for the snow, if you live in an area where snow is scarce or you’re worried about cleanliness, you can actually use shaved ice from a clean ice maker, but it won’t be quite as fluffy. The real deal is always best.
Substitution Guidance: Need a dairy-free option? You can use a can of full-fat coconut milk (the kind in the can, not the carton) and sweeten it with a little maple syrup or agave, but it will change the flavor profile significantly. For a lower-sugar version, you can try a sugar-free condensed milk alternative, but I can’t vouch for the texture. Honestly, this recipe is so simple that it’s best to stick with the classics.
Equipment Needed
One of the best things about this recipe is how little equipment you need. You don’t need a mixer, a blender, or any fancy gadgets. Just a few basics.
- Large Mixing Bowl: You need a big bowl to hold all that snow. A metal or glass bowl works best because it stays cold. I use my big stainless steel mixing bowl—it helps keep the snow from melting too fast while you’re working.
- Measuring Cups and Spoons: For the snow (if you’re measuring) and the vanilla. Nothing fancy needed.
- A Sturdy Spoon or Spatula: You’ll need this to gently fold the ingredients together. A rubber spatula is my go-to because it’s gentle and gets every last bit of the condensed milk off the sides.
- Serving Bowls or Cups: To enjoy your creation immediately. I like using small glass cups or little ceramic bowls.
- An Ice Cream Scoop (Optional): If you want to get fancy with your serving, a standard ice cream scoop makes perfect little snowballs of ice cream.
Budget-Friendly Options: Don’t overthink this. A regular bowl from your kitchen cabinet and a spoon from the drawer will work perfectly. You don’t need to buy anything special. The only “special” thing is the snow, and that’s free!
Preparation Method

Making this snow ice cream is almost too easy. It’s more about technique and timing than anything else. The key is to work quickly so the snow doesn’t melt before you get to eat it.
- Go Collect Your Snow (5 minutes): This is the most important step. Take your large mixing bowl and head outside. Look for the freshest, cleanest snow you can find. I usually go for the snow that’s piled up on my deck railing or the top of the picnic table. It’s perfectly untouched. Gently scoop about 8 cups of snow into your bowl. Don’t pack it down—just let it be light and fluffy. If you’re using a scale, 500 grams is your target.
- Bring the Bowl Inside (30 seconds): Don’t dawdle! Get that bowl back inside and onto your counter. The colder the bowl and the snow are, the better your final texture will be. If your kitchen is super warm, you might want to pop the bowl in the freezer for a minute while you get the other ingredients ready.
- Add the Liquid Ingredients (2 minutes): Open your can of sweetened condensed milk. Give it a good stir in the can first—sometimes it settles. Pour the entire can over the snow. Then, add your 1 teaspoon of pure vanilla extract. Don’t dump it all in one spot if you can help it; try to drizzle it around a bit.
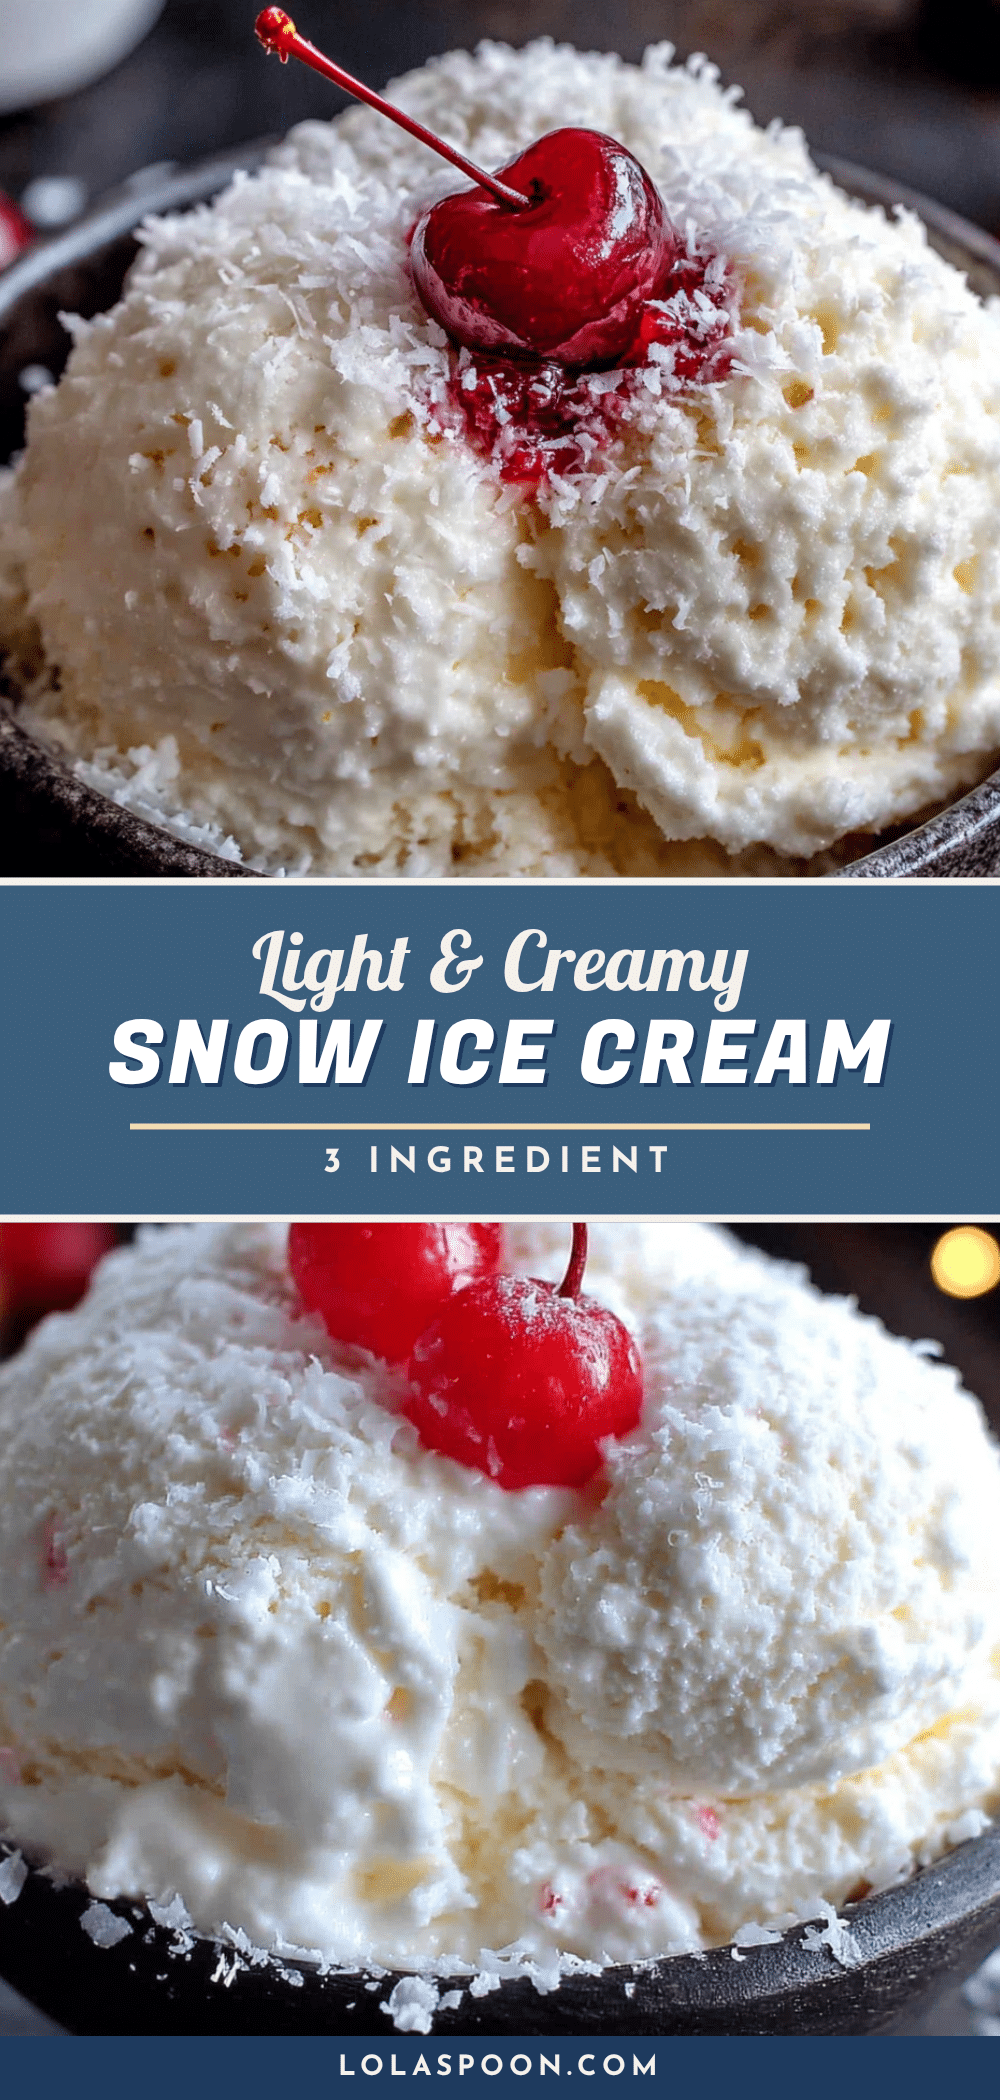
- Fold, Don’t Stir (3 minutes): Here’s where the magic happens. Using your rubber spatula or a large spoon, gently fold the condensed milk and vanilla into the snow. Do not stir vigorously! You want to incorporate the ingredients without deflating the snow. Think of it like folding in egg whites—gentle, sweeping motions from the bottom up. You’ll see the snow start to turn a beautiful, creamy white. It will look like soft-serve ice cream.
- Check the Consistency (30 seconds): The mixture should be thick, creamy, and hold its shape a little. If it seems too soupy or runny, you might have gotten a little too much liquid or the snow was too wet. Don’t panic! Just add a handful more of fresh snow and gently fold it in. If it’s too stiff (unlikely, but possible), you can drizzle in a tiny splash of milk or a little more condensed milk.
- Serve Immediately (1 minute): This is not a recipe you can make ahead of time. Snow ice cream is best eaten the second it’s made. Scoop it into bowls or cups right away. If you wait too long, it will melt into a sweet, watery slush. It’s still tasty, but you lose that amazing fluffy texture. So get those spoons ready!
Troubleshooting Tip: If your snow ice cream tastes a little flat, you might have used too much snow. Next time, add the condensed milk a little at a time and taste as you go. You can always add more, but you can’t take it out. Also, make sure your vanilla isn’t old—vanilla can lose its potency over time.
Cooking Tips & Techniques
Over the years, I’ve made a few mistakes with this recipe so you don’t have to. Here are the things I’ve learned the hard way.
- The Snow Quality is Everything: I once used snow that had been sitting for a day. It was a little crusty on top. The resulting ice cream was grainy and not nearly as light. Always, always use fresh, fluffy snow. The smaller the snowflakes, the better the texture. That powdery, dry snow is your best friend.
- Work in a Cold Kitchen: If your kitchen is toasty, your snow will start melting the second you bring it in. If you can, turn down the thermostat a bit before you start, or work near an open window. A cold bowl helps too—pop it in the freezer for 10 minutes before you go outside.
- Don’t Overmix: This is the biggest mistake people make. You want to just combine the ingredients. If you keep stirring, you’ll break down the snow structure and end up with a puddle. A few gentle folds is all it takes. It’s okay if you see a few streaks of white—they’ll disappear as you eat it.
- Use a Light Hand: When you’re scooping the snow, don’t pack it into the measuring cup. Just let it fall in loosely. Packed snow is denser and will make your ice cream heavier. We’re going for light and airy here.
- Timing is Everything: Have all your ingredients measured and ready to go before you bring the snow inside. The clock is ticking from the moment that snow hits the bowl. You want to be able to mix and serve in under 5 minutes.
Variations & Adaptations
Once you’ve mastered the basic recipe, it’s fun to play around. Here are a few ways I’ve changed it up over the years.
- Chocolate Snow Ice Cream: This is my personal favorite variation. Before you add the snow, whisk 2 tablespoons of unsweetened cocoa powder into the sweetened condensed milk. Make sure it’s fully dissolved—no lumps! Then proceed as normal. You get a rich, chocolatey snow cream that tastes like a frozen hot chocolate.
- Minty Fresh Twist: Instead of vanilla, use 1/2 teaspoon of peppermint extract. The flavor is so bright and refreshing. For a fun touch, fold in a handful of mini chocolate chips after you’ve mixed the base. It tastes just like a Thin Mint cookie.
- Berry Swirl: If you have some fresh or frozen berries, you can make a quick sauce. Mash about 1/2 cup of strawberries or raspberries with a tablespoon of maple syrup. Swirl this into your finished snow ice cream for a pretty pink effect and a burst of fruity flavor.
- Dairy-Free Version: As I mentioned, you can use a can of full-fat coconut cream or coconut milk. Sweeten it with 1/4 cup of maple syrup and a pinch of salt. The flavor is a little different—more tropical—but it’s still incredibly creamy and delicious.
Serving & Storage Suggestions
This recipe is all about immediate gratification, but here’s how to make the most of it.
Serving: Serve the snow ice cream immediately in chilled bowls or cups. I like to top it with a little sprinkle of cinnamon or a few fresh berries for color. It’s wonderful on its own, but it also pairs beautifully with a warm cookie. If you’re serving it to guests, you can set up a little “snow cream bar” with toppings like chocolate sauce, sprinkles, crushed candy canes, or toasted coconut. It makes for a fun, interactive dessert.
Storage: Here’s the honest truth—snow ice cream does not store well. If you put it in the freezer, it will freeze into a solid block of ice. When you try to scoop it later, it will be icy and hard, not fluffy and creamy. The texture is completely lost. This is a recipe that is meant to be made and eaten immediately. If you have leftovers (which is rare in my house), your best bet is to just enjoy it as a sweet, cold drink as it melts.
Reheating: You don’t reheat snow ice cream. If it melts, it’s gone. That’s part of the magic—it’s a fleeting, ephemeral treat. It teaches you to be present and enjoy the moment.
Nutritional Information & Benefits
Let’s be honest—this is a treat. But it’s a treat made with real, simple ingredients, and that counts for something. The nutritional values below are estimates for the entire batch, assuming you use the full can of sweetened condensed milk.
| Nutrient | Per Serving (1/6 of recipe) |
|---|---|
| Calories | ~220 |
| Total Fat | ~6g |
| Saturated Fat | ~4g |
| Carbohydrates | ~38g |
| Sugar | ~35g |
| Protein | ~4g |
| Calcium | ~130mg |
The sweetened condensed milk provides a good dose of calcium and protein, which is more than you can say for most frozen desserts. The snow itself is just water, so you’re also getting hydrated! It’s a fun, occasional treat that fits into a balanced lifestyle. If you’re watching your sugar intake, you can try the variations with less sweetener, or just enjoy a smaller portion. It’s all about balance.
Dietary Considerations: This recipe is vegetarian. It contains dairy and gluten-free as written. For a vegan option, use the coconut milk variation mentioned above. Always check your labels if you have specific allergies.
Conclusion
This snow ice cream is one of those recipes that reminds me why I love cooking. It’s not about fancy techniques or expensive ingredients. It’s about taking something simple and turning it into a moment of pure joy. It’s the surprise of it—the fact that something so easy can be so incredibly good. I love that it makes a snow day feel special. I love that it gets kids excited about being outside. And I love that it’s a little bit silly and a whole lot delicious.
I really hope you give this a try the next time the snow falls. Don’t overthink it. Just grab a bowl, head outside, and make a little magic. And when you do, I’d love to hear about it! Leave a comment below and tell me how it turned out. Did you try a fun variation? Did your kids love it? Share your snow day stories with me. Let’s make this winter a little bit sweeter, one bowl at a time.
Frequently Asked Questions
Can I use snow that has been on the ground for a few days?
I really wouldn’t recommend it. Snow that has been sitting for a while gets compacted and can pick up dirt, debris, and other stuff from the environment. It will also be much denser and icier, which will ruin the light, fluffy texture you’re going for. Always use the freshest snow you can find.
What if I don’t have sweetened condensed milk?
You can make a substitute by simmering 1 cup of whole milk with 3/4 cup of sugar and a pinch of salt until it reduces by about half. Let it cool completely before using. It won’t be quite as thick as the canned stuff, but it will work in a pinch. You can also use a mixture of heavy cream and powdered sugar, but the texture will be different.
My snow ice cream turned out soupy. What did I do wrong?
This usually happens for one of three reasons: your snow was too wet or heavy, your kitchen was too warm, or you overmixed it. Next time, try using lighter, fluffier snow and work as quickly as possible. If it still happens, you can stir in a handful of fresh snow to thicken it back up.
Can I use a sugar substitute to make this lower in sugar?
You can try, but I can’t guarantee the results. Sugar substitutes don’t have the same texture or body as real sugar, so your ice cream might end up thinner or with a different mouthfeel. If you want to try it, use a sweetened condensed milk alternative made with stevia or monk fruit, and be prepared for a slightly different result.
Is it safe to eat snow?
Generally, yes, as long as you use clean, fresh snow from a safe area. Avoid snow that is near roads (it can have salt and exhaust residue), under trees (it can have sap and bugs), or that has been plowed. Freshly fallen snow from your own backyard or a clean deck is perfectly safe to eat in small amounts. As with anything, use your best judgment.
Pin This Recipe!
Easy 3-Ingredient Snow Ice Cream Recipe

This snow ice cream is a quick and easy dessert made with just three simple ingredients: fresh snow, sweetened condensed milk, and vanilla extract. It’s light, fluffy, and perfect for a snow day treat.
- Prep Time: 5 minutes
- Cook Time: 0 minutes
- Total Time: 5 minutes
- Yield: 6 servings 1x
- Category: Dessert
- Cuisine: American
Ingredients
- 8 cups (about 500g) fresh, clean snow
- 1 can (14 ounces / 397g) sweetened condensed milk
- 1 teaspoon (5ml) pure vanilla extract
Instructions
- Go collect your snow: Take a large mixing bowl outside and gently scoop about 8 cups of fresh, clean snow into it. Do not pack it down.
- Bring the bowl inside immediately.
- Add the liquid ingredients: Pour the entire can of sweetened condensed milk over the snow, then add the vanilla extract.
- Fold, don’t stir: Using a rubber spatula or large spoon, gently fold the condensed milk and vanilla into the snow until just combined. Do not overmix.
- Check the consistency: The mixture should be thick and creamy. If too soupy, add a handful of fresh snow and fold gently. If too stiff, add a splash of milk or more condensed milk.
- Serve immediately: Scoop into bowls or cups and enjoy right away.
Notes
Use the freshest, fluffiest snow possible. Work quickly to prevent melting. Do not overmix. This recipe is best eaten immediately and does not store well.
Nutrition
- Serving Size: 1/6 of recipe
- Calories: 220
- Sugar: 35
- Sodium: 50
- Fat: 6
- Saturated Fat: 4
- Carbohydrates: 38
- Protein: 4
Keywords: snow ice cream, 3-ingredient, easy dessert, snow day, winter treat, homemade ice cream
Easy 3-Ingredient Snow Ice Cream Recipe
This snow ice cream is a quick and easy dessert made with just three simple ingredients: fresh snow, sweetened condensed milk, and vanilla extract. It’s light, fluffy, and perfect for a snow day treat.
- Prep Time: 5 minutes
- Cook Time: 0 minutes
- Total Time: 5 minutes
- Yield: 6 servings 1x
- Category: Dessert
- Cuisine: American
Ingredients
- 8 cups (about 500g) fresh, clean snow
- 1 can (14 ounces / 397g) sweetened condensed milk
- 1 teaspoon (5ml) pure vanilla extract
Instructions
- Go collect your snow: Take a large mixing bowl outside and gently scoop about 8 cups of fresh, clean snow into it. Do not pack it down.
- Bring the bowl inside immediately.
- Add the liquid ingredients: Pour the entire can of sweetened condensed milk over the snow, then add the vanilla extract.
- Fold, don’t stir: Using a rubber spatula or large spoon, gently fold the condensed milk and vanilla into the snow until just combined. Do not overmix.
- Check the consistency: The mixture should be thick and creamy. If too soupy, add a handful of fresh snow and fold gently. If too stiff, add a splash of milk or more condensed milk.
- Serve immediately: Scoop into bowls or cups and enjoy right away.
Notes
Use the freshest, fluffiest snow possible. Work quickly to prevent melting. Do not overmix. This recipe is best eaten immediately and does not store well.
Nutrition
- Serving Size: 1/6 of recipe
- Calories: 220
- Sugar: 35
- Sodium: 50
- Fat: 6
- Saturated Fat: 4
- Carbohydrates: 38
- Protein: 4
Keywords: snow ice cream, 3-ingredient, easy dessert, snow day, winter treat, homemade ice cream