The woman at the community garden plot next to mine—her name is Rosa—watched me one Saturday morning as I stared at a pile of pumpkin innards like it was a math problem I couldn’t solve. I’d just hacked open my first sugar pumpkin of the season, thrilled by the deep orange flesh inside, but completely unprepared for the slippery mass of seeds and stringy pulp that came with it. She didn’t say anything at first. She just kept watering her kale, pretending not to notice my struggle. Then, without looking up, she said, “You’re going to roast those, right?”
I admitted I’d never actually done it before. I mean, I’d eaten pumpkin seeds plenty of times—those salty, crunchy shells you crack between your teeth at fall gatherings. But making them myself? Honestly, it felt like one of those kitchen tasks that everyone else just *knew* how to do. Rosa laughed, wiped her hands on her jeans, and walked over. She showed me how to separate the seeds from the pulp in a big bowl of water—the pulp floats, the seeds sink—and told me her grandmother used to lay them out on a dish towel overnight to dry. “But you,” she said, pointing a muddy finger at me, “you have one of those little air fryers, right? That’ll work even better.”
That conversation changed everything. I went home, rinsed my seeds, and tossed them in a bowl with a little oil and salt. Five minutes in the air fryer later, I had a bowl of the lightest, crispiest pumpkin seeds I’d ever tasted. No oven preheating, no waiting an hour, no worrying about burning. Just a handful of golden, crackling seeds that tasted like fall itself. Maybe you’ve been there—standing in your kitchen with a pumpkin and no real plan for the seeds. Let me tell you, this method is the one you’ll come back to every single time. I’ve been making them this way for three seasons now, and I still get excited every time I hear that air fryer timer go off.
Why You’ll Love This Recipe
Let’s be honest—most pumpkin seed recipes are a bit of a letdown. They come out either chewy and sad or burned on the edges and raw in the middle. This air fryer method solves all of that. You get a perfectly crunchy, golden-brown snack in literally five minutes. No fuss, no mess, no guessing game.
- Quick & Easy: From seed to snack in under 10 minutes total. Yes, really. The air fryer does all the heavy lifting while you clean up the pumpkin mess.
- Simple Ingredients: You need exactly three things—pumpkin seeds, oil, and salt. That’s it. No fancy spice blends required (though we’ll get to those later).
- Perfect for Snack Season: Great for Halloween parties, Thanksgiving prep, game day munching, or just a weekday afternoon craving. They’re the kind of snack that disappears before you can put them in a bowl.
- Crowd-Pleaser: I’ve served these to kids, adults, picky eaters, and people who swore they didn’t like pumpkin seeds. Every single person reached for more.
- Unbelievably Delicious: The texture is what gets you. Light, airy, crispy all the way through—not that dense, chewy texture you get from oven roasting. The flavor concentrates beautifully because the hot air circulates so fast.
What makes this recipe different from every other pumpkin seed post out there? It’s the timing. Most recipes tell you to roast seeds at 300°F for 30-40 minutes, stirring every 10 minutes, hoping they don’t burn. That’s a lot of babysitting for a snack. The air fryer cuts that time by more than half and delivers a superior texture. I’ve tested this at least a dozen times—different temperatures, different seasonings, different seed sizes. Five minutes at 360°F is the sweet spot. Trust me on this one.
This isn’t just a snack. It’s the kind of thing that makes you feel like you’ve unlocked a secret kitchen hack. You’ll find yourself saving pumpkin seeds from every squash you cook all year long. That’s not an exaggeration—I have a bag of frozen seeds in my freezer right now from a butternut squash I carved two weeks ago. That’s how good these are.
What Ingredients You Will Need
This recipe uses the simplest ingredients to create something genuinely satisfying. You probably have everything on hand right now, which is exactly how a good snack recipe should work.
- Fresh pumpkin seeds (1 cup, about 4 ounces) — These come straight from your pumpkin carving or cooking project. Rinse them well in a colander to remove the stringy pulp. You don’t need to pat them completely dry, but give them a good shake. If you’re using store-bought raw pumpkin seeds, those work perfectly too—just skip the washing step.
- Olive oil or avocado oil (1 tablespoon) — You need just enough to coat the seeds lightly. Avocado oil has a higher smoke point, which works beautifully in the air fryer, but olive oil adds a lovely flavor. I’ve used both and honestly prefer olive oil for the taste. Coconut oil works too if that’s what you have, though it adds a subtle sweetness.
- Fine sea salt (½ teaspoon, or to taste) — Don’t skimp here. The salt brings out the nutty flavor of the seeds and makes them addictive. I use fine sea salt because it sticks better than coarse kosher salt. If you’re using table salt, start with ¼ teaspoon and adjust from there.
- Optional seasonings — This is where you can get creative. Garlic powder, smoked paprika, cayenne pepper, cinnamon sugar, everything bagel seasoning, or even a splash of lime juice and chili powder. I’ll share specific combinations in the variations section below.
One thing I’ve learned from making these so many times—the quality of your seeds matters more than you’d think. Seeds from a fresh pie pumpkin or sugar pumpkin tend to be smaller, more tender, and have thinner shells than seeds from a giant carving pumpkin. If you’re using seeds from a jack-o’-lantern pumpkin, they’ll still work great, but they might need an extra minute or two in the air fryer because the shells are thicker. I learned this the hard way when I made a batch from a massive pumpkin and wondered why they weren’t getting crispy.
For the oil, I recommend using a brand you trust. I personally use California Olive Ranch for everyday cooking and Chosen Foods avocado oil when I want a neutral flavor. But honestly, any good-quality oil will do. The key is not to overdo it—too much oil and your seeds will be greasy instead of crispy. One tablespoon per cup of seeds is the perfect ratio.
If you’re watching your sodium, you can absolutely reduce the salt or use a salt-free seasoning blend. I’ve made these with just garlic powder and onion powder, and they’re still delicious. The crunch itself is satisfying enough that you don’t *need* a lot of salt.
Equipment Needed
You don’t need much for this recipe, which is part of the beauty. Here’s what you’ll need:
- Air fryer (any size works) — I use a 5.8-quart Cosori air fryer, and it handles a full cup of seeds easily. If you have a smaller basket, just work in batches. Don’t overcrowd the basket, or the seeds won’t crisp up properly.
- Mixing bowl — Any medium bowl works for tossing the seeds with oil and seasonings. I use a stainless steel bowl because it doesn’t absorb odors.
- Colander or fine-mesh strainer — For rinsing the seeds and removing pulp. A fine-mesh strainer is better because the seeds won’t fall through.
- Paper towels or clean kitchen towel — For drying the seeds after rinsing. You don’t need them bone-dry, but you want to remove excess moisture.
- Spatula or spoon — For stirring the seeds halfway through cooking. A silicone spatula works great because it won’t scratch your air fryer basket.
If you don’t have an air fryer, you can still make these in the oven. Spread the seeds in a single layer on a baking sheet and roast at 325°F for 15-20 minutes, stirring halfway through. The texture won’t be quite as light and crispy, but they’ll still be delicious. I’ve done both methods, and honestly, the air fryer version is so much faster and easier that it’s worth the investment if you make these regularly.
One tip—if your air fryer basket has a nonstick coating, be gentle when stirring the seeds. I use a silicone spatula to avoid scratching the surface. My first air fryer basket got scratched up from using metal utensils, and I learned my lesson the hard way.
Preparation Method
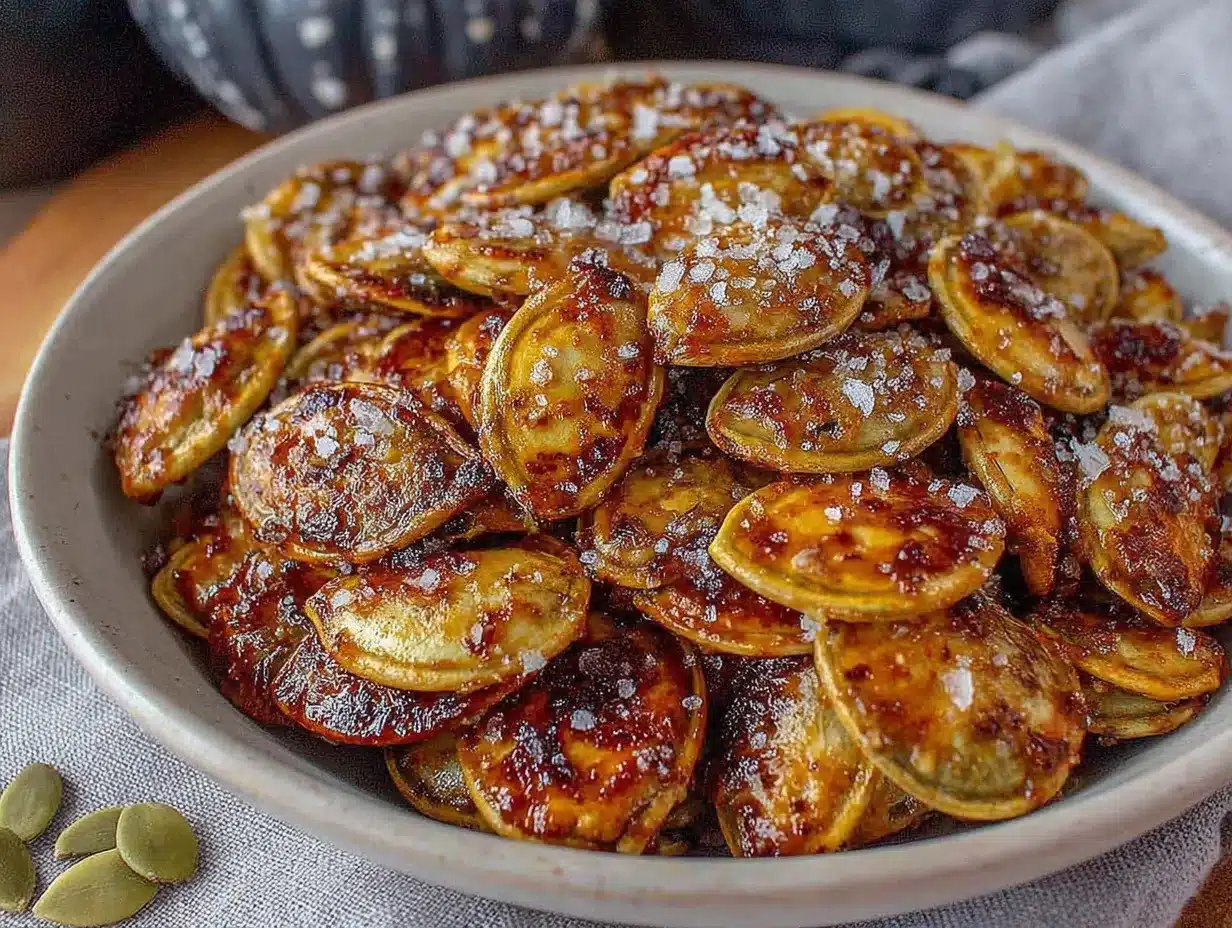
Making these air fryer pumpkin seeds is almost embarrassingly easy. Here’s the step-by-step process that I’ve refined through countless batches:
- Prepare the seeds. After carving your pumpkin or scooping out the seeds from a squash, place them in a colander and rinse under cool running water. Use your fingers to gently separate the seeds from the stringy pulp. The pulp will wash away, leaving clean seeds behind. This takes about 2-3 minutes. Don’t stress about getting every single bit of pulp off—a little bit left on adds flavor as it cooks.
- Dry the seeds. Spread the rinsed seeds on a paper towel or clean kitchen towel. Pat them gently to remove excess moisture. They don’t need to be completely dry, but you don’t want them dripping wet. Let them sit for 5 minutes while you preheat your air fryer. I’ve skipped this step before when I was in a hurry, and the seeds came out a bit steamy instead of crispy. The drying matters.
- Preheat the air fryer. Set your air fryer to 360°F (182°C) and let it preheat for 3 minutes. Most air fryers preheat quickly, but this step ensures the seeds hit the hot air immediately for maximum crispiness. If your air fryer doesn’t have a preheat setting, just run it empty for 3 minutes.
- Season the seeds. In a medium mixing bowl, combine the cleaned and dried pumpkin seeds with 1 tablespoon of olive oil, ½ teaspoon of fine sea salt, and any additional seasonings you’re using. Toss everything together until the seeds are evenly coated. The oil should glisten on the seeds without pooling at the bottom of the bowl. If you see excess oil, you’ve used too much—add a few more seeds to balance it out.
- Arrange in the air fryer basket. Spread the seasoned seeds in a single layer in the air fryer basket. Don’t pile them up or overlap them. If you have more seeds than will fit in a single layer, cook them in batches. Overcrowding is the number one mistake people make—the seeds need room for the hot air to circulate around each one.
- Cook for 5 minutes. Air fry at 360°F for 5 minutes. At the 2.5-minute mark, pause the air fryer, pull out the basket, and give the seeds a good stir with a spatula. This ensures even cooking. Shake the basket gently to redistribute the seeds.
- Check for doneness. After 5 minutes, the seeds should be golden brown and sound hollow when you shake the basket. They’ll continue to crisp up as they cool, so don’t worry if they seem slightly soft right out of the air fryer. If they’re not quite golden enough, add 1 more minute and check again. Every air fryer runs a little differently—mine runs hot, so 5 minutes is perfect, but yours might need 6.
- Cool completely. Transfer the seeds to a plate or baking sheet in a single layer. Let them cool for 5-10 minutes. This is when the magic happens—the seeds go from slightly soft to perfectly crispy as they cool. I know it’s tempting to eat them right away, but waiting those few minutes makes a huge difference.
A few things I’ve learned through trial and error—if your seeds are on the larger side (like from a carving pumpkin), add an extra minute to the cooking time. If they’re small and delicate (like from a sugar pumpkin), check them at 4 minutes. The first time I made these, I used seeds from a giant Halloween pumpkin and wondered why they were still chewy after 5 minutes. Now I know better.
Also, don’t walk away during the last minute of cooking. The line between perfectly golden and slightly burned is thin in an air fryer. I’ve burned exactly one batch in my life, and the smell of burned pumpkin seeds lingers in a way that’s hard to describe. Learn from my mistake.
Cooking Tips & Techniques
After making these air fryer pumpkin seeds more times than I can count, I’ve picked up a few tricks that make the process foolproof. Let me share what I’ve learned so you don’t have to make the same mistakes I did.
Don’t skip the drying step. I know I mentioned this already, but it’s worth repeating. Wet seeds steam instead of crisp. If you’re in a rush, spread the rinsed seeds on a baking sheet and pop them in the air fryer at 200°F for 2-3 minutes to dry them out before adding oil and seasonings. I’ve done this, and it works like a charm.
Season after cooking for stronger flavor. Here’s a trick I picked up from a chef friend—season the seeds lightly before cooking, then add a second layer of seasoning right after they come out of the air fryer while they’re still warm. The heat helps the second layer stick, and you get a more intense flavor without the seasonings burning during cooking. This works especially well with garlic powder and paprika, which can turn bitter if overheated.
Shake, don’t stir. When you’re halfway through cooking, shake the air fryer basket vigorously instead of stirring with a spoon. The shaking action redistributes the seeds more evenly and prevents them from clumping together. I learned this when I noticed that stirring left some seeds stuck together in little clusters that didn’t crisp evenly.
Watch for the color change. The seeds will go from pale cream to golden brown as they cook. The perfect color is a uniform light golden brown with slightly darker edges. If you see any seeds turning dark brown, pull the batch immediately—those seeds will taste bitter. I’ve pulled slightly underdone seeds before and let them finish crisping during the cooling phase, and it’s always worked out better than risking burned seeds.
Make a big batch and store them. These seeds keep beautifully for up to two weeks in an airtight container at room temperature. I often make a double batch on Sunday and snack on them all week. Just make sure they’re completely cool before you store them, or the trapped steam will make them soft. I learned this the hard way when I stored a warm batch and found soggy seeds the next day.
Variations & Adaptations
Once you’ve mastered the basic recipe, the possibilities are endless. Here are some of my favorite variations that I’ve tested and loved:
- Spicy Chili Lime: Add ½ teaspoon chili powder, ¼ teaspoon cayenne pepper, and the zest of one lime to the oil before tossing. Squeeze fresh lime juice over the seeds after cooking. This is my personal favorite—the tangy lime cuts through the heat beautifully. I made this version for a football party and got asked for the recipe four times.
- Sweet Cinnamon Sugar: Replace the salt with 1 tablespoon brown sugar and 1 teaspoon cinnamon. Toss the seeds in the oil first, then sprinkle the sugar mixture over them. These taste like a healthier version of cinnamon toast crunch. My kids devour these before they even cool down.
- Everything Bagel: After cooking, toss the warm seeds with 1 tablespoon of everything bagel seasoning (poppy seeds, sesame seeds, garlic flakes, onion flakes, and salt). The seasoning sticks beautifully to the oil-coated seeds. This is my go-to for snacking straight out of a bowl.
- Garlic Parmesan: Add ½ teaspoon garlic powder and 1 tablespoon finely grated Parmesan cheese to the seeds before cooking. The Parmesan gets slightly crispy in the air fryer and adds a savory umami flavor. Just watch them closely—the cheese can burn quickly.
- Maple Cinnamon: Swap the oil for 1 tablespoon melted coconut oil and add 1 tablespoon maple syrup and ½ teaspoon cinnamon. The maple syrup caramelizes slightly in the air fryer, creating a sweet, crunchy coating. These are dangerous—I can’t stop eating them.
For dietary adaptations, these seeds are naturally gluten-free, vegetarian, and vegan (if you skip the Parmesan). They’re also keto-friendly in their savory versions—the seeds are low in carbs and high in healthy fats. If you’re watching your oil intake, you can use a spray oil to lightly coat the seeds instead of tossing them in a tablespoon of oil. The texture will be slightly less crispy, but still delicious.
One variation I tried that didn’t work—adding fresh herbs before cooking. The high heat of the air fryer turned the herbs into bitter, burned specks. If you want an herby flavor, add dried herbs like rosemary or thyme to the oil before tossing, or sprinkle fresh herbs over the seeds after they come out of the air fryer. I learned this after ruining a perfectly good batch with fresh rosemary.
Serving & Storage Suggestions
These air fryer pumpkin seeds are incredibly versatile when it comes to serving. Here’s how I like to enjoy them:
Serving temperature: These seeds are best at room temperature, right after they’ve cooled from cooking. The texture is at its peak—crispy, light, and satisfying. That said, I’ve eaten them warm, cold, and even straight from the freezer (more on that below), and they’re good at every temperature.
Presentation ideas: Serve them in a simple bowl for snacking, or use them as a topping for soups and salads. I love sprinkling them over roasted butternut squash soup—the crunch contrasts beautifully with the creamy soup. They’re also fantastic on top of a fall salad with apples, dried cranberries, and a maple vinaigrette. For parties, I put them out in small ramekins alongside other snacks like nuts and dried fruit.
Complementary dishes: These seeds pair wonderfully with warm apple cider, hot mulled wine, or a cozy chai latte. They’re also great alongside cheese boards—the salty crunch complements soft cheeses like brie or goat cheese. I’ve even crushed them up and used them as a coating for chicken tenders, and it was surprisingly amazing.
Storage instructions: Store completely cooled seeds in an airtight container at room temperature for up to 2 weeks. If you live in a humid climate, add a silica gel packet (the kind you find in packaged foods) to the container to absorb excess moisture. I live in a humid area, and this trick has saved many batches from going soft.
Freezer storage: You can freeze these seeds for up to 3 months. Place them in a freezer-safe bag or container, squeeze out as much air as possible, and freeze. To refresh them, spread the frozen seeds on a baking sheet and warm them in the air fryer at 300°F for 2-3 minutes. They’ll crisp right back up. I do this all the time with extra batches.
Reheating tips: If your seeds lose their crunch over time, don’t throw them away. Spread them on a baking sheet and warm them in the oven at 300°F for 5 minutes, or in the air fryer at 300°F for 2 minutes. Let them cool completely before eating. This works like magic—I’ve revived seeds that were a week old and they tasted fresh again.
Flavor development: Interestingly, the flavor of these seeds deepens over the first 24 hours after cooking. The salt and seasonings meld with the natural nuttiness of the seeds, creating a more complex taste. I actually prefer them on day two, when the flavors have had time to settle. Just make sure they’re stored properly.
Nutritional Information & Benefits
These air fryer pumpkin seeds aren’t just delicious—they’re packed with nutrition. Here’s a quick breakdown per 1-ounce serving (about ¼ cup):
- Calories: Approximately 150-160
- Protein: 7 grams
- Healthy Fats: 13 grams (mostly unsaturated)
- Carbohydrates: 4 grams
- Fiber: 2 grams
- Iron: 20% of daily value
- Magnesium: 37% of daily value
- Zinc: 23% of daily value
Pumpkin seeds are a nutritional powerhouse. They’re one of the best natural sources of magnesium, which supports muscle function, sleep quality, and bone health. The zinc content is great for immune support—especially relevant during cold and flu season. And the healthy fats and fiber make them a satisfying snack that keeps you full between meals.
From a dietary perspective, these seeds are naturally gluten-free, dairy-free, and low in sugar. They fit well into Mediterranean, keto, paleo, and whole-food eating patterns. The only potential allergen concern is for people with seed allergies, which are less common than nut allergies but still worth noting.
I personally love that I can enjoy a crunchy, satisfying snack without any guilt. The air fryer method uses minimal oil compared to traditional roasting, so you’re getting all the nutrition without unnecessary added fats. It’s one of those rare snacks that tastes indulgent but is actually good for you.
Conclusion
If you’ve been tossing pumpkin seeds in the trash all these years, it’s time to stop. This air fryer method turns what most people consider a byproduct into the star of your snack rotation. Five minutes, three ingredients, and you’ve got a bowl of light, crispy, golden seeds that rival anything you’d buy at the store.
What I love most about this recipe is how forgiving it is. Whether you’re using seeds from a Halloween jack-o’-lantern, a sugar pumpkin for pie, or even a butternut squash, the process stays the same. You can season them sweet, savory, spicy, or leave them plain—they always turn out delicious. I’ve made these for holiday gatherings, weeknight snacks, and even as a topping for my morning yogurt bowl. They never disappoint.
I’d love to hear how yours turn out. Try the basic recipe first, then experiment with the variations. Maybe you’ll discover a combination I haven’t tried yet—if you do, come back and tell me about it in the comments. That’s the best part of cooking, honestly. The way a simple recipe can spark so many creative possibilities.
So next time you’re carving a pumpkin or cooking a squash, save those seeds. Rinse them, toss them with a little oil and salt, and let your air fryer do the rest. You’ll never look at a pumpkin the same way again.
Frequently Asked Questions
Can I use store-bought raw pumpkin seeds instead of fresh ones?
Absolutely. Store-bought raw pumpkin seeds (sometimes called pepitas) work perfectly in this recipe. You can skip the rinsing and drying steps since they’re already clean. Just toss them with oil and seasonings and air fry as directed. The cooking time might be slightly shorter since they’re already fairly dry, so check them at 4 minutes.
Do I need to boil the seeds before air frying?
No, boiling isn’t necessary for this recipe. Some traditional methods call for boiling seeds in salted water before roasting, but the air fryer gets them plenty crispy without that extra step. If you want extra salty seeds, you can soak them in salted water for 30 minutes before drying and cooking, but I’ve found it’s not worth the extra effort.
Why did my pumpkin seeds turn out chewy instead of crispy?
Chewy seeds usually mean one of three things: they weren’t dried well enough before cooking, the air fryer basket was overcrowded, or they needed another minute or two of cooking time. Make sure your seeds are patted dry, spread in a single layer, and cooked until golden brown. Let them cool completely before eating—they’ll crisp up more as they cool.
Can I make these without oil?
You can, but the texture won’t be quite as crispy. The oil helps the seeds crisp up evenly and helps the seasonings stick. If you’re avoiding oil, try using a light mist of cooking spray or simply toss the seeds with a tiny amount of water before adding seasonings. They’ll still be tasty, just less crunchy.
How long do these stay fresh?
Stored in an airtight container at room temperature, these seeds stay fresh and crispy for up to 2 weeks. If they start to lose their crunch, you can revive them in the air fryer at 300°F for 2 minutes. They also freeze beautifully for up to 3 months—just thaw and reheat briefly to restore the texture.
Pin This Recipe!
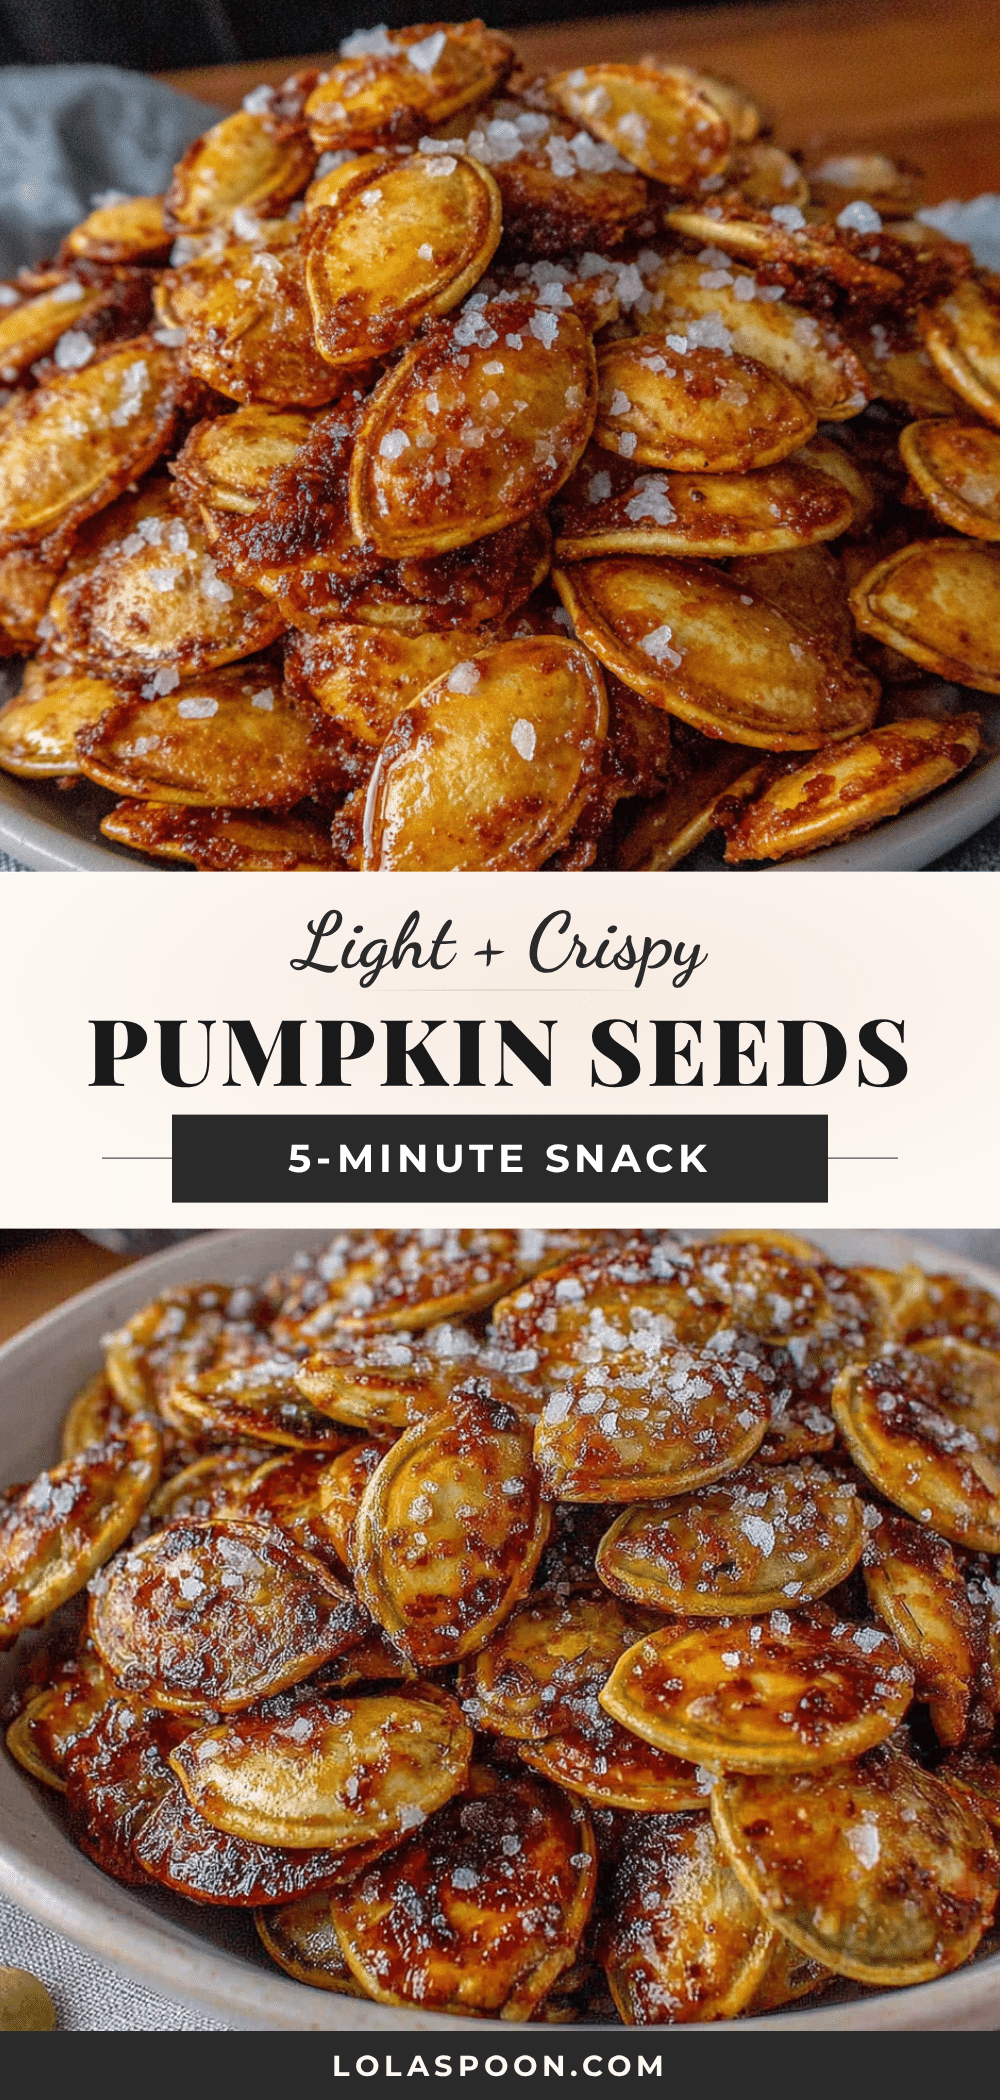
Easy 5-Minute Air Fryer Pumpkin Seeds (Light & Crispy)

Perfectly crunchy, golden-brown pumpkin seeds made in just 5 minutes in the air fryer. A simple, foolproof snack that’s light, crispy, and delicious.
- Prep Time: 5 minutes
- Cook Time: 5 minutes
- Total Time: 10 minutes
- Yield: 4 servings 1x
- Category: Snack
- Cuisine: American
Ingredients
- 1 cup fresh pumpkin seeds (about 4 ounces)
- 1 tablespoon olive oil or avocado oil
- ½ teaspoon fine sea salt (or to taste)
- Optional seasonings: garlic powder, smoked paprika, cayenne pepper, cinnamon sugar, everything bagel seasoning, lime juice and chili powder
Instructions
- Prepare the seeds: After carving your pumpkin, place seeds in a colander and rinse under cool water, using your fingers to separate seeds from pulp. Don’t worry about removing every bit of pulp.
- Dry the seeds: Spread rinsed seeds on a paper towel or clean kitchen towel and pat gently to remove excess moisture. Let sit for 5 minutes while preheating the air fryer.
- Preheat the air fryer to 360°F (182°C) for 3 minutes.
- Season the seeds: In a medium bowl, combine cleaned and dried pumpkin seeds with 1 tablespoon olive oil, ½ teaspoon fine sea salt, and any optional seasonings. Toss until evenly coated.
- Arrange seeds in a single layer in the air fryer basket. Do not overcrowd; cook in batches if needed.
- Air fry at 360°F for 5 minutes. At the 2.5-minute mark, pause, pull out the basket, and stir the seeds with a spatula. Shake the basket gently to redistribute.
- Check for doneness: Seeds should be golden brown and sound hollow when shaken. If not golden enough, add 1 more minute and check again.
- Cool completely: Transfer seeds to a plate or baking sheet in a single layer. Let cool for 5-10 minutes—they will crisp up as they cool.
Notes
For larger seeds (from carving pumpkins), add 1 extra minute. For smaller seeds (from sugar pumpkins), check at 4 minutes. Don’t skip the drying step—wet seeds steam instead of crisp. Season lightly before cooking, then add a second layer of seasoning after cooking for stronger flavor. Store in an airtight container at room temperature for up to 2 weeks. Freeze for up to 3 months.
Nutrition
- Serving Size: 1 ounce (about ¼ cup
- Calories: 150160
- Sodium: 150
- Fat: 13
- Saturated Fat: 2
- Carbohydrates: 4
- Fiber: 2
- Protein: 7
Keywords: air fryer pumpkin seeds, crispy pumpkin seeds, easy pumpkin seeds, healthy snack, fall snack, Halloween snack, Thanksgiving snack