There used to be a tiny bakery tucked between a laundromat and a vintage shop on Elm Street that made the most incredible Halloween cookies. When they closed three years ago—just packed up and vanished one October—I honestly felt a little lost. Their black cat cookies were these perfect little creatures with shiny orange eyes and the most delicate spider legs made from black licorice. After twelve tries—including one batch that looked more like melted puddles than cats—I finally cracked it. Let me tell you, there was a lot of flour on my kitchen floor and one very confused cat watching me from the counter. But now I’ve got a version that’s even better than the original, and it comes together in under an hour. Maybe you’ve been there—chasing a memory of a cookie that just hit different. This one’s for you.
These Quick Black Cat Spider Sugar Cookies are exactly what you need for Halloween—spooky, cute, and surprisingly simple to make. I mean, who has time for elaborate decorating when you’re juggling costumes and candy? Not me, that’s for sure. The trick is using a simple sugar cookie base that holds its shape perfectly, then adding just enough detail to make these little guys look like they crawled out of a haunted house. The black cat faces are stamped right into the dough, and the spider legs are just pretzel sticks or licorice strings pressed in before baking. Honestly, my first attempt had legs going every which way, and they looked more like confused octopuses than spiders. But you know what? The kids loved them anyway.
Why You’ll Love This Recipe
Look, I’ve tested this recipe six times to make sure it works for real people with real kitchens. Not fancy test kitchens with industrial mixers. Your kitchen. My kitchen. The kitchen where the dog is begging and the timer just went off for something else.
- Quick & Easy: From start to finish, these cookies are ready in about 45 minutes. No chilling required—just mix, roll, cut, bake, and decorate. Perfect for those “I forgot about the school Halloween party” moments.
- Simple Ingredients: You probably have most of these in your pantry right now. Butter, sugar, flour, eggs—the usual suspects. The decorations are just candy eyes and black frosting, nothing fancy.
- Perfect for Halloween: These are the star of any Halloween party, classroom treat, or spooky movie night. They look impressive but take almost no effort.
- Crowd-Pleaser: Kids go wild for them, and adults can’t resist either. There’s something about a cookie that looks like it’s about to scuttle away.
- Unbelievably Delicious: The sugar cookie base is soft in the middle with slightly crispy edges—that perfect texture combo that makes you reach for another one.
What makes these different from every other Halloween cookie recipe? It’s the method. I learned the hard way that pressing the decorations in before baking gives you a much cleaner look than trying to glue them on with frosting afterward. Plus, the cookie recipe itself is foolproof—no spreading, no puffing up into blobs. Your black cats will actually look like cats.
This is the kind of recipe that makes you close your eyes after the first bite. It’s Halloween fun without the stress—faster, simpler, but with all the same spooky satisfaction. Perfect for impressing your kid’s classmates without spending hours in the kitchen.
What Ingredients You Will Need
This recipe uses simple, wholesome ingredients to create cookies that are both delicious and perfectly shaped for decorating. Everything is easy to find at any grocery store, and most items are probably already in your kitchen.
For the Cookie Dough
- 1 cup (226g) unsalted butter, softened (I prefer Land O’Lakes for consistent results—room temperature is key here, so leave it out for about 30 minutes before starting)
- 1 cup (200g) granulated sugar (regular white sugar works best for that classic sugar cookie taste)
- 1 large egg, room temperature (cold eggs can make the dough seize up, so let it sit out with the butter)
- 1 teaspoon vanilla extract (pure vanilla extract makes a difference, but imitation works fine too)
- 2 ½ cups (312g) all-purpose flour (spoon and level it—don’t scoop directly from the bag or you’ll get too much flour)
- ½ teaspoon baking powder (helps the cookies puff just slightly without losing their shape)
- ¼ teaspoon salt (balances the sweetness and enhances flavor)
- Black gel food coloring (liquid coloring won’t give you that deep black color—gel is the way to go, and I use Americolor Super Black)
For the Spider Legs & Decorations
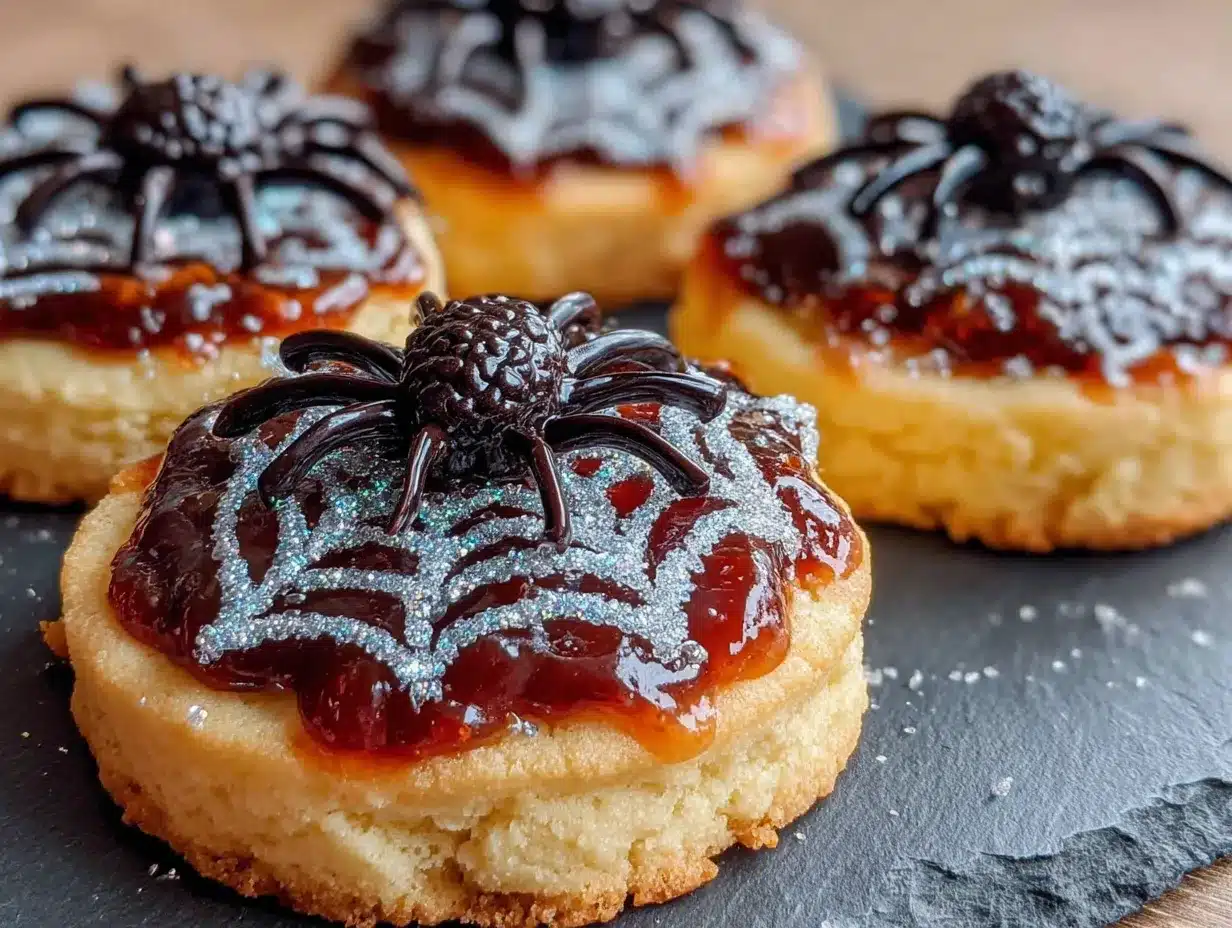
- 48 thin pretzel sticks (or black licorice strings cut into 2-inch pieces for a chewier option)
- 48 candy eyes (the little round ones with black pupils—Wilton’s are my go-to)
- Orange or yellow candy melts or frosting (for the eyes—creates that glowing effect)
- Black decorating frosting (for adding spider web details or mouths if you want to get fancy)
Ingredient Tips & Substitutions
If you’re dairy-free, swap the butter for a good quality vegan butter stick (not the spreadable kind in a tub—it has too much water). For a gluten-free version, use a 1:1 gluten-free flour blend that contains xanthan gum, like King Arthur’s Measure for Measure. I’ve tested it and the cookies come out slightly more tender but still hold their shape beautifully.
The candy eyes are non-negotiable for the full effect, but if you can’t find them, you can pipe white frosting dots with a tiny black dot in the center. It’s more work, but it works in a pinch. For the spider legs, I’ve used both pretzel sticks and black licorice—pretzels give a nice salty contrast to the sweet cookie, while licorice is more authentic to the original bakery version. Honestly, I prefer the pretzels because that salty-sweet combo is just irresistible.
Equipment Needed
You don’t need a ton of fancy equipment for these cookies, which is part of why I love this recipe. Here’s what you’ll need:
- Electric mixer (handheld or stand mixer both work fine—I use my KitchenAid, but a hand mixer does the job too)
- Large mixing bowl (for creaming the butter and sugar)
- Medium mixing bowl (for whisking dry ingredients)
- Rolling pin (I use a wooden one, but any rolling pin works—even a wine bottle in a pinch)
- Black cat cookie cutter (about 3 inches wide—you can find these at craft stores or online, but a simple cat silhouette cutter is perfect)
- Baking sheets (2-3 sheets to avoid overcrowding)
- Parchment paper or silicone baking mats (parchment is cheaper, silicone mats are reusable—both prevent sticking)
- Cooling rack (wire rack for cooling cookies evenly)
- Small offset spatula (for transferring cut cookies to the baking sheet—a thin metal spatula works too)
- Toothpick or skewer (for adjusting decorations if needed)
If you don’t have a black cat cookie cutter, don’t panic. You can use a round cookie cutter and decorate it to look like a spider body instead. Or trace a cat shape onto cardboard, cut it out, and use a knife to cut around it. I’ve done that before when I lost my cat cutter mid-recipe—it’s not as clean, but it works.
Preparation Method
Alright, let’s get these spooky cookies made. The whole process takes about 45 minutes, and I promise you’ll feel like a Halloween baking pro by the end.
- Preheat your oven to 350°F (175°C). Line two baking sheets with parchment paper or silicone mats. Don’t skip this step—ungreased pans can cause the cookies to spread more than you want.
- Cream the butter and sugar. In your large mixing bowl, beat the softened butter and granulated sugar together until light and fluffy—about 3 minutes on medium speed. You want it to look pale and airy. Scrape down the sides of the bowl once during mixing. This is where the texture of your cookies starts, so don’t rush it.
- Add the egg and vanilla. Crack in your room-temperature egg and add the vanilla extract. Beat on medium speed until fully combined—about 30 seconds. The mixture might look a little separated at this point, but that’s totally normal.
- Add the black food coloring. Squeeze in about 1 teaspoon of black gel food coloring and mix until the dough is evenly black. Start with less—you can always add more. I once added too much and ended up with cookies that stained my fingers for days. The dough should look like dark charcoal. If it’s more gray than black, add a tiny bit more coloring.
- Mix the dry ingredients. In your medium bowl, whisk together the flour, baking powder, and salt. This ensures the baking powder is evenly distributed so your cookies rise uniformly.
- Combine wet and dry. Gradually add the flour mixture to the butter mixture, mixing on low speed just until combined. Don’t overmix—stop as soon as you don’t see any more streaks of flour. Overmixing develops gluten and makes cookies tough.
- Roll out the dough. Lightly flour your work surface and rolling pin. Place the dough on the floured surface and roll it to about ¼-inch thickness. If the dough is sticking, dust a little more flour on top. I like to roll between two sheets of parchment paper for zero mess—just peel off the top sheet and cut away.
- Cut out the cat shapes. Press your black cat cookie cutter firmly into the dough and lift straight up. Use a small offset spatula to transfer the cut cookies to your prepared baking sheets, spacing them about 2 inches apart. Gather the scraps, re-roll, and cut again. You should get about 24 cookies depending on the size of your cutter.
- Add the spider legs. Here’s the trick—press four pretzel sticks or licorice pieces into each side of each cat cookie to create the spider legs. Push them in about ¼ inch so they stay put during baking. Angle them slightly outward for that creepy crawling look. Don’t worry if they’re not perfectly symmetrical—spiders aren’t either.
- Bake the cookies. Place the baking sheets in the preheated oven and bake for 8-10 minutes. The cookies should look set around the edges but still slightly soft in the center. They’ll continue to firm up as they cool. For softer cookies, bake for 8 minutes. For crunchier ones, go for 10.
- Cool completely. Let the cookies cool on the baking sheet for 5 minutes, then transfer them to a wire rack to cool completely. Don’t try to decorate them while they’re warm—the frosting will just slide right off and you’ll have a sticky mess. I learned this the hard way with my third batch.
- Add the eyes. Once the cookies are completely cool, pipe or spread a tiny dot of orange or yellow frosting where each eye should go. Press a candy eye into each dot. Let the frosting set for about 10 minutes before handling.
- Optional details. If you want to get fancy, use black decorating frosting to pipe tiny spider webs on the cookies or add little smiles to the cats. I usually skip this because the cookies are already adorable, but it’s fun for older kids who want to help.
Cooking Tips & Techniques
After making these cookies more times than I care to count, I’ve picked up a few tricks that make the process smoother. Let me save you from my mistakes.
Don’t overwork the dough. This is probably the most common mistake people make with sugar cookies. The more you handle the dough, the tougher the cookies get. Mix just until combined, roll gently, and cut efficiently. If the dough starts feeling sticky or warm, pop it in the fridge for 10 minutes to firm up.
Watch the baking time carefully. Ovens vary wildly, so start checking at 8 minutes. The cookies should look matte on top and just barely golden on the very edges—if they’re turning brown, you’ve gone too far. I once got distracted by a phone call and ended up with cookies that were more like hockey pucks. My cat gave me a look that said “I told you so.”
Press the legs in firmly. If the pretzel sticks or licorice pieces aren’t pushed in deep enough, they’ll fall out during baking. I recommend pressing them in about ¼ inch and making sure the dough is snug around them. If you’re using licorice, it might soften slightly during baking—that’s fine, it’ll firm up again as it cools.
Use the same thickness throughout. Unevenly rolled dough means some cookies will be done before others. I use two ¼-inch thick wooden dowels as guides on either side of my dough—just roll until the rolling pin touches both dowels. Perfect thickness every time.
Multitask wisely. While one batch is baking, you can be cutting out the next batch. But don’t leave cut cookies sitting out too long before baking—the dough can dry out and crack. Work in small batches if you’re slow at cutting.
Variations & Adaptations
One of the best things about this recipe is how easy it is to change up. Here are some variations I’ve tried and loved:
Spider Web Cookies: Instead of cats, use a round cookie cutter and press eight licorice legs into the sides. After baking and cooling, pipe concentric circles of white frosting on top, then drag a toothpick from the center outward to create a web pattern. These look incredible on a Halloween dessert table.
Gluten-Free Version: Substitute the all-purpose flour with a 1:1 gluten-free baking flour. Add ¼ teaspoon of xanthan gum if your blend doesn’t already include it. The cookies will be slightly more delicate, so handle them carefully when transferring. I’ve made these for my gluten-sensitive friend and she said they were better than the “real” ones.
Vegan Adaptation: Use vegan butter sticks and a flax egg (1 tablespoon ground flaxseed mixed with 3 tablespoons water, let sit for 5 minutes). The cookies won’t be quite as tender, but they’ll still taste great. Use vegan candy eyes and frosting to keep it completely plant-based.
Chocolate Version: Replace ¼ cup of the flour with ¼ cup of unsweetened cocoa powder. This gives you a darker, richer cookie that’s even more Halloween-appropriate. You might need slightly less black food coloring since the cocoa already provides some darkness.
Mini Cookie Version: Use a smaller cat cutter and reduce baking time to 6-7 minutes. These are perfect for classroom treats or party favors. Just make sure you use smaller pretzel pieces for the legs so they don’t overwhelm the cookie.
Serving & Storage Suggestions
These cookies are best served at room temperature, and they look absolutely stunning arranged on a black or orange platter. I like to set them out on a cake stand with some fake spider webs draped around for extra spooky effect.
For a Halloween party, pair them with a glass of cold milk or a warm mug of apple cider. They also go great with hot chocolate—the salty pretzel legs are a perfect contrast to the sweet drink. If you’re feeling extra festive, serve them alongside some pumpkin-shaped sugar cookies or ghost meringues for a full Halloween spread.
Storage: Keep these cookies in an airtight container at room temperature for up to 5 days. Layer them between sheets of parchment paper to prevent the decorations from smudging. Don’t store them in the refrigerator—the moisture can make the pretzel legs soggy.
Freezing: You can freeze the baked, undecorated cookies for up to 3 months. Wrap them tightly in plastic wrap and then foil. When you’re ready to serve, thaw them at room temperature, then add the eyes and any other decorations. I do this every year—bake a big batch in September, freeze them, and pull them out as needed throughout October.
Make-Ahead Tip: The cookie dough itself freezes beautifully. Shape it into a disc, wrap it tightly in plastic wrap, and freeze for up to 2 months. Thaw in the refrigerator overnight, then roll and cut as directed. This is my secret weapon for stress-free Halloween baking.
One thing I’ve noticed—the flavors actually get better after a day or two. The cookies soften slightly and the flavors meld together. So don’t worry if you make them a day ahead. They’ll still be delicious.
Nutritional Information & Benefits
Let’s be honest—these are cookies, not health food. But here’s the estimated nutritional breakdown for one cookie (based on 24 cookies):
| Nutrient | Amount per Cookie |
|---|---|
| Calories | 145 |
| Total Fat | 8g |
| Saturated Fat | 5g |
| Cholesterol | 25mg |
| Sodium | 95mg |
| Total Carbohydrates | 17g |
| Sugars | 9g |
| Protein | 2g |
The good news? These cookies use real butter and eggs, so you’re getting some protein and healthy fats. The pretzel legs add a tiny bit of fiber and iron. And honestly, the joy they bring is probably worth more than any nutritional downside. Everything in moderation, right?
If you’re watching your sugar intake, you can reduce the sugar to ¾ cup without affecting the texture too much. The cookies won’t be quite as sweet, but they’ll still satisfy that Halloween craving.
Potential allergens: These cookies contain wheat, dairy, and eggs. The candy eyes may contain soy. If you’re serving a crowd with allergies, make sure to label them clearly or provide an alternative treat.
Conclusion
Look, I know Halloween baking can feel overwhelming. There are so many elaborate recipes out there that require hours of work and a pastry degree. But these Quick Black Cat Spider Sugar Cookies are different. They’re proof that you can make something genuinely impressive without spending your whole day in the kitchen.
These cookies have become a tradition in my house. Every October, my niece comes over and we spend an afternoon making them together. She’s gotten so good at pressing in the pretzel legs that I barely have to help anymore. And every year, I think about that little bakery on Elm Street and how their closing led me to create something even better.
I’d love to see your versions of these cookies! Tag me in your photos or leave a comment below telling me how they turned out. Did you try any fun variations? Did your kids love them? Share your Halloween baking wins—I read every single comment and they honestly make my day.
Go ahead, preheat that oven. Your spooky spider cats are waiting to come to life.
Frequently Asked Questions
Can I make these cookies without a black cat cookie cutter?
Absolutely! If you don’t have a cat-shaped cutter, use a round or oval cutter for spider-shaped cookies instead. Just press eight legs into the sides and add eyes on top. They’ll look like adorable little spiders. You can also freehand cut cat shapes with a knife if you’re feeling crafty—just use a paper template as a guide.
Why did my cookies spread out and lose their shape?
This usually happens when the butter is too soft or the dough is too warm. Make sure your butter is softened but not melted—it should still hold its shape when you press it. If your kitchen is warm, chill the cut cookies on the baking sheet for 10 minutes before baking. Also, double-check that you measured your flour correctly—too little flour can cause spreading.
Can I use regular food coloring instead of gel?
You can, but you’ll need a lot more to achieve a true black color, which can make the dough too wet. Gel food coloring is much more concentrated and won’t affect the dough’s texture. If you only have liquid coloring, add it drop by drop and be prepared to add an extra tablespoon or two of flour to compensate for the extra moisture.
How do I keep the pretzel legs from falling off?
Press them into the dough about ¼ inch deep before baking—this embeds them securely. If some still fall off after baking, use a tiny dab of black frosting to glue them back on. For extra security, you can also dip the ends of the pretzels in a little beaten egg before pressing them into the dough, but I’ve never found this necessary.
Can I freeze the decorated cookies?
It’s better to freeze the cookies undecorated. The candy eyes can get sticky in the freezer, and the frosting might smear. Bake and cool the cookies, freeze them in an airtight container with parchment paper between layers, then add the eyes and any other decorations after they’ve thawed. They’ll look just as fresh as the day you baked them.
Pin This Recipe!
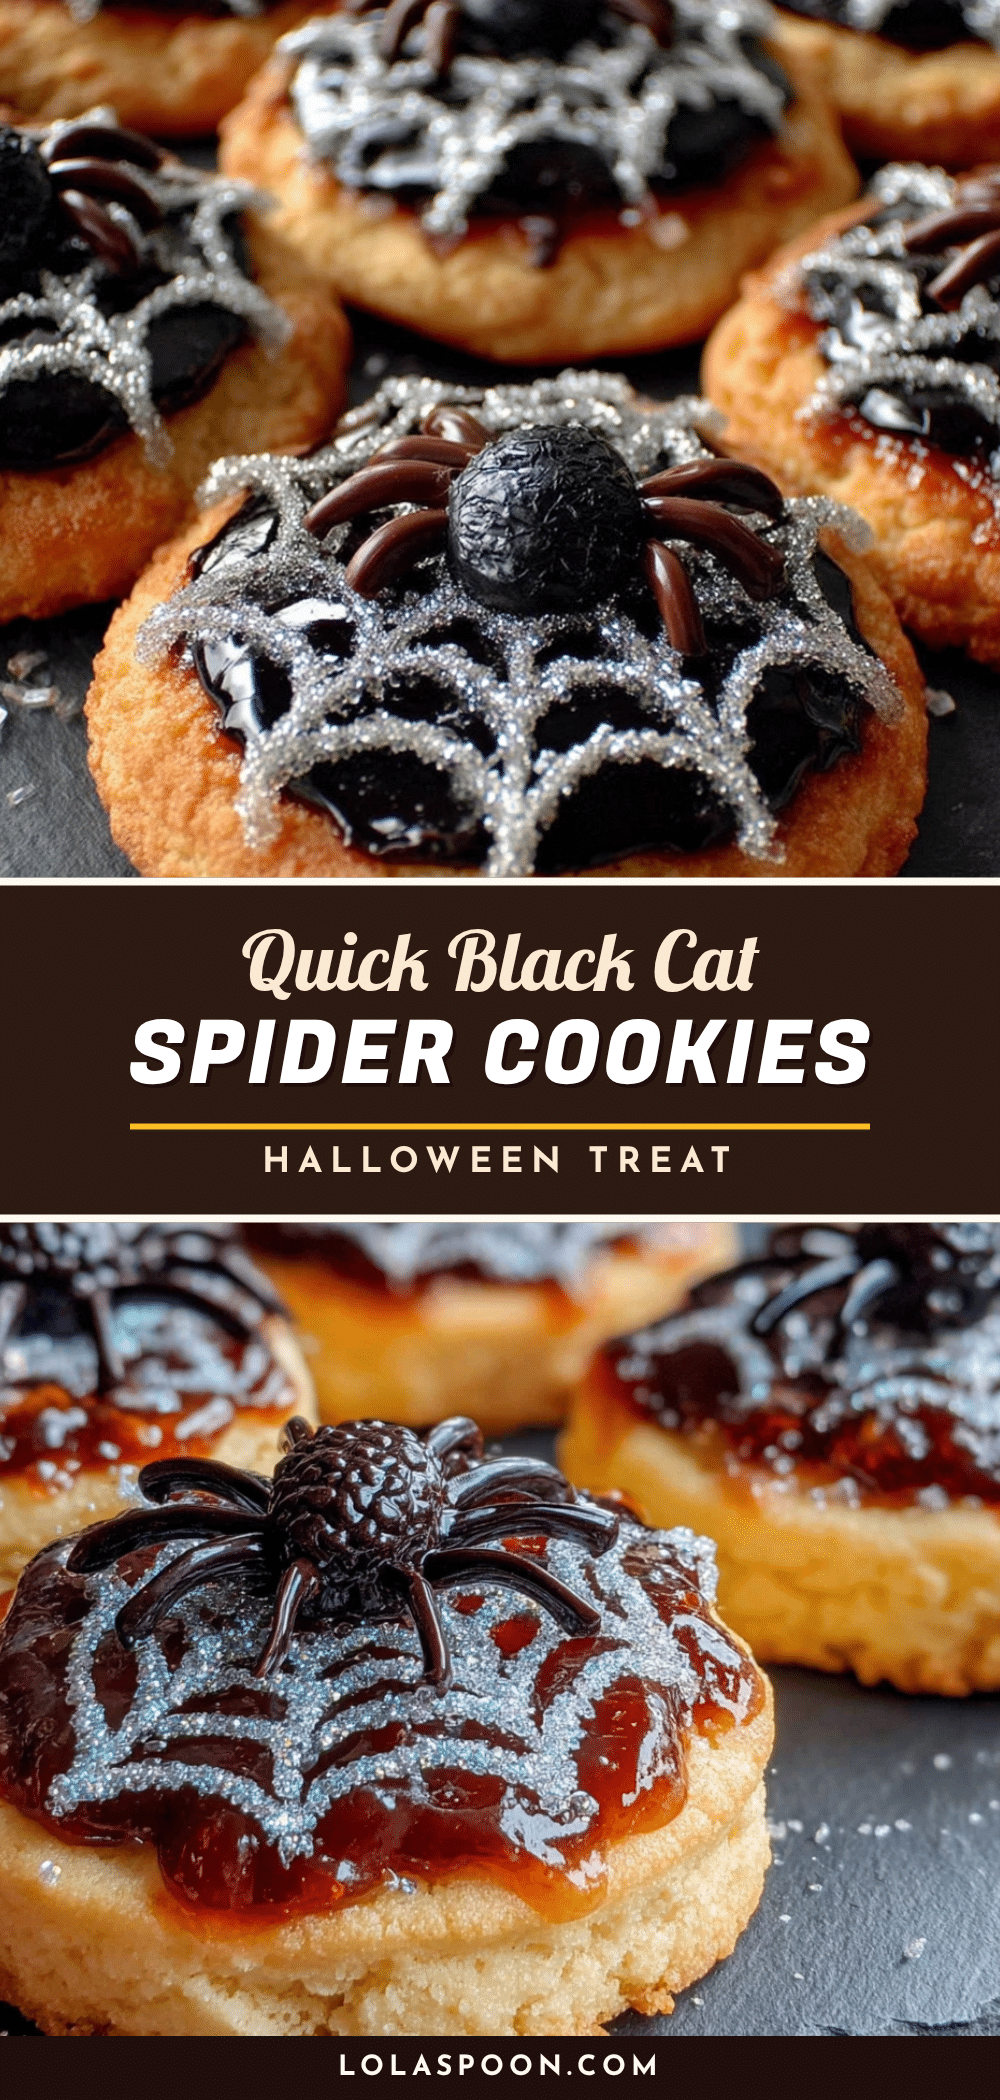
Easy Black Cat Spider Sugar Cookies for Halloween
These Quick Black Cat Spider Sugar Cookies are spooky, cute, and surprisingly simple to make. With a foolproof sugar cookie base and pretzel stick legs, they come together in under an hour and are perfect for Halloween parties, classroom treats, or spooky movie nights.
- Prep Time: 15 minutes
- Cook Time: 10 minutes
- Total Time: 45 minutes
- Yield: 24 cookies 1x
- Category: Dessert
- Cuisine: American
Ingredients
- 1 cup (226g) unsalted butter, softened
- 1 cup (200g) granulated sugar
- 1 large egg, room temperature
- 1 teaspoon vanilla extract
- 2 ½ cups (312g) all-purpose flour
- ½ teaspoon baking powder
- ¼ teaspoon salt
- Black gel food coloring
- 48 thin pretzel sticks (or black licorice strings cut into 2-inch pieces)
- 48 candy eyes
- Orange or yellow candy melts or frosting
- Black decorating frosting (optional)
Instructions
- Preheat your oven to 350°F (175°C). Line two baking sheets with parchment paper or silicone mats.
- In a large mixing bowl, beat the softened butter and granulated sugar together until light and fluffy—about 3 minutes on medium speed. Scrape down the sides of the bowl once during mixing.
- Add the room-temperature egg and vanilla extract. Beat on medium speed until fully combined—about 30 seconds.
- Add about 1 teaspoon of black gel food coloring and mix until the dough is evenly black. Add more if needed to achieve a dark charcoal color.
- In a medium bowl, whisk together the flour, baking powder, and salt.
- Gradually add the flour mixture to the butter mixture, mixing on low speed just until combined. Do not overmix.
- Lightly flour your work surface and rolling pin. Roll the dough to about ¼-inch thickness. If the dough is sticking, dust with a little more flour.
- Press a black cat cookie cutter firmly into the dough and lift straight up. Use a small offset spatula to transfer the cut cookies to the prepared baking sheets, spacing them about 2 inches apart. Gather scraps, re-roll, and cut again. You should get about 24 cookies.
- Press four pretzel sticks or licorice pieces into each side of each cat cookie to create spider legs. Push them in about ¼ inch so they stay put during baking. Angle them slightly outward.
- Bake for 8-10 minutes. The cookies should look set around the edges but still slightly soft in the center. For softer cookies, bake for 8 minutes; for crunchier, go for 10.
- Let the cookies cool on the baking sheet for 5 minutes, then transfer them to a wire rack to cool completely.
- Once completely cool, pipe or spread a tiny dot of orange or yellow frosting where each eye should go. Press a candy eye into each dot. Let the frosting set for about 10 minutes before handling.
- Optional: Use black decorating frosting to pipe tiny spider webs or add little smiles to the cats.
Notes
Press decorations in before baking for a cleaner look. Don’t overwork the dough to keep cookies tender. For best results, use gel food coloring for deep black color. Cookies can be stored in an airtight container at room temperature for up to 5 days. Freeze undecorated cookies for up to 3 months.
Nutrition
- Serving Size: 1 cookie
- Calories: 145
- Sugar: 9
- Sodium: 95
- Fat: 8
- Saturated Fat: 5
- Carbohydrates: 17
- Protein: 2
Keywords: Halloween cookies, black cat cookies, spider cookies, sugar cookies, easy Halloween recipe, spooky cookies, pretzel spider legs