Megan wasn’t trying to impress anyone. I’d stopped by her place on a random Tuesday afternoon in early December to drop off a cookbook she’d lent me, and the smell of rosemary and something faintly sweet hit me before I even got through the front door. She was standing in her kitchen, laughing at something on her phone, casually arranging little cups on a baking sheet like she was just… existing. Not hosting. Not performing. Just making a snack because she felt like it.
I stood there for a second, taking it in. These tiny cups—clear plastic ones, the kind you’d grab for a kids’ party—were filled with what looked like a miniature Christmas feast. A curl of prosciutto, a little wedge of brie, some bright red cranberries, a sprig of rosemary sticking out like a tiny tree. It was ridiculous how pretty they were, and she barely looked up when she said, “Oh, these? They’re for my sister’s thing on Saturday. Takes like ten minutes.”
Honestly, I almost laughed. Here I was, stressing about what to bring to my own holiday gathering, and she’d just casually invented the perfect solution while wearing sweatpants. It hit me right then—this was it. The thing everyone needs during the chaos of December. A fancy-looking appetizer that takes almost no effort, travels like a dream, and makes you look like you actually planned something. Because let’s face it, by the time mid-December rolls around, we’re all just trying to survive the holiday shuffle without losing our minds.
I asked her if I could watch. She shrugged and handed me a handful of rosemary sprigs. “Snap the bottoms off,” she said, like it was nothing. And that’s how I learned the secret to the easiest, most festive appetizer you’ll make all season. Maybe you’ve been there—staring at a party invitation, wondering what to bring that isn’t another store-bought cookie tray or a sad veggie platter. These Christmas charcuterie cups are your answer. They’re the thing I’ve brought to three parties since that Tuesday, and every single time, someone asks for the recipe.
Why You’ll Love This Recipe
I’ve tested this recipe more times than I care to admit—Megan’s original version, then my own tweaks, then a version for my gluten-free cousin, then another for a friend who doesn’t eat pork. Every single time, people go crazy for them. Here’s why these little cups are about to become your holiday MVP:
- Ready in 15 Minutes : No joke. From fridge to table in the time it takes to find parking at a holiday party. This is the recipe you make when you’re already running late.
- Simple Ingredients : You don’t need a specialty grocery store or a second mortgage to buy fancy cheese. Most of this stuff is already in your fridge or easy to grab at any supermarket.
- Perfect for Holiday Parties : Christmas Eve, office potlucks, ugly sweater gatherings, New Year’s Eve—these fit everywhere. They’re portable, individual portions, and zero cleanup.
- Crowd-Pleaser : I’ve watched kids who “don’t like cheese” eat three of these. Adults hover around the table. They’re the first thing to disappear, every single time.
- Unbelievably Festive : The red and green colors, the little rosemary sprigs, the way they look like tiny holiday gifts—they photograph beautifully and make you look like you tried way harder than you did.
What makes these different from every other charcuterie board out there? Portion control, for starters. No double-dipping, no fighting over the last piece of cheese, no soggy crackers from sitting next to wet grapes. Plus, they’re completely customizable. You can make them for a crowd with dietary restrictions without having to label everything. And honestly? They just feel special. There’s something about opening your own little cup of goodies that makes people smile.
This is the kind of recipe that makes you close your eyes after the first bite—not because it’s complicated, but because it’s exactly what you needed. Comfort food reimagined as a handheld holiday moment. Perfect for impressing guests without breaking a sweat, or turning a simple get-together into something memorable without spending all day in the kitchen.
What Ingredients You Will Need
This recipe uses simple, beautiful ingredients that come together to create something greater than the sum of their parts. The magic is in the contrast—salty ham, creamy cheese, sweet fruit, crunchy nuts, all wrapped up in a festive little package. Here’s what you’ll need:
For the Base Layer
- Prosciutto (4-6 ounces, thinly sliced) – The salty, silky foundation. I prefer prosciutto di Parma for its delicate texture, but any good-quality prosciutto works. You’ll need about 1-2 slices per cup, torn in half.
- Salami or Genoa Salami (4-6 ounces, sliced) – Adds a heartier, peppery note. Look for pre-sliced salami from the deli counter—it folds beautifully. I like the ones with a little white peppercorn visible.
- Pepperoni (optional, 2-3 ounces) – For a little spicy kick. My kids love the mini pepperoni rounds.
The Cheese Situation
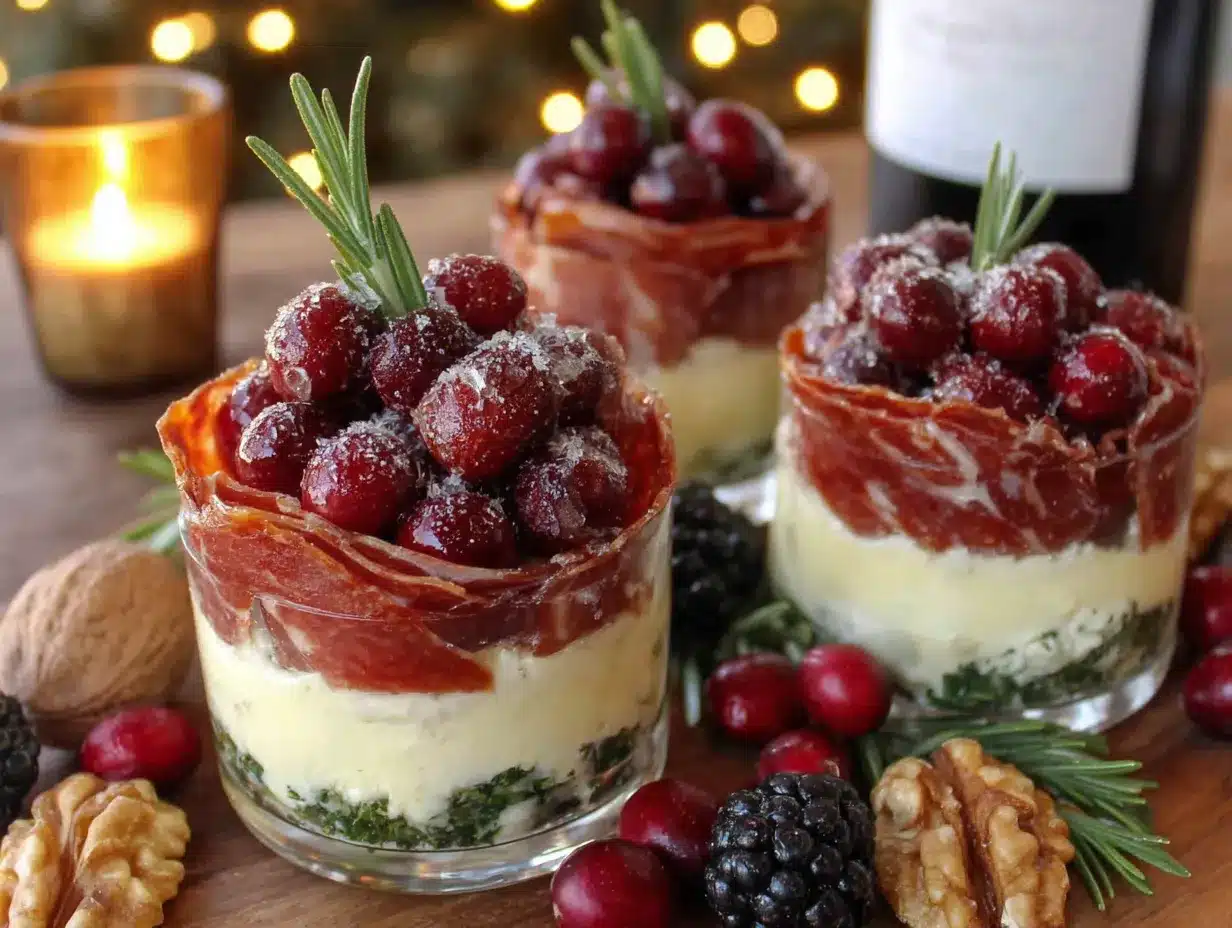
- Brie or Camembert (4-6 ounces) – Cut into small wedges. The creamy texture against the salty meat is heaven. I recommend a double-cream brie for maximum richness.
- Cheddar Cubes (4 ounces) – Sharp white cheddar adds a nice tangy contrast. Cut into 1/2-inch cubes so they fit neatly in the cups.
- Gouda or Smoked Gouda (4 ounces) – The smoky flavor is so good with the rosemary. I use a young gouda for milder flavor, but aged works too.
- Goat Cheese Log (2-3 ounces) – Optional, but the tangy crumbles add a lovely pop of flavor. Roll some in crushed pistachios for extra crunch.
The Fruit & Sweet Stuff
- Red Grapes (1 cup) – Seedless, cut into small clusters. The sweetness balances the savory elements perfectly.
- Fresh Cranberries (1/2 cup) – For color and a tart pop. They look like little rubies against the green rosemary.
- Dried Cranberries or Cherries (1/3 cup) – Adds chewy sweetness. I prefer dried tart cherries when I can find them.
- Honey or Fig Jam (2-3 tablespoons) – A tiny drizzle or dollop adds a touch of sweetness. Fig jam is especially festive.
The Crunch Factor
- Marcona Almonds or Roasted Almonds (1/2 cup) – These are my go-to. Marcona almonds are saltier and more buttery. Regular roasted almonds work great too.
- Pistachios (1/4 cup, shelled) – The green color is so Christmas-y. I always add these for visual appeal.
- Rosemary Sprigs (12-15 small sprigs) – Not just for garnish! They add a subtle piney aroma that screams Christmas. Plus they look like tiny Christmas trees.
- Crackers or Crostini (about 12-15 small crackers) – I like buttery Ritz-style crackers or thin wheat crackers. For gluten-free, use rice crackers or cucumber rounds.
Ingredient Tips: For the best texture, let your cheese sit at room temperature for about 15 minutes before assembling. It’s easier to cut and tastes creamier. I’ve found that buying pre-sliced prosciutto from the deli counter (not the pre-packaged stuff) has a much better texture—it’s thinner and more pliable. If you’re making these for a crowd with dietary restrictions, swap the meats for roasted red pepper strips and marinated artichoke hearts for a vegetarian version.
Equipment Needed
The beauty of this recipe is that you probably already own everything you need. No fancy gadgets required—just a few basics:
- Clear Plastic Cups (5-ounce or 7-ounce size) – The star of the show. I use the clear plastic party cups from the grocery store—they’re cheap, disposable, and let the colors shine. You can also use small mason jars or even paper cups if that’s what you have.
- Cutting Board – Any size works. I use a large wooden one for the prep work, but plastic is fine too.
- Sharp Knife – A good chef’s knife or paring knife for cutting cheese and fruit. Nothing fancy needed.
- Small Bowls or Ramekins – For holding your prepped ingredients while you assemble. I use little prep bowls, but any small bowls work.
- Serving Tray or Platter – For arranging the finished cups. A large wooden board or even a baking sheet covered in parchment paper works beautifully.
- Tongs – Optional, but helpful for handling the prosciutto without tearing it.
Budget-Friendly Tip: Skip the expensive charcuterie boards. A clean baking sheet lined with a pretty napkin or some parchment paper looks just as good and costs nothing. I’ve used the same dollar-store plastic cups for three holiday seasons now—they wash up fine if you’re gentle, but they’re also cheap enough to toss.
Preparation Method
This is the fun part. The whole process takes about 15 minutes once you get the hang of it, and it’s actually kind of meditative—just you, some good music, and a bunch of pretty ingredients going into little cups. Here’s how it goes:
- Prep Your Ingredients First (5 minutes) – Before you touch a single cup, get everything ready. Cut your brie into small wedges (about 1-inch pieces). Cube your cheddar and gouda into 1/2-inch squares. Cut your grapes into small clusters of 2-3 grapes each. Tear your prosciutto slices in half lengthwise. Fold your salami slices into quarters or roll them into little cones. Have everything in separate bowls so you can grab and go.
- Start with the Meat Layer (2 minutes) – Take your first cup and drop in a folded piece of prosciutto against one side. Add a folded salami slice or two against the opposite side. The meat should kind of nestle into the bottom of the cup, creating a little nest for everything else. Don’t worry about being perfect—the messier it looks, the more rustic and appealing it is. I like to let a little bit of the meat peek over the top edge of the cup for visual interest.
- Add the Cheese (3 minutes) – Drop in your brie wedge, a couple cheddar cubes, and a piece of gouda. If you’re using goat cheese, crumble a little on top. The cheese should be visible from the side of the cup—that’s part of the appeal. Try to distribute the different cheese types evenly across all your cups so nobody gets stuck with just one kind.
- Tuck in the Fruit (2 minutes) – Add a small cluster of grapes, tucking them between the cheese and meat. Sprinkle in a few fresh cranberries (they’ll roll to the bottom, which is fine). Add a small pinch of dried cranberries or cherries. The red colors against the green rosemary is what makes these look so Christmas-y, so don’t skimp on the fruit.
- Add the Crunch (1 minute) – Drop in a few almonds and a small handful of pistachios. They should fill any empty spaces in the cup. The nuts add texture and visual contrast. I like to put a few on top so they’re the first thing people see.
- Finish with the Garnish (2 minutes) – Stick a small rosemary sprig into each cup, angled so it looks like a tiny Christmas tree growing out of the ingredients. Add a cracker or two, leaning them against the side of the cup so they’re easy to grab. If you’re using honey or fig jam, add a tiny dollop on top of one of the cheese pieces. Drizzle honey sparingly—a little goes a long way.
- Repeat and Arrange (2 minutes) – Continue until all cups are filled. Arrange them on your serving tray in rows or a circular pattern. I like to leave a little space between cups so people can grab them easily. If you’re transporting them, cover the tray with plastic wrap and keep them refrigerated until you’re ready to leave.
Pro Tip: Make these no more than 2-3 hours before serving. The crackers can get soft if they sit too long. If you’re prepping ahead, assemble everything except the crackers and add them right before serving. The cups will hold up beautifully in the fridge for a few hours—just let them sit at room temperature for 10 minutes before serving so the cheese softens a bit.
Cooking Tips & Techniques
I’ve made these cups about a dozen times now, and I’ve learned a few things the hard way. Here are my best tips for making these look and taste amazing:
Don’t Overfill the Cups. I know it’s tempting to cram in as much as possible, but leave a little breathing room. People need to be able to see what’s inside, and they need room to grab things. A cup that’s overflowing looks messy, not abundant. Aim for the ingredients to fill about 3/4 of the cup.
Layer Strategically. Put the heavier things (cheese cubes, grapes) at the bottom and lighter things (crackers, rosemary) on top. This keeps the cups from toppling over and makes them look more intentional. I learned this after my first batch looked like a salad bar exploded.
Use the Rosemary as a Handle. That little sprig isn’t just decoration—it’s functional. Guests can grab the rosemary sprig to pull the cup closer or pick it up. Plus, the aroma of rosemary gets released as people handle it, which adds to the whole sensory experience.
Keep It Cold Until Serving. The cheese and meat will start to sweat if they sit out too long. These cups are best served within 30 minutes of coming out of the fridge. If you’re at a party, set them out and let people grab them—they’ll disappear fast enough that temperature won’t be an issue.
My Biggest Failure: The first time I made these, I used giant cups (like 12-ounce party cups) and they looked sad and sparse. The smaller cups (5-7 ounces) are perfect because they look full without needing a ton of ingredients. Learn from my mistake—size matters here.
Variations & Adaptations
One of the best things about this recipe is how flexible it is. Here are some of my favorite variations:
Vegetarian Christmas Cups
Skip the meat entirely and double up on the cheese. Add marinated artichoke hearts, roasted red pepper strips, and some olives for savory depth. I made these for my vegetarian sister-in-law and she said they were better than the original. The key is to use really good cheese—a nice aged gouda or a truffle brie makes all the difference.
Gluten-Free Version
Replace the crackers with cucumber rounds, apple slices, or gluten-free rice crackers. Everything else in the recipe is naturally gluten-free. I’ve also used small gluten-free pretzel sticks for a salty crunch. Just make sure your deli meats are gluten-free—most are, but it’s worth checking the label.
Dairy-Free Option
Use dairy-free cheese alternatives or skip the cheese entirely and add extra nuts, olives, and roasted vegetables. I’ve made these with cashew cheese and they were surprisingly good. The key is to add something creamy—mashed avocado works great, or a dollop of hummus.
Sweet & Spicy Twist
Add a drizzle of hot honey or a sprinkle of red pepper flakes to the cups. The heat cuts through the richness of the cheese and meat beautifully. I tried this on a whim and now it’s my preferred version. A little goes a long way—start with a tiny drizzle.
Mini Dessert Charcuterie Cups
For a sweet version, swap the meats and cheese for chocolate-covered pretzels, mini cookies, fresh berries, and a dollop of Nutella or cookie butter. Use mint sprigs instead of rosemary for a festive touch. These are amazing for a Christmas cookie exchange or dessert table.
Serving & Storage Suggestions
These cups are designed to be served cold or at room temperature. Here’s how to make them shine:
Serving Temperature: Take the cups out of the fridge about 10-15 minutes before serving. This lets the cheese soften slightly and the flavors come together. Don’t leave them out longer than 30 minutes, especially if you’re using fresh fruit or soft cheese.
Presentation Ideas: Arrange the cups on a large wooden board or a white platter for maximum contrast. I like to scatter a few extra rosemary sprigs and fresh cranberries around the tray for a festive look. If you’re feeling fancy, add a little sign that says “Grab & Go” or “Charcuterie Cups.”
What to Serve Alongside: These cups pair beautifully with a glass of sparkling wine, a crisp white wine like Sauvignon Blanc, or a light beer. For non-alcoholic options, try sparkling water with cranberry juice or a festive punch. They also go great with other appetizers like stuffed mushrooms, spinach dip, or a simple cheese ball.
Storage: These are best eaten within a few hours of assembly. If you have leftovers (unlikely!), you can store them in the fridge for up to 24 hours. The crackers will get soft, so I recommend removing them before storing. The cups don’t freeze well—the texture of the fruit and cheese will suffer.
Reheating: Don’t. These are served cold. If you want a warm element, you can add a small cup of warm soup or a mini grilled cheese on the side, but the cups themselves should stay cool.
Flavor Development: The flavors actually meld together nicely after about an hour in the fridge. The rosemary aroma infuses the cheese and fruit subtly. If you’re making these ahead, assemble them 1-2 hours before serving for the best flavor.
Nutritional Information & Benefits
While these are definitely a treat, they do offer some nutritional benefits thanks to the quality ingredients. Here’s a rough estimate per cup (based on 12 cups with standard ingredients):
- Calories: Approximately 180-220 per cup
- Protein: 8-10 grams (from cheese and meat)
- Fat: 14-18 grams (mostly from cheese and nuts—the good kind)
- Carbohydrates: 8-12 grams (from fruit and crackers)
- Fiber: 1-2 grams (from nuts and fruit)
- Sugar: 4-6 grams (natural sugars from fruit)
Health Benefits: The nuts provide healthy fats and vitamin E. The cheese offers calcium and protein. The grapes and cranberries are packed with antioxidants. The rosemary has anti-inflammatory properties. These cups are a more balanced option than many holiday appetizers—they have protein, fat, and carbs in a reasonable portion.
Dietary Considerations: This recipe contains dairy and gluten (from crackers). It’s naturally low-carb and keto-friendly if you skip the crackers. For a lower-sodium version, use low-sodium deli meats and skip the salted nuts. Always check labels if you’re serving guests with specific dietary needs.
Conclusion
These Christmas charcuterie cups have become my go-to holiday appetizer for a reason. They’re simple, beautiful, and somehow always make me look like I put in way more effort than I actually did. Every time I bring them to a party, someone asks for the recipe, and I get to tell them the story about Megan in her sweatpants, casually creating the perfect party food without even trying.
That’s what I love most about this recipe—it’s proof that you don’t need to stress over complicated appetizers to impress people. Sometimes the best things come from a random Tuesday afternoon, a friend who doesn’t know she’s a genius, and a handful of ingredients thrown together with zero pretense. So go ahead, make these for your next holiday gathering. Customize them however you like, add your own twist, and watch them disappear.
I’d love to hear how yours turn out! Drop a comment below and let me know what combinations you tried. Did you add something unexpected? Did your guests fight over the last cup? Share your stories—I read every single one. And if you’re looking for more easy holiday appetizers, don’t miss my cranberry brie phyllo cups or these sausage stuffed mushrooms—they’re just as simple and just as popular. Happy holidays, and happy snacking!
Frequently Asked Questions
Can I make these charcuterie cups ahead of time?
Yes! You can assemble them up to 3 hours ahead of serving. Just keep them covered in the fridge and add the crackers right before serving so they stay crunchy. If you’re making them more than 3 hours ahead, prep all the ingredients but assemble just before you need them.
What size cups should I use?
I recommend 5-ounce to 7-ounce clear plastic cups. They’re the perfect size for a single serving without looking empty. You can find them at any grocery store or party supply store. Mini mason jars also work great if you want a more rustic look.
How many cups does this recipe make?
With the ingredient amounts listed, you’ll get about 12-15 cups, depending on how full you fill them. I usually plan for 2 cups per person if serving as an appetizer before a meal, or 3-4 cups per person if it’s the main snack at a party.
Can I use different meats and cheeses?
Absolutely! That’s the beauty of this recipe. Try soppressata, capicola, or even leftover holiday ham. For cheese, any firm or semi-soft cheese works—manchego, fontina, havarti, or even blue cheese for the adventurous. Just make sure you have a mix of textures and flavors.
How do I transport these to a party?
Arrange the filled cups on a large tray or baking sheet and cover tightly with plastic wrap. Keep them refrigerated until you’re ready to leave. If the drive is longer than 20 minutes, put the tray in a cooler with an ice pack. Once you arrive, just remove the plastic wrap and they’re ready to serve!
Pin This Recipe!
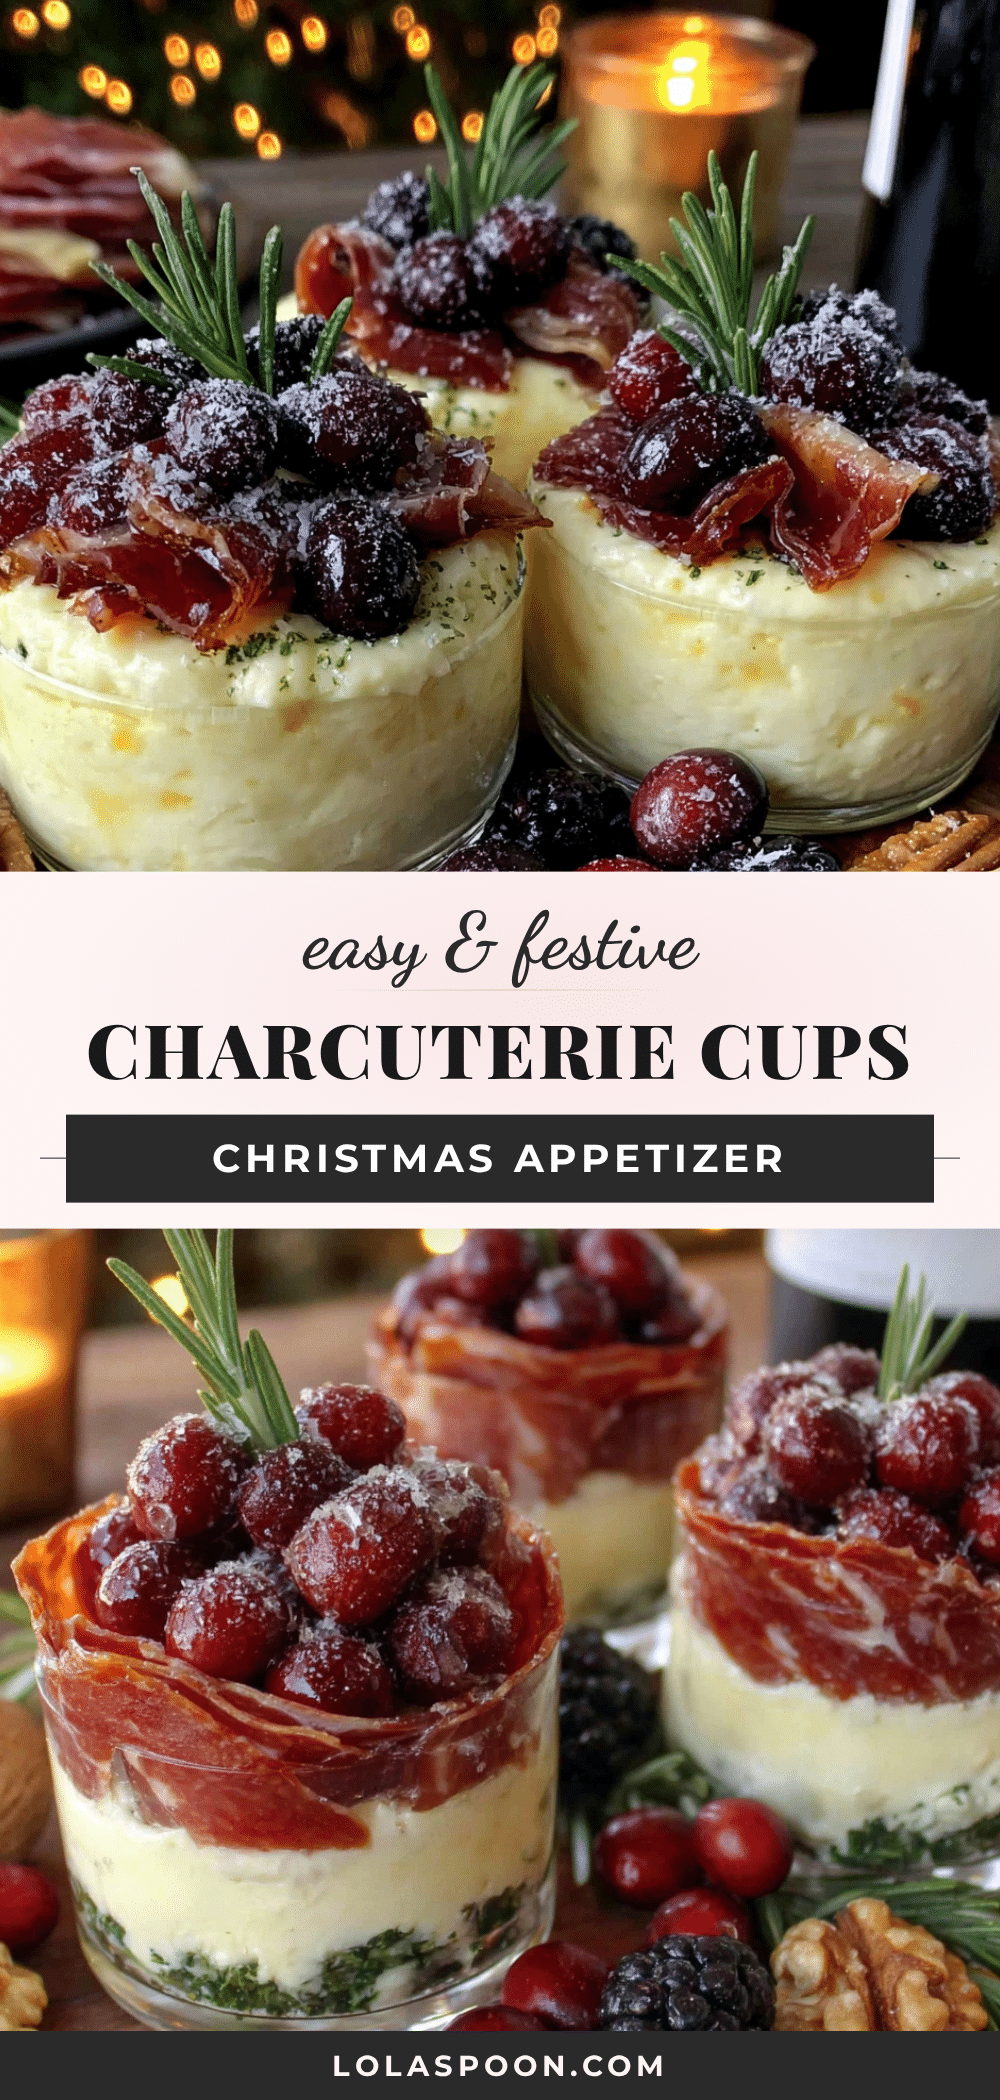
Easy Christmas Charcuterie Cups: Best 15-Minute Appetizer

These Christmas charcuterie cups are the perfect holiday appetizer—ready in 15 minutes, portable, and completely customizable. They look festive and impressive with minimal effort.
- Prep Time: 15 minutes
- Cook Time: 0 minutes
- Total Time: 15 minutes
- Yield: 12-15 cups 1x
- Category: Appetizer
- Cuisine: American
Ingredients
- 4–6 ounces prosciutto, thinly sliced
- 4–6 ounces salami or Genoa salami, sliced
- 2–3 ounces pepperoni (optional)
- 4–6 ounces brie or camembert, cut into small wedges
- 4 ounces sharp white cheddar, cut into 1/2-inch cubes
- 4 ounces gouda or smoked gouda, cut into 1/2-inch cubes
- 2–3 ounces goat cheese log (optional)
- 1 cup red grapes, cut into small clusters
- 1/2 cup fresh cranberries
- 1/3 cup dried cranberries or dried tart cherries
- 2–3 tablespoons honey or fig jam
- 1/2 cup Marcona almonds or roasted almonds
- 1/4 cup shelled pistachios
- 12–15 small rosemary sprigs
- 12–15 small crackers or crostini
Instructions
- Prep your ingredients first: cut brie into 1-inch wedges, cube cheddar and gouda into 1/2-inch squares, cut grapes into small clusters of 2-3 grapes each, tear prosciutto slices in half lengthwise, fold salami slices into quarters or roll into cones.
- Start with the meat layer: drop a folded piece of prosciutto against one side of a clear plastic cup, add a folded salami slice or two against the opposite side, letting a little meat peek over the top edge.
- Add the cheese: drop in a brie wedge, a couple cheddar cubes, and a piece of gouda. If using goat cheese, crumble a little on top.
- Tuck in the fruit: add a small cluster of grapes, a few fresh cranberries, and a small pinch of dried cranberries or cherries.
- Add the crunch: drop in a few almonds and a small handful of pistachios, filling any empty spaces.
- Finish with the garnish: stick a small rosemary sprig into each cup, add a cracker or two leaning against the side, and if using honey or fig jam, add a tiny dollop on top of one cheese piece.
- Repeat until all cups are filled. Arrange on a serving tray and serve within 2-3 hours.
Notes
Make these no more than 2-3 hours before serving. The crackers can get soft if they sit too long. If prepping ahead, assemble everything except the crackers and add them right before serving. Let cups sit at room temperature for 10 minutes before serving so the cheese softens. For a vegetarian version, skip the meat and double up on cheese, adding marinated artichoke hearts, roasted red pepper strips, and olives. For gluten-free, replace crackers with cucumber rounds, apple slices, or gluten-free rice crackers.
Nutrition
- Serving Size: 1 cup
- Calories: 200
- Sugar: 5
- Sodium: 450
- Fat: 16
- Saturated Fat: 7
- Carbohydrates: 10
- Fiber: 1.5
- Protein: 9
Keywords: Christmas charcuterie cups, holiday appetizer, easy appetizer, 15-minute recipe, charcuterie cups, party food, Christmas party appetizer


