There used to be a little diner off Highway 61 called Millie’s Place that made a green bean casserole that I still dream about. When they closed in 2018 after Millie retired, I honestly felt a little lost. That creamy, savory, perfectly crunchy dish was my go-to comfort food after long work weeks, and no other version came close. After nine tries — nine! — with everything from canned soup to from-scratch bechamel, I finally cracked the code. Let me tell you, the day I pulled that baking dish out of the oven and tasted it, I almost cried. It was Millie’s, right down to that golden, crispy top.
This creamy homemade green bean casserole isn’t just another side dish. It’s the one that disappears first at every family gathering, the one people ask for the recipe before they even finish their plate. I mean, I’ve seen folks go back for thirds, and that’s not an exaggeration. The secret is a silky, from-scratch mushroom sauce that beats any canned soup, plus a double dose of crunch that stays crispy even the next day. Maybe you’ve been there — staring at a bland, soggy casserole and wondering why it gets so much hype. This version will change your mind.
It took me a while to realize that the magic wasn’t in some fancy technique. It was in using real ingredients and a little patience. The first few times I tried, I rushed the roux or skimped on the mushrooms, and it showed. But once I slowed down and paid attention to the little things — like letting the onions get properly golden and seasoning the sauce just right — everything clicked. This is the green bean casserole that made my picky nephew ask for vegetables. Twice. Now that’s a win.
Why You’ll Love This Recipe
This isn’t your grandma’s green bean casserole — well, actually, it might be even better. I’ve tested this recipe more times than I care to count, and it’s been family-approved, holiday-tested, and picky-eater-certified. Here’s why it works so well for real families on a budget:
- Quick & Easy: Comes together in about 45 minutes, with just 15 minutes of active prep. Perfect for busy weeknights or Thanksgiving morning chaos.
- Simple Ingredients: No canned cream-of-anything soups or mystery ingredients. You likely have everything in your pantry right now — butter, flour, milk, mushrooms, and green beans.
- Perfect for Family Meals: Great for Sunday dinners, holiday feasts, potlucks, or just a cozy Tuesday night. It reheats beautifully, which means leftovers are actually a good thing.
- Crowd-Pleaser: Kids love the creamy texture and crunchy topping, while adults appreciate the rich, savory flavor. I’ve yet to meet someone who doesn’t go back for seconds.
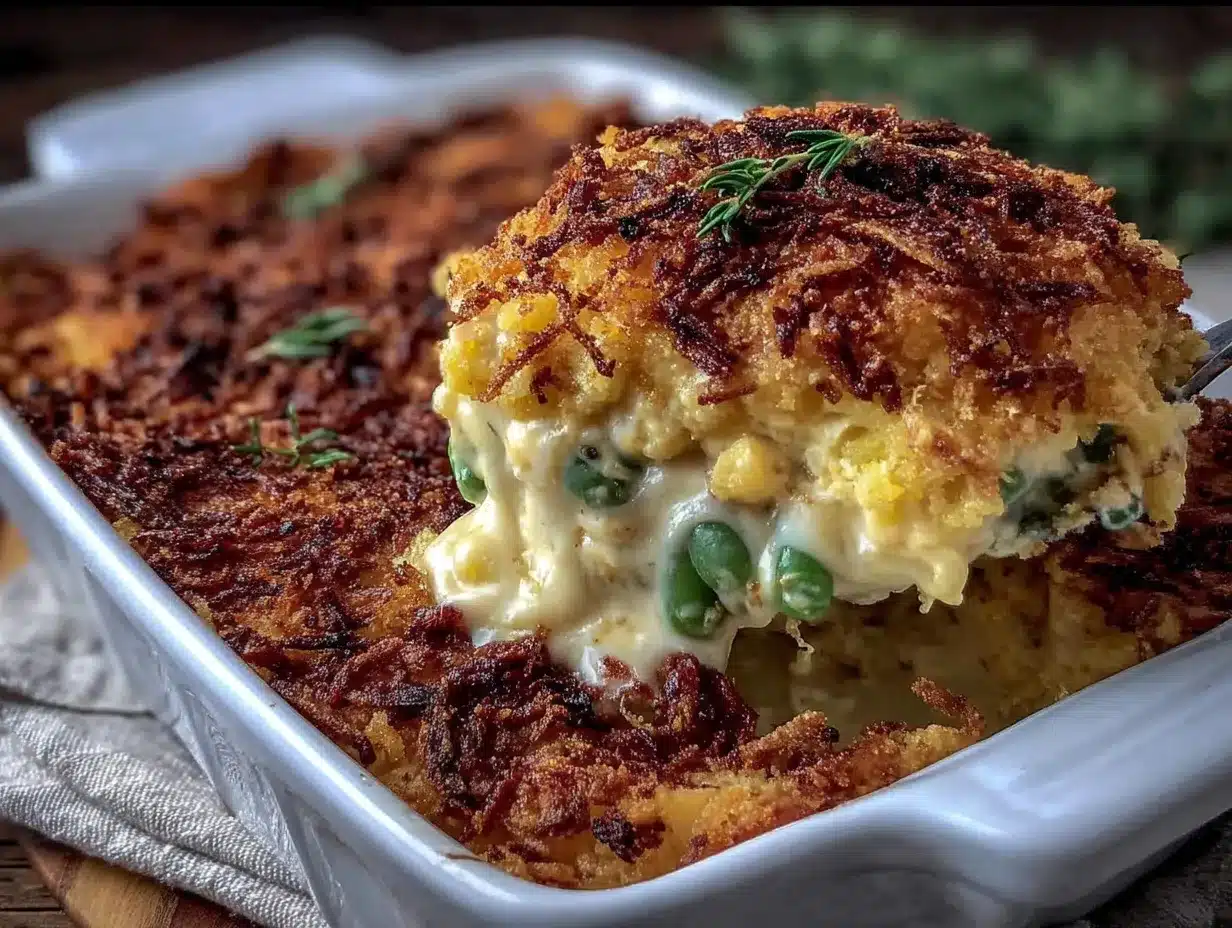
- Unbelievably Delicious: The combination of tender green beans, velvety mushroom sauce, and that irresistible crispy onion topping is pure comfort food magic. It’s the kind of dish that makes you close your eyes after the first bite.
What makes this recipe different from all the others? It’s the technique. Instead of relying on canned soup, you make a proper roux-based sauce that’s silky smooth and packed with real mushroom flavor. The double-crunch topping — a mix of homemade crispy onions and buttery breadcrumbs — stays crunchy even after sitting in the fridge overnight. This isn’t just another version of green bean casserole; it’s the best version you’ll ever make.
Honestly, this recipe is comfort food reimagined. It’s healthier than the boxed version, faster than most from-scratch recipes, and has the same soul-soothing satisfaction that makes you feel like everything’s going to be okay. Perfect for impressing guests without breaking the bank, or turning a simple weeknight dinner into something memorable.
What Ingredients You Will Need
This recipe uses simple, wholesome ingredients to deliver bold flavor and satisfying texture without the fuss. Most of these are pantry staples, and the ones that aren’t are easy to find at any grocery store. Let’s break it down:
For the Green Bean Casserole Base
- Fresh green beans, 1½ pounds (680g) — Look for bright, crisp beans with no brown spots. I prefer fresh over frozen for the best texture, but frozen work in a pinch (just thaw and pat dry first). Trim the ends and cut into 2-inch pieces.
- Unsalted butter, 4 tablespoons (½ stick or 56g) — This is the foundation of your roux and adds richness. I recommend using a good quality butter like Kerrygold for the best flavor, but any unsalted butter works.
- Cremini mushrooms, 8 ounces (225g) — Also called baby bellas, these have more flavor than standard white mushrooms. Slice them thinly so they cook evenly. If you can’t find cremini, white mushrooms are fine.
- Yellow onion, 1 medium (about 150g) — Diced finely. This adds sweetness and depth to the sauce. You’ll use half in the sauce and half in the crispy topping.
- Garlic cloves, 3 (about 12g) — Minced fresh. Don’t use the jarred stuff; fresh garlic makes a real difference here.
- All-purpose flour, ¼ cup (30g) — This thickens the sauce. For a gluten-free version, use a 1:1 gluten-free flour blend.
- Whole milk, 2 cups (480ml) — Whole milk gives the creamiest sauce, but 2% works too. For a dairy-free option, use unsweetened oat milk or full-fat coconut milk.
- Heavy cream, ½ cup (120ml) — This adds extra richness and body. You can substitute with half-and-half if you want a lighter sauce.
- Chicken or vegetable broth, ½ cup (120ml) — Low-sodium is best so you can control the salt. I prefer chicken broth for deeper flavor, but vegetable broth works for a vegetarian version.
- Dried thyme, 1 teaspoon (2g) — Earthy and aromatic. Fresh thyme works too; use 1 tablespoon (about 4 sprigs).
- Salt, 1 teaspoon (5g) — Plus more to taste. I use fine sea salt.
- Black pepper, ½ teaspoon (1g) — Freshly ground is always better.
- Nutmeg, ¼ teaspoon (0.5g) — Optional but highly recommended. It adds a subtle warmth that makes the sauce taste more complex.
For the Crispy Topping
- Panko breadcrumbs, 1 cup (120g) — These stay crunchier than regular breadcrumbs. I recommend the Japanese-style panko for the best texture.
- French fried onions, 1½ cups (about 85g) — The classic store-bought kind works great here. Look for the original flavor, not the spicy version.
- Butter, 2 tablespoons (28g) — Melted, for tossing with the breadcrumbs. This helps them brown evenly.
- Grated Parmesan cheese, ¼ cup (25g) — Optional but adds a savory, nutty flavor that pairs beautifully with the green beans.
Equipment Needed
You don’t need a fancy kitchen to make this green bean casserole. Here’s what you’ll actually use:
- Large pot (5-6 quart) — For blanching the green beans. Any large pot with a lid works.
- Large skillet or sauté pan (12-inch) — For making the mushroom sauce. A deep skillet with high sides is ideal.
- 9×13-inch baking dish (3-quart) — This is the standard size for a family-sized casserole. A 2.5-quart dish works too, but the casserole will be thicker.
- Colander — For draining the blanched green beans.
- Large bowl — For mixing the topping ingredients.
- Whisk — Essential for making a smooth roux without lumps. A flat whisk works best.
- Wooden spoon or silicone spatula — For stirring the sauce and scraping the pan.
- Cutting board and sharp knife — For trimming the green beans and dicing the onion and mushrooms.
- Measuring cups and spoons — For accurate measurements. I cannot stress this enough — baking and cooking are different, but this recipe benefits from precision.
If you don’t have a 9×13-inch dish, you can use a 10-inch cast-iron skillet or a 2.5-quart casserole dish. Just adjust the baking time slightly — a deeper dish might need 5-10 extra minutes. I’ve used my grandmother’s old Pyrex dish for years, and it works perfectly. No need to buy anything fancy.
Preparation Method
Let’s get cooking! This recipe has three main parts: blanching the green beans, making the sauce, and assembling everything. Take your time with the sauce — it’s where all the flavor lives.
Step 1: Prepare the Green Beans
- Fill a large pot with water and bring it to a rolling boil over high heat. Add 1 tablespoon of salt — this helps the beans stay bright green and flavorful.
- While the water heats, trim the ends off the green beans and cut them into 2-inch pieces. I like to line up a handful at a time and cut them all at once — it’s faster that way.
- Once the water is boiling, add the green beans and cook for exactly 3 minutes. Set a timer; you don’t want them mushy. They should be tender-crisp — bright green and still have a little bite.
- Drain the beans in a colander and immediately rinse them with cold water to stop the cooking. This is called “shocking” and it locks in that beautiful color and texture. Let them drain completely while you make the sauce.
Step 2: Make the Creamy Mushroom Sauce
- In a large skillet, melt 4 tablespoons of butter over medium heat. Once it’s foaming, add the diced onion and cook for 4-5 minutes, stirring occasionally, until the onion is soft and translucent. Don’t rush this step — you want the onion to release its sweetness.
- Add the sliced mushrooms and cook for 6-8 minutes, stirring every minute or so. The mushrooms will release liquid at first — that’s normal. Keep cooking until the liquid evaporates and the mushrooms start to brown. This is where the deep, savory flavor develops.
- Add the minced garlic and cook for 30 seconds until fragrant. Stir constantly so the garlic doesn’t burn.
- Sprinkle the flour over the mushroom mixture and stir to coat everything evenly. Cook for 1-2 minutes, stirring constantly. This cooks the raw flour taste out and helps thicken the sauce properly.
- Slowly pour in the milk while whisking continuously. Keep whisking to prevent lumps from forming. The sauce will start to thicken after about 2-3 minutes.
- Add the heavy cream and broth, whisking until smooth. Bring the sauce to a gentle simmer — you’ll see small bubbles around the edges — then reduce the heat to low.
- Stir in the dried thyme, salt, pepper, and nutmeg. Let the sauce simmer for 5-7 minutes, stirring occasionally, until it’s thick enough to coat the back of a spoon. Taste and adjust seasoning — you might want a little more salt or pepper.
Step 3: Assemble the Casserole
- Preheat your oven to 375°F (190°C).
- Add the blanched green beans to the skillet with the sauce and stir gently until everything is well coated. The sauce should cling to the beans nicely.
- Pour the green bean mixture into your greased 9×13-inch baking dish and spread it into an even layer.
Step 4: Make the Crispy Topping
- In a small bowl, combine the panko breadcrumbs, melted butter, and Parmesan cheese (if using). Stir until the breadcrumbs are evenly moistened.
- Sprinkle the French fried onions over the casserole, then top with the buttered breadcrumb mixture. This double-layer topping is the secret to that perfect crunch.
Step 5: Bake and Serve
- Bake the casserole for 20-25 minutes, until the sauce is bubbly around the edges and the topping is golden brown and crispy. If the topping starts to brown too quickly, tent the dish loosely with foil for the last 5 minutes.
- Let the casserole rest for 5-10 minutes before serving. This helps the sauce set up so it doesn’t run all over the plate.
- Serve warm and watch it disappear. Seriously, don’t expect leftovers.
Cooking Tips & Techniques
After making this green bean casserole more times than I can count, I’ve picked up a few tricks that make a real difference. Here’s what I’ve learned the hard way:
Don’t skip the blanching step. I know it’s tempting to just throw raw beans in the sauce and hope for the best, but blanching ensures the beans are perfectly tender without being mushy. Raw beans release water as they bake, which can make your casserole watery. Blanching solves that problem.
Season the sauce generously. The green beans and the topping are both fairly neutral, so the sauce needs to carry the flavor. Taste it before you add the beans and adjust the salt and pepper. I always add a little more than I think I need — the beans will absorb some of the seasoning.
Watch your heat when making the roux. The first time I made this, I cranked the heat too high and ended up with a lumpy, scorched mess. Keep the heat at medium-low and whisk constantly. If you see any brown specks in the flour, you’ve gone too far — start over.
Let the casserole rest before serving. I know you’ll be tempted to dig in right away, but those 5-10 minutes of resting time are crucial. The sauce thickens as it cools slightly, which means every bite is perfectly coated instead of soupy.
Make the topping fresh. Store-bought fried onions are fine, but toasting them with butter and breadcrumbs takes them to another level. The butter helps them brown evenly and adds a richness you just can’t get from the can.
Scale the recipe easily. Need to feed a crowd? Double everything and use a 10×15-inch baking dish. Just add 10 minutes to the baking time. For a smaller group, halve the recipe and use an 8×8-inch dish.
Variations & Adaptations
One of the best things about this green bean casserole is how adaptable it is. Here are some variations I’ve tried and loved:
Dietary Variations
- Gluten-Free: Use a 1:1 gluten-free flour blend in the sauce and gluten-free panko breadcrumbs for the topping. The rest of the recipe is naturally gluten-free if you check your fried onions — some brands contain wheat flour.
- Dairy-Free/Vegan: Substitute the butter with vegan butter or olive oil, use unsweetened oat milk or full-fat coconut milk instead of dairy milk, and skip the Parmesan. The sauce will be slightly thinner but still delicious.
- Low-Carb/Keto: Replace the breadcrumbs with crushed pork rinds or almond flour mixed with Parmesan. Skip the fried onions or use a low-carb alternative. The sauce is already fairly low in carbs if you use a low-carb milk substitute.
Flavor Variations
- Bacon Lover’s Version: Cook 6 strips of bacon until crispy, crumble them, and stir half into the sauce. Sprinkle the rest on top with the breadcrumbs. Because everything is better with bacon.
- Cheesy Green Bean Casserole: Stir 1 cup of shredded cheddar or Gruyère into the sauce before adding the beans. The cheese adds a wonderful savory depth that pairs beautifully with the mushrooms.
- Spicy Kick: Add ½ teaspoon of red pepper flakes or a diced jalapeño (seeds removed) when you cook the onions. The heat cuts through the richness nicely.
Seasonal Adaptations
- Summer Fresh: Use fresh green beans from the farmer’s market and add 1 cup of cherry tomatoes, halved, to the sauce. The tomatoes burst and add a sweet-tart pop.
- Fall Harvest: Add 1 cup of diced butternut squash or sweet potatoes to the sauce. Roast them first for extra flavor, then stir them in with the green beans.
- Spring Light: Swap half the green beans for asparagus spears (cut into 2-inch pieces) and add ½ cup of fresh peas. Blanch the asparagus for 2 minutes instead of 3.
Serving & Storage Suggestions
This green bean casserole is incredibly versatile when it comes to serving. Here’s how to make the most of it:
Serving Temperature: Serve the casserole warm, straight from the oven. The sauce is at its creamiest right after baking, and the topping is at its crunchiest. If you’re making it for a holiday meal, you can assemble it a day ahead and bake it just before serving.
What to Serve With It: This casserole is a natural side for roasted turkey, baked ham, or roast chicken. It also pairs beautifully with mashed potatoes, stuffing, and cranberry sauce. For a weeknight meal, serve it alongside grilled pork chops or a simple roasted chicken. I’ve even eaten it as a main dish with a side salad — it’s that satisfying.
Storage Instructions: Leftovers (if you have any) keep well in an airtight container in the refrigerator for up to 4 days. The topping will lose some of its crunch, but the flavor is still fantastic. To reheat, place the casserole in a 350°F oven for 15-20 minutes, or until heated through. You can also microwave individual portions, but the topping will be softer.
Freezing Tips: This casserole freezes beautifully for up to 3 months. Assemble the casserole completely but don’t bake it. Cover tightly with foil and freeze. When you’re ready to bake, thaw overnight in the refrigerator, then bake as directed, adding 10-15 minutes to the baking time. You can also freeze the baked casserole — just let it cool completely, wrap tightly, and freeze. Reheat straight from frozen in a 350°F oven for 30-40 minutes.
How Flavors Develop: Like many casseroles, this one tastes even better the next day. The flavors meld together overnight, and the sauce becomes even creamier. If you’re planning ahead, make it a day in advance and reheat it — your future self will thank you.
Nutritional Information & Benefits
Here’s the approximate nutritional breakdown for one serving (based on 8 servings per recipe):
- Calories: 285
- Total Fat: 18g
- Saturated Fat: 10g
- Cholesterol: 45mg
- Sodium: 480mg
- Total Carbohydrates: 24g
- Dietary Fiber: 4g
- Sugars: 8g
- Protein: 8g
This casserole is more than just comfort food — it’s actually pretty nutritious. Green beans are packed with vitamins A, C, and K, plus fiber that’s great for digestion. Mushrooms are one of the few natural sources of vitamin D, and they also provide B vitamins and antioxidants. The dairy adds calcium and protein, making this a well-rounded side dish.
If you’re watching your sodium, use low-sodium broth and unsalted butter, and go easy on the salt in the sauce. The fried onions do add some sodium, but you can reduce the amount or use a low-sodium version. For a lighter option, substitute the heavy cream with half-and-half or whole milk — the sauce will be slightly less rich but still delicious.
This recipe is vegetarian as written (use vegetable broth) and can be made gluten-free and dairy-free with the substitutions mentioned above. It contains dairy and gluten in its standard form, so be mindful if you’re cooking for someone with allergies.
Conclusion
This creamy homemade green bean casserole has become a staple in my kitchen for good reason. It’s the dish that brings people together, the one that makes everyone at the table smile. Whether you’re making it for Thanksgiving, a family dinner, or just because you need a little comfort, this recipe delivers every single time.
Don’t be afraid to make it your own — swap in different mushrooms, add some cheese, or throw in extra veggies. The base recipe is forgiving and adaptable, which is exactly what a good family recipe should be. I’ve made this for potlucks, holiday feasts, and random Tuesday dinners, and it’s always a hit. Honestly, it’s become my go-to when I want to impress without stressing.
I’d love to hear how yours turns out! Drop a comment below and let me know if you tried any variations — I’m always looking for new ideas. And if you loved this recipe, share it with a friend who needs a little comfort food in their life. Happy cooking, friend. You’ve got this.
Frequently Asked Questions
Can I use frozen green beans instead of fresh?
Yes, you can use frozen green beans in a pinch. Thaw them completely and pat them dry with paper towels before using. Skip the blanching step since frozen beans are already blanched. Keep in mind that frozen beans tend to be softer, so the texture won’t be as crisp as fresh.
Can I make this green bean casserole ahead of time?
Absolutely! You can assemble the casserole completely (without baking) up to 24 hours in advance. Cover it tightly with foil and refrigerate. When you’re ready to bake, add about 10 minutes to the baking time since the dish will be cold. I actually think the flavors meld together even better overnight.
Why is my sauce lumpy?
Lumpy sauce usually happens when you add the milk too quickly or don’t whisk enough. The key is to add the milk slowly while whisking constantly. If you end up with lumps, you can strain the sauce through a fine-mesh sieve, or use an immersion blender to smooth it out. Next time, try using a flat whisk — it’s much better at reaching the corners of the pan.
How do I keep the topping crunchy?
The double-layer topping — fried onions plus buttered breadcrumbs — is designed to stay crunchy. To keep it that way, don’t cover the casserole while it’s resting or storing. If you’re reheating leftovers, use the oven instead of the microwave. The microwave will steam the topping and make it soggy. A quick 5-minute stint under the broiler can revive the crunch too.
Can I add other vegetables to this casserole?
Definitely! This recipe is very flexible. Try adding 1 cup of sliced mushrooms, ½ cup of diced bell peppers, or 1 cup of cauliflower florets. Just blanch any hard vegetables along with the green beans, or sauté them with the mushrooms. The sauce is creamy enough to coat a variety of veggies, so feel free to clean out your crisper drawer.
Pin This Recipe!

Easy Creamy Green Bean Casserole Recipe – Best Homemade

This creamy homemade green bean casserole features a silky from-scratch mushroom sauce and a double-crunch topping that stays crispy even the next day. It’s the perfect comfort food side dish for holidays, family dinners, or any occasion.
- Prep Time: 15 minutes
- Cook Time: 30 minutes
- Total Time: 45 minutes
- Yield: 8 servings 1x
- Category: Side Dish
- Cuisine: American
Ingredients
- 1½ pounds (680g) fresh green beans, trimmed and cut into 2-inch pieces
- 4 tablespoons (½ stick or 56g) unsalted butter
- 8 ounces (225g) cremini mushrooms, thinly sliced
- 1 medium yellow onion (about 150g), diced finely
- 3 garlic cloves (about 12g), minced
- ¼ cup (30g) all-purpose flour
- 2 cups (480ml) whole milk
- ½ cup (120ml) heavy cream
- ½ cup (120ml) low-sodium chicken or vegetable broth
- 1 teaspoon (2g) dried thyme
- 1 teaspoon (5g) fine sea salt
- ½ teaspoon (1g) freshly ground black pepper
- ¼ teaspoon (0.5g) nutmeg (optional)
- 1 cup (120g) panko breadcrumbs
- 1½ cups (about 85g) French fried onions
- 2 tablespoons (28g) unsalted butter, melted
- ¼ cup (25g) grated Parmesan cheese (optional)
Instructions
- Preheat oven to 375°F (190°C).
- Bring a large pot of salted water to a boil. Add green beans and blanch for exactly 3 minutes. Drain and rinse with cold water to stop cooking. Set aside.
- In a large skillet, melt 4 tablespoons butter over medium heat. Add diced onion and cook 4-5 minutes until soft and translucent.
- Add sliced mushrooms and cook 6-8 minutes until liquid evaporates and mushrooms begin to brown.
- Add minced garlic and cook 30 seconds until fragrant.
- Sprinkle flour over mushroom mixture and stir to coat. Cook 1-2 minutes, stirring constantly.
- Slowly pour in milk while whisking continuously. Cook 2-3 minutes until sauce thickens.
- Add heavy cream and broth, whisking until smooth. Bring to a gentle simmer, then reduce heat to low.
- Stir in dried thyme, salt, pepper, and nutmeg. Simmer 5-7 minutes until sauce coats the back of a spoon. Adjust seasoning to taste.
- Add blanched green beans to the skillet and stir gently to coat.
- Pour green bean mixture into a greased 9×13-inch baking dish and spread evenly.
- In a small bowl, combine panko breadcrumbs, melted butter, and Parmesan cheese (if using). Stir until moistened.
- Sprinkle French fried onions over the casserole, then top with buttered breadcrumb mixture.
- Bake for 20-25 minutes until bubbly and golden brown. If topping browns too quickly, tent with foil for last 5 minutes.
- Let casserole rest 5-10 minutes before serving.
Notes
Don’t skip blanching the green beans—it ensures they are tender-crisp and prevents a watery casserole. Season the sauce generously; the beans and topping are neutral. Let the casserole rest before serving to allow the sauce to set. For best crunch, make the topping fresh and avoid covering the casserole while storing. Leftovers keep in the refrigerator for up to 4 days; reheat in the oven to maintain texture.
Nutrition
- Serving Size: 1 serving (based on
- Calories: 285
- Sugar: 8
- Sodium: 480
- Fat: 18
- Saturated Fat: 10
- Carbohydrates: 24
- Fiber: 4
- Protein: 8
Keywords: green bean casserole, creamy green bean casserole, homemade green bean casserole, Thanksgiving side dish, comfort food, holiday recipe