Let me tell you something. My sister, Claire, swore she hated peppermint mochas. For years. Every holiday season, she’d roll her eyes at the red-and-green cups and mutter something about “toothpaste coffee.” I believed her. I mean, why wouldn’t I? She’s my sister. Then, last Christmas Eve, I caught her. There she was, standing in my kitchen at 11 PM, holding a mason jar full of this syrup, pouring it into her mug with this guilty little smile. “It’s research,” she said. I didn’t say a word. I just handed her the whipped cream.
This peppermint mocha syrup is the reason my coffee bar actually gets used. It’s not just for coffee, either. It’s for hot chocolate, milkshakes, drizzling over ice cream, or even pancakes if you’re feeling rebellious. Honestly, I started making it because I got tired of buying those expensive bottles at the store that somehow tasted more like chemicals than chocolate. This version? It’s rich, it’s smooth, and it has that perfect peppermint kick without being overpowering. You know that feeling when you take a sip and everything just clicks? That’s this syrup.
And here’s the thing—it’s ridiculously easy. Like, “I made this while wrapping presents” easy. No candy thermometers, no complicated steps. Just a saucepan, a whisk, and about ten minutes of your time. It keeps in the fridge for weeks, which means you can make a big batch before the guests arrive and just let them serve themselves. Perfect for a Christmas coffee bar where you want to look like you spent hours on something that actually took minutes.
- Quick & Easy: Ready in under 15 minutes. Seriously, you can make this while the coffee brews.
- Simple Ingredients: Sugar, cocoa powder, water, peppermint extract, and a pinch of salt. That’s it.
- Perfect for a Christmas Coffee Bar: Set out a pitcher with a ladle, some mugs, and let guests customize their drinks.
- Crowd-Pleaser: Even the peppermint skeptics (looking at you, Claire) end up coming back for seconds.
- Unbelievably Delicious: The deep chocolate flavor balanced with cool peppermint is next-level comfort in a mug.
What makes this recipe different from the rest? It’s the ratio. I spent three batches getting it right—too much peppermint and it tastes like mouthwash, too little and it’s just sad hot chocolate. This is the sweet spot. Plus, I use a tiny trick: blooming the cocoa powder in hot water first. It sounds fancy, but it just means the chocolate flavor gets deeper and richer. No lumps, no bitterness, just smooth, velvety syrup that makes every drink feel like a treat.
This isn’t just a recipe. It’s the one that makes your guests close their eyes after the first sip. It’s the one that gets texted around the family group chat. It’s the one that turns a simple cup of coffee into a holiday moment. And honestly? It’s the one that proved my sister wrong. Not that I’m keeping score.
What Ingredients You Will Need
This recipe uses pantry staples to deliver that rich, festive flavor without any fuss. Most of these are things you probably already have, which makes this perfect for last-minute holiday prep. I’ve tested this with different brands and ratios, so I’ll share what works best.
- Granulated Sugar (1 cup / 200g): This provides the sweetness and body. I’ve tried brown sugar, and while it adds a deeper molasses note, it changes the color to a muddy brown. Stick with white sugar for that classic mocha look. If you want a less sweet syrup, you can reduce it to ¾ cup, but the texture will be thinner.
- Unsweetened Cocoa Powder (½ cup / 50g): This is the heart of the syrup. I recommend Ghirardelli or Droste for the richest flavor. Dutch-processed cocoa works beautifully here because it’s smoother and less acidic. If you only have natural cocoa powder, that’s fine—the syrup will just be a bit more bitter, so you might want to add an extra tablespoon of sugar.
- Water (1 cup / 240ml): Just tap water is fine. The water dissolves the sugar and cocoa, creating the base. I’ve used filtered water before, and honestly, I couldn’t tell the difference. Don’t substitute milk here—it will make the syrup grainy and prone to scorching.
- Peppermint Extract (1 teaspoon / 5ml): This is where quality matters. I use McCormick or Simply Organic—they’re pure and potent. Avoid “peppermint flavoring” or “peppermint oil” unless you know what you’re doing. Oil is extremely concentrated and can ruin the batch. Start with 1 teaspoon, taste, and add more if you want a stronger kick. I’ve pushed it to 1½ teaspoons for a real wintergreen punch, but that’s my personal preference.
- Pinch of Salt (about ⅛ teaspoon / 0.5g): Salt isn’t optional here. It balances the sweetness and deepens the chocolate flavor. I use fine sea salt, but table salt works too. Don’t skip it—the syrup will taste flat without it.
- Optional: Vanilla Extract (½ teaspoon / 2.5ml): This is my secret weapon. It rounds out the peppermint and makes the chocolate taste more complex. I add it every time, but if you want a pure peppermint mocha, leave it out.
Substitution Guidance: Need a sugar-free version? Swap the granulated sugar for 1 cup of allulose or monk fruit sweetener. The texture might be slightly thinner, but the flavor holds up. For a dairy-free syrup, you’re already good—this recipe is naturally dairy-free. If you’re out of cocoa powder, you can melt 4 ounces of dark chocolate (70% cocoa) into the hot water instead. Just stir until smooth and reduce the sugar to ¾ cup.
Equipment Needed
You don’t need a fancy kitchen for this. I’ve made this syrup in a cramped apartment and a big family kitchen, and the results were the same. Here’s what you’ll need:
- Medium Saucepan (2-quart / 2-liter): A heavy-bottomed saucepan is best because it distributes heat evenly and prevents scorching. I use my old Calphalon pot that’s seen better days, but it still works perfectly. If you only have a thin pot, just stir more frequently.
- Whisk: A balloon whisk is ideal for smoothing out cocoa lumps. A fork works in a pinch, but it’ll take more elbow grease. I’ve definitely used a fork when my whisk was in the dishwasher—don’t judge.
- Measuring Cups and Spoons: Accuracy matters here, especially with the peppermint extract. I use OXO measuring spoons because they’re easy to read. A liquid measuring cup for the water is helpful too.
- Fine-Mesh Strainer (Optional): If you want a perfectly smooth syrup, strain it after cooking. I only do this when I’m making syrup for a party. For everyday use, I skip it—a few tiny cocoa lumps never hurt anyone.
- Glass Jar or Bottle (16-ounce / 500ml capacity): A mason jar works beautifully. Make sure it’s heat-safe—I once poured hot syrup into a cold jar and heard a crack that made me jump. Let the syrup cool slightly before pouring.
- Funnel (Optional): Helps avoid messy spills when transferring the syrup. I use a small plastic funnel I bought for a dollar. It’s ugly, but it works.
Preparation Method
This is the part where the magic happens. I’ve broken it down into simple steps, with all the little details I wish someone had told me the first time. Let’s get started.
- Combine the dry ingredients. In your medium saucepan, whisk together the granulated sugar, cocoa powder, and salt. Make sure there are no big lumps of cocoa. I use my fingers to break up any stubborn clumps—it’s faster than whisking forever. At this point, the mixture looks like a sandy, dark brown powder. That’s perfect.
- Add the water and whisk. Pour in the 1 cup of water and whisk vigorously until the mixture is smooth. You’ll see the cocoa dissolve into the water, creating a thin, dark liquid. Don’t worry if it looks a bit grainy at first—that’s just the sugar not being dissolved yet. Keep whisking for about 30 seconds. I once rushed this step and ended up with lumps that took forever to break down. Patience, friend.
- Bring to a gentle boil. Place the saucepan over medium heat. Stir occasionally with your whisk. After about 3 to 4 minutes, you’ll see small bubbles forming around the edges. That’s when you know it’s getting close. Do NOT walk away at this point. I learned this the hard way when I got distracted by a Christmas cookie delivery and came back to a bubbly mess on the stovetop. The syrup can boil over quickly if you’re not watching.
- Simmer for 2 minutes. Once the mixture reaches a gentle boil (not a rolling boil—just a steady simmer), reduce the heat to low. Let it simmer for exactly 2 minutes, whisking constantly. This step is crucial because it allows the sugar to fully dissolve and the cocoa to bloom. You’ll notice the syrup thickening slightly and becoming glossy. The smell at this point is incredible—like a chocolate shop at the mall.
- Remove from heat and add extracts. Take the saucepan off the burner. Let it sit for 30 seconds to cool slightly—this prevents the peppermint extract from evaporating instantly. Then, stir in the peppermint extract and the optional vanilla extract. Give it a good whisk. The aroma will hit you immediately. I always take a deep breath here. It smells like Christmas in a pot.
- Taste and adjust. Grab a clean spoon and take a tiny taste. Be careful—it’s hot! The syrup should taste strongly of chocolate with a cool peppermint finish. If you want more peppermint, add another ¼ teaspoon at a time. Remember, the flavor will mellow slightly as it cools, so aim for a little stronger than you think you want. I’ve added up to 1½ teaspoons total for a real punch.
- Strain (optional) and cool. If you want a silky smooth syrup, pour it through a fine-mesh strainer into your glass jar. This catches any undissolved cocoa particles. I usually skip this for home use, but for a party, it makes the syrup look professional. Let the syrup cool completely at room temperature before sealing the jar. This takes about 30 to 45 minutes. Don’t rush it—putting a lid on warm syrup creates condensation that can water it down.
- Store and enjoy. Once cooled, screw on the lid and refrigerate. The syrup will thicken as it chills, becoming a pourable consistency. It keeps for up to 3 weeks in the fridge. I’ve pushed it to 4 weeks and it was still fine, but the peppermint flavor fades after week 3.
Cooking Tips & Techniques
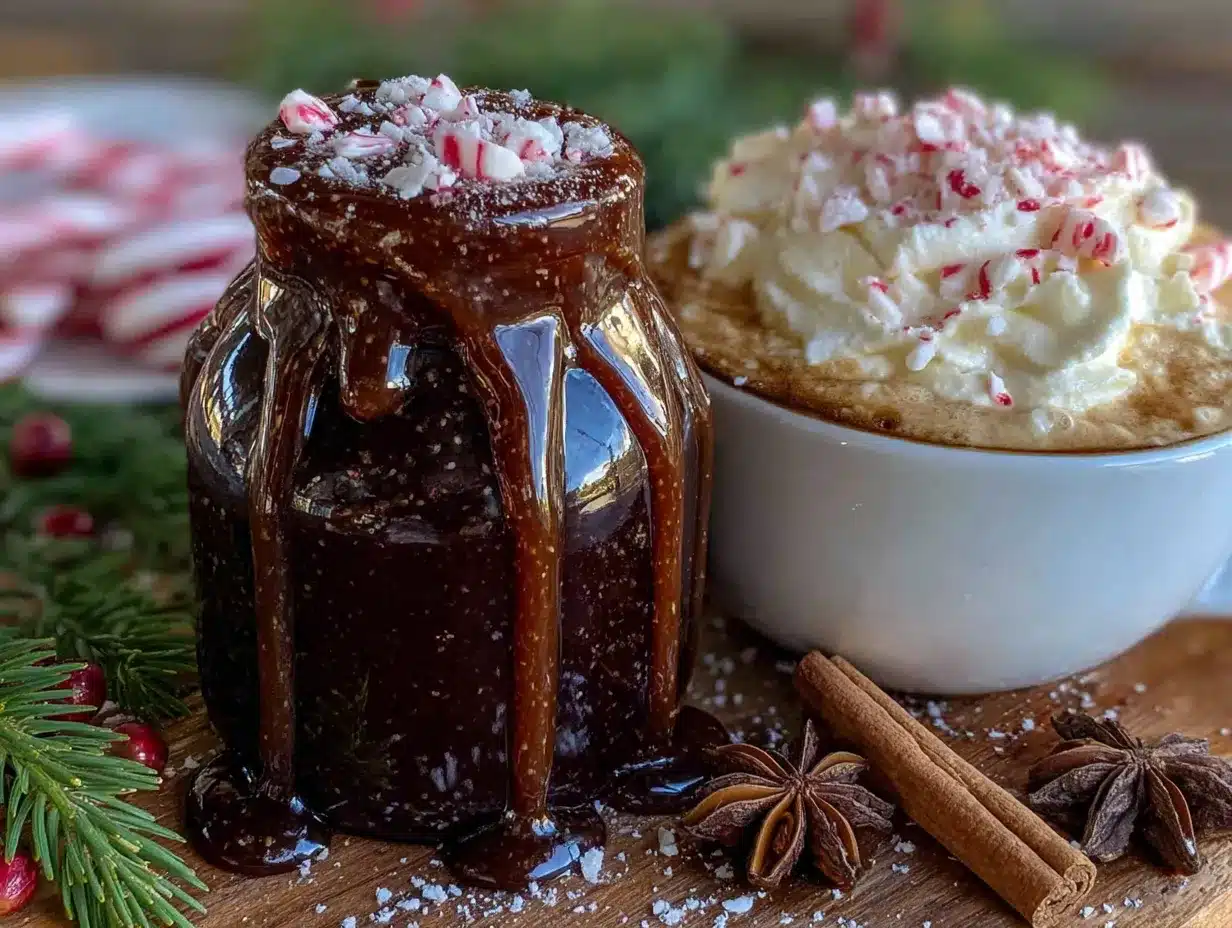
I’ve made this syrup at least twenty times now, and I’ve messed up plenty along the way. Here’s what I’ve learned so you don’t have to repeat my mistakes.
Watch the heat. Medium heat is your friend. High heat will scorch the sugar and cocoa, leaving you with a bitter, burnt flavor that no amount of peppermint can fix. If you see dark brown specks floating in the syrup, you’ve gone too hot. Start over—it’s not worth saving.
Don’t over-boil. The syrup only needs 2 minutes of simmering. Any longer and the water evaporates too much, leaving you with a thick paste instead of a pourable syrup. I once let it boil for 5 minutes while I answered a text message. The result was a sticky, taffy-like mess that I had to scrape into the trash. Learn from my distraction.
Use the right peppermint extract. This is non-negotiable. Pure peppermint extract is made from peppermint oil and alcohol. “Imitation peppermint flavor” is made from artificial chemicals and tastes like a candle. Read the label. If it says “natural flavor” but doesn’t specify peppermint oil, it’s probably imitation. Spend the extra dollar for the real stuff.
Make it ahead. This syrup actually tastes better after sitting overnight in the fridge. The flavors meld together, and the peppermint becomes more integrated. So if you’re hosting a Christmas coffee bar, make this the day before. Your future self will thank you.
Scale it up. Hosting a crowd? Double or triple the recipe easily. Just use a larger pot—a 4-quart pot for a double batch, a 6-quart for a triple. The cooking time stays the same. I make a triple batch every year for our family Christmas brunch, and it disappears within hours.
Variations & Adaptations
One of the best things about this syrup is how flexible it is. Here are some ways to make it your own.
Dark Chocolate Peppermint Syrup: Swap the unsweetened cocoa powder for ½ cup of dark cocoa powder (like Hershey’s Special Dark). This gives the syrup a richer, more intense chocolate flavor that pairs beautifully with the peppermint. I tried this for a friend who loves dark chocolate, and she said it was the best mocha she’d ever had. Reduce the sugar to ¾ cup since dark cocoa is less bitter than you’d think.
Mint Mocha Syrup (No Peppermint): If you’re not a peppermint fan (Claire sends her regards), use spearmint extract instead. The flavor is sweeter and less sharp. Use 1 teaspoon of spearmint extract, and add a drop of green food coloring if you want that festive green hue. It’s great for St. Patrick’s Day or just a change of pace.
Spiced Peppermint Mocha: Add ½ teaspoon of cinnamon and ¼ teaspoon of nutmeg along with the dry ingredients. This creates a chai-meets-mocha vibe that’s perfect for cozy winter mornings. I made this by accident once when I grabbed the wrong jar from the spice cabinet. Best accident ever.
Vegan and Dairy-Free: This recipe is already vegan and dairy-free as written. Just make sure your sugar is vegan-friendly (some brands use bone char in processing). Wholesome and Florida Crystals are good options. Serve with oat milk or almond milk for a completely plant-based coffee bar.
Alcoholic Version for Adults: Once the syrup is made and cooled, stir in 2 tablespoons of peppermint schnapps or crème de menthe. This turns your coffee bar into an adult-only affair. I’ve done this for New Year’s Eve brunch, and it was a hit. Just label it clearly so nobody gets an unexpected surprise.
Serving & Storage Suggestions
This syrup is the star of any Christmas coffee bar, but it’s versatile enough for everyday use too.
Serving Temperature: Serve the syrup at room temperature or slightly chilled. If it’s too cold, it won’t mix well into hot coffee. I take the jar out of the fridge about 15 minutes before guests arrive to let it warm up slightly. For iced coffee, the cold syrup is perfect—it chills the drink without diluting it.
Presentation Tips: Pour the syrup into a clear glass pitcher or a swing-top bottle for a rustic look. Label it with a cute tag (“Peppermint Mocha Syrup – 2 tbsp per cup”). Set out a small ladle or a pump dispenser if you have one. I found a glass pump bottle at a thrift store for $3, and it makes the coffee bar look so fancy. Pair the syrup with bowls of whipped cream, chocolate shavings, and crushed candy canes for toppings.
What to Serve Alongside: This syrup is amazing in hot coffee, iced coffee, hot chocolate, or steamed milk. For a full coffee bar, offer a variety of milks (whole, oat, almond), a pot of strong brewed coffee, and a kettle of hot water for Americanos. Add some cookies or biscotti on the side—gingerbread and shortbread are my favorites.
Storage Instructions: Store the syrup in an airtight glass jar in the refrigerator for up to 3 weeks. Do not freeze it—the texture becomes grainy when thawed. I’ve tried freezing it in ice cube trays for individual servings, and while it works, the syrup separates slightly. It’s better fresh.
Reheating: If the syrup crystallizes or thickens too much in the fridge (this can happen after week 2), microwave it for 10 to 15 seconds and stir. Or place the jar in a bowl of warm water for a few minutes. The syrup will return to its pourable consistency. Do not boil it again—that will change the flavor.
How Flavors Develop: The peppermint flavor is strongest on day one. By day three, it mellows and blends with the chocolate. I actually prefer it on day two or three. If you’re making this for a party, make it two days ahead for the best balance.
Nutritional Information & Benefits
Let’s be honest—this is a treat. But knowing what’s in it helps you enjoy it mindfully.
Estimated Nutritional Values (per 2-tablespoon serving):
- Calories: 80
- Total Fat: 0.5g
- Sodium: 20mg
- Total Carbohydrates: 20g
- Sugars: 18g
- Protein: 0.5g
Health Benefits of Key Ingredients: Cocoa powder is rich in antioxidants called flavonoids, which can support heart health and reduce inflammation. Peppermint extract has been shown to aid digestion and soothe headaches. Of course, these benefits are small in the amounts used here, but it’s nice to know you’re getting a little something good alongside the sweetness.
Dietary Considerations: This syrup is naturally gluten-free, dairy-free, and vegan. It contains no nuts or soy (check your peppermint extract label to be sure). If you’re watching your sugar intake, you can use a sugar substitute like allulose or monk fruit, but the texture will be slightly thinner.
Potential Allergens: None from the ingredients themselves, but always check your cocoa powder and extracts for cross-contamination warnings if you have severe allergies.
Personal Wellness Perspective: I believe in balance. This syrup is a special treat for the holidays, not an everyday thing. When I make it, I savor every sip and don’t feel guilty about it. Life is too short for bad coffee and regret.
Frequently Asked Questions
Can I use peppermint oil instead of extract?
I don’t recommend it. Peppermint oil is much more concentrated—just a few drops can overpower the entire batch. If you only have oil, start with 2 drops and taste. You can always add more, but you can’t take it out. I’ve ruined a batch with ¼ teaspoon of oil, and it tasted like a candy cane exploded in my mouth.
Why is my syrup grainy?
Graininess usually means the sugar didn’t fully dissolve. Make sure you simmer the syrup for the full 2 minutes, whisking constantly. If it’s still grainy after cooling, try reheating it gently with an extra tablespoon of water and whisking until smooth. I’ve saved a few batches this way.
How long does this syrup last?
In an airtight jar in the refrigerator, it stays good for up to 3 weeks. After that, the peppermint flavor starts to fade, and the texture can become slightly thick. I’ve never had it go bad because it gets used up too fast!
Can I make this without sugar?
Yes. Substitute the granulated sugar with 1 cup of allulose or monk fruit sweetener. The syrup will be slightly thinner, and it might not thicken as much, but the flavor will still be great. I’ve tested this for a keto friend, and she loved it.
How much syrup should I use per cup of coffee?
Start with 2 tablespoons per 8-ounce cup of coffee. Adjust to your taste—some people like 1 tablespoon for a milder flavor, others go up to 3 tablespoons for a dessert-like drink. I always start with 2 and add more if needed. Remember, you can always add, but you can’t take away.
Conclusion
This peppermint mocha syrup is more than just a recipe. It’s the thing that makes your Christmas coffee bar feel special without a ton of effort. It’s the reason guests linger over their mugs, the reason someone asks for the recipe before they leave, the reason you feel like a holiday hero even though you only spent 15 minutes in the kitchen.
I love this recipe because it’s forgiving. You can tweak it, scale it, and make it your own. Maybe you’ll add a pinch of cinnamon like I did by accident. Maybe you’ll go heavy on the peppermint like my sister now insists on. The point is, it’s yours now. Make it for your next gathering. Make it for a quiet morning by the tree. Make it just because.
I’d love to hear how it turns out for you. Drop a comment below and tell me your favorite way to use it—do you stir it into coffee, drizzle it over pancakes, or sneak spoonfuls straight from the jar? No judgment here. And if you have a variation I haven’t tried, share it. We’re all in this together, one mug at a time.
Now go make some syrup. Your coffee is waiting.
Pin This Recipe!
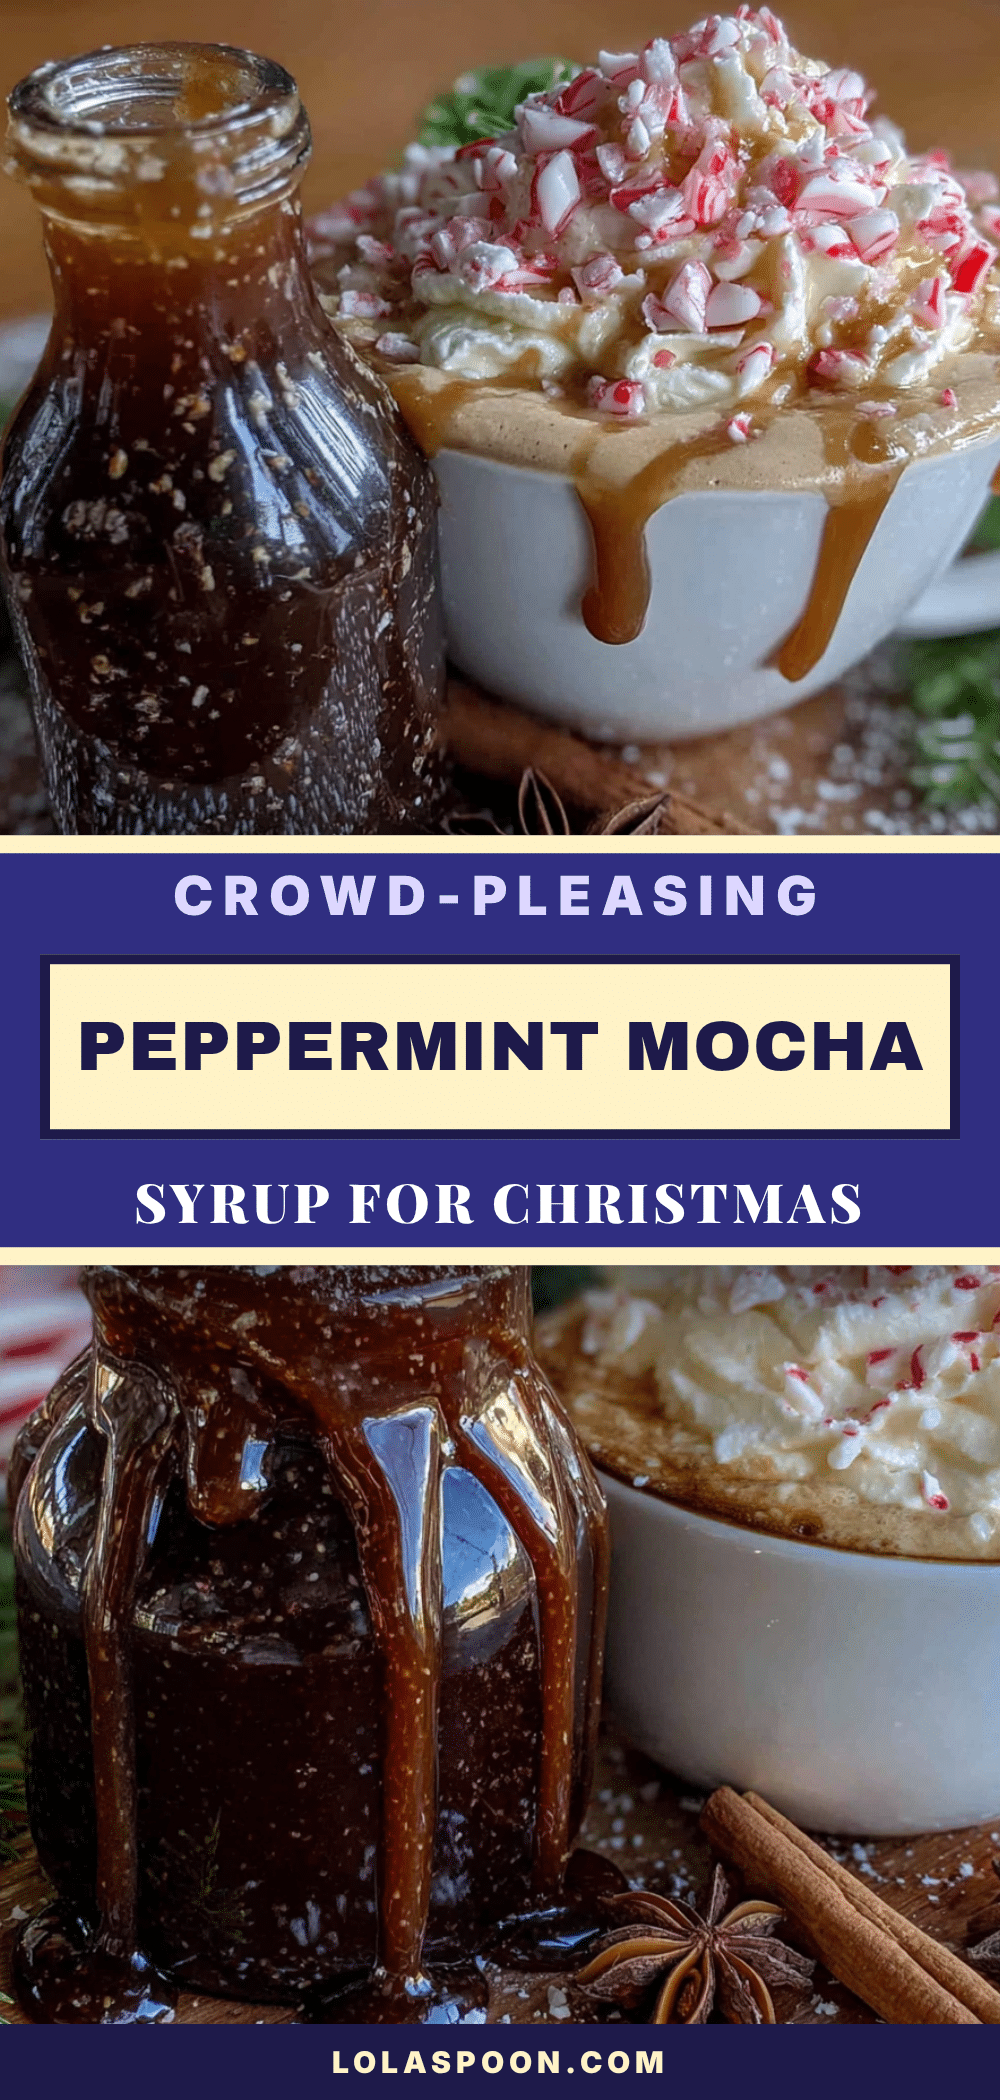
Easy Homemade Peppermint Mocha Syrup Recipe
This rich, smooth peppermint mocha syrup is ridiculously easy to make in under 15 minutes with simple pantry ingredients. Perfect for coffee, hot chocolate, milkshakes, or drizzling over desserts, it’s a crowd-pleaser that even peppermint skeptics will love.
- Prep Time: 5 minutes
- Cook Time: 10 minutes
- Total Time: 15 minutes
- Yield: 16 servings (2 tablespoons per serving) 1x
- Category: Condiment
- Cuisine: American
Ingredients
- 1 cup (200g) granulated sugar
- ½ cup (50g) unsweetened cocoa powder (Dutch-processed recommended)
- 1 cup (240ml) water
- 1 teaspoon (5ml) peppermint extract (pure, not imitation)
- ⅛ teaspoon (0.5g) salt (fine sea salt or table salt)
- ½ teaspoon (2.5ml) vanilla extract (optional)
Instructions
- In a medium saucepan, whisk together the granulated sugar, cocoa powder, and salt until no large lumps remain.
- Pour in the water and whisk vigorously until the mixture is smooth and the cocoa is dissolved, about 30 seconds.
- Place the saucepan over medium heat. Stir occasionally with the whisk. After 3-4 minutes, small bubbles will form around the edges, indicating it’s near a boil.
- Once the mixture reaches a gentle boil (steady simmer, not rolling boil), reduce heat to low and let it simmer for exactly 2 minutes, whisking constantly. The syrup will thicken slightly and become glossy.
- Remove the saucepan from heat and let it sit for 30 seconds to cool slightly. Stir in the peppermint extract and optional vanilla extract. Whisk well.
- Taste the syrup (careful, it’s hot) and adjust peppermint if desired, adding ¼ teaspoon at a time. Remember the flavor will mellow as it cools.
- For a silky smooth syrup, pour through a fine-mesh strainer into a heat-safe glass jar. Let cool completely at room temperature (30-45 minutes) before sealing.
- Once cooled, seal the jar and refrigerate. The syrup will thicken as it chills. Store for up to 3 weeks.
Notes
Use pure peppermint extract, not peppermint oil or imitation flavoring. The syrup tastes even better after sitting overnight in the fridge as flavors meld. For a sugar-free version, substitute granulated sugar with 1 cup of allulose or monk fruit sweetener. To scale up, double or triple the recipe using a larger pot; cooking time remains the same.
Nutrition
- Serving Size: 2 tablespoons
- Calories: 80
- Sugar: 18
- Sodium: 20
- Fat: 0.5
- Carbohydrates: 20
- Fiber: 1
- Protein: 0.5
Keywords: peppermint mocha syrup, homemade coffee syrup, Christmas coffee bar, peppermint syrup recipe, easy syrup, holiday drink