I was standing in the frozen foods aisle last October, staring at a box of party meatballs, when the smell of garlic and oregano hit me — not from the store, but from somewhere deep in my memory. And suddenly I was seven years old at my babysitter Mrs. Kowalski’s kitchen table, watching her pull a baking sheet of the most ridiculous, wonderful things out of the oven. Little meatballs wrapped in strips of bread dough, with tiny olive eyes staring up at me. She called them “monster meatballs,” and I thought she was the cleverest person alive. I’d forgotten about them completely until that moment in the freezer aisle.
Mrs. Kowalski wasn’t a fancy cook. Her kitchen smelled like coffee and butter, and she had this chipped yellow mixing bowl she used for everything. But she understood something about feeding kids — that if you made food look like a little creature, suddenly even the pickiest eater would grab one. I tried to recreate her recipe that very night, and honestly? The first batch was a mess. The dough slid off, the eyes fell out, and I burned my thumb on the baking sheet. But I kept tweaking, because that memory was too good to let go of.
These Crowd-Pleasing Mummy Meatball Sub Bites are my grown-up version of Mrs. Kowalski’s monster meatballs — perfect for Halloween parties when you want to impress without spending all day in the kitchen. They’re basically mini meatball subs wrapped up like mummies, with little candy eyes peeking through the dough strips. Maybe you’ve been there, standing in a party supply aisle wondering how to feed a crowd something that actually tastes good and looks fun. These are your answer.
Why You’ll Love This Recipe
Let me tell you why these mummy meatball bites have become my non-negotiable Halloween party recipe. I’ve tested this at three different gatherings now, and every single time, the tray comes back empty before the punch bowl even gets touched. That’s not a brag — that’s just the truth about how good these little guys are.
- Ready in 30 Minutes : From fridge to table in half an hour flat. You can make these while your guests are walking in the door, and nobody will know you weren’t slaving away all afternoon.
- Simple Ingredients : Frozen meatballs, store-bought pizza dough, marinara sauce, and cheese. No special grocery trip required — you probably have most of this already.
- Perfect for Halloween Parties : They look like little mummies! The visual payoff is huge for almost no effort. Kids love them, adults love them, and they photograph beautifully for social media.
- Crowd-Pleaser : I’ve served these to a group that included three vegetarians (I made a veggie version), two kids under five, and my uncle who “doesn’t do themed food,” and everyone went back for seconds.
- Unbelievably Delicious : The combination of juicy meatball, melted mozzarella, tangy marinara, and buttery golden dough is pure comfort food magic. It’s like a sloppy joe and a pizza had a baby that dressed up for Halloween.
What makes this recipe different from every other Halloween appetizer out there? It’s the texture. Most themed party food is dry or falls apart, but these bites have a perfect ratio of soft bread, gooey cheese, and juicy meatball. I figured out that brushing the dough with garlic butter before baking gives you that golden, flaky crust that makes people close their eyes after the first bite. It’s comfort food reimagined — festive enough for a party, but satisfying enough that nobody feels like they’re eating a gimmick.
What Ingredients You Will Need
This recipe uses simple, store-bought ingredients to create something that looks way more complicated than it actually is. Here’s what you’ll need to grab:
For the Mummy Bites
- 1 package (about 24) frozen fully cooked Italian-style meatballs (I prefer Rosina or Aidells for consistent texture)
- 1 can (13.8 oz) refrigerated pizza dough (Pillsbury classic crust works perfectly — don’t get the thin crust version)
- 12 slices provolone or mozzarella cheese, cut into quarters (provolone melts smoother; mozzarella gives more stretch)
- 1 cup marinara sauce, plus extra for dipping (Raos or Victoria are my go-to brands for clean flavor)
- 48 candy eyeballs (Wilton brand holds up best during baking — the generic ones sometimes melt into puddles)
For the Garlic Butter Wash

- 3 tablespoons unsalted butter, melted
- 2 cloves garlic, minced (or 1 teaspoon garlic powder if you’re in a rush)
- 1 teaspoon dried parsley
- 1/4 teaspoon salt
Substitution Notes
- Meatballs : Use plant-based frozen meatballs for a vegetarian version. I’ve tested this with Impossible meatballs and they work great — just make sure they’re fully cooked before wrapping.
- Dough : Homemade pizza dough works if you have it, but the canned stuff is more forgiving for this application. Gluten-free pizza dough also works, though it tears more easily.
- Cheese : Dairy-free mozzarella shreds can replace the sliced cheese. Daiya brand melts decently, but you won’t get quite the same stretch.
- Candy Eyeballs : If you can’t find them, use small dots of black olive or even black sesame seeds. The candy ones are more fun, but olives give a creepier, more “mummy” vibe.
Equipment Needed
- Baking sheet (half-sheet pan is ideal — 18×13 inches)
- Parchment paper or silicone baking mat
- Sharp knife or pizza cutter
- Pastry brush (a silicone one works best for the garlic butter)
- Small bowl for melted butter
- Measuring spoons
- Cutting board
- Toothpicks (for securing dough if needed)
Honestly, you don’t need anything fancy here. I’ve made these with a butter knife and a fork when my kitchen was in chaos. The silicone mat is worth buying if you make these often — nothing sticks, and cleanup takes ten seconds. If you don’t have a pastry brush, just use a spoon to drizzle the butter over the dough. It won’t be as even, but it still works.
Preparation Method
Let me walk you through this step by step. I’ve made these about eight times now, so I know exactly where things can go wrong and how to fix them.
- Preheat your oven to 400°F (200°C). Line your baking sheet with parchment paper or a silicone mat. Don’t skip this — the cheese will stick and you’ll lose half your mummies to the pan.
- Thaw the meatballs. Place frozen meatballs in a microwave-safe bowl and microwave for 1-2 minutes until thawed but not hot. You want them soft enough to cut easily but firm enough to hold their shape. Drain any excess liquid — wet meatballs make soggy dough.
- Prepare the cheese. Cut each slice of provolone or mozzarella into four equal squares. You’ll need two squares per mummy. Set them aside on a plate.
- Roll out the dough. Open the can of pizza dough and unroll it onto a lightly floured cutting board. Press it into a rough rectangle about 12×8 inches. Don’t stress about perfection — mummies aren’t supposed to look perfect.
- Cut the dough into strips. Using a pizza cutter or sharp knife, cut the dough into 24 long strips, each about 1/2 inch wide. You’ll use two strips per mummy. If the strips are uneven, that’s fine — it actually looks more mummy-like.
- Assemble the mummies. Take one meatball and place two cheese squares on top, pressing gently so they stick. Place the meatball cheese-side up at one end of a dough strip. Wrap the strip around the meatball, slightly overlapping as you go, leaving a small gap at the top for the eyes. Repeat with the second strip, wrapping in the opposite direction for a crisscross effect. Tuck the ends of the dough underneath the meatball. Place on the prepared baking sheet, seam-side down.
- Repeat for all 24 meatballs. Space them about 1 inch apart on the baking sheet. You’ll probably need two batches unless you have a really big oven.
- Make the garlic butter wash. In a small bowl, combine melted butter, minced garlic, dried parsley, and salt. Stir until well mixed. The garlic should be fully incorporated — nobody wants a chunk of raw garlic on their mummy.
- Brush the mummies. Using your pastry brush, gently brush each mummy with the garlic butter mixture. Be thorough but gentle — you don’t want to dislodge the dough strips. This step is what gives them that golden, glossy finish.
- Bake for 12-15 minutes. The mummies are done when the dough is golden brown and the cheese is bubbly and slightly browned in spots. Keep an eye on them after 12 minutes — ovens vary, and you don’t want burnt mummies.
- Add the eyes. Remove from the oven and let cool for 2 minutes. While still warm, press two candy eyeballs into the gap you left at the top of each mummy. Press gently but firmly — they need to stick to the warm cheese. If the cheese has cooled too much, the eyes won’t stay.
- Serve immediately. Arrange on a platter with warm marinara sauce for dipping. Watch them disappear.
Pro tip from my third batch disaster : Don’t overcrowd the baking sheet. I tried to fit all 24 on one pan and the dough steamed instead of crisping. Give them room to breathe!
Cooking Tips & Techniques
I learned most of these the hard way, so you don’t have to. Here’s what I wish someone had told me before my first attempt:
The dough temperature matters. Cold dough is harder to work with and tears easily. Let the can sit on the counter for 10 minutes before opening. If you’re using homemade dough, let it come to room temperature first. Warm dough stretches more evenly and wraps around the meatballs without fighting you.
Don’t over-wrap. I got too enthusiastic with my first batch and wrapped each meatball in four strips of dough. They looked like dough balls with eyes. Two strips per meatball is the sweet spot — enough to look like bandages, but leaving enough meatball exposed to actually taste the meat.
The cheese placement matters. Put the cheese on top of the meatball before wrapping, not underneath. I tried it both ways, and putting it on top ensures the cheese melts outward and creates that nice little window for the eyes. Underneath, the cheese just melts into a puddle on the baking sheet.
Timing is everything. These are best served within 15 minutes of coming out of the oven. The dough gets less crispy as it sits, and the candy eyes can slide off if the cheese cools too much. If you’re hosting a party, assemble them ahead of time on the baking sheet, cover with plastic wrap, and refrigerate for up to 4 hours. Then just brush with butter and bake when guests arrive.
My biggest failure : I once tried to make these with homemade meatballs from scratch. The meatballs were too soft and fell apart during wrapping. Stick with frozen — they’re firmer and hold their shape better. This is not the recipe to go gourmet on.
Variations & Adaptations
I’ve played around with this recipe more than I’d like to admit. Here are my favorite variations:
Spicy Mummies : Mix 1/2 teaspoon red pepper flakes into the marinara sauce and use pepper jack cheese instead of provolone. The heat cuts through the richness and gives these a grown-up kick. I made these for a Halloween party where everyone was over 21, and they were gone in 10 minutes.
Breakfast Mummies : Swap the meatballs for fully cooked breakfast sausage links, cut into 1-inch pieces. Use cheddar cheese and serve with maple syrup for dipping instead of marinara. I made these for a Halloween morning brunch and my kids still talk about them.
Veggie Mummies : Replace meatballs with large button mushrooms (stemmed) or cooked falafel balls. Brush the mushrooms with olive oil and roast at 400°F for 5 minutes before wrapping. These are surprisingly good — the mushrooms get juicy and the dough stays crispy.
Mini Mummies : Use cocktail-sized meatballs (about 1/2 inch diameter) and cut the dough strips even thinner, about 1/4 inch wide. Bake for 8-10 minutes instead of 12-15. These are perfect for kids’ parties where regular-sized ones might be too filling.
Pizza Mummies : Before wrapping, dip each meatball in extra marinara sauce. Use mozzarella cheese and sprinkle dried oregano on top before baking. It turns them into mini pizza bites dressed as mummies — a total crowd-pleaser.
Serving & Storage Suggestions
Here’s how to make these the star of your Halloween spread:
Serving Temperature : Serve warm, straight from the oven. The cheese should be stretchy and the dough should be golden and crisp. If you’re transporting them, wrap the baking sheet in foil and a kitchen towel — they’ll stay warm for about 20 minutes.
Presentation Ideas : Arrange the mummies on a black platter or a dark cutting board to make the white dough pop. Serve with a small bowl of warm marinara sauce in the center. Add a few fake spider webs around the platter for extra Halloween flair. I put little plastic spiders on the toothpicks I use for dipping, and people lose their minds.
What to Serve Alongside : These pair beautifully with a simple green salad with balsamic vinaigrette (the acidity cuts the richness), roasted broccoli, or a bowl of creamy tomato soup. For a Halloween party, I serve them with deviled eggs dyed green and “witches’ fingers” (breadsticks with almond nails).
Storage : Leftover mummies (if you have any!) can be stored in an airtight container in the refrigerator for up to 3 days. The dough will soften, but they’re still delicious cold or reheated.
Reheating : The best way to reheat is in a 350°F oven for 5-7 minutes. The microwave works in a pinch (30 seconds), but the dough will be soft rather than crispy. If you’re reheating for a party, pop them under the broiler for 1-2 minutes to recrisp the dough — watch carefully so the candy eyes don’t melt.
Flavor Development : Honestly, these are best fresh. The magic is in the contrast between warm, crispy dough and juicy meatball. If you make them ahead, assemble but don’t bake, then bake fresh when ready to serve.
Nutritional Information & Benefits
Per serving (2 mummy bites): Approximately 380 calories, 22g protein, 28g carbohydrates, 18g fat, 8g saturated fat, 55mg cholesterol, 780mg sodium, 2g fiber, 6g sugar.
These aren’t health food, but they’re not as bad as you might think. The protein from the meatballs and cheese helps keep you full, and the marinara sauce provides a serving of vegetables (yes, tomatoes count!). If you’re watching sodium, look for low-sodium meatballs and marinara — you can cut the sodium by about 30% without sacrificing flavor.
The garlic butter wash adds minimal calories but big flavor. Garlic has been shown to support immune health, which is fitting for a Halloween recipe — maybe it’ll ward off more than vampires!
Dietary Considerations : This recipe contains gluten (pizza dough), dairy (cheese, butter), and soy (often in frozen meatballs). For a dairy-free version, use dairy-free cheese and olive oil instead of butter. For gluten-free, use gluten-free pizza dough. Always check labels if cooking for someone with allergies.
Conclusion
These Crowd-Pleasing Mummy Meatball Sub Bites are the Halloween recipe you’ve been looking for — fun enough to impress your Instagram followers, delicious enough to actually satisfy your hungry guests, and simple enough that you’re not stuck in the kitchen while everyone else is having fun. Every time I make them, I think about Mrs. Kowalski and her chipped yellow bowl, and I smile knowing that something so simple can bring so much joy.
I’d love to hear how yours turn out! Did you try a variation? Did your kids help wrap the mummies? Did the candy eyes stay put? Drop a comment below and let me know — I read every single one, and your tips might help another reader nail this recipe on their first try.
And hey, if you’re looking for more Halloween party ideas, my spooky stuffed bell peppers and ghost pizza bites are always a hit too. Happy Halloween, and happy cooking!
Frequently Asked Questions
Can I make these ahead of time for a party?
Absolutely! Assemble the mummies completely on the baking sheet, cover tightly with plastic wrap, and refrigerate for up to 4 hours. When you’re ready to serve, brush with garlic butter and bake as directed. Add 2 minutes to the baking time if they’re going in cold from the fridge.
What if I can’t find candy eyeballs?
No problem! You can use small slices of black olive, black sesame seeds, or even tiny dots of black food coloring on the cheese. The candy eyeballs are fun, but the mummies still look great without them. Just make sure whatever you use is edible and secure.
Can I freeze these after baking?
Yes, but the texture won’t be quite the same. Let them cool completely, then freeze in a single layer on a baking sheet. Once frozen, transfer to a freezer bag. Reheat in a 350°F oven for 10-12 minutes straight from frozen. The dough will be softer than fresh, but they’re still tasty.
How do I keep the dough from getting soggy?
Make sure your meatballs are fully thawed and patted dry before wrapping. Any excess moisture will steam the dough instead of letting it crisp. Also, don’t overcrowd the baking sheet — give each mummy at least an inch of space for air to circulate.
Can I use homemade meatballs?
You can, but I don’t recommend it for this recipe. Homemade meatballs tend to be softer and can fall apart during wrapping. If you want to use homemade, make them a day ahead and refrigerate them well — cold, firm meatballs hold their shape much better. Also, make sure they’re fully cooked before wrapping, because the baking time is short.
Pin This Recipe!
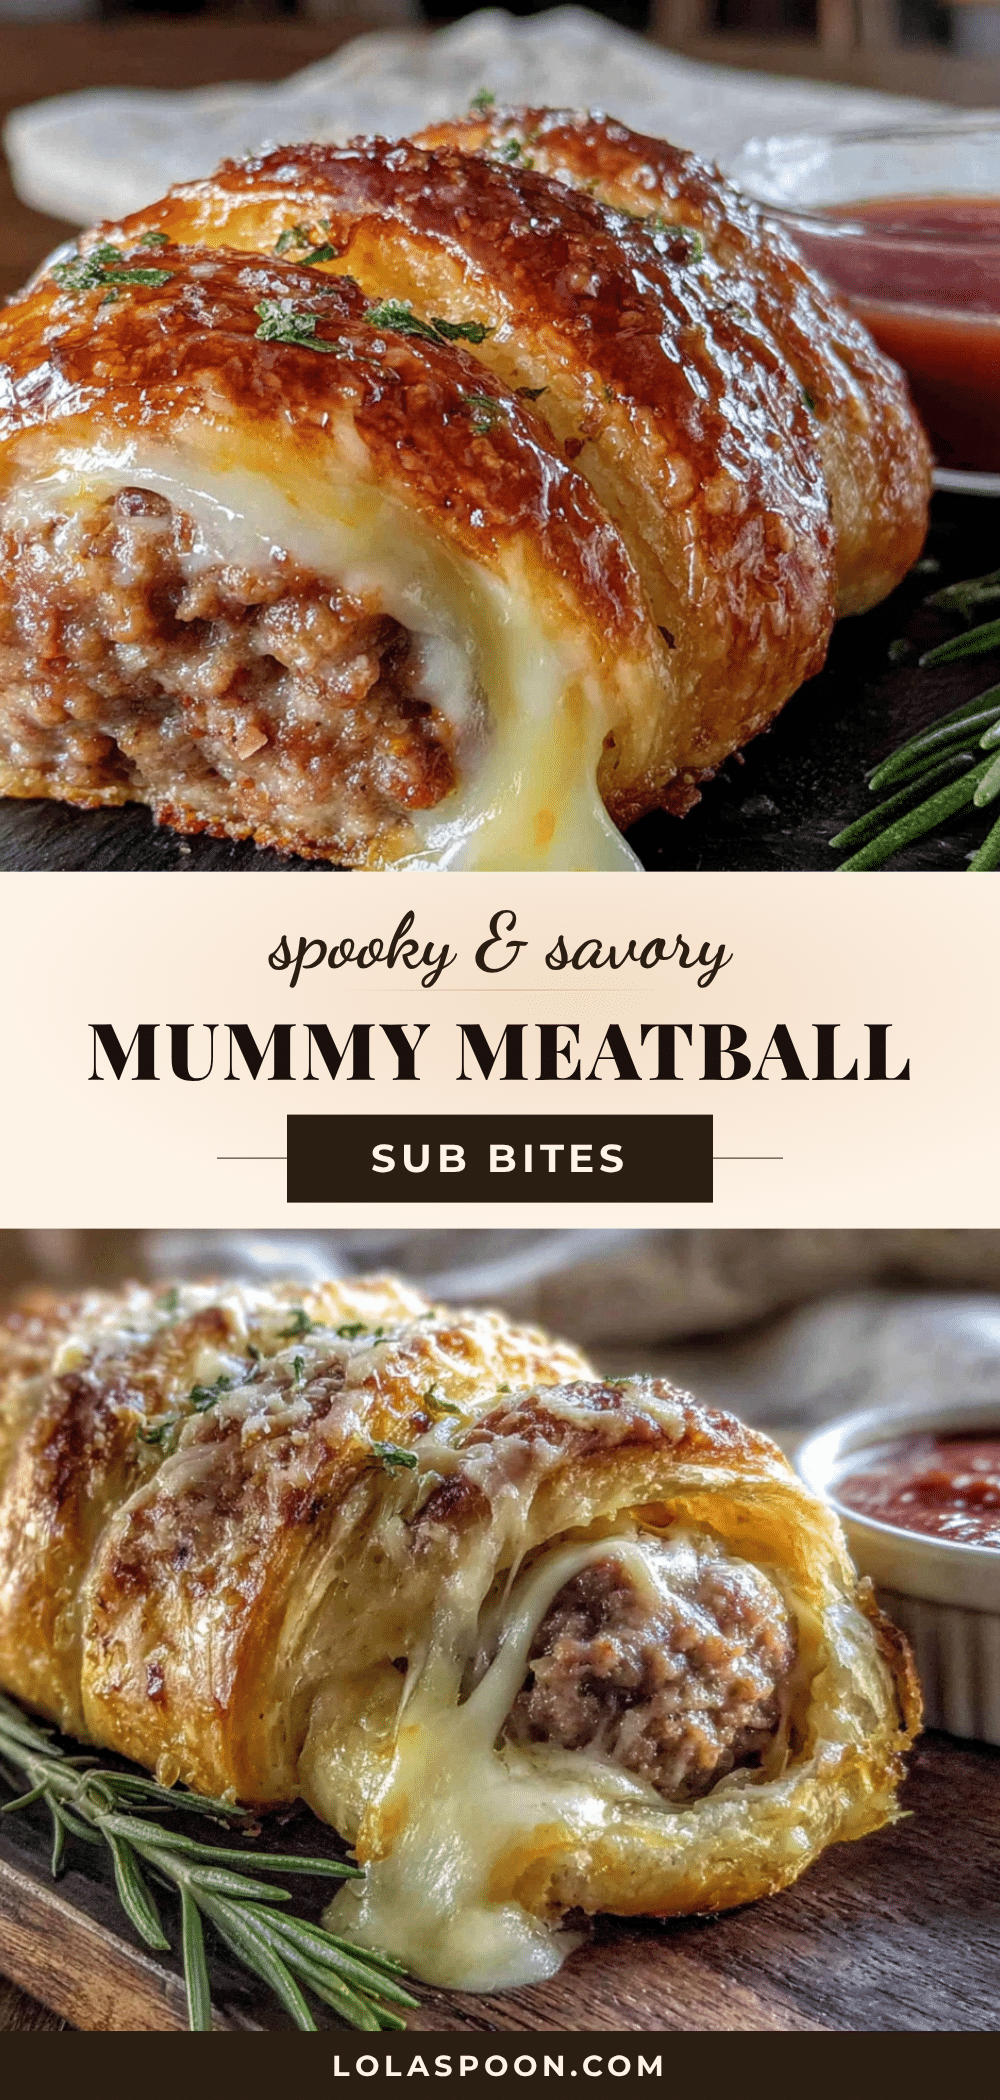
Halloween Mummy Meatball Sub Bites: Easy 30-Min Recipe

These Crowd-Pleasing Mummy Meatball Sub Bites are mini meatball subs wrapped like mummies, with candy eyes peeking through the dough strips. Ready in 30 minutes, they’re perfect for Halloween parties and guaranteed to disappear fast.
- Prep Time: 15 minutes
- Cook Time: 15 minutes
- Total Time: 30 minutes
- Yield: 12 servings (2 mummy bites per serving) 1x
- Category: Appetizer
- Cuisine: American
Ingredients
- 1 package (about 24) frozen fully cooked Italian-style meatballs
- 1 can (13.8 oz) refrigerated pizza dough
- 12 slices provolone or mozzarella cheese, cut into quarters
- 1 cup marinara sauce, plus extra for dipping
- 48 candy eyeballs
- 3 tablespoons unsalted butter, melted
- 2 cloves garlic, minced (or 1 teaspoon garlic powder)
- 1 teaspoon dried parsley
- 1/4 teaspoon salt
Instructions
- Preheat your oven to 400°F (200°C). Line your baking sheet with parchment paper or a silicone mat.
- Thaw the meatballs: Place frozen meatballs in a microwave-safe bowl and microwave for 1-2 minutes until thawed but not hot. Drain any excess liquid.
- Prepare the cheese: Cut each slice of provolone or mozzarella into four equal squares. You’ll need two squares per mummy.
- Roll out the dough: Open the can of pizza dough and unroll it onto a lightly floured cutting board. Press it into a rough rectangle about 12×8 inches.
- Cut the dough into strips: Using a pizza cutter or sharp knife, cut the dough into 24 long strips, each about 1/2 inch wide.
- Assemble the mummies: Take one meatball and place two cheese squares on top, pressing gently. Place the meatball cheese-side up at one end of a dough strip. Wrap the strip around the meatball, slightly overlapping, leaving a small gap at the top for the eyes. Repeat with the second strip, wrapping in the opposite direction for a crisscross effect. Tuck the ends underneath. Place on the prepared baking sheet, seam-side down.
- Repeat for all 24 meatballs. Space them about 1 inch apart on the baking sheet.
- Make the garlic butter wash: In a small bowl, combine melted butter, minced garlic, dried parsley, and salt. Stir until well mixed.
- Brush the mummies: Using a pastry brush, gently brush each mummy with the garlic butter mixture.
- Bake for 12-15 minutes, until the dough is golden brown and the cheese is bubbly.
- Add the eyes: Remove from the oven and let cool for 2 minutes. While still warm, press two candy eyeballs into the gap at the top of each mummy.
- Serve immediately with warm marinara sauce for dipping.
Notes
Don’t overcrowd the baking sheet; give each mummy at least an inch of space. These are best served within 15 minutes of coming out of the oven. For make-ahead, assemble on the baking sheet, cover with plastic wrap, and refrigerate for up to 4 hours, then brush with butter and bake when ready.
Nutrition
- Serving Size: 2 mummy bites
- Calories: 380
- Sugar: 6
- Sodium: 780
- Fat: 18
- Saturated Fat: 8
- Carbohydrates: 28
- Fiber: 2
- Protein: 22
Keywords: Halloween, mummy, meatball, sub, bites, appetizer, party, 30-minute, easy, kid-friendly


