My husband had claimed to hate green bean casserole for a solid decade. Ten years of wrinkling his nose at the mention of it, of pushing his chair back from the Thanksgiving table a little too fast when the dish came my way. “It’s just… soggy,” he’d say. “And weirdly mushy.” I never argued, honestly. I kind of agreed with him. The classic version, with its gloppy sauce and canned everything, never did much for me either. It always felt like a side dish that was just… there. Taking up space on an already crowded holiday table.
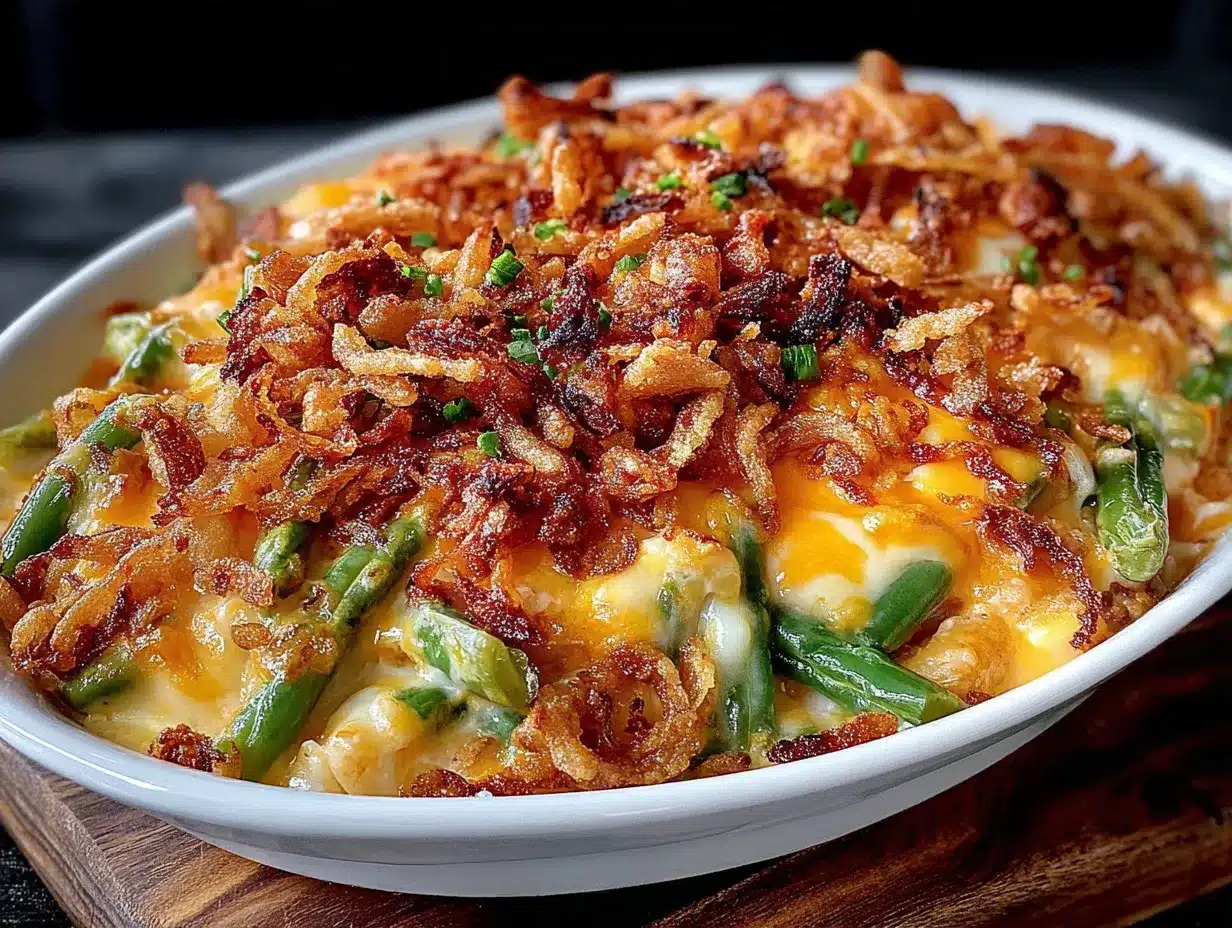
Then, last November, I decided to mess with a good thing. Or, I guess, a not-so-good thing. I was determined to make a version that would actually get eaten. I swapped the canned soup for a real, from-scratch cheese sauce, used fresh green beans instead of the limp canned ones, and piled on those crispy fried onions until they were practically falling off the plate. I didn’t tell him what I was doing. I just made it, set it on the table next to the turkey, and waited. He took a tiny, skeptical spoonful. Then another. Then I caught him—I mean, I literally caught him—sneaking back into the kitchen after dinner to eat the last few bites straight from the baking dish. He was leaning against the counter, fork in hand, looking guilty and delighted all at once. “Okay,” he mumbled, mouth full. “This is different.” That was the moment I knew I had something special. This isn’t your grandma’s green bean casserole (sorry, Grandma). This is the one that converts the skeptics, pleases the picky eaters, and makes everyone at the table ask for seconds before the turkey’s even been carved.
Maybe you’ve got a picky eater or two at your table. Maybe you’re the one who’s been burned by a watery, bland casserole before. I get it. This recipe is for you. It’s for the family dinner that needs a win, and for the cook who wants a side dish that actually shines. Let’s make it.
Why You’ll Love This Kid-Approved Cheesy Green Bean Casserole with Crispy Onions
This isn’t just another recipe to add to your Thanksgiving lineup. It’s the one that will have your kids asking for leftovers for a week. I’ve tested this version more times than I can count, tweaking the cheese-to-bean ratio and the crunch factor until it hit that sweet spot of creamy, cheesy, and crispy. It’s family-approved, budget-friendly, and honestly, it’s the kind of dish that makes you feel like a kitchen genius with very little actual effort.
- Quick & Easy: From start to table in about 45 minutes, most of which is hands-off oven time. Perfect for a busy weeknight or a chaotic holiday morning.
- Simple Ingredients: No canned soup, no fancy cheese. You likely have the cheddar, milk, and butter in your fridge right now.
- Perfect for Thanksgiving & Weeknights: It’s elegant enough for the holiday table but simple enough for a Tuesday night dinner alongside some roast chicken.
- Crowd-Pleaser: This is the dish that gets the “Can I have the recipe?” texts. Kids love the cheesy pull, adults love the real-food flavor. It’s a guaranteed win.
- Unbelievably Delicious: The secret is a sharp cheddar béchamel sauce that coats every single bean. It’s creamy without being heavy, and the crispy onion topping adds that salty, crunchy contrast that makes everyone go back for more.
What makes this different from the rest? It’s the cheese sauce. I don’t use a can of cream of mushroom soup. Instead, I make a quick roux and whisk in whole milk and a generous pile of sharp cheddar. It takes an extra five minutes, and the payoff is a casserole that tastes rich, homemade, and nothing like the gloppy stuff from a can. It’s comfort food that feels a little bit fancy, but stays completely down-to-earth. It’s the kind of dish that makes you close your eyes after the first bite, and that’s a feeling worth sharing with your family.
What Ingredients You Will Need
This recipe uses simple, wholesome ingredients to deliver that creamy, cheesy, and crunchy texture without any fuss. Most of these are pantry staples, which makes this a great last-minute side dish for any occasion.
- Fresh Green Beans: 1 ½ pounds, trimmed and cut into 2-inch pieces. Fresh beans give you that crisp-tender bite that canned beans just can’t match. I prefer using haricots verts (thin French green beans) when I can find them, but standard green beans work perfectly too.
- Unsalted Butter: 3 tablespoons. This is the base of our roux. Using unsalted butter lets you control the salt level in the final dish.
- All-Purpose Flour: 3 tablespoons. This thickens the cheese sauce to that perfect, creamy consistency.
- Whole Milk: 2 cups. Whole milk gives the sauce a richer texture, but 2% will work in a pinch. Avoid skim milk, as the sauce may turn out thinner.
- Sharp Cheddar Cheese: 2 cups, freshly shredded. Please, for the love of all things cheesy, shred your own cheese from a block. Pre-shredded cheese has anti-caking agents that prevent it from melting smoothly, leaving you with a grainy sauce. I recommend a good sharp cheddar like Tillamook or Cabot for the best flavor.
- Salt: ½ teaspoon, plus more for the blanching water.
- Black Pepper: ¼ teaspoon, freshly ground.
- Garlic Powder: ½ teaspoon. This adds a subtle savory note without being overpowering. It’s the secret to making this kid-friendly.
- Ground Nutmeg: A pinch (optional, but recommended). This is an old-school trick that brings out the nuttiness of the cheese. Don’t skip it if you have it on hand.
- Crispy Fried Onions: 1 ½ cups, divided. I use the classic French’s brand for that reliable crunch. You’ll mix half into the casserole and sprinkle the rest on top.
Ingredient Substitution Notes
If you need to make this gluten-free, use a 1:1 gluten-free all-purpose flour blend in the roux. For a dairy-free version, substitute the butter with a plant-based butter, use unsweetened oat milk or cashew milk, and swap the cheddar for a high-quality dairy-free shredded cheese. Just know the texture will be slightly different—good, but different. If you’re in a serious pinch, frozen green beans (thawed and patted dry) can replace fresh, but the texture will be softer.
Equipment Needed
You don’t need a lot of fancy gear for this one. Here’s what you’ll need:
- Large Pot: For blanching the green beans. Any 5- to 6-quart pot will do.
- Large Bowl: Filled with ice water for shocking the beans after blanching.
- Medium Saucepan: For making the cheese sauce. A heavy-bottomed saucepan works best to prevent scorching.
- Whisk: Essential for a lump-free roux and smooth cheese sauce. A silicone whisk is great for nonstick pans.
- 9×13-inch Baking Dish: A standard casserole dish works perfectly. You can also use a 2.5-quart oval baking dish.
- Cheese Grater: For shredding your own cheese. A box grater is my go-to, but a food processor with a shredding disc works in a flash.
- Cutting Board and Chef’s Knife: For trimming the green beans.
I’ve made this in a disposable aluminum pan for potlucks, and it works just fine. No need to buy anything special. If you don’t have a whisk, a fork will work in a pinch, though you’ll need to stir a bit more vigorously to avoid lumps.
Preparation Method
Let’s walk through this step-by-step. I’ll tell you exactly what to look for so you nail it on the first try.
- Preheat and Prep: Preheat your oven to 375°F (190°C). Bring a large pot of salted water to a rolling boil. While the water heats up, trim the ends off your green beans and cut them into 2-inch pieces. Fill a large bowl with ice water and set it nearby.
- Blanch the Green Beans: Drop the green beans into the boiling water and cook for exactly 3 minutes. You want them bright green and crisp-tender. If you cook them longer, they’ll get mushy in the oven. Drain the beans in a colander, then immediately plunge them into the ice water bath. This stops the cooking process and locks in that vibrant color. Let them sit for 2-3 minutes, then drain them well and pat them dry with a clean kitchen towel. Set aside.
- Make the Roux: In a medium saucepan over medium heat, melt the 3 tablespoons of butter. Once it’s fully melted and bubbling, add the 3 tablespoons of flour. Whisk constantly for about 1 minute. You’re looking for a smooth, golden paste that smells slightly nutty. Don’t let it brown too much—just cook off the raw flour taste.
- Whisk in the Milk: Slowly pour in the 2 cups of whole milk, whisking constantly to prevent lumps. Keep whisking until the mixture is smooth and starts to thicken, about 3-4 minutes. It should be thick enough to coat the back of a spoon. If it seems too thick, add a splash more milk.
- Add the Cheese: Reduce the heat to low. Add the 2 cups of freshly shredded sharp cheddar cheese, one handful at a time, stirring until each addition is fully melted before adding the next. Stir in the ½ teaspoon of salt, ¼ teaspoon of black pepper, ½ teaspoon of garlic powder, and a pinch of nutmeg if using. Taste the sauce—it should be rich, cheesy, and well-seasoned. Remember, the beans and onions will absorb some of the salt, so don’t be shy.
- Combine Everything: In a large bowl, combine the blanched green beans, the cheese sauce, and ¾ cup of the crispy fried onions. Gently fold everything together until the beans are evenly coated. The sauce will be thick and luscious. Transfer the mixture to your greased 9×13-inch baking dish and spread it into an even layer.
- Bake: Bake the casserole uncovered for 20 minutes. After 20 minutes, remove it from the oven and sprinkle the remaining ¾ cup of crispy fried onions evenly over the top. Return the dish to the oven and bake for another 10-15 minutes, until the casserole is bubbly around the edges and the onions are golden and crunchy.
- Rest and Serve: Let the casserole rest for 5 minutes before serving. This allows the sauce to set up a little, making it easier to serve without turning into a soupy mess. The top should be crispy, the inside creamy, and the beans perfectly tender.
Pro Tip: If you’re making this ahead for a holiday, you can assemble the entire casserole (without the top layer of onions) and refrigerate it for up to 24 hours. When you’re ready to bake, add an extra 10 minutes to the initial bake time, then add the onions and finish baking.
Cooking Tips & Techniques
I’ve made this casserole at least a dozen times, and I’ve learned a few things the hard way. Let me save you the trouble.
Don’t Overcook the Beans: This is the number one mistake. Blanching for exactly 3 minutes keeps them crisp. If you boil them longer, they’ll turn to mush in the oven. I once got distracted by a phone call and left them in for 6 minutes. The result was a sad, limp casserole that even the cheese sauce couldn’t save.
Shred Your Own Cheese: I know it’s tempting to buy the bagged shreds. I’ve done it. But the anti-caking agents in pre-shredded cheese (usually potato starch and cellulose) prevent it from melting into a smooth sauce. You’ll end up with a grainy, clumpy mess. Spend the 2 minutes shredding a block of cheddar. Your taste buds will thank you.
Toast the Onions Separately for Extra Crunch: If you want the ultimate crispy topping, spread the remaining onions on a baking sheet and toast them in the oven for 3-4 minutes while the casserole rests. This revives their crunch and ensures they stay crispy even after being on top of a hot, steamy casserole.
Season the Water Generously: When blanching the beans, the water should taste like the sea. This is your only chance to season the beans from the inside out. If the water is under-salted, the beans will taste flat no matter how much cheese sauce you add.
Variations & Adaptations
One of the best things about this recipe is how flexible it is. Here are a few ways to make it your own.
- Add Protein: Turn this into a main dish by adding 2 cups of shredded rotisserie chicken or cooked, crumbled bacon. Stir it in with the green beans before baking. It’s a great way to use up leftover Thanksgiving turkey.
- Make It a One-Pan Meal: Add 1 cup of cooked quinoa or rice to the mixture. It stretches the casserole further and adds a nice texture contrast. My kids love this version for a quick weeknight dinner.
- Spice It Up: For a little heat, add ¼ teaspoon of cayenne pepper or a pinch of red pepper flakes to the cheese sauce. It doesn’t make it spicy, just gives it a warm, subtle kick that adults will appreciate.
- Mushroom Lover’s Version: Sauté 8 ounces of sliced cremini mushrooms in a little butter until golden, then stir them into the casserole. This adds an earthy, savory depth that pairs beautifully with the cheese sauce.
- Dairy-Free Adaptation: I’ve tested this with oat milk and a plant-based cheddar shred, and it works surprisingly well. Use a dairy-free butter for the roux, unsweetened oat milk for the sauce, and a good quality vegan cheddar. The texture is slightly less creamy, but the flavor is still fantastic.
Serving & Storage Suggestions
This casserole is best served hot, straight from the oven. Let it rest for 5 minutes so the sauce sets, then scoop it onto plates alongside your main dish. It pairs beautifully with roast turkey, baked ham, or even a simple roast chicken. For a holiday spread, I love serving it with mashed potatoes and cranberry sauce.
Storage: Leftovers (if you have any!) keep well in an airtight container in the refrigerator for up to 4 days. The crispy onions will soften over time, but the flavor is still fantastic.
Reheating: To reheat, place the casserole in a 350°F oven for 10-15 minutes, or until warmed through. You can also reheat individual portions in the microwave for 1-2 minutes. If you want to revive some of the crunch, sprinkle a few fresh crispy onions on top before reheating.
Freezing: You can freeze the assembled, unbaked casserole (without the top layer of onions) for up to 3 months. Wrap the dish tightly in plastic wrap and then foil. To bake, thaw overnight in the refrigerator, then follow the baking instructions, adding an extra 10 minutes to the initial bake time.
I’ve found that the flavors actually meld together beautifully after a day in the fridge. The second-day casserole is even more flavorful, though the texture is softer. It’s a great make-ahead option for a busy holiday week.
Nutritional Information & Benefits
Here’s the nutritional breakdown for one serving (about 1 cup), based on 8 servings:
| Nutrient | Amount Per Serving |
|---|---|
| Calories | 285 |
| Total Fat | 18g |
| Saturated Fat | 10g |
| Cholesterol | 50mg |
| Sodium | 520mg |
| Total Carbohydrates | 18g |
| Dietary Fiber | 4g |
| Sugars | 7g |
| Protein | 14g |
| Calcium | 320mg |
| Vitamin A | 15% DV |
| Vitamin C | 20% DV |
Green beans are a great source of fiber, vitamin C, and vitamin K. The cheese provides calcium and protein, making this a more balanced side dish than you might expect. It’s not a health food, but it’s a real-food dish that fits into a balanced diet. If you’re watching your sodium, you can reduce the salt in the cheese sauce and use low-sodium fried onions.
Frequently Asked Questions
Can I use frozen green beans instead of fresh?
Yes, you can. Thaw the frozen beans completely and pat them dry with a paper towel to remove excess moisture. Skip the blanching step and add them directly to the cheese sauce. The texture will be a bit softer, but the flavor will still be great.
Why did my cheese sauce turn out grainy?
This usually happens when you use pre-shredded cheese or overheat the sauce. Always shred your own cheese from a block, and keep the heat on low when melting it into the sauce. High heat can cause the cheese to separate and become grainy.
Can I make this casserole ahead of time?
Absolutely. Assemble the casserole completely (without the top layer of onions) and refrigerate it for up to 24 hours. When ready to bake, add 10 minutes to the initial bake time, then add the onions and finish as directed.
What can I use instead of fried onions?
If you can’t find crispy fried onions, you can make your own by tossing thinly sliced onions in flour and shallow-frying them until golden. Alternatively, crushed buttery crackers (like Ritz) mixed with a little melted butter make a delicious, crunchy topping.
Is this recipe gluten-free?
Not as written, but it’s easy to adapt. Use a 1:1 gluten-free all-purpose flour blend in the roux, and make sure your crispy fried onions are labeled gluten-free (some brands contain wheat flour). The rest of the ingredients are naturally gluten-free.
Conclusion
This cheesy green bean casserole is proof that you don’t need a can of soup to make a side dish that everyone actually wants to eat. It’s creamy, crunchy, cheesy, and just the right amount of indulgent. Whether you’re serving it at a holiday feast or a simple Tuesday dinner, it’s the kind of recipe that makes you look like you spent hours in the kitchen—when really, it comes together in under an hour.
I love this recipe because it takes a classic that often gets overlooked and makes it the star of the table. It’s the dish that gets scraped clean, the one people ask for year after year. And honestly? It makes me happy every single time I make it.
I’d love to hear how this turns out for you! Did your picky eaters love it? Did you try one of the variations? Drop a comment below and let me know. Don’t forget to share this recipe with a friend who needs a new Thanksgiving side dish—and pin it to your holiday board for later. Happy cooking, friends!
Pin This Recipe!

Kid-Approved Cheesy Green Bean Casserole Easy Thanksgiving Recipe

This cheesy green bean casserole swaps canned soup for a from-scratch cheese sauce, uses fresh green beans, and piles on crispy fried onions for a creamy, crunchy, and utterly delicious side dish that converts even the biggest skeptics.
- Prep Time: 15 minutes
- Cook Time: 30 minutes
- Total Time: 45 minutes
- Yield: 8 servings 1x
- Category: Side Dish
- Cuisine: American
Ingredients
- 1 ½ pounds fresh green beans, trimmed and cut into 2-inch pieces
- 3 tablespoons unsalted butter
- 3 tablespoons all-purpose flour
- 2 cups whole milk
- 2 cups sharp cheddar cheese, freshly shredded
- ½ teaspoon salt
- ¼ teaspoon black pepper, freshly ground
- ½ teaspoon garlic powder
- A pinch of ground nutmeg (optional)
- 1 ½ cups crispy fried onions, divided
Instructions
- Preheat oven to 375°F (190°C). Bring a large pot of salted water to a boil. Fill a large bowl with ice water.
- Blanch the green beans in boiling water for exactly 3 minutes until bright green and crisp-tender. Drain and immediately transfer to ice water bath for 2-3 minutes. Drain well and pat dry.
- In a medium saucepan over medium heat, melt butter. Add flour and whisk constantly for 1 minute until smooth and golden.
- Slowly pour in milk, whisking constantly, and cook for 3-4 minutes until thickened enough to coat the back of a spoon.
- Reduce heat to low. Add shredded cheddar cheese one handful at a time, stirring until melted. Stir in salt, pepper, garlic powder, and nutmeg (if using).
- In a large bowl, combine blanched green beans, cheese sauce, and ¾ cup crispy fried onions. Fold gently until evenly coated. Transfer to a greased 9×13-inch baking dish.
- Bake uncovered for 20 minutes. Remove from oven, sprinkle remaining ¾ cup crispy fried onions on top, and bake for another 10-15 minutes until bubbly and golden.
- Let rest for 5 minutes before serving.
Notes
For make-ahead: assemble casserole without top layer of onions, refrigerate up to 24 hours. Add 10 minutes to initial bake time, then add onions and finish. For extra crunchy topping, toast remaining onions on a baking sheet for 3-4 minutes while casserole rests. Shred cheese from a block for smoothest sauce.
Nutrition
- Serving Size: 1 cup
- Calories: 285
- Sugar: 7
- Sodium: 520
- Fat: 18
- Saturated Fat: 10
- Carbohydrates: 18
- Fiber: 4
- Protein: 14
Keywords: green bean casserole, cheesy green bean casserole, Thanksgiving side dish, kid-friendly, easy green bean casserole, from scratch, crispy onions


