The Friendsgiving potluck was in six hours and I’d completely forgotten. Everyone else would be bringing their signature dishes—David’s legendary mac and cheese, Sarah’s show-stopping pecan pie, and Michelle’s slow-cooked brisket that she’d probably started marinating three days ago. I had a single, sad-looking turkey breast in my freezer, a stick of butter, and a sinking feeling in my stomach. I mean, you know that feeling when you’re about to show up empty-handed to a food event? It’s the worst. I frantically scanned my pantry, praying for a miracle. There was dried rosemary from a Christmas gift basket, a jar of garlic that was starting to sprout, and some sad, wilted thyme. Honestly, I almost called to say I was “sick.” But then, in a moment of pure desperation, I decided to just go for it. I threw that butter in a bowl, chopped up every herb I could find, and slathered it all over that turkey breast like my reputation depended on it. Let me tell you, the pan gravy that came out of that ordeal was a total accident—but it was the kind of accident that changes your life. That turkey was so juicy, so flavorful, and that gravy was so silky that people actually asked me for the recipe before they even asked who brought the pie. It was the underdog story of the night, and it’s why I still make this Herb Butter Roasted Turkey Breast with Pan Gravy for every single gathering. It’s my little secret weapon.
Why You’ll Love This Recipe
This isn’t just another turkey recipe—it’s the one that will make you the hero of your next dinner party, potluck, or festive get-together. I’ve tested this method more times than I can count, tweaking the herb ratios and roasting times until it was absolutely foolproof. Here’s why this one is different:
- Quick & Easy: Comes together in under 2 hours, perfect for those moments when you’re hosting and realize you forgot to plan a main dish.
- Simple Ingredients: No fancy grocery trips needed. Butter, herbs, a turkey breast, and pantry staples are all you need.
- Perfect for Hosting: This dish steals the table. It’s impressive enough for a holiday but simple enough for a casual Sunday dinner with friends.
- Crowd-Pleaser: Juicy, flavorful, and always gets rave reviews—even from the folks who claim they “don’t like turkey.”
- Unbelievably Delicious: The herb butter creates a crispy, golden skin while keeping the meat incredibly moist. And that pan gravy? It’s liquid gold.
What makes this recipe stand out is the technique. Instead of just rubbing butter on the outside, you’re going to gently loosen the skin and get that herby goodness right under it. This isn’t just another version—it’s my best version. It’s the kind of recipe that makes you close your eyes after the first bite. Perfect for impressing guests without stress, or turning a simple meal into something memorable.
What Ingredients You Will Need
This recipe uses simple, wholesome ingredients to deliver bold flavor and satisfying texture without the fuss. Most of these are pantry staples or easy to find at any grocery store. Here’s what you’ll need:
For the Herb Butter
- Unsalted butter, softened (½ cup / 1 stick) — (adds richness and helps the skin crisp up)
- Fresh rosemary, finely chopped (1 tablespoon) — (I prefer fresh over dried here for a brighter flavor)
- Fresh thyme leaves (1 tablespoon) — (use lemon thyme if you can find it for a subtle citrus note)
- Fresh sage, finely chopped (1 teaspoon) — (adds that classic Thanksgiving aroma)
- Garlic cloves, minced (3 cloves) — (use a microplane for a paste-like texture)
- Kosher salt (1 teaspoon) — (Diamond Crystal is my go-to for its consistent saltiness)
- Black pepper, freshly ground (½ teaspoon)
- Lemon zest (from 1 lemon) — (this brightens everything up)
For the Turkey
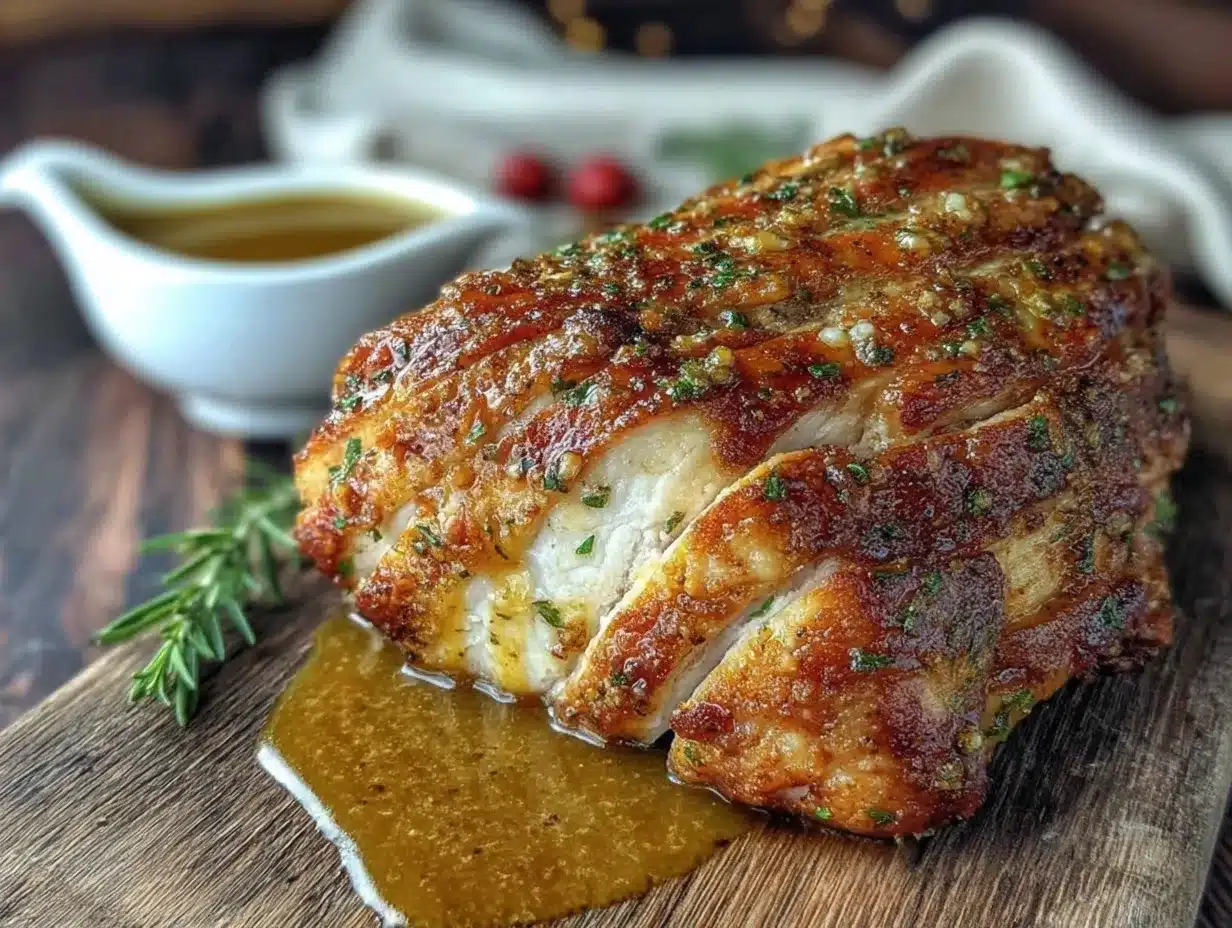
- Bone-in, skin-on turkey breast (4-5 pounds) — (look for one that’s evenly shaped for even cooking)
- Kosher salt (1 tablespoon) — (for seasoning the outside)
- Black pepper (1 teaspoon)
- Yellow onion, quartered (1 medium) — (adds flavor to the pan drippings for the gravy)
- Carrots, roughly chopped (2 medium) — (adds natural sweetness to the gravy base)
- Celery stalks, roughly chopped (2 stalks) — (classic mirepoix for depth)
For the Pan Gravy
- Pan drippings (from the roasted turkey)
- All-purpose flour (2 tablespoons) — (you can substitute cornstarch for a gluten-free option)
- Low-sodium chicken broth (1½ cups) — (use turkey broth if you have it)
- Dry white wine (¼ cup) — (optional, but adds a lovely acidity; use extra broth if skipping)
- Fresh thyme sprigs (2 sprigs) — (for infusing while the gravy simmers)
- Salt and pepper (to taste)
Ingredient Selection Tip: When buying your turkey breast, look for one that’s not injected with a sodium solution. It will give you better control over the salt level and a more natural flavor. I recommend Bell & Evans or Butterball for consistent quality.
Equipment Needed
You don’t need a professional kitchen to pull this off, but having the right tools makes everything easier. Here’s what you’ll need:
- Roasting pan (with a rack if you have one; a large baking sheet works in a pinch)
- Instant-read thermometer — (this is non-negotiable for perfectly cooked turkey; I love my Thermapen)
- Small bowl (for mixing the herb butter)
- Chef’s knife and cutting board
- Measuring spoons
- Microplane or zester (for the lemon zest and garlic)
- Whisk (for the gravy)
- Fine-mesh strainer (optional, for silky gravy)
- Aluminum foil (for tenting the turkey)
Budget-Friendly Tip: If you don’t have a roasting rack, you can use a few thick carrot and celery stalks as a makeshift rack. It works surprisingly well and adds flavor to the drippings!
Preparation Method
Let’s get cooking! This method is broken down into clear steps so you can follow along without any stress. Remember, we’re cooking to impress, so take your time and enjoy the process.
Step 1: Make the Herb Butter
In a small bowl, combine the softened butter, chopped rosemary, thyme, sage, minced garlic, kosher salt, black pepper, and lemon zest. Mix everything together with a fork until it’s well combined. You want the herbs evenly distributed throughout the butter. Set it aside at room temperature while you prep the turkey.
Step 2: Prep the Turkey
Take your turkey breast out of the refrigerator about 30 minutes before you start. Pat it completely dry with paper towels—this is crucial for crispy skin. Season the entire breast generously with kosher salt and black pepper, including the underside. Don’t be shy here; the salt helps the meat stay juicy.
Step 3: Apply the Herb Butter
Here’s the trick: gently slide your fingers under the skin of the turkey breast, loosening it from the meat without tearing it. You’re creating a pocket. Take about two-thirds of the herb butter and spread it directly onto the meat under the skin. Then, rub the remaining butter all over the outside of the skin. This double-layer technique ensures flavor in every bite.
Step 4: Set Up the Roasting Pan
Preheat your oven to 425°F (220°C). Arrange the quartered onion, chopped carrots, and celery in the bottom of your roasting pan. Place the turkey breast on top of the vegetables (or on a rack set over them). The vegetables will absorb the drippings and add incredible flavor to your gravy later.
Step 5: Roast the Turkey
Roast the turkey breast at 425°F for 20 minutes. This high heat kickstarts the browning process. Then, without opening the oven, reduce the temperature to 350°F (175°C) and continue roasting. The total cooking time will be about 1 hour to 1 hour 15 minutes, depending on the size of your breast.
Step 6: Check for Doneness
Start checking the internal temperature at the 50-minute mark. Insert your instant-read thermometer into the thickest part of the breast, avoiding the bone. You’re looking for 155°F (68°C). The temperature will continue to rise as it rests, reaching the safe 165°F (74°C). If the skin is getting too dark before the meat is done, tent the breast loosely with foil.
Step 7: Let It Rest
Once the turkey hits 155°F, remove it from the oven and transfer it to a cutting board. TENT it loosely with foil—don’t wrap it tight or the skin will get soggy. Let it rest for at least 15-20 minutes. This is the hardest part, I know, but it’s essential. The juices need time to redistribute.
Step 8: Make the Pan Gravy
While the turkey rests, place your roasting pan with the vegetables and drippings over two burners on medium heat. (Be careful, the pan is hot!) Sprinkle the flour over the drippings and whisk constantly for about 1-2 minutes until it forms a golden paste. Slowly pour in the chicken broth and white wine (if using), whisking continuously to prevent lumps. Add the thyme sprigs. Bring the gravy to a simmer and cook for 3-4 minutes until it thickens. Strain the gravy through a fine-mesh strainer into a serving bowl, pressing on the vegetables to extract all the flavor. Season with salt and pepper to taste.
Cooking Tips & Techniques
I’ve learned a few things the hard way so you don’t have to. Here are my best tips for nailing this recipe every single time.
Don’t skip the drying step. The number one mistake I see is people not patting the turkey dry enough. Moisture is the enemy of crispy skin. Use extra paper towels and really get in there. I once forgot this step and ended up with pale, rubbery skin—total disaster.
Use a thermometer, not a timer. I cannot stress this enough. Ovens vary wildly. A timer is a suggestion; a thermometer is the truth. Pull the turkey at 155°F and let carryover cooking do the rest. It’s the difference between dry, stringy meat and perfectly juicy turkey.
Make the gravy while the turkey rests. This is a great multitasking strategy. Your turkey is resting, your guests are waiting, and you’re making magic with those drippings. The whole process takes less than 10 minutes. Plus, the gravy tastes best when it’s fresh and hot.
Taste your gravy before serving. The salt level in the gravy depends entirely on the drippings, which can vary. Always taste and adjust at the end. A splash of lemon juice or a pinch of sugar can balance things out if it’s too salty or too bitter.
Variations & Adaptations
This recipe is incredibly flexible. Here are some ways to make it your own:
- Herb Swap: Don’t have fresh sage? Use tarragon or marjoram instead. In the summer, I love using fresh basil and oregano for a more Mediterranean vibe. It’s surprisingly delicious.
- Spicy Kick: Add ½ teaspoon of red pepper flakes or a pinch of cayenne to the herb butter. The heat cuts through the richness beautifully and will definitely get people talking at your next gathering.
- Citrus Twist: Replace the lemon zest with orange zest and add a few strips of orange peel to the roasting pan. It pairs wonderfully with the thyme and gives the gravy a subtle, sweet brightness.
- Low-Carb Option: Skip the flour in the gravy and use 1 tablespoon of cornstarch mixed with 2 tablespoons of cold water (a slurry) instead. Whisk it in at the end and simmer until thickened.
- Dairy-Free Version: Substitute the butter with a high-quality vegan butter like Miyoko’s. The flavor will be slightly different, but the technique works perfectly.
Serving & Storage Suggestions
This dish is built for hosting. Here’s how to serve it like a pro and handle leftovers.
Serving Temperature: Slice the turkey breast against the grain and serve it warm, not piping hot. The gravy should be served alongside in a warm gravy boat. For a dinner party, I like to arrange the slices on a large platter and pour a little gravy over the top, then serve the rest on the side.
What to Serve Alongside: This turkey breast pairs beautifully with classic sides like mashed potatoes, roasted Brussels sprouts, or a simple green salad with a vinaigrette. For a potluck, bring it with a stack of warm dinner rolls so people can make little turkey sandwiches.
Storage Instructions: Store leftover turkey in an airtight container in the refrigerator for up to 4 days. The gravy can be stored separately for up to 3 days. The flavors actually deepen overnight!
Reheating Tips: To reheat the turkey without drying it out, place slices in a baking dish with a splash of chicken broth, cover with foil, and warm in a 300°F oven for 10-15 minutes. Reheat the gravy on the stovetop over low heat, whisking occasionally. Add a splash of broth if it’s too thick.
Freezer Instructions: You can freeze the cooked, sliced turkey for up to 2 months. Wrap it tightly in plastic wrap and then foil. The gravy freezes well too—just thaw it overnight in the fridge and reheat gently.
Nutritional Information & Benefits
This recipe is a great source of lean protein, and the vegetables in the gravy add a boost of vitamins. Here’s a rough estimate per serving (based on 8 servings):
- Calories: Approximately 350-400
- Protein: 45-50 grams
- Fat: 18-22 grams (mostly from the butter, which is fine in moderation)
- Carbohydrates: 5-7 grams (from the flour and vegetables)
Health Benefits: Turkey is an excellent source of lean protein, which is great for muscle maintenance and satiety. The herbs (rosemary, thyme, sage) are packed with antioxidants and anti-inflammatory compounds. Garlic is known for its immune-boosting properties. This is comfort food that actually has some nutritional merit!
Dietary Considerations: This recipe is naturally gluten-free if you use cornstarch instead of flour for the gravy. It’s also low-carb friendly. It contains dairy (butter), so it’s not suitable for a vegan diet unless you use a substitute.
Conclusion
This Perfect Herb Butter Roasted Turkey Breast with Pan Gravy is more than just a recipe—it’s your secret weapon for hosting. It’s the dish that looks like you spent all day on it but actually comes together with minimal fuss. Whether you’re facing a last-minute potluck panic or planning a festive holiday dinner, this turkey breast delivers every single time. I love how the herb butter creates that golden, crispy skin and how the pan gravy ties the whole meal together. It’s the kind of recipe that makes you feel like a rockstar in your own kitchen.
Now, go ahead and make it your own! Swap in your favorite herbs, adjust the seasonings, and serve it with pride. I’d love to hear how it turns out—leave a comment below and let me know what your guests thought. Did you add a twist? Did someone ask for seconds? Share your story! And if you loved this recipe, don’t forget to pin it for later and share it with your fellow hosting friends. Happy cooking!
Frequently Asked Questions
Can I use a boneless turkey breast for this recipe?
Yes, you can! The cooking time will be shorter—start checking for doneness at about 40 minutes. The bone adds flavor and helps the meat stay moist, so if you can, stick with bone-in. But boneless will still be delicious.
Do I have to use fresh herbs, or can I use dried?
Fresh herbs are best for the butter because they have a brighter, more vibrant flavor. If you only have dried, use about one-third of the amount. The texture will be different, but it will still taste good.
My gravy turned out lumpy. What did I do wrong?
Lumpy gravy usually happens when you add the liquid too quickly or don’t whisk enough. Don’t panic! Just pour it through a fine-mesh strainer into a clean bowl. It will remove the lumps and you’ll have silky smooth gravy.
Can I prepare the herb butter ahead of time?
Absolutely! You can make the herb butter up to 3 days in advance. Keep it covered in the refrigerator, but let it come to room temperature before using so it spreads easily. You can also freeze it for up to 3 months.
How do I know when the turkey is done without a thermometer?
I really recommend using a thermometer for safety and accuracy. But if you don’t have one, you can pierce the thickest part of the breast with a knife. The juices should run clear, not pink. The meat should also feel firm to the touch but not hard. When in doubt, cook it a little longer—but honestly, get a thermometer!
Pin This Recipe!
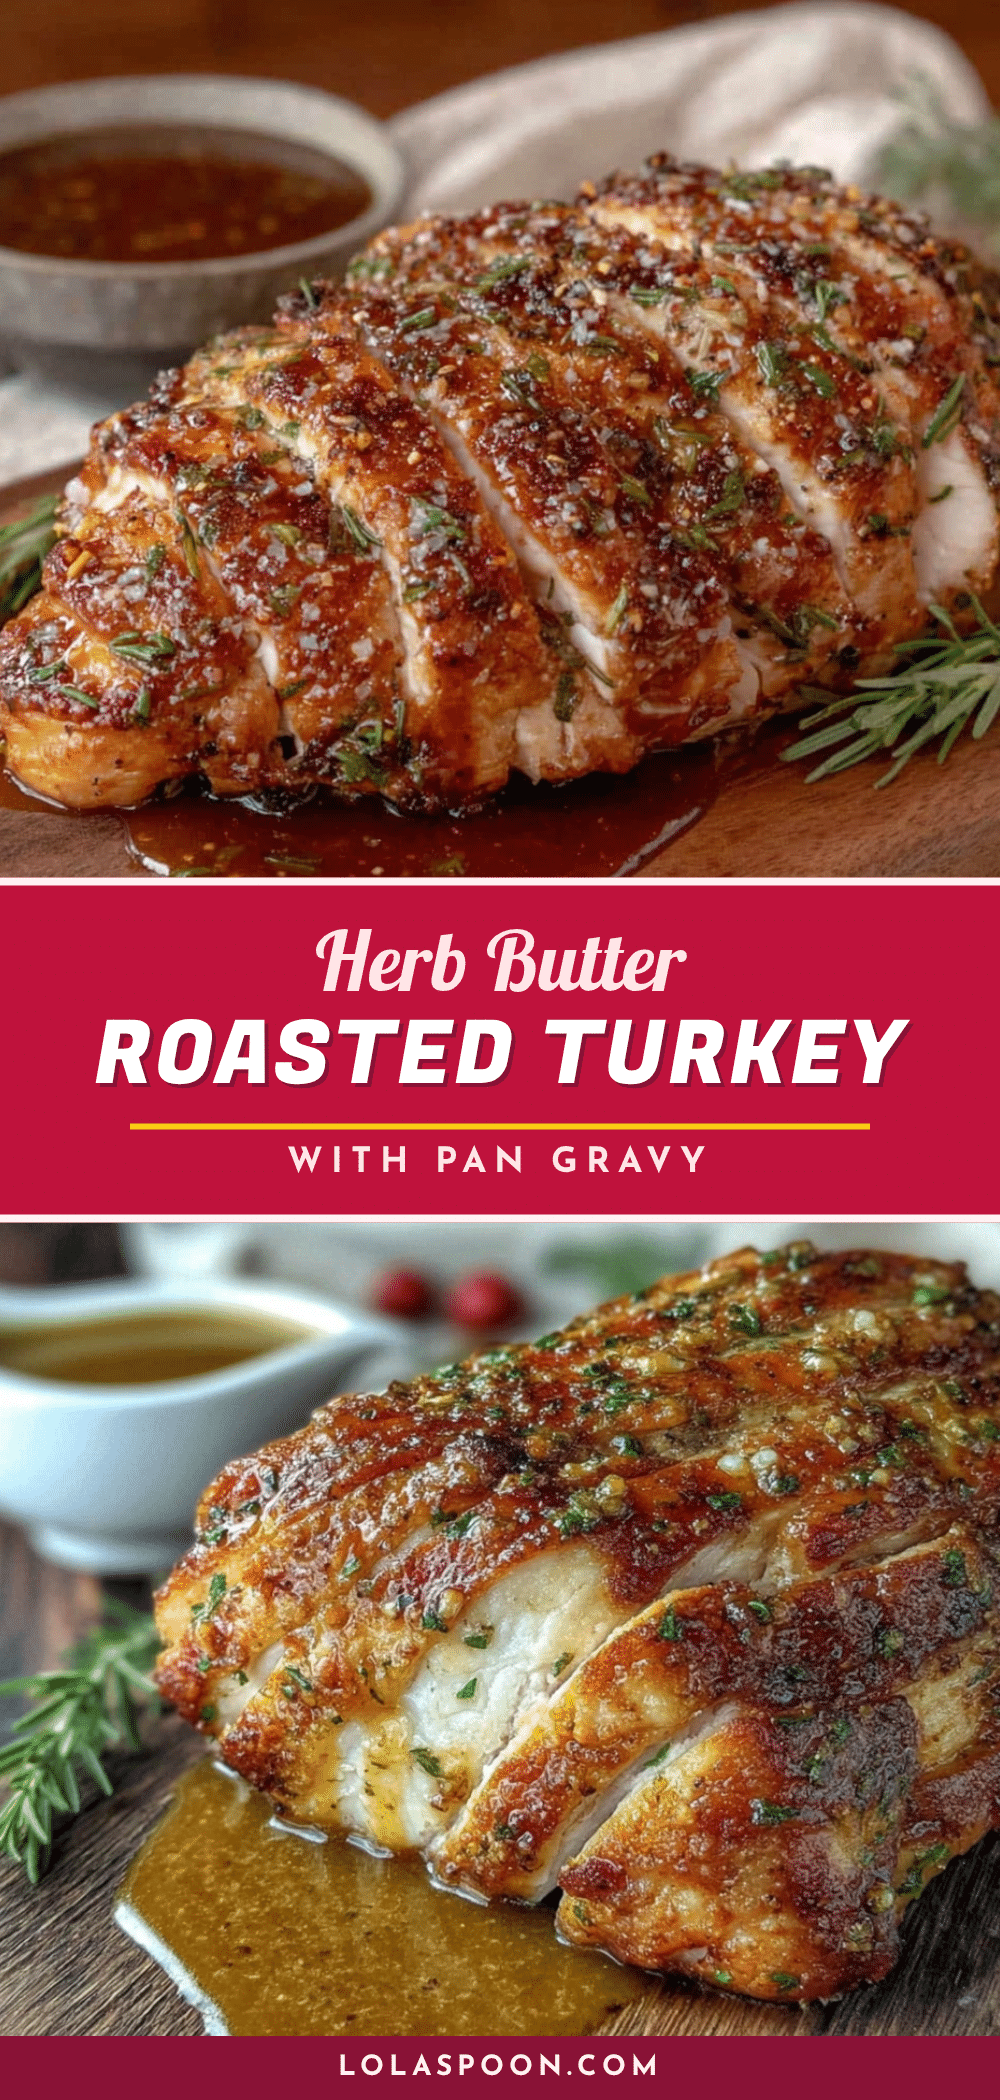
Perfect Herb Butter Roasted Turkey Breast (Easy Pan Gravy)
This Herb Butter Roasted Turkey Breast with Pan Gravy is the ultimate secret weapon for hosting. It’s juicy, flavorful, and comes together with minimal fuss, perfect for last-minute potlucks or festive holiday dinners.
- Prep Time: 20 minutes
- Cook Time: 1 hour 15 minutes
- Total Time: 1 hour 35 minutes
- Yield: 8 servings 1x
- Category: Main Course
- Cuisine: American
Ingredients
- ½ cup (1 stick) unsalted butter, softened
- 1 tablespoon fresh rosemary, finely chopped
- 1 tablespoon fresh thyme leaves
- 1 teaspoon fresh sage, finely chopped
- 3 garlic cloves, minced
- 1 teaspoon kosher salt (Diamond Crystal recommended)
- ½ teaspoon black pepper, freshly ground
- Zest of 1 lemon
- 1 (4-5 pound) bone-in, skin-on turkey breast
- 1 tablespoon kosher salt (for seasoning turkey)
- 1 teaspoon black pepper (for seasoning turkey)
- 1 medium yellow onion, quartered
- 2 medium carrots, roughly chopped
- 2 stalks celery, roughly chopped
- 2 tablespoons all-purpose flour (or cornstarch for gluten-free)
- 1½ cups low-sodium chicken broth (or turkey broth)
- ¼ cup dry white wine (optional; use extra broth if skipping)
- 2 sprigs fresh thyme (for gravy)
- Salt and pepper to taste (for gravy)
Instructions
- Make the herb butter: In a small bowl, combine softened butter, chopped rosemary, thyme, sage, minced garlic, 1 teaspoon kosher salt, ½ teaspoon black pepper, and lemon zest. Mix with a fork until well combined. Set aside at room temperature.
- Prep the turkey: Remove turkey breast from refrigerator 30 minutes before cooking. Pat completely dry with paper towels. Season generously with 1 tablespoon kosher salt and 1 teaspoon black pepper, including the underside.
- Apply the herb butter: Gently slide fingers under the turkey skin to loosen it from the meat without tearing. Spread about two-thirds of the herb butter directly onto the meat under the skin. Rub remaining butter all over the outside of the skin.
- Set up the roasting pan: Preheat oven to 425°F (220°C). Arrange quartered onion, chopped carrots, and celery in the bottom of a roasting pan. Place turkey breast on top of vegetables (or on a rack set over them).
- Roast the turkey: Roast at 425°F for 20 minutes. Without opening the oven, reduce temperature to 350°F (175°C) and continue roasting for 1 hour to 1 hour 15 minutes total, or until internal temperature reaches 155°F (68°C) in the thickest part of the breast. Tent with foil if skin browns too quickly.
- Let it rest: Remove turkey from oven and transfer to a cutting board. Tent loosely with foil and let rest for 15-20 minutes. The temperature will rise to 165°F (74°C) during resting.
- Make the pan gravy: While turkey rests, place roasting pan with vegetables and drippings over two burners on medium heat. Sprinkle flour over drippings and whisk constantly for 1-2 minutes until a golden paste forms. Slowly pour in chicken broth and white wine (if using), whisking continuously. Add thyme sprigs. Bring to a simmer and cook 3-4 minutes until thickened. Strain through a fine-mesh strainer into a serving bowl, pressing on vegetables. Season with salt and pepper to taste.
- Slice and serve: Slice turkey breast against the grain and serve warm with gravy alongside.
Notes
Don’t skip drying the turkey skin for crispy results. Use a thermometer for perfect doneness—pull at 155°F and let carryover cooking finish. Make gravy while turkey rests for best flavor. Taste gravy before serving and adjust seasoning. Leftover turkey can be stored in the refrigerator for up to 4 days or frozen for up to 2 months.
Nutrition
- Serving Size: 1 serving (about 4-5
- Calories: 375
- Sugar: 2
- Sodium: 780
- Fat: 20
- Saturated Fat: 10
- Carbohydrates: 6
- Fiber: 1
- Protein: 47
Keywords: herb butter roasted turkey breast, easy pan gravy, turkey breast recipe, Thanksgiving turkey, roasted turkey, holiday turkey, juicy turkey breast


