My neighbor Marco watched me fumbling with a bag of chicken thighs in my driveway last fall, flour dust puffing up around me. I was trying to balance groceries and my phone, and honestly, I looked like a mess. He didn’t say anything at first—just stood there with this knowing smile. Then he walked over and said, “You’re overcomplicating it. Come here, I’ll show you something.”
He pulled out his phone and showed me a photo of the crispiest, most golden chicken I had ever seen. No breading, no deep fryer, no fuss. Just chicken thighs with salt, pepper, and butter. He told me his grandmother used to make them on busy weeknights in their tiny apartment, and the smell would drift down the hallway and make the neighbors knock on their door. I remember thinking, “I need that in my life.”
So I went home, tried his method, and honestly? It changed how I cook chicken forever. I’ve tweaked it a bit over the months—added garlic, played with the temperature, figured out the timing for my finicky oven. But the heart of it is still Marco’s grandmother’s trick: let the chicken do the work, not you. This Quick Crispy Baked Chicken Thighs with Garlic Butter recipe is the result of that kitchen conversation, and it has saved my sanity on more Tuesday nights than I can count.
Maybe you’ve been there—staring at a pack of chicken thighs at 5:30 PM, wondering how you’re going to get dinner on the table without a meltdown. I get it. This recipe is for those exact nights. Let me walk you through it.
Why You’ll Love This Recipe
Look, I’ve tested a lot of chicken recipes over the years. Some are too fussy, some take forever, and some just don’t deliver on the crunch. These Quick Crispy Baked Chicken Thighs with Garlic Butter hit every single mark. Here’s why they’ve become a staple in my kitchen and probably will in yours too:
- Quick & Easy: From fridge to table in about 30 minutes. No marinating overnight, no complicated steps. Just simple, smart cooking.
- Simple Ingredients: You probably have everything already—chicken thighs, butter, garlic, salt, pepper, and a few pantry staples. No special trip to the store required.
- Perfect for Weeknights: This is the definition of a busy-day dinner. Minimal prep, minimal cleanup, maximum payoff. It works for those nights when you’re tired and just need something good on the table.
- Crowd-Pleaser: I’ve served these to picky kids, skeptical in-laws, and dinner guests. Every single time, the plate comes back clean. The crispy skin and juicy meat are hard to resist.
- Unbelievably Delicious: The garlic butter bastes the chicken as it bakes, creating this rich, savory flavor that soaks into every bite. The skin gets shatteringly crisp without any breading. It’s comfort food that feels fancy but isn’t.
What makes this recipe different from all the other baked chicken recipes out there? It’s the technique. Instead of flipping the chicken or fussing with a wire rack, you bake the thighs skin-side down first, then flip them halfway. That simple trick gives you perfectly rendered, crispy skin without any extra effort. Plus, the garlic butter mixture does double duty—it seasons the chicken and creates a little pan sauce that’s perfect for drizzling.
This isn’t just another chicken recipe. It’s the kind that makes you close your eyes after the first bite and think, “Why haven’t I been making this my whole life?” It’s comfort food reimagined—faster, simpler, but with the same soul-soothing satisfaction. Perfect for impressing your family on a Tuesday or turning a regular dinner into something memorable without breaking a sweat.
What Ingredients You Will Need
This recipe uses simple, wholesome ingredients to deliver bold flavor and satisfying texture without the fuss. Most of these are pantry staples, so you can whip this up anytime the craving hits.
- Bone-in, skin-on chicken thighs (4-6 thighs, about 1.5 lbs or 680g): This is non-negotiable for the crispiest results. The bone keeps the meat juicy, and the skin renders into that golden crackling we’re after. I prefer thighs over breasts here—they’re more forgiving and stay tender even if you cook them a minute too long.
- Unsalted butter (4 tablespoons, 56g), melted: Butter is the backbone of this recipe. It carries the garlic and herbs, helps the skin crisp up beautifully, and adds that rich, indulgent flavor. I recommend using a good quality butter like Kerrygold if you can—it really does make a difference in taste.
- Garlic (4 cloves, minced): Fresh garlic is key here. Don’t use the jarred stuff—it burns too easily and lacks that punchy, aromatic quality. You want the garlic to infuse the butter as it bakes, not scorch and turn bitter.
- Salt (1 teaspoon, 5g): I use kosher salt for its clean flavor and easy pinch-ability. Diamond Crystal is my go-to brand because it’s less salty by volume, giving you more control. If you’re using table salt, reduce to ¾ teaspoon.
- Black pepper (½ teaspoon, 1g), freshly ground: Freshly ground pepper adds a subtle heat and complexity that pre-ground pepper just can’t match. It’s a small step that makes a big difference.
- Garlic powder (½ teaspoon, 1.5g): This might seem redundant with the fresh garlic, but trust me—garlic powder adds a deeper, more rounded garlic flavor that survives the high heat better than fresh alone. It’s a little trick I picked up from a chef friend.
- Paprika (½ teaspoon, 1.5g): Sweet or smoked, depending on your mood. Smoked paprika adds a lovely hint of campfire flavor, while sweet paprika keeps it mild and lets the garlic shine. I usually go with smoked for extra depth.
- Dried thyme (½ teaspoon, 0.5g): Thyme and chicken are a classic pairing. The earthy, slightly floral notes complement the garlic butter beautifully. If you have fresh thyme, use 1 teaspoon of leaves instead.
- Optional: Fresh parsley (2 tablespoons, chopped), for garnish: A sprinkle of fresh parsley right before serving adds a pop of color and a fresh, herbaceous finish. It’s not essential, but it makes the dish look restaurant-worthy.
Substitution Guidance: If you’re out of butter, you can use olive oil, though the flavor will be less rich. For a dairy-free version, use a good plant-based butter or avocado oil. If you don’t have bone-in thighs, boneless skin-on thighs will work—just reduce the cooking time by about 5 minutes. And if you’re avoiding garlic (I’m so sorry), try using 1 teaspoon of onion powder and 1 tablespoon of nutritional yeast for a savory boost.
Equipment Needed
You don’t need a fancy kitchen to make these Quick Crispy Baked Chicken Thighs with Garlic Butter. Here’s what you’ll need:
- Baking sheet or oven-safe skillet: A rimmed baking sheet is perfect. I use a half-sheet pan (18×13 inches) because it gives the chicken plenty of space to crisp up without steaming. A cast-iron skillet works beautifully too—it holds heat well and gives you even browning.
- Parchment paper or aluminum foil: Lining your pan makes cleanup a breeze. I prefer parchment for easy release, but foil works fine too. Just spray it lightly with cooking spray if using foil.
- Small bowl for the garlic butter: Any small bowl will do for mixing the melted butter and seasonings. I use a ramekin because it feels fancy, but a cereal bowl works just as well.
- Tongs: These are your best friend for flipping the chicken without tearing the skin. Silicone-tipped tongs are gentle on the skin, but metal ones work fine too.
- Meat thermometer: This isn’t strictly necessary, but it takes the guesswork out of cooking chicken. An instant-read thermometer ensures your thighs are perfectly cooked at 165°F (74°C) without drying out. I use a Thermapen, but any reliable digital thermometer will do.
- Basting brush (optional): If you want to brush the garlic butter onto the chicken instead of drizzling, a silicone basting brush is handy. But honestly, drizzling works just as well and means one less thing to wash.
Budget-friendly tip: Don’t have a meat thermometer? You can check doneness by piercing the thickest part of the thigh with a knife—if the juices run clear, it’s done. And if you don’t have a basting brush, just use a spoon to drizzle the butter over the chicken. No need to buy extra gadgets for this recipe.
Preparation Method
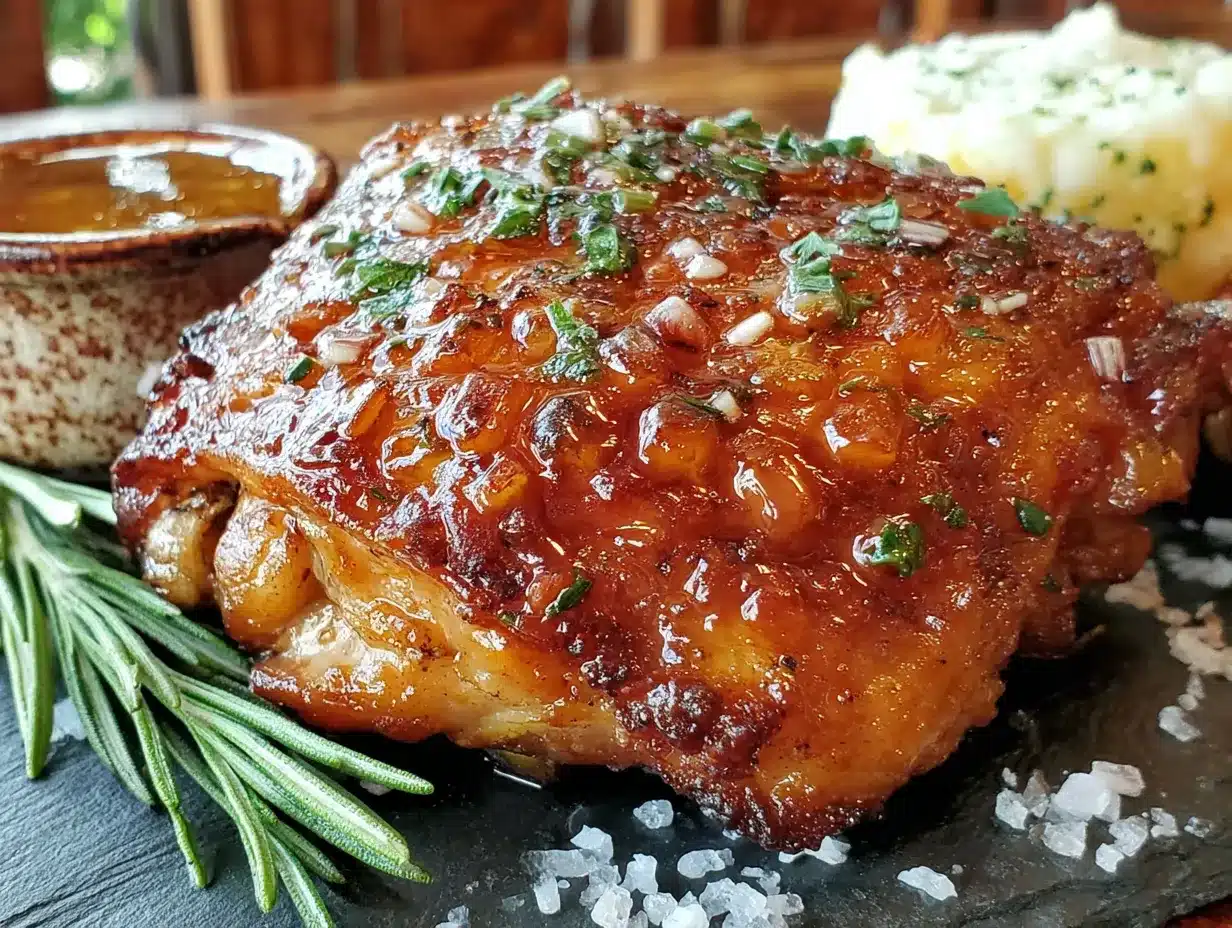
Let’s get cooking! This method is straightforward, but I’ll walk you through every step so you get perfect results every time.
Step 1: Preheat and Prep (5 minutes)
Preheat your oven to 425°F (220°C). This high heat is crucial for getting that crispy skin without drying out the meat. While the oven heats up, line your baking sheet with parchment paper or foil for easy cleanup. Pat the chicken thighs dry with paper towels—this is the most important step for crispy skin. Moisture is the enemy of crispiness, so really get them dry. Season both sides generously with salt and pepper.
Step 2: Make the Garlic Butter (2 minutes)
In a small bowl, combine the melted butter, minced garlic, garlic powder, paprika, and dried thyme. Stir until everything is well mixed. The smell at this point is incredible—take a moment to appreciate it. Set the bowl aside while you arrange the chicken.
Step 3: Arrange the Chicken (2 minutes)
Place the seasoned chicken thighs skin-side down on the prepared baking sheet. Make sure they’re not touching each other—crowding the pan traps steam and prevents crisping. If your thighs are large, use two baking sheets or cook in batches. Drizzle about half of the garlic butter mixture over the skin-side of the chicken (which is now facing down). Don’t worry if some butter pools around the edges—it’ll baste the chicken as it bakes.
Step 4: First Bake (15 minutes)
Pop the baking sheet into the preheated oven and bake for 15 minutes. During this time, the skin-side-down will start rendering fat and crisping up. You’ll hear a gentle sizzle—that’s the sound of good things happening. Don’t open the oven door to check too often; you want to maintain that high heat.
Step 5: Flip and Baste (2 minutes)
After 15 minutes, carefully remove the baking sheet from the oven. Using your tongs, flip each chicken thigh over so the skin side is now facing up. Be gentle—the skin is getting crispy and can tear if you’re rough. Drizzle the remaining garlic butter mixture over the skin, making sure to get some on each piece. If there’s any garlic left in the bowl, scrape it out and distribute it over the chicken.
Step 6: Second Bake (10-15 minutes)
Return the baking sheet to the oven and bake for another 10 to 15 minutes. The chicken is done when the skin is deep golden brown and crispy, and the internal temperature reaches 165°F (74°C) when measured at the thickest part of the thigh (avoiding the bone). If you don’t have a thermometer, look for juices that run clear when you pierce the thickest part with a knife. The skin should be crackling and the meat should feel firm but not hard when pressed.
Step 7: Rest and Serve (5 minutes)
Remove the chicken from the oven and let it rest on the baking sheet for 5 minutes. This allows the juices to redistribute, ensuring every bite is moist and flavorful. Don’t skip this step—I’ve made that mistake before, and the chicken ends up drier than it should be. After resting, transfer the thighs to a serving platter, spoon any pan juices over the top, and garnish with fresh parsley if using. Serve immediately.
Sensory Cues: At the end of baking, the kitchen should smell like roasted garlic and butter—rich and savory. The skin should look blistered and golden, with crispy edges. When you cut into a thigh, the meat should be opaque all the way through and release steam. The texture should be tender enough to pull apart with a fork but not falling apart.
Cooking Tips & Techniques
I’ve made these Quick Crispy Baked Chicken Thighs with Garlic Butter more times than I can count, and I’ve learned a few things along the way. Here are my best tips for perfect results every time:
Pat the chicken dry—really dry. This is the number one tip for crispy skin. I use paper towels and press firmly to absorb as much moisture as possible. If you have time, let the seasoned chicken sit uncovered in the fridge for 30 minutes to dry out the skin even more. It makes a noticeable difference.
Don’t skip the flip. Starting skin-side down allows the fat to render slowly, creating a crispy base. Flipping halfway ensures the skin gets evenly browned and crisp. I’ve tried baking them skin-side up the whole time, and the skin never gets as crispy. Trust the process.
Use a meat thermometer. I know I’ve said this already, but it’s worth repeating. Chicken thighs are forgiving, but they can still dry out if overcooked. At 165°F (74°C), they’re perfectly cooked—juicy and tender. I’ve pulled them out at 160°F and let carryover cooking bring them to 165°F, which works beautifully too.
Don’t crowd the pan. If your baking sheet is too full, the chicken will steam instead of roast. Give each thigh at least an inch of space on all sides. If you’re cooking for a crowd, use two baking sheets and swap positions halfway through baking for even cooking.
Let the chicken rest. I know it’s tempting to dig in right away, but that 5-minute rest is crucial. Cutting into hot chicken releases all those juices onto the cutting board instead of staying in the meat. Just wait—I promise it’s worth it.
Common mistake alert: I once forgot to flip the chicken and ended up with soggy skin on one side and burnt garlic on the other. Not my finest moment. Set a timer for the flip—it’s easy to get distracted when you’re juggling other dinner tasks. Another time, I used low-quality butter and the flavor was flat. Good butter really does make a difference here.
Variations & Adaptations
This recipe is incredibly versatile. Here are some ways to make it your own:
Spicy Version: Add ½ teaspoon of cayenne pepper or red pepper flakes to the garlic butter mixture. The heat cuts through the richness beautifully. I made this for a game night once, and it was the first thing to disappear from the table.
Herb Lover’s Twist: Swap the dried thyme for rosemary or oregano—or use a mix of all three. Fresh herbs work wonderfully here too; just double the amount since dried herbs are more concentrated. I love using a combination of thyme and rosemary for an earthy, aromatic flavor.
Lemon-Garlic Variation: Add the zest of one lemon to the garlic butter and squeeze the juice over the chicken after baking. The brightness cuts through the richness and adds a fresh, summery note. This is my go-to version when I want something a little lighter.
Dietary Adaptations: For a dairy-free version, use avocado oil or a high-quality plant-based butter. For a lower-fat option, you can reduce the butter to 2 tablespoons and add a splash of chicken broth to keep the chicken moist. If you’re watching your sodium, use a low-sodium salt or skip the added salt entirely—the garlic and herbs provide plenty of flavor.
Different Cooking Methods: You can also cook these on the stovetop in a cast-iron skillet. Start skin-side down over medium-high heat for 5 minutes, then flip and transfer to a 400°F (200°C) oven for 15 minutes. The stovetop sear adds even more crispiness. I’ve done this when I wanted extra-crunchy skin, and it’s fantastic.
Personal Variation: I once added a tablespoon of honey to the garlic butter for a sweet-and-savory version. The honey caramelized on the skin and created this sticky, crispy glaze that was absolutely addictive. Just be careful—the sugar can burn if you’re not watching closely. Keep the oven temperature at 400°F (200°C) instead of 425°F (220°C) if you try this.
Serving & Storage Suggestions
These Quick Crispy Baked Chicken Thighs with Garlic Butter are incredibly versatile when it comes to serving. Here’s how to make the most of them:
Serving Temperature: Serve the chicken hot, straight from the oven, while the skin is still crispy. If you need to hold them for a few minutes, keep them in a warm oven (200°F/95°C) uncovered to maintain crispiness. Covering them will trap steam and soften the skin.
What to Serve With: These thighs pair beautifully with simple sides. Try them with roasted vegetables like asparagus or broccoli, a fresh green salad with a tangy vinaigrette, or creamy mashed potatoes to soak up the garlic butter pan juices. For a low-carb option, serve with cauliflower rice or zucchini noodles. I love them with a side of crusty bread to mop up every last drop of that garlic butter—it’s too good to waste.
Storage Instructions: Store leftover chicken in an airtight container in the refrigerator for up to 4 days. The skin will soften as it sits, but the flavor will still be fantastic. To reheat, place the thighs on a baking sheet in a 375°F (190°C) oven for 10 minutes to re-crisp the skin. You can also reheat in an air fryer at 350°F (175°C) for 5 minutes for extra crispiness. Microwave reheating will make the skin soggy, so I’d avoid it if possible.
Freezing Instructions: These freeze beautifully. Let the chicken cool completely, then wrap each thigh individually in plastic wrap and place in a freezer-safe bag. They’ll keep for up to 3 months. To reheat, thaw overnight in the refrigerator and reheat in the oven as directed above.
Flavor Development: Honestly, these chicken thighs taste even better the next day. The garlic butter continues to infuse the meat overnight, and the flavors meld together beautifully. I often make a double batch just for leftovers to use in salads, sandwiches, or pasta the next day.
Nutritional Information & Benefits
Here’s the estimated nutritional breakdown for one serving (based on 4 servings, using bone-in skin-on chicken thighs):
| Nutrient | Amount per Serving |
|---|---|
| Calories | 380 kcal |
| Protein | 28g |
| Fat | 28g |
| Saturated Fat | 12g |
| Carbohydrates | 2g |
| Fiber | 0g |
| Sugar | 0g |
| Sodium | 680mg |
Health Benefits: Chicken thighs are an excellent source of high-quality protein, which supports muscle repair and keeps you feeling full. They’re also rich in B vitamins, particularly B6 and B12, which help with energy metabolism and brain function. Garlic is known for its immune-boosting properties and anti-inflammatory benefits. While this recipe is higher in fat due to the butter and skin, it’s a satisfying meal that can fit into a balanced diet—especially when paired with vegetables or a salad.
Dietary Considerations: This recipe is naturally gluten-free, low-carb, and keto-friendly. It contains dairy (butter) and is not suitable for vegan or vegetarian diets. If you’re watching your sodium, reduce the salt or use a salt-free seasoning blend. The butter can be swapped for a dairy-free alternative as mentioned earlier.
Conclusion
These Quick Crispy Baked Chicken Thighs with Garlic Butter have become a lifeline in my kitchen. They’re proof that you don’t need complicated techniques or fancy ingredients to make something truly delicious. Just a few simple steps, a little patience, and you’ve got a dinner that feels special without taking over your evening.
I love this recipe because it respects my time—and yours. It’s honest cooking that delivers every single time. Whether you’re feeding a hungry family, meal-prepping for the week, or just treating yourself to a comforting dinner, these chicken thighs have your back.
Now I’d love to hear from you. Have you tried these? Did you add your own twist? Drop a comment below and let me know how they turned out. And if you loved them as much as I do, share this recipe with a friend who needs a quick weeknight win. Happy cooking!
Frequently Asked Questions
Can I use boneless, skinless chicken thighs?
Yes, but the cooking time will be shorter—about 20-25 minutes total. The skin is what gets crispy, so you’ll miss that texture, but the garlic butter will still keep the meat moist and flavorful. Just check for doneness at 165°F (74°C).
Can I make this recipe ahead of time?
Absolutely! You can prep the garlic butter mixture up to 3 days in advance and store it in the refrigerator. You can also season the chicken and keep it in the fridge for up to 24 hours before baking. Just let it come to room temperature for 15 minutes before putting it in the oven.
Why is my chicken skin not crispy?
The most common reasons are not patting the chicken dry enough, overcrowding the pan, or not starting skin-side down. Make sure your chicken is very dry, give each thigh space, and don’t skip the flip. Also, check that your oven is fully preheated—a hot oven is key for crispiness.
Can I use chicken breasts instead of thighs?
You can, but breasts cook faster and dry out more easily. If using boneless, skinless breasts, reduce the cooking time to about 20 minutes total and check for doneness at 165°F (74°C). Bone-in, skin-on breasts will take about 30-35 minutes. The skin will crisp up nicely, but the meat won’t be as forgiving as thighs.
How do I prevent the garlic from burning?
Garlic can burn if it’s exposed to high heat for too long. To prevent this, make sure the garlic is mixed thoroughly into the butter (the butter insulates it a bit), and don’t add extra garlic on top of the chicken before baking. The second bake is shorter, so the garlic should be fine—but if your oven runs hot, check the chicken a few minutes early.
Pin This Recipe!
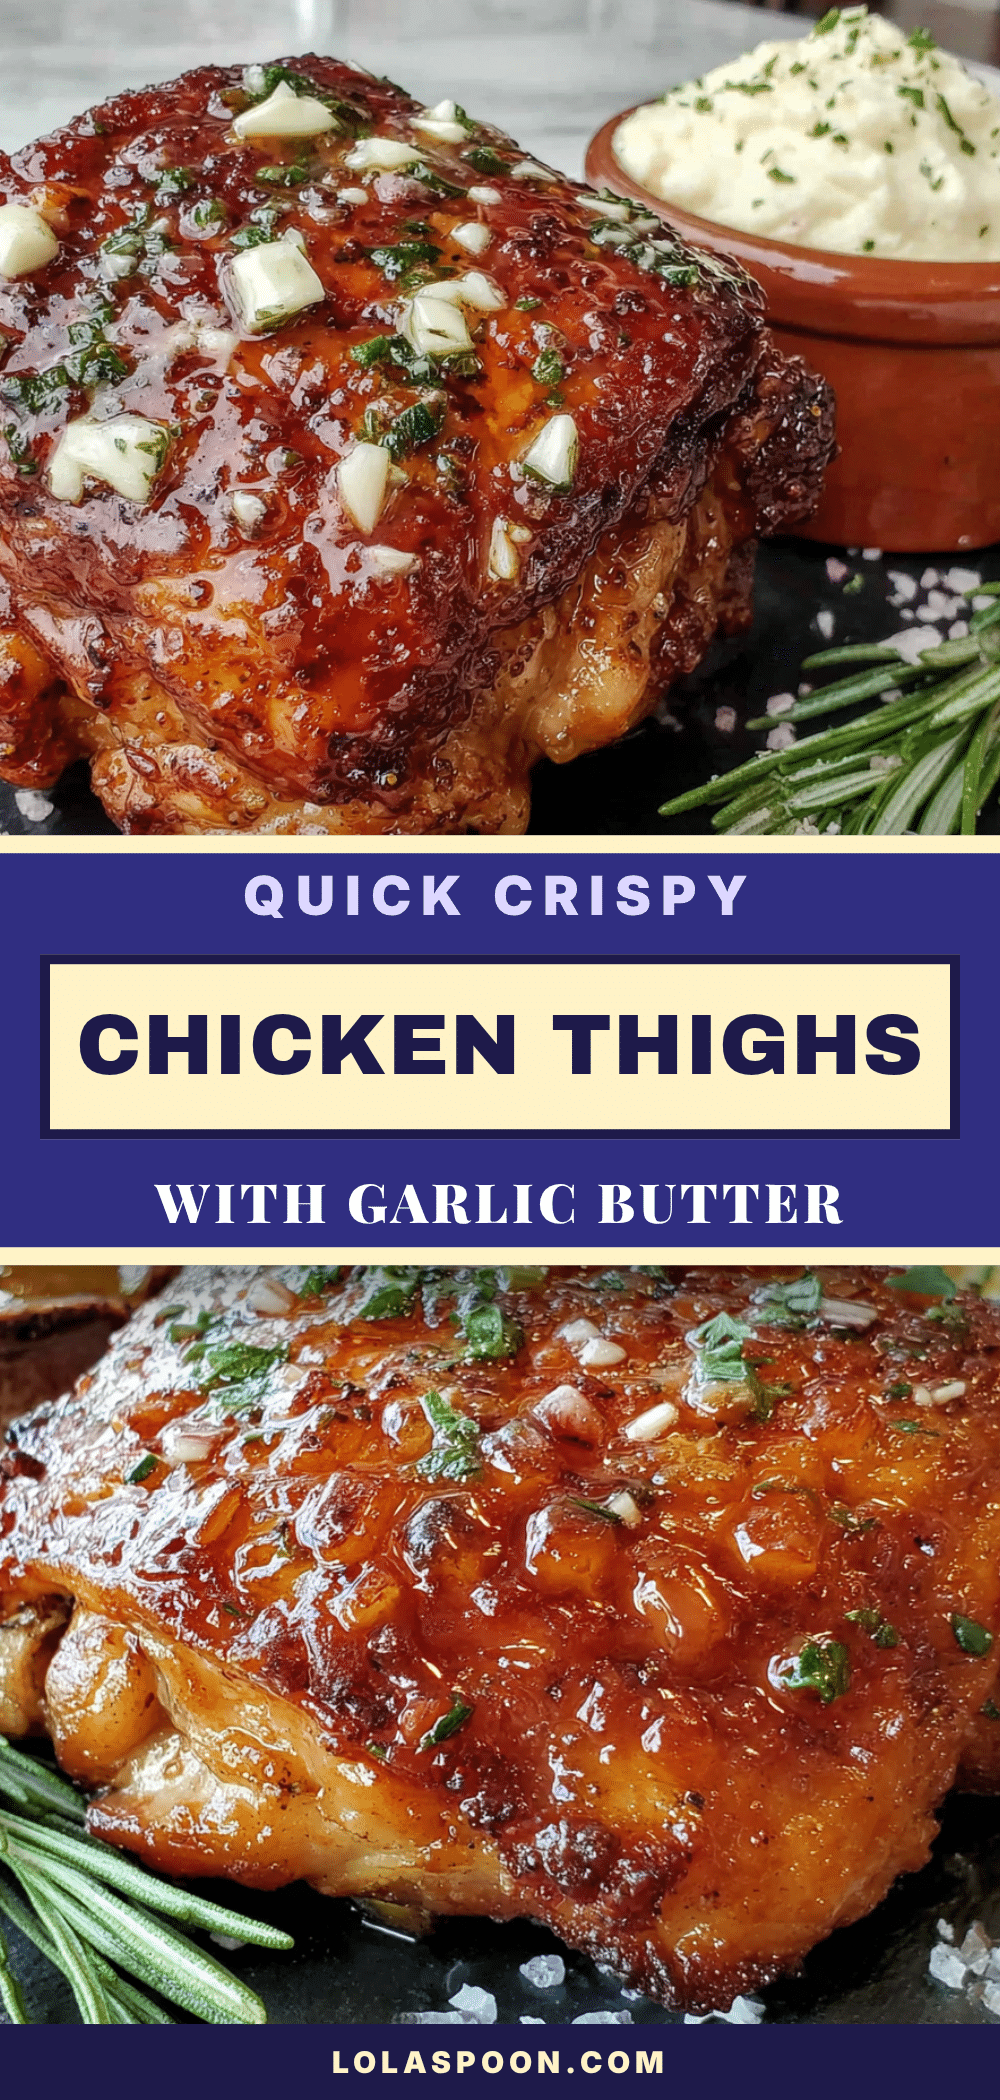
Quick Crispy Baked Chicken Thighs with Garlic Butter – Easy 30-Minute Recipe

These Quick Crispy Baked Chicken Thighs with Garlic Butter are a lifesaver for busy weeknights. With simple ingredients and a clever technique, you get perfectly crispy skin and juicy meat in just 30 minutes.
- Prep Time: 5 minutes
- Cook Time: 25 minutes
- Total Time: 30 minutes
- Yield: 4 servings 1x
- Category: Main Course
- Cuisine: American
Ingredients
- 4–6 bone-in, skin-on chicken thighs (about 1.5 lbs or 680g)
- 4 tablespoons (56g) unsalted butter, melted
- 4 cloves garlic, minced
- 1 teaspoon (5g) kosher salt
- ½ teaspoon (1g) freshly ground black pepper
- ½ teaspoon (1.5g) garlic powder
- ½ teaspoon (1.5g) paprika (sweet or smoked)
- ½ teaspoon (0.5g) dried thyme
- 2 tablespoons fresh parsley, chopped (optional, for garnish)
Instructions
- Preheat your oven to 425°F (220°C). Line a baking sheet with parchment paper or foil for easy cleanup. Pat the chicken thighs dry with paper towels and season both sides generously with salt and pepper.
- In a small bowl, combine the melted butter, minced garlic, garlic powder, paprika, and dried thyme. Stir until well mixed.
- Place the seasoned chicken thighs skin-side down on the prepared baking sheet, making sure they are not touching. Drizzle about half of the garlic butter mixture over the skin-side (which is now facing down).
- Bake for 15 minutes. Do not open the oven door too often.
- Carefully remove the baking sheet from the oven. Using tongs, flip each chicken thigh so the skin side is now facing up. Drizzle the remaining garlic butter mixture over the skin.
- Return the baking sheet to the oven and bake for another 10-15 minutes, until the skin is deep golden brown and crispy, and the internal temperature reaches 165°F (74°C) at the thickest part of the thigh.
- Remove the chicken from the oven and let it rest on the baking sheet for 5 minutes. Transfer to a serving platter, spoon any pan juices over the top, and garnish with fresh parsley if using. Serve immediately.
Notes
Pat the chicken very dry for the crispiest skin. Do not crowd the pan. Let the chicken rest for 5 minutes before serving. For extra crispiness, let the seasoned chicken sit uncovered in the fridge for 30 minutes before baking.
Nutrition
- Serving Size: 1 serving (1 thigh)
- Calories: 380
- Sodium: 680
- Fat: 28
- Saturated Fat: 12
- Carbohydrates: 2
- Protein: 28
Keywords: crispy baked chicken thighs, garlic butter chicken, quick chicken recipe, weeknight dinner, easy chicken thighs


