My brother-in-law Mark had refused to eat anything with peppermint for as long as I’d known him. Seven years. He claimed it tasted like toothpaste and ruined perfectly good chocolate. Then last December, I was testing a batch of these Quick Peppermint Bark Cheesecake Bars on a random Tuesday night, mostly because I needed something fast for a work potluck the next day. I caught him standing in front of the open fridge at 11 p.m., fork in hand, staring at the pan I’d just finished chilling. “I’m just checking the consistency,” he mumbled with a mouthful of cheesecake.
Honestly, that moment made my whole holiday season. You know that feeling when you prove someone wrong without even trying? That’s exactly what these bars do. They’re not your typical fussy holiday dessert that takes all afternoon and leaves your kitchen looking like a sugar bomb exploded. These come together in about 20 minutes of actual work, then the fridge does the heavy lifting. The peppermint here isn’t aggressive or medicinal—it’s a cool, subtle crunch that plays off the creamy cheesecake layer and that dark chocolate topping.
I’d been burned before by complicated cheesecake recipes that cracked, sunk, or just plain stressed me out. This one? No water bath, no fussy crust pressing, no waiting for hours to cool gradually. You mix, you layer, you chill. That’s it. The first time I made them, I forgot to soften my cream cheese properly and still ended up with a silky smooth filling—that’s how forgiving this recipe is. These bars became my go-to for every holiday gathering, classroom party, and last-minute hostess gift. They’re the kind of dessert that makes you look like you tried really hard when you really, really didn’t.
Why You’ll Love This Recipe
These Quick Peppermint Bark Cheesecake Bars are the weeknight hero you didn’t know you needed. Here’s why they’ll become your new holiday staple:
- Truly Quick: Twenty minutes of hands-on time, then the refrigerator does the rest. No baking, no standing over a hot stove, no complicated steps that require three hands.
- Simple Ingredients: You probably already have cream cheese, butter, and vanilla in your kitchen. The only special purchase is a box of Oreos and some candy canes—both easy to find at any grocery store.
- Perfect for Weeknights: When you need a dessert for a school bake sale, a work potluck, or just because it’s Tuesday and you deserve something sweet, these bars deliver without stealing your whole evening.
- Crowd-Pleaser: I’ve brought these to six different gatherings this season and never brought a single crumb home. Kids love the crunch, adults love the sophisticated flavor combo.
- Unbelievably Delicious: The texture is what gets everyone—that buttery Oreo crust gives way to a cloud-like cheesecake layer, then a snappy chocolate top with crunchy peppermint pieces. It’s three textures in one perfect bite.
What makes these different from every other peppermint bark dessert out there? It’s the ratio. Most versions go heavy on the chocolate and light on the cheesecake, leaving you with a dry, crumbly situation. I spent three test batches getting the cream cheese layer just right—not too dense, not too airy, but that perfect spoonable consistency that feels indulgent without being heavy. Plus, using Oreos for the crust instead of graham crackers adds a deep chocolate flavor that ties the whole thing together. This isn’t just another holiday dessert. It’s the one that makes people close their eyes after the first bite and ask for the recipe before they’ve even finished chewing.
What Ingredients You Will Need
This recipe uses simple, mostly pantry-friendly ingredients to create something that tastes way more complicated than it is. Here’s what you’ll need to grab:
For the Crust:
- 24 Oreo cookies (regular, not double-stuffed)—you want the whole cookie, filling included. The cream filling helps bind the crust together.
- 4 tablespoons unsalted butter, melted—this gives the crust that classic sandy texture that holds together when you press it.
For the Cheesecake Layer:
- 16 ounces cream cheese, softened to room temperature (I prefer Philadelphia for the smoothest texture, but any block-style brand works)
- ½ cup granulated sugar
- 2 teaspoons vanilla extract—use real vanilla here, not imitation. It makes a noticeable difference in the final flavor.
- 2 large eggs, room temperature—cold eggs can seize up the cream cheese mixture and leave you with lumps
- ½ cup sour cream, room temperature—this is my secret ingredient for extra creamy cheesecake. Don’t skip it.
For the Topping:
- 1 cup dark chocolate chips (60-70% cacao)—I use Ghirardelli or Guittard for the best melt and snap
- ¼ cup heavy cream
- ½ cup crushed candy canes or peppermint candies (about 6-8 regular-sized candy canes)—crush them yourself for the best texture; pre-crushed ones can be too powdery
- Optional: ¼ teaspoon peppermint extract—add this to the chocolate layer if you want a stronger mint punch
Ingredient Tips: Make sure your cream cheese, eggs, and sour cream are all at room temperature before you start. Cold ingredients are the number one reason cheesecake filling turns out lumpy. If you’re in a hurry, cut the cream cheese into cubes and let it sit on the counter for 20 minutes. For the candy canes, I like to put them in a zip-top bag and whack them with a rolling pin—it’s oddly satisfying and gives you a mix of fine and chunky pieces that look beautiful on top.
Equipment Needed
You don’t need any fancy gadgets for these Quick Peppermint Bark Cheesecake Bars. Here’s what you’ll want to have on hand:
- 9×9-inch baking pan—an 8×8 works too, your bars will just be slightly thicker. Line it with parchment paper for easy removal.
- Food processor or zip-top bag and rolling pin—for crushing the Oreos. The food processor is faster and gives you more even crumbs, but the bag-and-rolling-pin method works in a pinch and lets you work out some frustration.
- Electric hand mixer or stand mixer—you need this for the cheesecake layer. Whisking by hand won’t get it smooth enough, and nobody wants lumpy cheesecake.
- Medium microwave-safe bowl—for melting the chocolate topping
- Spatula—a rubber spatula for scraping every bit of cheesecake goodness out of the bowl
- Measuring cups and spoons
- Small offset spatula or butter knife—for smoothing the cheesecake layer evenly
If you don’t have a food processor, no worries. I’ve made these bars more times than I can count using the bag method. Just put the Oreos in a sturdy zip-top bag, squeeze out the air, and go to town with a rolling pin. It takes about two minutes and gives you a good arm workout. For the chocolate melting, you can also use a double boiler if you prefer, but the microwave method is faster and requires less cleanup—just watch it carefully so you don’t burn the chocolate.
Preparation Method
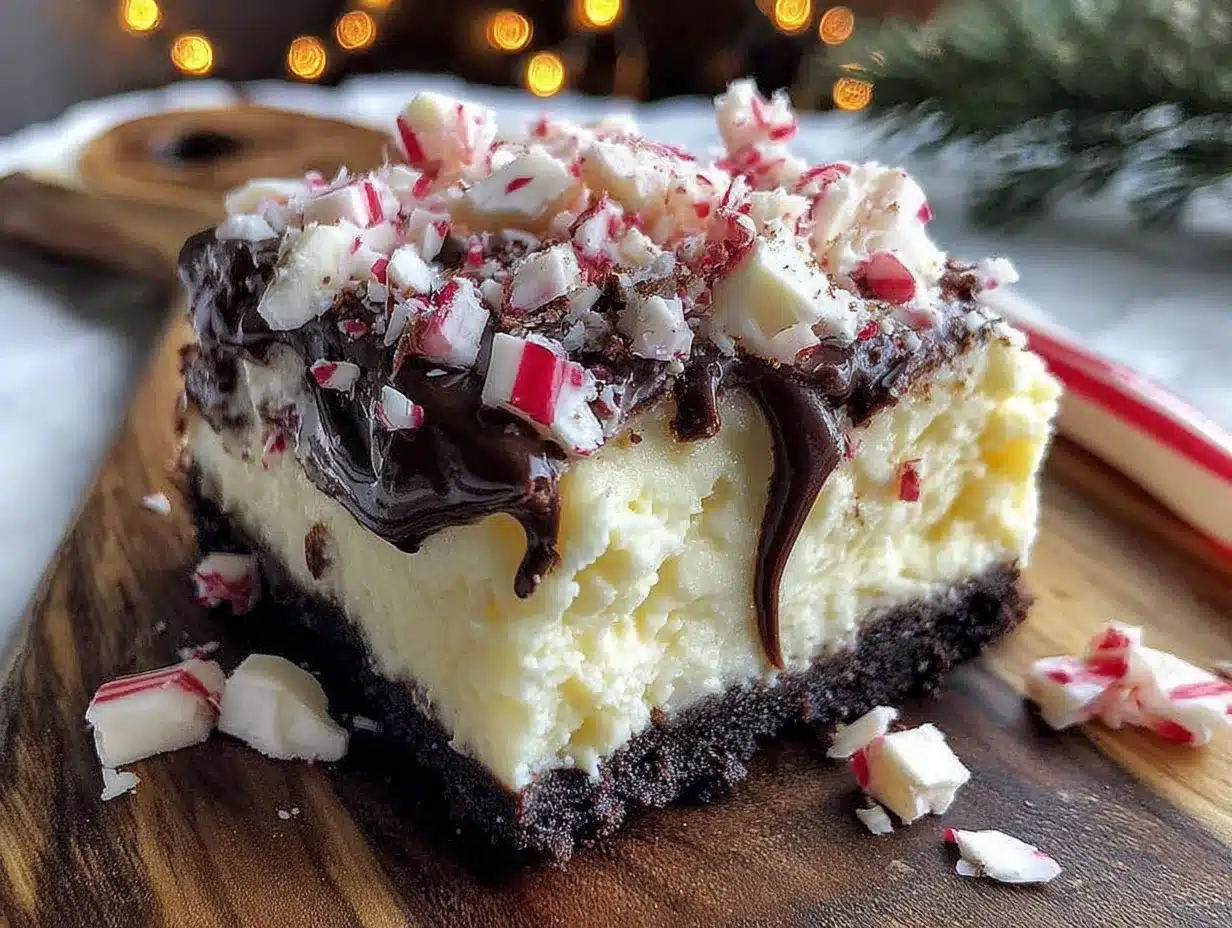
Let’s make these Quick Peppermint Bark Cheesecake Bars. Remember, the total hands-on time is about 20 minutes, so don’t be intimidated by the number of steps—they’re all simple and fast.
- Prep your pan. Line a 9×9-inch baking pan with parchment paper, leaving a 2-inch overhang on two opposite sides. This creates handles that let you lift the entire block of bars out later. Lightly spray the parchment with nonstick cooking spray just to be safe.
- Make the crust. Put 24 Oreo cookies (filling and all) in a food processor and pulse until you have fine, even crumbs. If you’re using the bag method, crush them until no large pieces remain. Pour the crumbs into a medium bowl, add 4 tablespoons of melted butter, and stir with a fork until every crumb is moistened. The mixture should look like wet sand and hold together when you squeeze it.
- Press the crust. Dump the crumb mixture into your prepared pan. Use the bottom of a measuring cup or a flat-bottomed glass to press it down firmly and evenly. Don’t skimp on this step—a tightly packed crust won’t crumble when you cut the bars. Press it all the way to the edges and make sure the corners are filled. Pop the pan in the refrigerator while you make the filling.
- Start the cheesecake filling. In a large bowl, beat 16 ounces of softened cream cheese with an electric mixer on medium speed until it’s completely smooth, about 2 minutes. Scrape down the sides and bottom of the bowl with a spatula. Add ½ cup sugar and 2 teaspoons vanilla extract, then beat for another minute until everything is well combined and fluffy.
- Add the eggs and sour cream. Crack 2 eggs into a small bowl first (this way you avoid shell pieces in your batter). With the mixer on low speed, add the eggs one at a time, mixing just until each is incorporated. Overmixing at this stage adds too much air and can cause the cheesecake to puff up and crack. Add ½ cup sour cream and mix on low just until combined. The filling should be silky smooth with no lumps.
- Assemble the bars. Take the crust out of the fridge. Pour the cheesecake filling over the crust and use an offset spatula or the back of a spoon to spread it evenly to the edges. Give the pan a gentle tap on the counter to release any air bubbles.
- Bake. Place the pan in a preheated 325°F (163°C) oven. Bake for 30-35 minutes, or until the edges look set and the center still has a slight jiggle when you gently shake the pan. It should look like firm Jell-O, not liquid. Don’t overbake or the texture will be dense instead of creamy.
- Cool completely. Let the cheesecake cool on a wire rack for 1 hour at room temperature. Then transfer it to the refrigerator and chill for at least 3 hours, but 4-5 is better. This step is crucial—don’t rush it. The bars need to be fully cold before you add the chocolate layer.
- Make the chocolate topping. When the cheesecake is fully chilled, put 1 cup dark chocolate chips and ¼ cup heavy cream in a microwave-safe bowl. Microwave in 30-second intervals, stirring after each, until the chocolate is completely melted and smooth. This usually takes about 90 seconds total. If you want a stronger peppermint flavor, stir in ¼ teaspoon peppermint extract now.
- Add the topping. Pour the melted chocolate over the chilled cheesecake layer. Use the offset spatula to spread it into an even, thin layer that covers the entire surface. Work quickly—the cold cheesecake will start to set the chocolate immediately.
- Add the peppermint crunch. While the chocolate is still wet, sprinkle the crushed candy canes evenly over the top. Press them in gently with your fingers so they stick. Return the pan to the refrigerator for at least 30 minutes to let the chocolate set completely.
- Cut and serve. Use the parchment handles to lift the entire block out of the pan. Place it on a cutting board and use a sharp knife to cut into 16 squares (4 rows by 4 rows). For clean cuts, wipe the knife clean between each slice. Serve cold or at room temperature.
Cooking Tips & Techniques
After making these Quick Peppermint Bark Cheesecake Bars more times than I can count, I’ve picked up a few tricks that make the process even smoother. Let me save you from my early mistakes.
The room temperature thing is real. I cannot stress this enough. The first time I made these, I was impatient and used cold cream cheese straight from the fridge. My filling looked like cottage cheese—lumpy and sad. I had to microwave it in short bursts and re-beat it, which overworked the mixture and made the final texture a bit grainy. Take the 20 minutes to let everything come to room temperature. Your future self will thank you.
Don’t overmix the eggs. This was a hard lesson for me. I thought more mixing meant smoother cheesecake. It doesn’t. Overmixing incorporates too much air, which causes the cheesecake to puff up in the oven like a soufflé, then collapse and crack as it cools. Mix on low speed and stop as soon as the eggs disappear into the batter. A few streaks are fine—they’ll smooth out as you spread the filling.
Watch your bake time. Every oven runs differently. My old oven took exactly 32 minutes; my new one does it in 28. Start checking at the 25-minute mark. The edges should look dry and set, but the center should still wobble when you gently shake the pan. If the center looks completely firm, you’ve gone too far. The cheesecake continues to cook from residual heat after you pull it out, so pulling it slightly underdone is actually perfect.
Patience with the chill time. I know, I know—you want to eat these now. But cutting into warm or barely-chilled cheesecake is a recipe for disaster. The bars will be soft, the layers will smush together, and you’ll end up with a delicious but ugly mess. I learned this the hard way when I tried to rush a batch for a party. Trust the process. Three hours minimum in the fridge, and overnight is even better. The flavors actually meld and deepen as they sit.
Crush candy canes strategically. Put them in a zip-top bag, cover with a kitchen towel (so you don’t poke a hole in the bag), and go at them with a rolling pin or heavy pan. You want a mix of fine powder and small chunks. The powder sticks to the chocolate and gives color, while the chunks provide that satisfying crunch. If you only have big pieces, they’ll fall off when you cut the bars.
Variations & Adaptations
One of the best things about these Quick Peppermint Bark Cheesecake Bars is how easy they are to customize. Here are some variations I’ve tried and loved:
Gluten-Free Version: Swap the regular Oreos for gluten-free chocolate sandwich cookies. Most major brands make a gluten-free version now, and they work exactly the same way. Everything else in the recipe is naturally gluten-free, so you’re good to go.
White Chocolate Peppermint: Replace the dark chocolate chips with white chocolate for a totally different look and flavor. The white chocolate against the red peppermint pieces is stunning for Christmas parties. Just be careful when melting white chocolate—it’s more delicate and can seize up if overheated. Use low power and stir frequently.
Mint Chocolate Chip Twist: Fold ½ cup of mini chocolate chips into the cheesecake filling before pouring it over the crust. This adds little pockets of chocolate throughout the creamy layer and makes every bite a surprise. I did this for a St. Patrick’s Day party once, and people went crazy for it.
No-Bake Version: If you don’t want to turn on the oven at all, you can make this a no-bake cheesecake. Replace the eggs with 1 cup of heavy cream, whipped to stiff peaks and folded into the cream cheese mixture. You’ll need to chill it for at least 6 hours or overnight for it to set properly. The texture is lighter and mousse-like, but just as delicious.
Dairy-Free Adaptation: Use dairy-free cream cheese (Kite Hill or Violife work well), coconut cream instead of sour cream, and vegan butter for the crust. The chocolate topping is naturally dairy-free if you use dark chocolate chips that don’t contain milk solids. The texture will be slightly different—a bit less firm—but the flavor is still fantastic.
My personal favorite variation is the white chocolate version. I made it for a cookie exchange last year, and three people asked for the recipe before I even left the party. The white chocolate gives it a sweeter, more decadent feel that pairs beautifully with the cool peppermint crunch.
Serving & Storage Suggestions
These Quick Peppermint Bark Cheesecake Bars are versatile when it comes to serving. Here’s how to get the most out of them:
Serving Temperature: I prefer these bars straight from the fridge—cold and firm with a snappy chocolate top. But they’re also excellent at room temperature, where the cheesecake layer softens to a creamier consistency. For parties, I usually take them out of the fridge about 10 minutes before serving so they’re not ice-cold but still hold their shape.
Presentation Ideas: Cut the bars into clean squares and arrange them on a white platter for maximum holiday contrast. Dust with a little powdered sugar for a snowy effect, or add a single small candy cane piece to the center of each bar. For gift-giving, stack them in a clear cellophane bag tied with red ribbon—they make gorgeous last-minute hostess gifts.
What to Serve With: A cup of hot coffee or espresso is the perfect companion—the bitterness balances the sweetness. For a dessert spread, pair them with sugar cookies, hot cocoa, or a simple vanilla ice cream. I also love serving them alongside fresh berries in the summer for a pop of tartness.
Storage: Keep the bars in an airtight container in the refrigerator for up to 5 days. Layer them with parchment paper between each layer so the chocolate doesn’t stick. I’ve never had a batch last longer than 3 days in my house, but they hold up beautifully for the full 5.
Freezing: These freeze like a dream. Cut the bars into squares, place them on a baking sheet in a single layer, and freeze for 1 hour until solid. Transfer to a freezer-safe container with parchment between layers. They’ll keep for up to 3 months. Thaw in the refrigerator overnight before serving. The texture stays remarkably creamy—I actually prefer the texture of thawed bars because the flavors have more time to meld.
Flavor Development: Here’s something interesting—these bars actually taste better on day two. The peppermint flavor infuses into the cheesecake layer overnight, and the crust softens slightly to a more cake-like texture. If you can plan ahead, make them a day before you need them. Your taste buds will thank you.
Nutritional Information & Benefits
Let’s be real—these are a treat, not a health food. But here’s what you’re working with per bar (based on 16 servings):
- Calories: Approximately 320-350 per bar
- Fat: 22g
- Carbohydrates: 30g
- Protein: 5g
- Sugar: 22g
Health Highlights: The dark chocolate topping actually brings some benefits—it’s rich in antioxidants and flavonoids that support heart health when consumed in moderation. The cream cheese provides calcium and protein, and the eggs add high-quality protein and vitamins. The peppermint itself has been used for centuries to aid digestion, which is convenient after a heavy holiday meal.
Dietary Considerations: This recipe contains dairy, eggs, and gluten (from the Oreos). It can be made gluten-free with the substitution mentioned above. It’s not suitable for vegan diets without significant modifications. The bars are nut-free as written, making them safe for school parties and gatherings where nut allergies are a concern.
My Perspective: I believe in balance. These bars are an indulgence, and that’s okay. The holidays are about joy and connection, not counting calories. One bar won’t derail anyone’s healthy habits, and the joy of sharing something homemade with people you love has benefits that go way beyond nutrition facts. Make them, enjoy them, and don’t feel guilty about it.
Conclusion
These Quick Peppermint Bark Cheesecake Bars are proof that you don’t need to spend hours in the kitchen to create something truly special. They’re fast enough for a Tuesday night, fancy enough for a holiday party, and forgiving enough for a beginner baker. The combination of crunchy Oreo crust, silky cheesecake, snappy dark chocolate, and cool peppermint crunch is honestly irresistible—I’ve never met anyone who could eat just one.
What I love most about this recipe is how it brings people together. Every time I make these bars, someone asks for the recipe. Every time I bring them to a gathering, the pan comes home empty. There’s something deeply satisfying about watching someone take that first bite and seeing their eyes light up. That’s why I keep making them, year after year.
Now it’s your turn. Give these bars a try, and don’t be afraid to make them your own—swap the chocolate, add some sprinkles, or double the peppermint crunch. I’d love to hear how they turn out for you. Drop a comment below and let me know your favorite variation, or tag me in your photos on social media. Happy baking, friend. You’ve got this.
Frequently Asked Questions
Can I use regular chocolate chips instead of dark chocolate?
Absolutely! Milk chocolate or semi-sweet chips work great. Just keep in mind that milk chocolate will make the bars sweeter, so you might want to reduce the sugar in the cheesecake layer by a tablespoon or two to balance it out.
How do I crush candy canes without making a huge mess?
Put them in a sturdy zip-top bag, cover the bag with a kitchen towel (this is key—it prevents holes), and use a rolling pin or the bottom of a heavy pan to crush them. The towel catches any rogue pieces and keeps your counter clean.
Can I make these bars ahead of time for a party?
Yes, and I actually recommend it! These bars taste even better on day two. You can make them up to 3 days ahead and keep them covered in the refrigerator. Add the crushed candy cane topping just before serving if you want it to stay extra crunchy.
Why did my cheesecake layer crack on top?
This usually happens from overbaking or overmixing. Make sure you pull the bars when the center still has a slight jiggle, and mix on low speed after adding the eggs. Also, let the cheesecake cool slowly at room temperature before refrigerating—rapid temperature changes can cause cracking.
Can I use a different cookie for the crust?
Definitely! Chocolate wafer cookies, shortbread cookies, or even ginger snaps would all work beautifully. Just make sure you have about 2 cups of fine crumbs and adjust the butter if needed—drier cookies might need a little more butter to hold together.
Pin This Recipe!
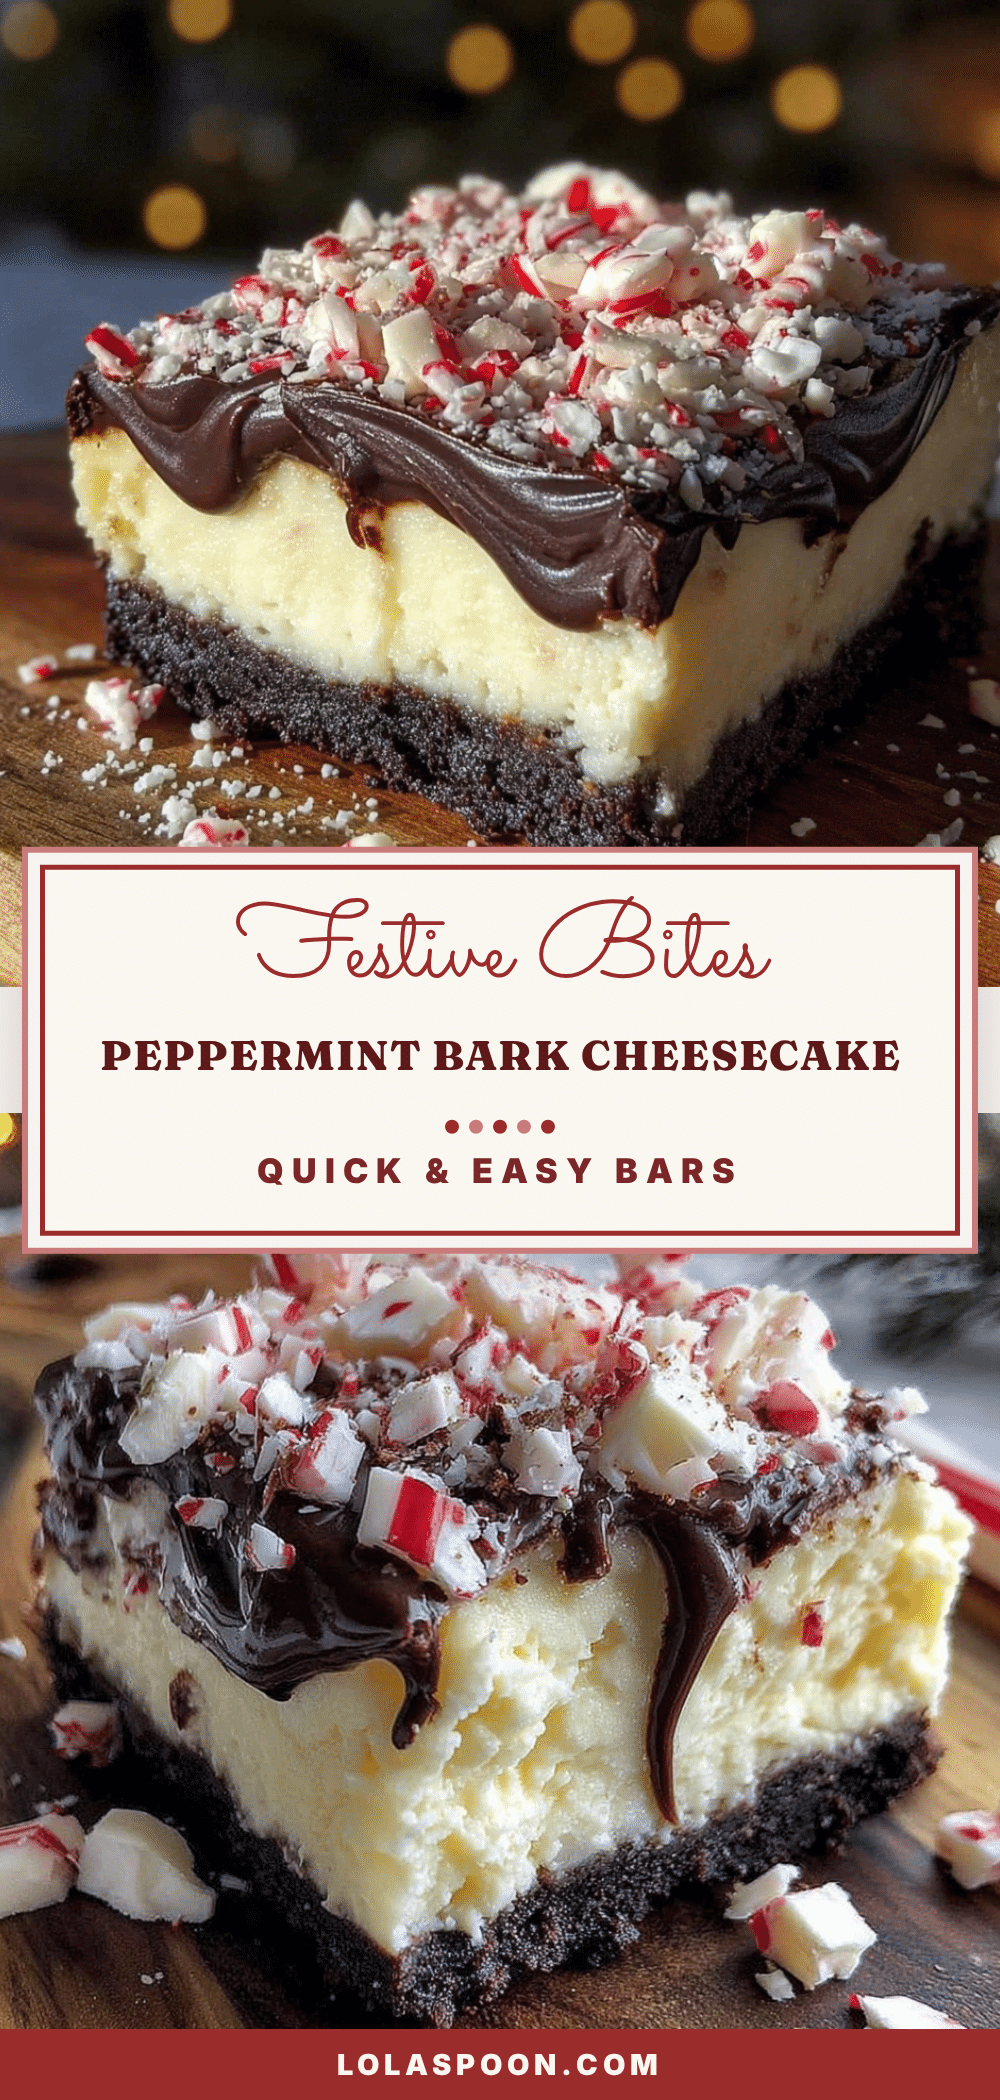
Quick Peppermint Bark Cheesecake Bars: Easy Holiday Dessert
These Quick Peppermint Bark Cheesecake Bars are a fast, no-fuss holiday dessert with a crunchy Oreo crust, creamy cheesecake layer, dark chocolate topping, and cool peppermint crunch. Ready in 20 minutes of hands-on time, they’re perfect for weeknights, potlucks, and holiday gatherings.
- Prep Time: 20 minutes
- Cook Time: 30-35 minutes
- Total Time: 4 hours 50 minutes (includes chilling)
- Yield: 16 bars 1x
- Category: Dessert
- Cuisine: American
Ingredients
- 24 Oreo cookies (regular, not double-stuffed)
- 4 tablespoons unsalted butter, melted
- 16 ounces cream cheese, softened to room temperature
- ½ cup granulated sugar
- 2 teaspoons vanilla extract
- 2 large eggs, room temperature
- ½ cup sour cream, room temperature
- 1 cup dark chocolate chips (60-70% cacao)
- ¼ cup heavy cream
- ½ cup crushed candy canes or peppermint candies (about 6–8 regular-sized candy canes)
- Optional: ¼ teaspoon peppermint extract
Instructions
- Prep your pan. Line a 9×9-inch baking pan with parchment paper, leaving a 2-inch overhang on two opposite sides. Lightly spray the parchment with nonstick cooking spray.
- Make the crust. Pulse 24 Oreo cookies in a food processor until fine crumbs form. Alternatively, crush them in a zip-top bag with a rolling pin. Pour crumbs into a medium bowl, add 4 tablespoons melted butter, and stir until every crumb is moistened (mixture should look like wet sand).
- Press the crust. Dump crumb mixture into prepared pan. Use the bottom of a measuring cup or flat-bottomed glass to press it down firmly and evenly, all the way to the edges and corners. Refrigerate while making filling.
- Start the cheesecake filling. In a large bowl, beat 16 ounces softened cream cheese with an electric mixer on medium speed until completely smooth, about 2 minutes. Scrape down sides and bottom. Add ½ cup sugar and 2 teaspoons vanilla extract, beat for another minute until fluffy.
- Add the eggs and sour cream. Crack 2 eggs into a small bowl. With mixer on low speed, add eggs one at a time, mixing just until incorporated. Add ½ cup sour cream and mix on low just until combined. Filling should be silky smooth.
- Assemble the bars. Take crust out of fridge. Pour cheesecake filling over crust and spread evenly to edges. Give pan a gentle tap on counter to release air bubbles.
- Bake. Place pan in preheated 325°F (163°C) oven. Bake for 30-35 minutes, until edges look set and center still has a slight jiggle when shaken. Don’t overbake.
- Cool completely. Let cheesecake cool on a wire rack for 1 hour at room temperature. Then refrigerate for at least 3 hours (4-5 is better) until fully cold.
- Make the chocolate topping. When cheesecake is fully chilled, combine 1 cup dark chocolate chips and ¼ cup heavy cream in a microwave-safe bowl. Microwave in 30-second intervals, stirring after each, until completely melted and smooth (about 90 seconds total). Stir in ¼ teaspoon peppermint extract if desired.
- Add the topping. Pour melted chocolate over chilled cheesecake layer. Use offset spatula to spread into an even, thin layer covering entire surface. Work quickly.
- Add the peppermint crunch. While chocolate is still wet, sprinkle crushed candy canes evenly over top. Press in gently with fingers. Return pan to refrigerator for at least 30 minutes to set chocolate completely.
- Cut and serve. Use parchment handles to lift entire block out of pan. Place on cutting board and cut into 16 squares (4 rows by 4 rows) with a sharp knife, wiping knife clean between slices. Serve cold or at room temperature.
Notes
Make sure cream cheese, eggs, and sour cream are at room temperature to avoid lumps. Don’t overmix the eggs to prevent cracking. Pull cheesecake from oven when center still jiggles slightly. Chill at least 3 hours before adding chocolate topping. Bars taste even better on day two. For clean cuts, wipe knife between slices. Can be frozen for up to 3 months.
Nutrition
- Serving Size: 1 bar
- Calories: 320350
- Sugar: 22
- Sodium: 200
- Fat: 22
- Saturated Fat: 12
- Carbohydrates: 30
- Fiber: 1
- Protein: 5
Keywords: peppermint bark cheesecake bars, easy holiday dessert, no-bake cheesecake bars, Oreo crust cheesecake, peppermint dessert, quick dessert recipe, Christmas dessert, potluck dessert