My neighbor across the hall, a retired pastry chef named Mrs. Kowalski, watched me one October evening as I stood in my kitchen doorway, staring at a bag of pretzel rods like they held the secrets to the universe. I was supposed to be bringing a treat to a Halloween party, and everything I thought of felt either too complicated or too boring. She didn’t say anything at first. Then she just smiled, shuffled over with a small bag of white chocolate chips, and said, “You’re overthinking it. Make them look like something that will make people laugh.” That was it. No formal lesson, no fancy equipment. Just a neighbor, a shared hallway, and a simple idea that turned into this recipe for white chocolate witch finger pretzels.
Honestly, I had never thought of combining the salty crunch of a pretzel rod with the sweet, creamy coating of white chocolate, let alone turning it into something that looked like a spooky witch finger. I was skeptical at first. Wouldn’t it be messy? Would the chocolate just slide off? But Mrs. Kowalski was right—sometimes the best recipes come from a conversation, not a cookbook. I tweaked her idea a little, adding a pop of color with some green food gel and using sliced almonds for the fingernails. The first batch I made, I accidentally melted the chocolate too fast and it seized up into a grainy mess. You know that feeling when you ruin something before you’ve even started? I almost gave up. But I tried again, slower this time, and it worked. The pretzels looked ridiculous and wonderful all at once.
What I love most about these quick witch finger pretzels is how they capture that playful, slightly spooky spirit of Halloween without requiring a culinary degree. They are the kind of thing you can whip up after work, while the kids are doing homework, or even during a commercial break. They are not supposed to be perfect—in fact, the more imperfect they look, the more they look like real, gnarled witch fingers. That is the beauty of it. Every time I make them, I think of Mrs. Kowalski standing in the hallway, her hands dusted with flour, teaching me that the best kitchen tricks are the ones shared between friends. Maybe you have a neighbor like that, or maybe you are just looking for a fun, fast Halloween project. Either way, these spooky treats are for you.
Why You’ll Love This Recipe
I have tested this recipe about six times now, and let me tell you—each batch taught me something new. The first time, I used cheap white chocolate and it never set properly. The second time, I learned that chilling the pretzels on a parchment-lined tray makes all the difference. So trust me when I say these quick witch finger pretzels are the result of real trial and error, not just a theory.
- Quick & Easy: From start to finish, these come together in about 30 minutes. That includes melting, decorating, and chilling time. Perfect for a last-minute Halloween party or a weeknight treat when the kids are begging for something fun.
- Simple Ingredients: You probably already have pretzel rods in your pantry. White chocolate chips, a drop of green food coloring, and some sliced almonds are all you need. No fancy grocery trips required.
- Perfect for Halloween: These are a guaranteed hit at any spooky gathering. They look impressively creepy but are actually incredibly easy. Kids love helping with the “fingernails,” and adults get a kick out of the playful presentation.
- Crowd-Pleaser: The salty-sweet combo is universally loved. I have brought these to work parties, family dinners, and neighborhood get-togethers, and they always disappear first. Even people who claim they don’t like white chocolate end up grabbing a second one.
- Unbelievably Delicious: The texture is what gets me every time. The crunch of the pretzel, the creaminess of the white chocolate, and the slight nuttiness of the almond—it is a simple but perfect combination. It is comfort food with a spooky twist.
What makes this recipe different from the dozens of other Halloween treats out there is the balance. It is not just another chocolate-covered pretzel. The green tint and almond nail make it look genuinely spooky, but the flavor is pure, uncomplicated goodness. It is the kind of treat that makes you close your eyes after the first bite—even if you are wearing a witch hat. Perfect for impressing guests without stress, or turning a simple snack into something memorable.
What Ingredients You Will Need
This recipe uses simple, everyday ingredients to deliver a big Halloween impact without the fuss. Most of these are pantry staples, and the ones that aren’t are easy to find at any grocery store.
- Pretzel rods (about 24 rods): These are the base of your witch fingers. Look for thick, sturdy pretzel rods that won’t break easily when you dip them. I prefer the brand Utz or Synder’s of Hanover for their consistent crunch. (Pro tip: if you can only find thin pretzel sticks, you can still use them—just be extra gentle during dipping.)
- White chocolate chips or melting wafers (12 oz or 340g): This is the “skin” of your witch fingers. I recommend using Ghirardelli white chocolate melting wafers or Guittard white chocolate chips for the smoothest melt and best flavor. Avoid white chocolate candy melts that are labeled as “chocolate-flavored” as they can taste waxy. (If you are dairy-free, look for a high-quality plant-based white chocolate alternative.)
- Green food coloring gel (a few drops): This gives the white chocolate that eerie, witchy skin tone. Gel coloring is better than liquid because it won’t thin out the chocolate. Start with just one drop—you can always add more. I like Americolor or Wilton gel colors. (If you want a deeper green, add a tiny drop of black or brown coloring to darken it.)
- Sliced almonds (about ¼ cup or 30g): These become the fingernails. Look for natural, unroasted, unsalted sliced almonds. They should be flat and wide enough to look like a nail bed. (If you only have whole almonds, you can slice them yourself with a sharp knife, but it is a bit tedious.)
- Coconut oil or vegetable shortening (1 teaspoon, optional): Adding a tiny bit of fat to your white chocolate helps it melt more smoothly and gives it a nicer shine. It is not strictly necessary, but I always add it when I remember. (If you are using melting wafers, you likely won’t need this.)
Substitution Guidance: If you don’t have pretzel rods, you can use thick breadsticks or even shortbread cookie sticks. For a gluten-free option, look for gluten-free pretzel rods (they do exist, though they are a bit more fragile). If you are avoiding nuts, you can use a small sliver of a dried apricot or a piece of a green jellybean for the fingernail—though it won’t have the same texture. And if you really hate white chocolate, you can use dark or milk chocolate instead, but the spooky green effect won’t be as visible.
Equipment Needed
You don’t need a professional kitchen for this one. Here is what you will need:
- Microwave-safe bowl or double boiler: For melting the white chocolate. I use a glass measuring cup because it is easy to dip the pretzels into. If you don’t have a microwave, a small saucepan with a heatproof bowl on top works perfectly.
- Baking sheet lined with parchment paper or a silicone baking mat: This is where the dipped pretzels will set. The parchment prevents sticking and makes cleanup a breeze. (I have used wax paper in a pinch, but it can stick if the chocolate is warm.)
- Spatula or spoon: For stirring the chocolate and helping to coat the pretzels evenly.
- Small piping bag or zip-top bag: For adding the knuckle details and “wrinkles” on the witch fingers. A zip-top bag with a tiny corner snipped off works great.
- Toothpick or small skewer: For creating the knuckle lines and adding texture to the chocolate before it sets.
- Refrigerator space: You will need a flat spot in your fridge to chill the pretzels for about 15 minutes. Make sure the baking sheet fits.
If you don’t have a piping bag, don’t worry. I have used a clean ketchup bottle, a turkey baster, and even a fork to drizzle the chocolate details. The key is just getting the chocolate onto the pretzel—it doesn’t have to be perfect.
Preparation Method
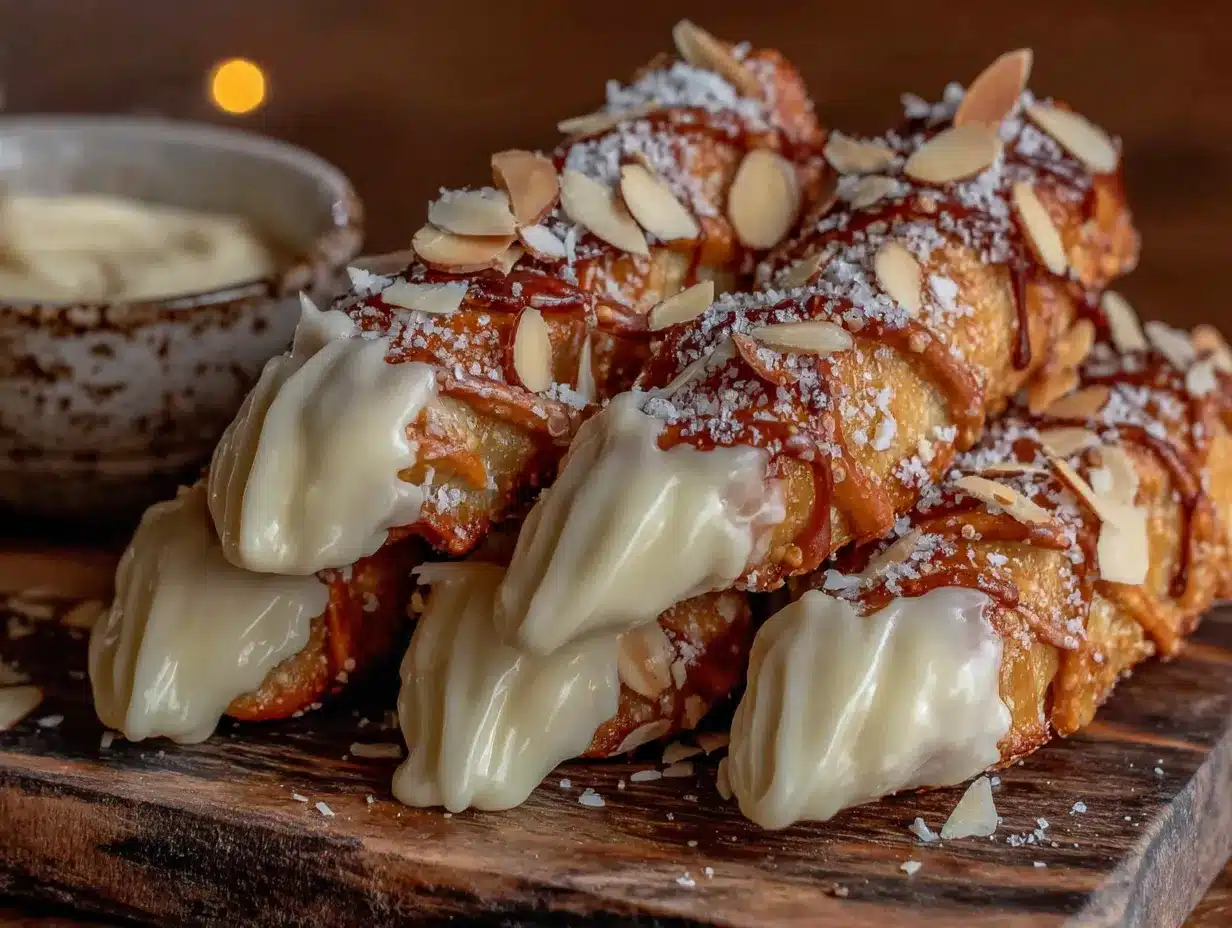
Let’s get to the fun part. Here is how to make these spooky treats step by step.
- Prepare your workspace. Line a large baking sheet with parchment paper or a silicone baking mat. Set it aside. Make sure your pretzel rods are arranged nearby and your sliced almonds are ready to go. This is a fast process once the chocolate is melted, so having everything within arm’s reach helps.
- Melt the white chocolate. Place the white chocolate chips or melting wafers in a microwave-safe bowl. Microwave in 20-second intervals, stirring well after each interval. White chocolate can burn easily, so don’t rush this step. It usually takes about 1 to 1.5 minutes total. When it is about 75% melted, stop microwaving and stir until the residual heat melts the rest. If you are using the coconut oil, stir it in now. (The chocolate should be smooth and glossy, not thick or lumpy.)
- Color the chocolate. Add 2 to 3 drops of green food coloring gel to the melted white chocolate. Stir until the color is evenly distributed. You want a pale, sickly green—like a witch’s skin. If it is too bright, add a tiny drop of brown or black coloring to mute it. (I once added too much green and ended up with neon fingers—still fun, but less spooky.)
- Dip the pretzels. Working one at a time, hold a pretzel rod by one end and dip the other end into the green white chocolate. Submerge about two-thirds of the pretzel, leaving the top third bare (this will be the “hand” part). Lift the pretzel out and let the excess chocolate drip back into the bowl. You can gently tap the pretzel against the side of the bowl to help it along. (If the chocolate is too thick to coat evenly, add another teaspoon of coconut oil or a splash of vegetable shortening to thin it out.)
- Add the fingernail. Immediately after dipping, place the coated pretzel on the prepared baking sheet. While the chocolate is still wet, press a sliced almond onto the tip of the pretzel, angled slightly upward like a fingernail. Gently press it down so it sticks. Repeat with the remaining pretzels. Work quickly—the chocolate sets fast.
- Create the knuckle details. Once all the pretzels are dipped and have their “nails,” it is time to add the wrinkles. Transfer the remaining green chocolate to a small piping bag or a zip-top bag with a tiny corner snipped off. Pipe small, horizontal lines across the “knuckles” of each witch finger—about three lines per pretzel, spaced evenly. You can also pipe a few lines near the “nail bed” to look like cuticles. (Don’t worry if they aren’t perfect. Real witch fingers are supposed to look a little gnarled.)
- Add texture. Use a toothpick or small skewer to gently drag through the piped lines, creating a more organic, wrinkly look. You can also lightly press the toothpick into the chocolate to create small indentations that look like pores or knuckle bumps. (This is where the recipe gets really fun. I always end up making one that looks like it has a wart.)
- Chill to set. Place the baking sheet in the refrigerator for 15 to 20 minutes, or until the chocolate is completely firm and set. Do not skip this step—the chocolate needs to be hard to hold its shape. (If you are in a hurry, you can pop them in the freezer for 5 to 7 minutes, but watch them carefully so they don’t crack.)
- Serve or store. Once the chocolate is set, your witch finger pretzels are ready to serve. They are best enjoyed within 24 hours, but they will keep in an airtight container in the refrigerator for up to a week.
Cooking Tips & Techniques
I have made these quick witch finger pretzels about a dozen times now, and I have learned a few things the hard way. Here are my best tips.
Don’t overheat the white chocolate. This is the most common mistake. White chocolate has a low melting point and can seize up into a thick, grainy paste if it gets too hot. Always melt it slowly, and stop microwaving while there are still a few lumps. The residual heat will finish the job. If your chocolate does seize, you can try stirring in a teaspoon of warm milk or cream, but honestly, it is usually better to start over with fresh chocolate.
Work in small batches. If you are making a big batch for a party, don’t melt all the chocolate at once. Melt half, use it, then melt the other half. This keeps the chocolate at the right consistency and prevents it from cooling down and thickening before you are done dipping. I learned this after my third batch turned into a lumpy mess halfway through.
Use a deep, narrow container for dipping. A tall drinking glass or a small mason jar works better than a wide bowl. It lets you submerge more of the pretzel without wasting chocolate. Just be careful not to tip it over—I have knocked over a glass of green chocolate before, and it looks like a crime scene.
Let the chocolate set fully before moving them. I know it is tempting to check if they are done after five minutes, but patience pays off. If you try to move them too soon, the chocolate will smudge and the fingernails will slide off. Give them the full 15 minutes in the fridge.
Make them look imperfect on purpose. The beauty of these witch finger pretzels is that they are supposed to look creepy. Wobbly lines, uneven coating, and slightly crooked almond nails all add to the effect. Don’t stress about making them look store-bought. The more “ugly” they are, the more they look like actual witch fingers.
Variations & Adaptations
One of the best things about this recipe is how easy it is to customize. Here are a few variations I have tried over the years.
Dark Chocolate Witch Fingers: If you are not a fan of white chocolate, swap it for dark or milk chocolate. You can still add a drop of green food coloring, but it will be much more subtle. For a truly spooky look, use dark chocolate and skip the coloring—the contrast with the almond nail is striking. (I made these for a friend who hates white chocolate, and they were a huge hit.)
Bloody Witch Fingers: After the chocolate sets, drizzle a little red candy melts or strawberry syrup over the “cuticle” area to look like blood. This is a great variation for a more gruesome Halloween party. Just be careful not to overdo it—a little goes a long way.
Gluten-Free Version: As I mentioned earlier, gluten-free pretzel rods exist and work well. They are a bit more fragile, so handle them gently during dipping. You can also use gluten-free breadsticks or even carrot sticks for a healthier, low-carb option (though the flavor will be different).
Spider Web Design: Instead of making witch fingers, you can turn these into spider web pretzels. Dip the entire pretzel in white chocolate, then pipe a web pattern using dark chocolate. It is a fun alternative if you have leftover chocolate.
Personal Variation: My favorite twist is adding a tiny pinch of cinnamon or pumpkin spice to the melted white chocolate. It gives the witch fingers a subtle, warm flavor that feels very autumnal. I tried this on a whim one year, and now I do it every time. It doesn’t change the color, but it adds a lovely aroma.
Serving & Storage Suggestions
These spooky treats are best served chilled, straight from the fridge. The cold chocolate has a satisfying snap when you bite into it, and the pretzel stays perfectly crunchy. Arrange them on a platter with the “fingers” pointing in different directions for maximum creepiness. You can also stand them up in a small glass or jar filled with black beans or candy corn to look like a hand reaching out of the ground.
For a Halloween party, I like to serve them alongside other spooky snacks like ghost-shaped cookies, pumpkin dip, or caramel apples. They also pair surprisingly well with a warm cup of apple cider or a mug of hot chocolate. The salty-sweet combo is a natural fit for fall flavors.
Storage: Store any leftover witch finger pretzels in an airtight container in the refrigerator. They will stay fresh for up to a week. Do not store them at room temperature, as the white chocolate can soften and become sticky. If you are making them ahead of time, you can prepare them up to three days in advance—just keep them chilled. The flavors actually develop a bit over time, and the pretzel stays crunchy as long as it is kept dry.
Freezing: You can freeze these pretzels for up to a month. Place them in a single layer on a baking sheet and freeze until solid, then transfer them to a freezer-safe bag or container. To serve, let them thaw in the refrigerator for about 30 minutes. (I have done this for a few holiday parties, and they taste just as good as fresh.)
Reheating: These are meant to be eaten cold, so no reheating is necessary. If you prefer a softer chocolate, you can let them sit at room temperature for 5 to 10 minutes before serving.
Nutritional Information & Benefits
Let’s be honest—these are a treat, not a health food. But here is a rough estimate of what you are getting per serving (one witch finger pretzel).
Estimated Nutritional Values (per pretzel):
- Calories: ~120
- Fat: 7g
- Carbohydrates: 14g
- Sugar: 8g
- Protein: 2g
- Sodium: 150mg
Health Benefits: The pretzel itself provides a small amount of iron and B vitamins from the enriched flour. The almonds add a bit of healthy fat, vitamin E, and magnesium. And white chocolate, while not exactly a superfood, does contain calcium from the milk solids. (I like to think of the almond as the “healthy” part, even if it is just a fingernail.)
Dietary Considerations: These are vegetarian, but not vegan (unless you use plant-based white chocolate). They contain gluten, dairy, and tree nuts (almonds). If you have allergies, be sure to check the labels on your pretzels and chocolate. For a nut-free version, skip the almond and use a piece of dried fruit or a green jellybean for the nail.
Personal Wellness Perspective: I believe in balance. These witch finger pretzels are a fun, occasional treat that brings joy to a holiday celebration. They are not something you eat every day, and that is okay. Sometimes, the best thing you can do for your mental health is to make something silly and delicious and share it with people you love. That has its own kind of nutritional value.
Conclusion
If you are looking for a Halloween treat that is equal parts fun, fast, and delicious, these white chocolate witch finger pretzels are the answer. They come together in about 30 minutes, use simple ingredients, and are guaranteed to get a reaction from everyone who sees them. Whether you are hosting a party, sending treats to school, or just want to do something silly with your kids on a Tuesday night, this recipe delivers.
I love this recipe because it reminds me that cooking doesn’t have to be serious. It can be playful, imperfect, and full of personality. Mrs. Kowalski taught me that the best recipes are the ones that make people smile—and these pretzels definitely do that. So go ahead, make a batch. Add too much green coloring. Forget to chill them long enough. It doesn’t matter. What matters is that you tried something fun and shared it with the people around you.
I would love to hear how yours turn out! Did you add a twist? Did your kids help with the fingernails? Leave a comment below and let me know. And if you are looking for more easy Halloween ideas, be sure to check out my other spooky snack recipes. Happy haunting, and happy snacking!
Frequently Asked Questions
Can I use white chocolate candy melts instead of chips?
Yes, absolutely. White chocolate candy melts are actually easier to work with because they are designed to melt smoothly and set firmly. They often come in colors, so you might even find green melts and skip the food coloring altogether. Just follow the melting instructions on the package.
How do I keep the almond fingernails from falling off?
Press the almond into the chocolate while it is still very wet. If the chocolate has started to set, the almond won’t stick as well. You can also dab a tiny bit of melted chocolate on the back of the almond before pressing it onto the pretzel. Chilling them immediately after also helps secure the nail.
Can I make these without a microwave?
Definitely. Use a double boiler instead. Fill a small saucepan with an inch of water and bring it to a simmer. Place a heatproof bowl on top, making sure it doesn’t touch the water. Add the white chocolate to the bowl and stir until melted. This method is actually more forgiving than a microwave and reduces the risk of burning.
Why did my white chocolate turn grainy?
White chocolate can seize (become grainy and thick) if it gets too hot or if even a tiny drop of water gets into the bowl. To fix it, try stirring in a teaspoon of warm milk, cream, or coconut oil. If that doesn’t work, you may need to start over with fresh chocolate. Always make sure your bowl and utensils are completely dry before you begin.
How far in advance can I make these for a party?
You can make them up to three days in advance. Store them in an airtight container in the refrigerator. If you are making them more than a day ahead, layer them between sheets of parchment paper so the chocolate doesn’t get scratched. They also freeze well for up to a month, as mentioned above.
Pin This Recipe!
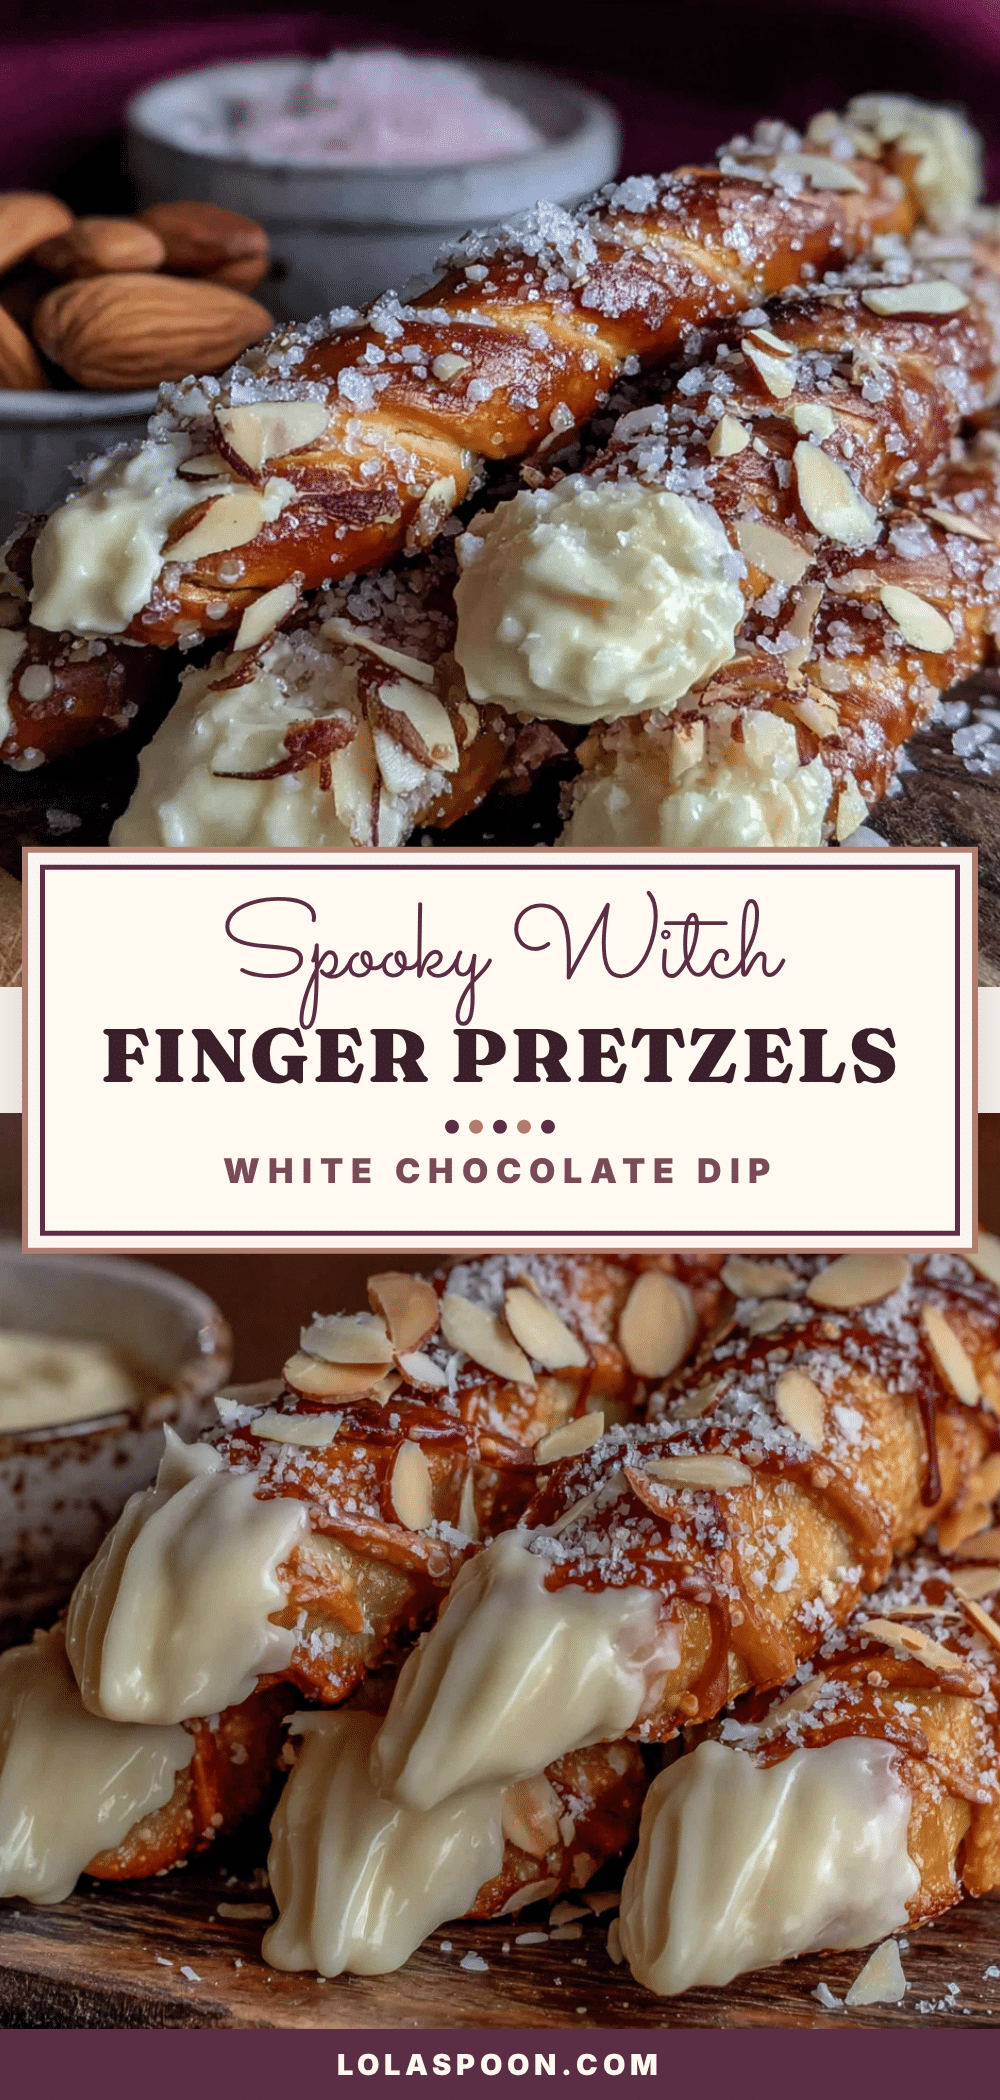
Spooky White Chocolate Witch Finger Pretzels (Easy 30-Min Recipe)

These spooky white chocolate witch finger pretzels are a quick and easy Halloween treat that combines salty pretzel rods with creamy white chocolate, green food coloring, and almond fingernails. Perfect for parties, they come together in just 30 minutes and are guaranteed to get a laugh.
- Prep Time: 15 minutes
- Cook Time: 5 minutes
- Total Time: 30 minutes
- Yield: 24 servings 1x
- Category: Dessert
- Cuisine: American
Ingredients
- 24 pretzel rods (about 12 oz)
- 12 oz (340g) white chocolate chips or melting wafers
- 2–3 drops green food coloring gel
- 1/4 cup (30g) sliced almonds
- 1 teaspoon coconut oil or vegetable shortening (optional)
Instructions
- Line a large baking sheet with parchment paper or a silicone baking mat. Set aside.
- Place white chocolate chips or melting wafers in a microwave-safe bowl. Microwave in 20-second intervals, stirring well after each, until about 75% melted. Stir until smooth. If using, stir in coconut oil.
- Add 2-3 drops green food coloring gel to the melted white chocolate and stir until evenly distributed. Aim for a pale, sickly green.
- Working one at a time, hold a pretzel rod by one end and dip the other end into the green chocolate, submerging about two-thirds. Let excess drip off, then place on the prepared baking sheet.
- Immediately press a sliced almond onto the tip of each coated pretzel, angled slightly upward like a fingernail. Press gently to adhere.
- Transfer remaining green chocolate to a small piping bag or zip-top bag with a tiny corner snipped off. Pipe small horizontal lines across the knuckles of each pretzel (about 3 lines per finger).
- Use a toothpick or small skewer to gently drag through the piped lines for a wrinkled effect. Optionally, press the toothpick into the chocolate to create small indentations.
- Place the baking sheet in the refrigerator for 15-20 minutes, or until the chocolate is completely firm.
- Serve chilled or store in an airtight container in the refrigerator for up to a week.
Notes
Don’t overheat the white chocolate; melt slowly. Work in small batches if making a large quantity. Use a deep, narrow container for dipping to minimize waste. Let chocolate set fully before moving. Imperfections add to the spooky effect.
Nutrition
- Serving Size: 1 pretzel
- Calories: 120
- Sugar: 8
- Sodium: 150
- Fat: 7
- Saturated Fat: 4
- Carbohydrates: 14
- Protein: 2
Keywords: Halloween, witch fingers, pretzels, white chocolate, easy, spooky, party treat


