My niece asked why I couldn’t just use a heart-shaped cookie cutter on regular red velvet crinkle cookies instead of shaping each one by hand. I started to explain why that wouldn’t work—then stopped. Honestly, I didn’t have a good reason. I’d just always done it the “traditional” way, rolling each ball and hoping they’d spread into imperfect circles. But she was twelve, staring at me with that mix of boredom and curiosity that only tweens can pull off, and I figured, what’s the worst that could happen? We’d end up with oddly shaped cookies that still taste amazing. So I grabbed my heart-shaped cutter, chilled the dough extra firm, and pressed down. The first one came out perfect—a distinct, unmistakable heart shape with those gorgeous crackled edges. I mean, I actually gasped. My niece just shrugged and said, “Told you.” That was three Valentine’s Days ago, and I haven’t shaped a single crinkle cookie by hand since. These Sweet Valentine’s Red Velvet Heart-Shaped Crinkle Cookies are now my go-to for every February 14th, and honestly, they’re too pretty not to make year-round. There’s something about that deep red crumb peeking through the powdered sugar that just screams love—maybe you’ve been there, staring at a plate of cookies wondering if they’re too pretty to eat. Trust me, they’re not. You’ll want to devour every single one.
Why You’ll Love This Recipe
These aren’t your average crinkle cookies. They’re a full-on Valentine’s Day experience that comes together with zero stress and maximum payoff. I’ve tested this recipe at least a dozen times (bless my neighbors, who’ve become professional cookie tasters), and here’s why it keeps winning hearts:
- Quick & Easy: From mixing bowl to cookie jar in under an hour. The dough needs just 30 minutes of chilling, so you’re not waiting around all day.
- Simple Ingredients: Cocoa powder, flour, sugar, eggs, butter—the usual suspects. No fancy extracts or hard-to-find red food coloring that stains everything it touches. I use gel food coloring for the richest red without the mess.
- Perfect for Valentine’s Day: Whether it’s a classroom party, a Galentine’s gathering, or a romantic night in, these heart-shaped beauties steal the show. I’ve even packaged them in little cellophane bags for my daughter’s teachers.
- Crowd-Pleaser: Kids love the fun shape, adults love the fudgy texture, and everyone loves that powdered sugar coating that gets all over your fingers.
- Unbelievably Delicious: The combo of rich cocoa and tangy buttermilk (or vinegar-milk hack if you’re out) creates this deep, complex flavor that’s miles better than any box mix.
What makes this version different? It’s the technique—chilling the dough until it’s firm enough to hold the heart shape while still spreading into those signature crinkles. Most crinkle cookie recipes turn into blobs when you try to shape them. Not these. They keep their heart shape perfectly while still getting that gorgeous crackled top. It’s comfort food reimagined—fudgy, festive, and faster than you’d think.
What Ingredients You Will Need
This recipe uses straightforward ingredients that deliver bold chocolate flavor and that signature tender crumb. Most of these are pantry staples, which means you’re probably already halfway there. Here’s what you’ll need:
For the Cookies:
- 1 ¾ cups all-purpose flour (spooned and leveled—don’t scoop straight from the bag or you’ll end up with dense cookies)
- ½ cup unsweetened cocoa powder (I prefer Dutch-process for a smoother, less acidic flavor, but natural works fine too)
- 1 teaspoon baking soda
- ½ teaspoon salt (fine sea salt, not coarse)
- ½ cup unsalted butter, softened (leave it out for about 30 minutes—microwaving it melts the edges and changes the texture)
- 1 cup granulated sugar
- 1 large egg, room temperature (quick tip: place it in warm water for 5 minutes if you forgot to take it out)
- 2 teaspoons vanilla extract (pure, not imitation—trust me on this one)
- 2 tablespoons buttermilk (or 2 tablespoons milk mixed with ½ teaspoon white vinegar, let sit for 5 minutes)
- 1 tablespoon red gel food coloring (liquid coloring won’t give you that deep, vibrant red—splurge on the gel)
For the Coating:
- ½ cup powdered sugar (for rolling—you’ll need more if you’re generous like me)
A quick note on the cocoa: I’ve tested this with both Hershey’s natural cocoa and Guittard Dutch-process, and honestly, both work beautifully. The Dutch-process gives a darker, more “red velvet” color, while natural cocoa makes the red pop more against the chocolate. Choose based on what you have—I’ve made these with whatever’s in my pantry and they’ve never disappointed.
For the food coloring, I cannot stress this enough: use gel. I learned this the hard way when I used liquid red coloring and ended up with pinkish-brown cookies that looked more like mud than velvet. Americolor Super Red is my go-to, but any brand of gel works. You’ll use about a tablespoon, but start with 2 teaspoons and add more if you want it deeper.
Equipment Needed
Nothing fancy here—just the basics you probably already own. Here’s what you’ll need:
- Large mixing bowl (or stand mixer with paddle attachment—both work, I’ve used both)
- Hand mixer or stand mixer (you can cream by hand, but your arm will thank you for using a mixer)
- Heart-shaped cookie cutter (about 2.5 to 3 inches—I found a set of three at Target for $5)
- Baking sheets (two, so you can rotate batches)
- Parchment paper or silicone baking mats (parchment is cheaper, mats are reusable—both prevent sticking)
- Cooling rack (wire rack lets air circulate so cookies don’t get soggy bottoms)
- Measuring cups and spoons
- Plastic wrap (for chilling the dough)
- Small bowl (for the powdered sugar)
If you don’t have a heart-shaped cutter, don’t let that stop you. You can use a small round cutter and call them “Valentine’s Crinkle Rounds”—they’ll taste just as good. Or, if you’re feeling creative, cut the shape freehand with a paring knife. I’ve done that when my cutter was buried in the back of a drawer, and while they weren’t perfectly symmetrical, they still looked adorable.
One tip on the baking sheets: avoid dark-colored ones unless you’re okay with darker bottoms. Light-colored, shiny aluminum sheets reflect heat and give you more even browning. I learned this after burning the first batch on my dark non-stick pan—live and learn, right?
Preparation Method
Let’s get baking. This method breaks down into simple steps, but I’ve included all the little details I wish someone had told me the first time I made these.
- Whisk the dry ingredients. In a medium bowl, whisk together the flour, cocoa powder, baking soda, and salt. Make sure there are no lumps—cocoa powder loves to clump, so I use a fork to break them up. Set this aside while you work on the wet ingredients.
- Cream the butter and sugar. In a large bowl (or stand mixer bowl), beat the softened butter and granulated sugar together on medium speed until light and fluffy. This takes about 3-4 minutes with a hand mixer, 2 minutes with a stand mixer. You’re looking for a pale, creamy texture—scrape down the sides halfway through. Don’t rush this step; proper creaming means air gets incorporated, which gives you a tender cookie.
- Add the egg and vanilla. Beat in the egg, then the vanilla extract, until fully combined. The mixture might look slightly curdled at this point—that’s totally normal, especially if your egg was a bit cold. Don’t panic.
- Add the buttermilk and food coloring. Pour in the buttermilk and red gel food coloring. Beat on low speed until the color is evenly distributed. The dough will look pretty red at this stage, but it’ll darken slightly as you add the flour. If you want a deeper red, add another teaspoon of gel coloring now.
- Combine wet and dry. Gradually add the flour mixture to the wet ingredients, mixing on low speed until just combined. Overmixing at this stage will make your cookies tough—stop as soon as you no longer see streaks of flour. Scrape down the bowl one more time to make sure everything’s incorporated.
- Chill the dough. This is the most important step. Wrap the dough in plastic wrap and flatten it into a disc (about 1 inch thick). Refrigerate for at least 30 minutes, or up to 3 days. The dough needs to be firm enough to hold the heart shape when you cut it. If you skip this step, your cookies will spread into puddles instead of hearts.
- Preheat and prep. About 15 minutes before you’re ready to bake, preheat your oven to 350°F (175°C). Line two baking sheets with parchment paper or silicone mats.
- Roll and cut. On a lightly floured surface, roll the chilled dough to about ¼-inch thickness. Don’t go thinner—they’ll bake up too crispy. Use your heart-shaped cutter to cut out shapes. Re-roll the scraps once, but no more—the dough gets tough if you overwork it.
- Coat in powdered sugar. Place the powdered sugar in a small bowl. Gently press each heart-shaped cookie into the sugar, coating both sides. Shake off any excess—you want a light, even coating, not a thick crust. Place the coated cookies about 2 inches apart on the prepared baking sheets.
- Bake. Bake for 8-10 minutes, rotating the pan halfway through. The cookies are done when the edges are set and the tops look slightly cracked. They’ll still be soft in the center—that’s what you want. Let them cool on the baking sheet for 5 minutes, then transfer to a wire rack to cool completely.
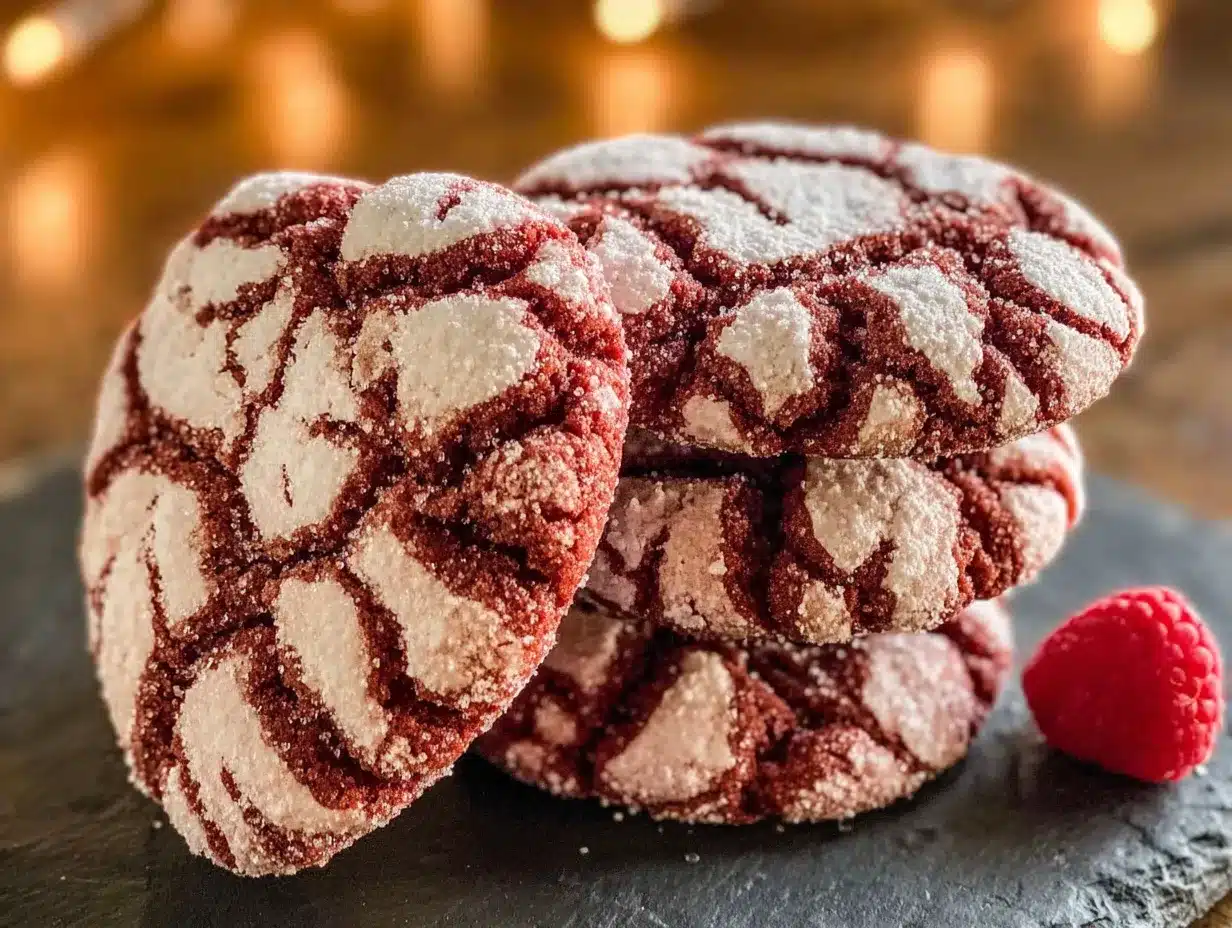
A few sensory cues to watch for: when you press the dough, it should feel firm and slightly cool from the fridge. The powdered sugar coating should look like a light dusting of snow—not a thick, cakey layer. And when the cookies come out of the oven, you should see those beautiful red cracks peeking through the white sugar. That’s the moment you know you’ve nailed it.
Cooking Tips & Techniques
After making these cookies more times than I can count (and failing spectacularly a few times), here’s what I’ve learned:
Don’t skip the chill. I know, I know—you’re impatient. I get it. The first time I made these, I thought “30 minutes is plenty” and cut the chilling to 15. The cookies spread into amorphous blobs that looked nothing like hearts. The powdered sugar turned into a sad, melted mess. Learn from my mistake: 30 minutes minimum, and 1 hour is even better.
Use a light hand with the powdered sugar. You want a thin, even coating—not a thick crust. If you press too hard, the sugar clumps and you lose that delicate crinkle effect. I gently press each cookie into the bowl, flip it once, and tap off the excess. It takes practice, but you’ll get a feel for it.
Rotate your baking sheets. Every oven has hot spots—I learned this when the cookies on the left side of my oven came out perfectly while the ones on the right were practically burnt. Rotating the pans halfway through ensures even baking. Also, bake one sheet at a time if you can. Crowding the oven messes with the heat distribution.
Check for doneness early. My first batch came out dry because I left them in the full 10 minutes. These cookies continue to set as they cool on the baking sheet, so pull them out when the edges are set but the centers still look slightly underdone. They’ll firm up perfectly. If you wait until they look “done” in the oven, they’ll be overbaked.
Let them cool completely. I know it’s tempting to grab one warm, but the powdered sugar needs time to set. Warm cookies will make the sugar dissolve into a sticky mess. Trust me—I’ve burned my tongue and ruined the aesthetic in one impatient move. Give them the full 5 minutes on the sheet, then transfer to a wire rack for at least 10 more minutes.
Variations & Adaptations
One of the best things about this recipe is how easily it adapts. Here are some variations I’ve tried and loved:
Gluten-Free Version: Substitute the all-purpose flour with a 1:1 gluten-free baking flour blend (I like King Arthur’s). The texture will be slightly more delicate, so handle the dough gently. Everything else stays the same—even the powdered sugar coating.
Vegan Adaptation: Use vegan butter (I recommend Earth Balance), a flax egg (1 tablespoon ground flaxseed mixed with 3 tablespoons water, let sit for 5 minutes), and plant-based milk with vinegar for the buttermilk. The cookies won’t be quite as tender, but they’re still delicious. I made these for my vegan friend’s Galentine’s party and they disappeared in minutes.
White Chocolate Drizzle: After the cookies have cooled completely, melt ½ cup white chocolate chips with 1 teaspoon coconut oil and drizzle over the tops. The white chocolate against the red cookies is stunning—perfect for gifting. I did this for a cookie exchange and everyone thought I bought them from a bakery.
Peppermint Twist: Add ½ teaspoon peppermint extract along with the vanilla. The mint-chocolate combo is surprisingly festive and works beautifully for Valentine’s Day. Just don’t overdo it—peppermint extract is potent and can overpower the chocolate.
Mini Heart Bites: Use a smaller heart cutter (about 1.5 inches) and reduce the baking time to 6-7 minutes. These are perfect for kids’ parties or as little treats to tuck into lunchboxes. I made a batch for my niece’s class and they were the hit of the party.
Dark Chocolate Version: Swap the all-purpose flour for 1 cup flour and ¾ cup dark cocoa powder (like black cocoa). The cookies will be darker, richer, and have that dramatic black-and-white contrast with the powdered sugar. It’s a bit more intense, but chocolate lovers will thank you.
Serving & Storage Suggestions
These cookies are best served at room temperature—the texture is soft and fudgy, and the powdered sugar stays crisp. I like to arrange them on a pretty plate with a few fresh raspberries or strawberries for color. They’re stunning on a Valentine’s Day dessert table alongside chocolate-covered strawberries and pink champagne.
For gifting, place the cookies in a decorative tin or cellophane bag tied with a red ribbon. They’ll stay fresh for up to 5 days at room temperature in an airtight container. I’ve also frozen them successfully—just layer them between sheets of parchment paper in a freezer-safe container. They’ll keep for up to 3 months.
When reheating, pop them in a 300°F oven for 3-4 minutes if you want that just-baked warmth. The microwave works too, but it’ll soften the powdered sugar coating. Honestly, I prefer them at room temperature—the flavors are more pronounced and the texture is spot-on.
One thing I’ve noticed: these cookies actually get better after a day. The flavors meld together, and the texture becomes even more fudgy. So if you’re making them ahead for a party, bake them the day before. Your future self will thank you.
Nutritional Information & Benefits
Per cookie (based on 24 cookies): approximately 130 calories, 5g fat, 20g carbohydrates, 2g protein, 12g sugar. These are estimates—your numbers will vary based on exact ingredients and cookie size.
While these are definitely a treat (hello, sugar and butter), they do have a few redeeming qualities. Cocoa powder is rich in antioxidants called flavonoids, which can support heart health and reduce inflammation. Plus, the buttermilk adds a touch of calcium and probiotics. But let’s be real—you’re not eating these for the health benefits. You’re eating them because they’re delicious, and that’s perfectly okay.
For those with dietary concerns: these cookies contain gluten, dairy, and eggs. I’ve provided gluten-free and vegan variations above. The sugar content is moderate for a dessert, but you can reduce the granulated sugar to ¾ cup if you prefer less sweetness—just note that the texture will be slightly less tender.
Conclusion
These Sweet Valentine’s Red Velvet Heart-Shaped Crinkle Cookies are more than just a pretty face—they’re genuinely delicious, surprisingly easy to make, and endlessly adaptable. Whether you’re baking for a loved one, a friend, or just because you deserve something sweet, these cookies deliver every single time.
I love that this recipe started with a twelve-year-old questioning my methods. It’s a good reminder that sometimes the best ideas come from the most unexpected places—and that being wrong can lead to something wonderful. So go ahead, grab that heart-shaped cutter, and make a batch. Customize them however you like—add white chocolate, go gluten-free, or keep them classic. They’re your cookies now.
I’d love to hear how yours turn out! Drop a comment below with your favorite variation, or tag me in your photos on social media. Happy Valentine’s Day, and happy baking!
Frequently Asked Questions
Can I make the dough ahead of time?
Absolutely! The dough can be refrigerated for up to 3 days or frozen for up to 3 months. Just wrap it tightly in plastic wrap and then in foil. When you’re ready to bake, let it sit at room temperature for about 10 minutes before rolling—it’ll be easier to work with.
Why did my cookies spread too much?
This usually happens when the dough isn’t chilled enough. Make sure you refrigerate it for at least 30 minutes, and don’t skip the step of coating in powdered sugar right before baking. If your kitchen is warm, pop the baking sheet in the fridge for 5 minutes before it goes in the oven.
Can I use liquid food coloring instead of gel?
You can, but the results won’t be as vibrant. Liquid coloring adds extra moisture to the dough, which can affect the texture and make the cookies spread more. If you’re in a pinch, use about 2 tablespoons of liquid coloring and reduce the buttermilk by 1 tablespoon.
How do I get the perfect crinkle effect?
The secret is the powdered sugar coating and the right oven temperature. Make sure the dough is well-chilled, roll it in powdered sugar generously, and bake at 350°F. The contrast between the cold dough and hot oven creates those beautiful cracks. Also, don’t overbake—pull them out when the edges are set but the centers are still soft.
Can I make these cookies without a heart-shaped cutter?
Definitely! Use a small round cutter for “Valentine’s Crinkle Rounds,” or shape the dough into balls and flatten slightly for traditional crinkle cookies. You can even cut them freehand with a paring knife—they won’t be perfect, but they’ll still taste amazing.
Pin This Recipe!

Sweet Valentines Red Velvet Heart Crinkle Cookies

These heart-shaped red velvet crinkle cookies are fudgy, festive, and surprisingly easy to make. With a deep red crumb peeking through a powdered sugar coating, they’re perfect for Valentine’s Day or any occasion.
- Prep Time: 15 minutes
- Cook Time: 10 minutes
- Total Time: 55 minutes
- Yield: 24 servings 1x
- Category: Dessert
- Cuisine: American
Ingredients
- 1 ¾ cups all-purpose flour (spooned and leveled)
- ½ cup unsweetened cocoa powder (Dutch-process or natural)
- 1 teaspoon baking soda
- ½ teaspoon fine sea salt
- ½ cup unsalted butter, softened
- 1 cup granulated sugar
- 1 large egg, room temperature
- 2 teaspoons pure vanilla extract
- 2 tablespoons buttermilk (or 2 tablespoons milk mixed with ½ teaspoon white vinegar, let sit for 5 minutes)
- 1 tablespoon red gel food coloring
- ½ cup powdered sugar (for coating)
Instructions
- Whisk the dry ingredients: In a medium bowl, whisk together flour, cocoa powder, baking soda, and salt. Set aside.
- Cream the butter and sugar: In a large bowl, beat softened butter and granulated sugar on medium speed until light and fluffy, about 3-4 minutes with a hand mixer or 2 minutes with a stand mixer. Scrape down sides halfway through.
- Add the egg and vanilla: Beat in the egg, then vanilla extract, until fully combined. The mixture may look slightly curdled—that’s normal.
- Add the buttermilk and food coloring: Pour in buttermilk and red gel food coloring. Beat on low speed until color is evenly distributed. Add more gel coloring if desired.
- Combine wet and dry: Gradually add flour mixture to wet ingredients, mixing on low speed until just combined. Do not overmix.
- Chill the dough: Wrap dough in plastic wrap and flatten into a 1-inch thick disc. Refrigerate for at least 30 minutes, or up to 3 days.
- Preheat and prep: About 15 minutes before baking, preheat oven to 350°F (175°C). Line two baking sheets with parchment paper or silicone mats.
- Roll and cut: On a lightly floured surface, roll chilled dough to about ¼-inch thickness. Use a heart-shaped cutter (2.5 to 3 inches) to cut out shapes. Re-roll scraps once only.
- Coat in powdered sugar: Place powdered sugar in a small bowl. Gently press each heart-shaped cookie into the sugar, coating both sides. Shake off excess. Place cookies 2 inches apart on prepared baking sheets.
- Bake: Bake for 8-10 minutes, rotating the pan halfway through. Cookies are done when edges are set and tops look slightly cracked. Cool on baking sheet for 5 minutes, then transfer to a wire rack to cool completely.
Notes
Chill the dough for at least 30 minutes to prevent spreading. Use gel food coloring for vibrant red color. For best results, bake one sheet at a time and rotate halfway through. Cookies continue to set as they cool, so remove from oven when centers are still slightly soft. Store in an airtight container at room temperature for up to 5 days, or freeze for up to 3 months.
Nutrition
- Serving Size: 1 cookie
- Calories: 130
- Sugar: 12
- Sodium: 95
- Fat: 5
- Saturated Fat: 3
- Carbohydrates: 20
- Fiber: 1
- Protein: 2
Keywords: red velvet cookies, heart-shaped cookies, Valentine's Day cookies, crinkle cookies, red velvet crinkle cookies, easy cookie recipe