The neighborhood cookie swap was in three days and I’d completely forgotten. Everyone else would be bringing those elaborate, multi-day creations—you know, the kind with homemade caramel and imported chocolate that takes a whole afternoon to assemble. I had a half-eaten bag of white chocolate chips, a stick of butter, and a sinking feeling in my stomach. Honestly, I almost just showed up with a store-bought tray and called it a day.
But then I spotted the container of sprinkles in the back of my pantry. And I remembered this ridiculously simple sugar cookie fudge recipe my aunt had scribbled on a napkin years ago. I mean, could it really work? Four ingredients, ten minutes of work, and a few hours to set. It felt almost too easy to bring to a swap where people were clearly showing off.
Let me tell you, I walked in feeling like I was cheating. The fudge was sitting pretty on a plate, all creamy and dotted with festive sprinkles. Everyone else had their complicated cookies arranged on tiered stands. And then the first person tried my fudge. Then another. And another. By the end of the night, my plate was empty and three people had asked for the recipe. I just stood there, slightly embarrassed, admitting it was basically a magic trick with four ingredients.
That’s the thing about this sugar cookie fudge—it looks like you spent hours, but you really just melted, stirred, and chilled. It’s the kind of recipe that makes you look like a hero without the stress. Maybe you’ve been there, scrambling for a last-minute contribution? This one’s for you.
Why You’ll Love This Recipe
Let me be honest with you—I’ve tested a lot of fudge recipes in my time. Some are finicky with temperature, others require a candy thermometer and nerves of steel. This sugar cookie fudge is not that recipe. It’s the one I turn to when I need something impressive but don’t have the energy for a project.
- Quick & Easy: Comes together in about 10 minutes of active time. Just melt, stir, pour, and chill. That’s it. No boiling sugar, no precise temperatures.
- Simple Ingredients: You only need four things—white chocolate chips, sweetened condensed milk, butter, and sprinkles. Chances are you already have most of these in your kitchen right now.
- Perfect for Hosting: This is the ultimate crowd-pleaser for potlucks, cookie swaps, holiday parties, or any gathering where you need to bring something that disappears fast.
- Crowd-Pleaser: Kids love the sprinkles, adults love the creamy texture, and everyone loves that it tastes just like a sugar cookie in fudge form.
- Unbelievably Delicious: The texture is what gets me every time—smooth, rich, and melt-in-your-mouth soft. It’s comfort food at its simplest.
What makes this version different from other fudge recipes? It’s the combination of white chocolate and the slight saltiness from the butter that mimics the flavor of a classic sugar cookie. Plus, the sprinkles add that nostalgic, fun factor that makes people smile. I’ve tried versions with almond extract or vanilla bean paste, but honestly, this simple version is the one that always wins.
This recipe isn’t just good—it’s the kind that makes you close your eyes after the first bite. It’s perfect for impressing guests without stress, or turning a simple Tuesday into something a little more special.
What Ingredients You Will Need
This sugar cookie fudge recipe uses simple, wholesome ingredients to deliver that classic sugar cookie flavor in a creamy, sliceable form. Most of these are pantry staples, which is exactly what you want when you’re in a pinch.
- White Chocolate Chips (3 cups / 510g): The base of the fudge. I recommend using a good quality brand like Ghirardelli or Guittard for the smoothest melt. Avoid white melting wafers or candy coating—they don’t have the same creamy texture. The chips should be real white chocolate with cocoa butter listed in the ingredients.
- Sweetened Condensed Milk (1 can / 14 oz / 397g): This is the secret to the fudge’s silky texture. Don’t confuse it with evaporated milk—they’re not the same. Sweetened condensed milk adds sweetness and helps the fudge set properly. I’ve used both Eagle Brand and store brands with good results.
- Unsalted Butter (2 tablespoons / 28g): Adds richness and helps the fudge set with a soft, creamy texture. I use unsalted so I can control the salt level. If you only have salted butter, just skip adding any extra salt later.
- Vanilla Extract (1 teaspoon): This gives the fudge that classic sugar cookie flavor. Pure vanilla extract is best, but imitation vanilla works in a pinch. Sometimes I add an extra ½ teaspoon for a stronger cookie taste.
- Sprinkles (⅓ cup / about 60g): Use rainbow jimmies or confetti-style sprinkles for the best look and texture. Avoid nonpareils (the tiny round balls) as they can bleed color into the fudge. I like to use festive sprinkles that match the occasion—red and green for Christmas, pastels for Easter, or just rainbow for any day.
Optional Add-ins: A pinch of salt (about ¼ teaspoon) can balance the sweetness. Some people like to add ½ teaspoon of almond extract along with the vanilla for a more pronounced cookie flavor. I’ve also tried adding a tablespoon of cornstarch to mimic the texture of a real sugar cookie—it’s subtle but nice.
Substitution Guidance: For a dairy-free version, use dairy-free white chocolate chips and a can of coconut sweetened condensed milk. The texture will be slightly different—a bit softer—but still delicious. I’ve also used vegan butter with good results.
Equipment Needed
You don’t need a lot of fancy equipment for this sugar cookie fudge, which is part of the beauty. Here’s what you’ll need:
- 8×8-inch Baking Pan: This is the perfect size for a thick, sliceable fudge. Line it with parchment paper or aluminum foil for easy removal. I’ve forgotten the parchment before and regretted it—the fudge sticks like crazy.
- Medium Saucepan: For melting the ingredients. A heavy-bottomed pan works best to prevent scorching. If you’re nervous about burning, you can use a double boiler instead.
- Silicone Spatula: Essential for stirring and scraping every last bit of fudge into the pan. A wooden spoon works too, but the spatula gets every corner.
- Measuring Cups and Spoons: For accurate measurements. Fudge is forgiving, but precise measurements help with the texture.
- Sharp Knife: For cutting the fudge cleanly. Run it under hot water, wipe it dry, then slice for the cleanest cuts.
Budget-Friendly Options: If you don’t have an 8×8 pan, a 9×9 will work—the fudge will just be slightly thinner. No saucepan? Use a microwave-safe bowl and melt in 30-second bursts, stirring between each. I’ve done this many times when I didn’t want to dirty a pan.
Preparation Method
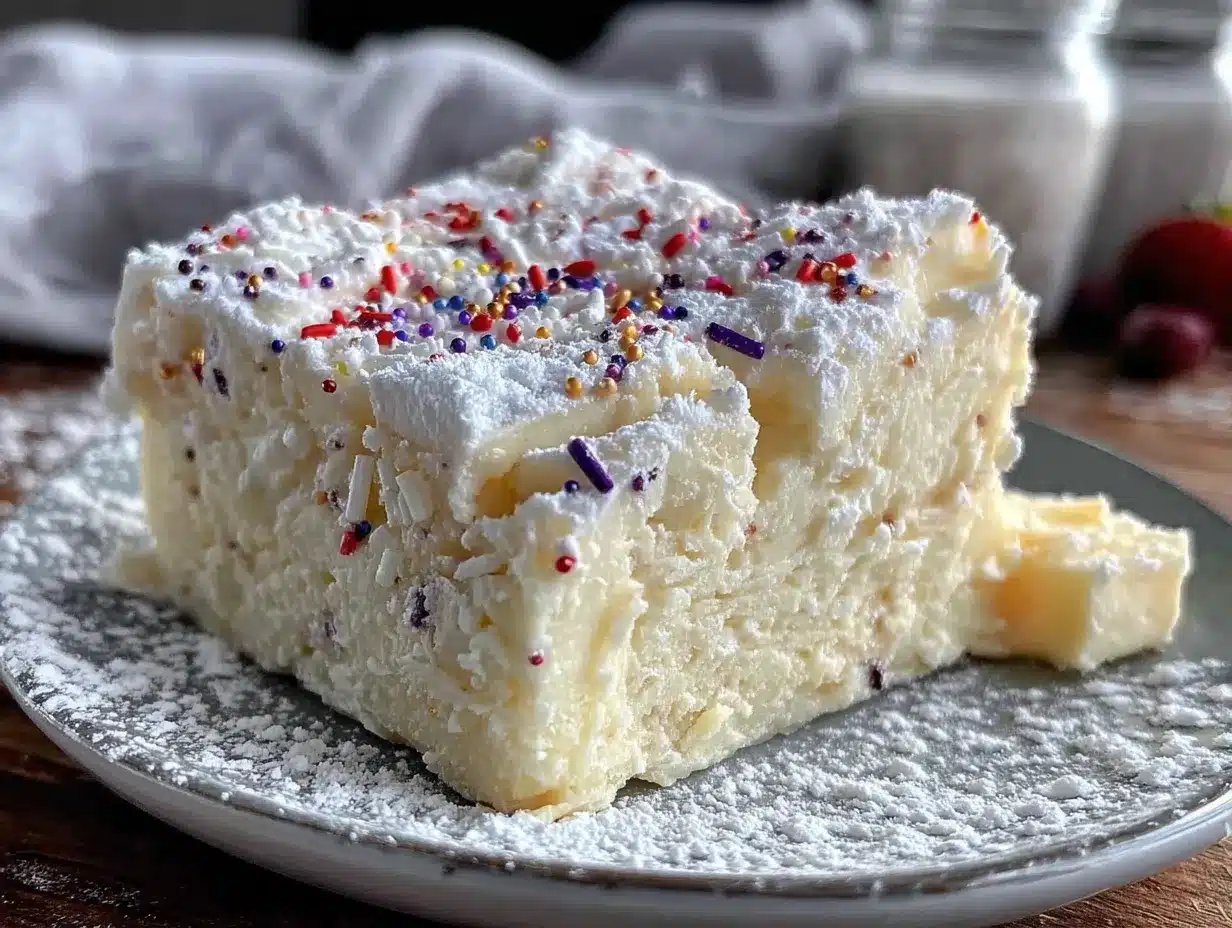
- Prepare the pan: Line an 8×8-inch baking pan with parchment paper, leaving some overhang on two sides. This creates “handles” that make it easy to lift the fudge out later. If you don’t have parchment, aluminum foil works—just grease it lightly with butter.
- Melt the base: In a medium saucepan over low heat, combine the white chocolate chips, sweetened condensed milk, and butter. Stir constantly with a silicone spatula. This is important—don’t walk away! White chocolate burns easily. You’ll see the chips start to soften and the mixture become smooth. It should take about 5-7 minutes.
- Add flavor: Once the mixture is completely smooth and glossy, remove the pan from heat. Stir in the vanilla extract and a pinch of salt if using. The mixture should be thick and slightly shiny. If it looks grainy, you might have overheated it—but don’t panic, it will still taste good.
- Fold in sprinkles: Gently fold in about ¼ cup of the sprinkles, reserving the rest for the top. Stir just until distributed—overmixing can cause the sprinkles to bleed their color. You want those little pops of color throughout.
- Pour and spread: Pour the fudge mixture into the prepared pan. Use your spatula to spread it evenly into the corners. Tap the pan gently on the counter a few times to release any air bubbles. The fudge will be thick and slightly sticky—that’s normal.
- Top with sprinkles: Immediately sprinkle the remaining sprinkles on top. Press them in gently with your fingers or the back of a spoon so they stick. Do this while the fudge is still warm—once it sets, the sprinkles won’t adhere.
- Chill to set: Place the pan in the refrigerator for at least 3 hours, or until the fudge is firm to the touch. I usually let it chill overnight for the best texture. The fudge should be firm but still creamy when you press it.
- Slice and serve: Once set, lift the fudge out of the pan using the parchment overhang. Place it on a cutting board. Use a sharp knife to cut into squares—I usually go for 1-inch pieces, which makes about 64 small squares. For clean cuts, wipe the knife between slices.
Sensory cues: When melting, the mixture should look like thick, glossy white paint. When you pour it into the pan, it should spread easily but hold its shape. After chilling, the fudge should feel firm but still give slightly when pressed. The smell is incredible—sweet, buttery, and like a bakery.
Cooking Tips & Techniques
I’ve made this sugar cookie fudge more times than I can count, and I’ve learned a few things the hard way. Here are my best tips:
Low and slow is the rule. White chocolate is sensitive to heat. If you rush it on high heat, it can seize up and become grainy. Keep the heat on low and stir constantly. I once got distracted by a phone call and ended up with a scorched mess—learn from my mistake!
Watch for the “almost there” moment. The fudge is ready when the white chocolate chips are mostly melted but you can still see a few small pieces. Remove from heat and keep stirring—the residual heat will finish the job. This prevents overheating.
Room temperature ingredients matter. If your butter is cold, it will take longer to melt and can cause uneven heating. Let it sit out for 15 minutes before starting. Same with the sweetened condensed milk—room temperature blends more smoothly.
The sprinkle strategy. Fold sprinkles in gently and don’t overmix. I’ve had batches where the sprinkles turned the whole fudge pink because I stirred too aggressively. Gentle folds are your friend.
Patience with chilling. I know it’s tempting to cut the fudge after an hour, but it won’t be fully set. Three hours is the minimum, and overnight is better. The fudge continues to firm up as it chills, developing that perfect creamy texture.
Storage trick: Store the fudge in an airtight container in the refrigerator. It keeps well for up to two weeks—if it lasts that long. Layer pieces between sheets of parchment paper so they don’t stick together.
Variations & Adaptations
One of the best things about this sugar cookie fudge is how easy it is to customize. Here are some variations I’ve tried and loved:
Festive Holiday Version: Use red and green sprinkles for Christmas, orange and black for Halloween, or pastel colors for Easter. You can also add a drop of food coloring to the fudge base for a tinted effect. I made a pink version for Valentine’s Day once and it was a hit.
Chocolate Sugar Cookie Fudge: Swap half the white chocolate chips for milk chocolate chips. The result tastes like a chocolate sugar cookie—rich but still sweet. My kids prefer this version, honestly.
Almond Cookie Twist: Replace the vanilla extract with ½ teaspoon of almond extract and ½ teaspoon of vanilla. The almond flavor gives it a subtle marzipan note that’s absolutely lovely. Top with sliced almonds along with the sprinkles.
Gluten-Free Adaptation: This recipe is naturally gluten-free as long as you check your white chocolate chips. Some brands add wheat-based ingredients. I use Ghirardelli or Enjoy Life brand for a guaranteed gluten-free option.
Dairy-Free Version: Use dairy-free white chocolate chips (like those from Enjoy Life or Pascha), vegan butter, and a can of coconut sweetened condensed milk. The texture will be slightly softer but still delicious. I’ve served this at parties and no one noticed the difference.
Extra Cookie Flavor: Add 2 tablespoons of sugar cookie mix (the dry mix from a box) to the fudge while melting. This adds that distinct “cookie” flavor. Just make sure it’s gluten-free if needed.
Serving & Storage Suggestions
This sugar cookie fudge is best served cold or at room temperature. I personally love it straight from the fridge—the texture is firmer and almost creamy like a truffle. If you prefer a softer fudge, let it sit at room temperature for 10-15 minutes before serving.
Presentation tips for hosting: Arrange the fudge squares on a white platter or cake stand for a beautiful contrast. Sprinkle a few extra sprinkles around the plate for a festive look. I like to add a small sign that says “Sugar Cookie Fudge” so guests know what they’re trying. For a party, cut the fudge into smaller bite-sized pieces—people love being able to grab just one more.
What to serve alongside: This fudge pairs beautifully with a cup of coffee or a glass of cold milk. For a dessert table, serve it alongside classic sugar cookies, chocolate truffles, or fresh fruit. It’s also amazing crumbled over vanilla ice cream for an easy sundae.
Storage instructions: Store the fudge in an airtight container in the refrigerator for up to 2 weeks. Layer pieces between sheets of parchment paper to prevent sticking. If you’re making it ahead for a party, it actually tastes better after a day or two—the flavors meld together.
Freezing instructions: This fudge freezes beautifully. Wrap individual pieces in plastic wrap, then place them in a freezer-safe bag. They’ll keep for up to 3 months. To thaw, just move them to the refrigerator overnight. I often make a double batch and freeze one for later.
Reheating tip: If the fudge seems too hard after refrigeration, let it sit at room temperature for 15 minutes. It will soften to the perfect creamy consistency.
Nutritional Information & Benefits
Let’s be real—this is a treat, not a health food. But here’s the nutritional info for one small square (based on 64 pieces):
- Calories: Approximately 85-100 per piece
- Fat: 5-6g
- Carbohydrates: 10-12g
- Sugar: 9-10g
- Protein: 1g
Health benefits of key ingredients: White chocolate contains cocoa butter, which has antioxidants and healthy fats. The butter adds vitamin A, and the sweetened condensed milk provides calcium and protein. Of course, these benefits come with sugar, so moderation is key.
Dietary considerations: This recipe is naturally gluten-free (check your chocolate chips) and can be made dairy-free with substitutions. It’s not suitable for vegan diets unless you use vegan ingredients. The fudge contains dairy and may contain soy (often in white chocolate).
Personal wellness perspective: I believe in balance. This fudge is perfect for special occasions, holidays, or when you just need a little sweetness in your life. I make it for parties and gatherings, not for everyday snacking. One or two pieces are enough to satisfy that sugar cookie craving without overdoing it.
Conclusion
This sugar cookie fudge has become my secret weapon for every gathering, potluck, and holiday party. It’s the recipe that makes me look like I spent hours in the kitchen when really, I just melted four ingredients together and let the fridge do the work. Honestly, that’s the kind of recipe we all need in our back pocket.
I love that it’s customizable—you can change the sprinkles for any occasion, add different extracts, or even swap the chocolate. But the simple version? That’s the one that keeps winning. Every time I bring it somewhere, people ask for the recipe, and I get to smile and say, “It’s just four ingredients.”
I hope you give this fudge a try, whether it’s for a last-minute contribution or a planned dessert table. Don’t be afraid to make it your own—add your favorite sprinkles, try a different extract, or double the batch. And when you do, I’d love to hear about it. Leave a comment below and tell me how it turned out, or share your own twist on the recipe. Happy cooking, friends!
Frequently Asked Questions
Can I use white chocolate bars instead of chips?
Yes, you can! Just chop the bars into small, even pieces so they melt evenly. Chips are more convenient because they’re already uniform in size, but bars work perfectly too. Use the same weight—about 3 cups or 510g.
Why did my fudge turn out grainy?
Grainy fudge usually happens when the white chocolate gets too hot or when moisture gets into the mixture. Keep the heat on low and stir constantly. If you’re using a microwave, heat in 30-second bursts and stir between each. A little graininess won’t ruin the taste, but it won’t be as smooth.
Can I make this without sweetened condensed milk?
Sweetened condensed milk is essential for the texture and sweetness of this fudge. I don’t recommend substituting it. If you’re dairy-free, use a can of coconut sweetened condensed milk—it works beautifully and adds a subtle coconut flavor.
How long does this fudge last?
Stored in an airtight container in the refrigerator, this fudge stays fresh for up to 2 weeks. It also freezes well for up to 3 months. Just make sure it’s well-wrapped to prevent freezer burn. The flavor actually gets better after a day or two!
Can I double this recipe?
Absolutely! Double all the ingredients and use a 9×13-inch pan instead of an 8×8. The chilling time might be slightly longer—give it at least 4 hours or overnight. This is perfect for large gatherings or holiday gift-giving.
Pin This Recipe!
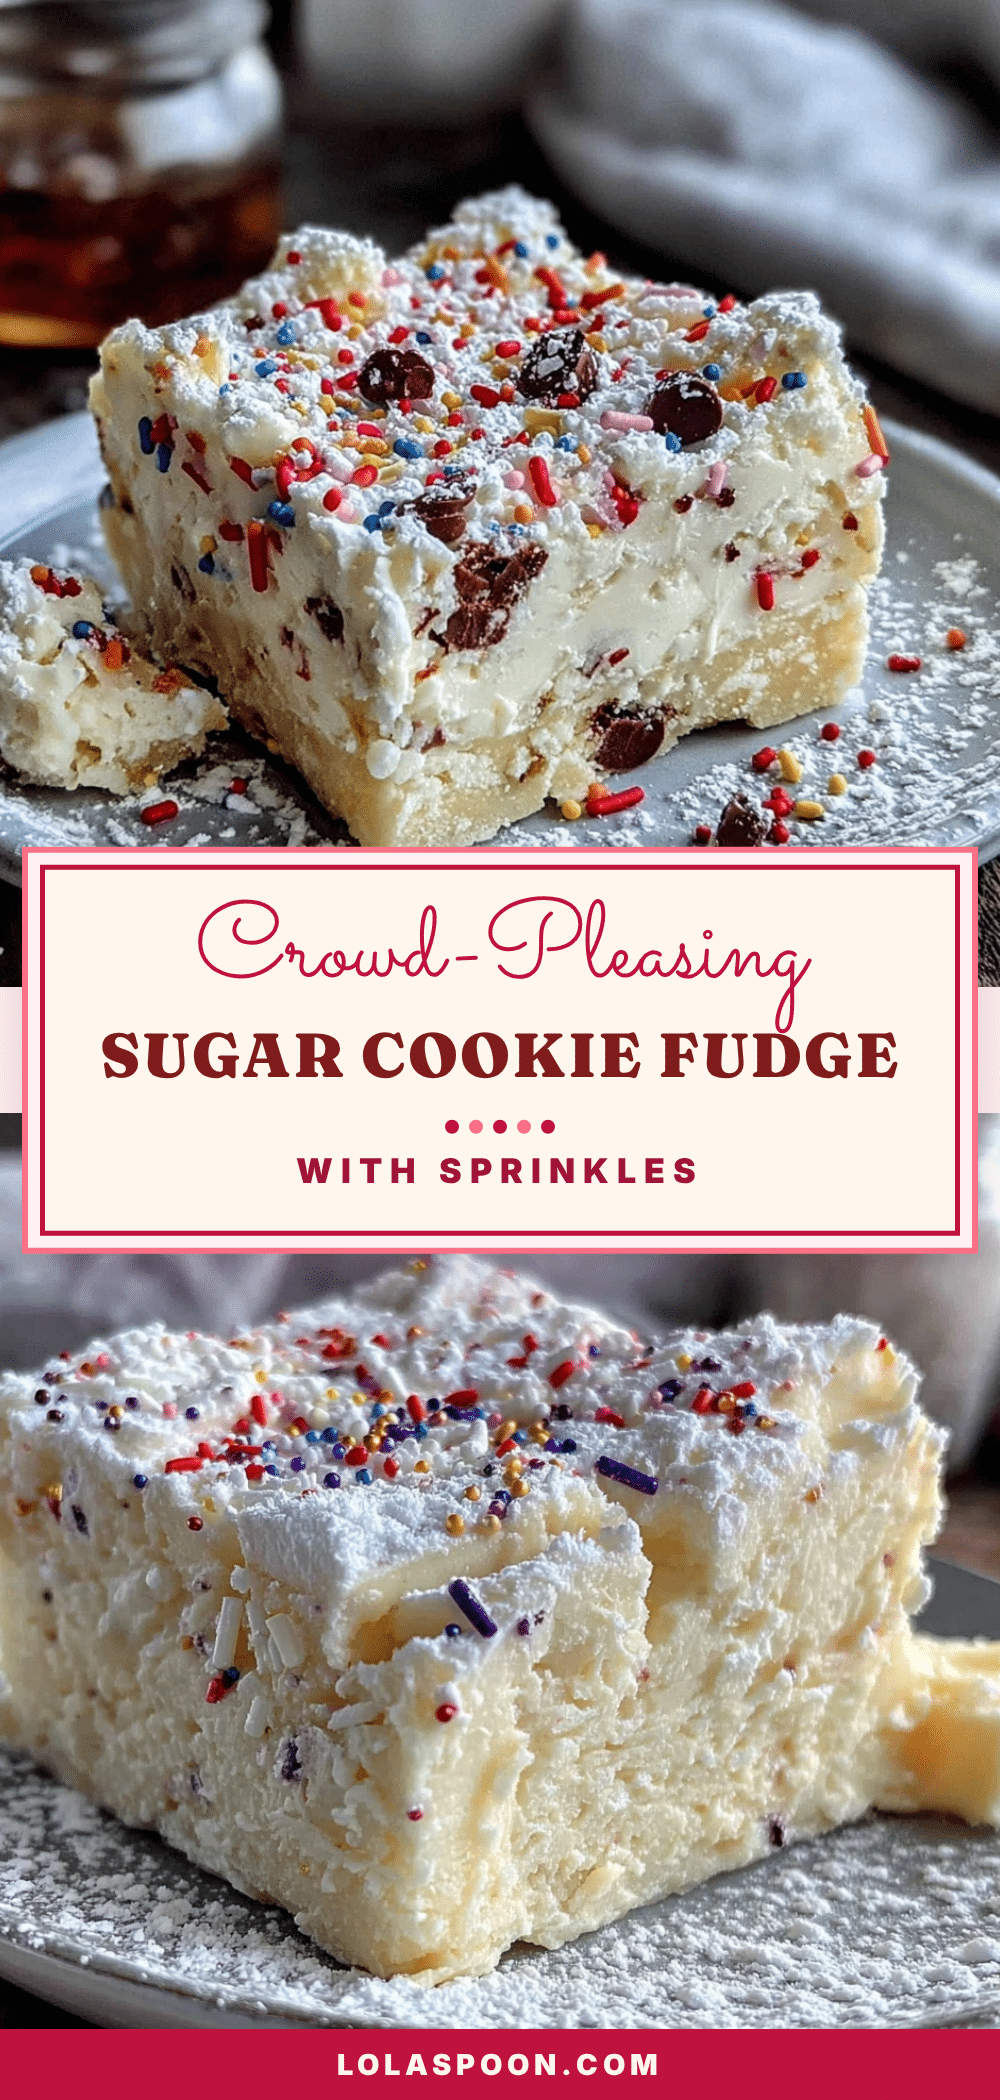
Best 4-Ingredient Sugar Cookie Fudge with Sprinkles
This creamy, melt-in-your-mouth sugar cookie fudge comes together with just four ingredients and ten minutes of active time. Perfect for last-minute contributions to cookie swaps, potlucks, or holiday parties, it tastes like a sugar cookie in fudge form and is always a crowd-pleaser.
- Prep Time: 10 minutes
- Cook Time: 5-7 minutes
- Total Time: 3 hours 15 minutes (includes chilling)
- Yield: 64 servings 1x
- Category: Dessert
- Cuisine: American
Ingredients
- 3 cups (510g) white chocolate chips
- 1 can (14 oz / 397g) sweetened condensed milk
- 2 tablespoons (28g) unsalted butter
- 1 teaspoon vanilla extract
- ⅓ cup (about 60g) sprinkles (rainbow jimmies or confetti-style)
- ¼ teaspoon salt (optional)
Instructions
- Line an 8×8-inch baking pan with parchment paper, leaving overhang on two sides for easy removal.
- In a medium saucepan over low heat, combine white chocolate chips, sweetened condensed milk, and butter. Stir constantly with a silicone spatula until smooth and glossy, about 5-7 minutes.
- Remove from heat and stir in vanilla extract and salt (if using).
- Gently fold in about ¼ cup of the sprinkles, reserving the rest for the top.
- Pour the fudge mixture into the prepared pan and spread evenly. Tap the pan gently on the counter to release air bubbles.
- Immediately sprinkle the remaining sprinkles on top and press gently to adhere.
- Refrigerate for at least 3 hours, or until firm. Overnight is best.
- Lift the fudge out using the parchment overhang, place on a cutting board, and cut into 1-inch squares with a sharp knife. Wipe the knife between cuts for clean edges.
Notes
Use good quality white chocolate chips (like Ghirardelli or Guittard) for the smoothest melt. Avoid white melting wafers. For dairy-free, use dairy-free white chocolate chips, vegan butter, and coconut sweetened condensed milk. Store in an airtight container in the refrigerator for up to 2 weeks, or freeze for up to 3 months.
Nutrition
- Serving Size: 1 piece (1-inch squa
- Calories: 90
- Sugar: 9.5
- Sodium: 30
- Fat: 5.5
- Saturated Fat: 3.5
- Carbohydrates: 11
- Protein: 1
Keywords: sugar cookie fudge, 4-ingredient fudge, easy fudge recipe, white chocolate fudge, sprinkle fudge, holiday fudge, last-minute dessert