Jen wasn’t trying to impress anyone. I’d stopped by her place to grab a lawn chair I’d lent her months ago, and the smell of chocolate and crushed cookies hit me before I even got through the screen door. She was standing at her kitchen counter with three little kids—two of them hers, one a neighbor—and they were all elbow-deep in pudding and crushed Oreos like it was the most normal Tuesday afternoon activity in the world. “Oh, these?” she said when I asked what she was making, barely looking up. “Just something for the kids’ Halloween party tomorrow. Takes ten minutes.” She said it the way someone might describe making toast. But the way those kids’ faces lit up when they dropped gummy worms into the cups? That stayed with me. I mean, honestly, I’d spent hours on elaborate Halloween treats before—pumpkin-shaped cookies, spiderweb cakes, the whole deal—and none of them got a reaction like those simple little cups of chocolate and crushed cookies. Let me tell you, watching Jen casually assemble these while her toddler licked pudding off his fingers taught me something important about Halloween desserts. They don’t need to be complicated to be the thing everyone remembers. Sometimes the simplest idea is the one that steals the whole show, you know?
Why You’ll Love This Recipe
These Halloween dirt cups are the kind of dessert that makes you look like a hero without actually doing much work. I’ve tested this recipe at four different Halloween gatherings now, and I can tell you with complete confidence—they disappear faster than anything else on the table.
- Crazy Easy: We’re talking 15 minutes of active prep time. That’s it. You can make these while answering the door for trick-or-treaters.
- Budget-Friendly: No fancy ingredients here. Everything comes from a regular grocery store, and you probably already have half of it in your pantry.
- Perfect for Parties: These are individual servings, which means no cutting, no serving utensils, no mess. Guests just grab one and go.
- Kid-Approved: I’ve never met a child who didn’t lose their mind over these. The gummy worms poking out of “dirt” is pure magic to little eyes.
- Make-Ahead Friendly: You can assemble these a day in advance. The flavors actually get better as they sit overnight.
What makes these different from other dirt cup recipes? It’s the texture. I spent three batches getting the pudding-to-crumb ratio just right so every spoonful gives you that creamy-meets-crunchy thing that makes people close their eyes while eating. Plus, I figured out the trick to keeping the gummy worms from bleeding their color into the pudding—because nobody wants green-tinted chocolate pudding.
These are the kind of Halloween treats that make you feel like you pulled off something special, even though you barely broke a sweat. Perfect for when you’re hosting a Halloween party and need something that looks impressive but doesn’t keep you stuck in the kitchen while your guests are having fun.
What Ingredients You Will Need
This recipe uses simple, everyday ingredients to create something that feels way more special than it has any right to be. Most of these are pantry staples, which makes this perfect for those last-minute Halloween cravings.
For the Pudding Base
- 2 (3.9 oz) boxes instant chocolate pudding mix (I prefer Jell-O brand for the smoothest texture, but store brands work fine too)
- 4 cups cold whole milk (2% works, but whole milk gives you that rich, creamy texture that makes these feel indulgent. For dairy-free, use oat milk—it’s thicker than almond milk)
For the “Dirt” Layer
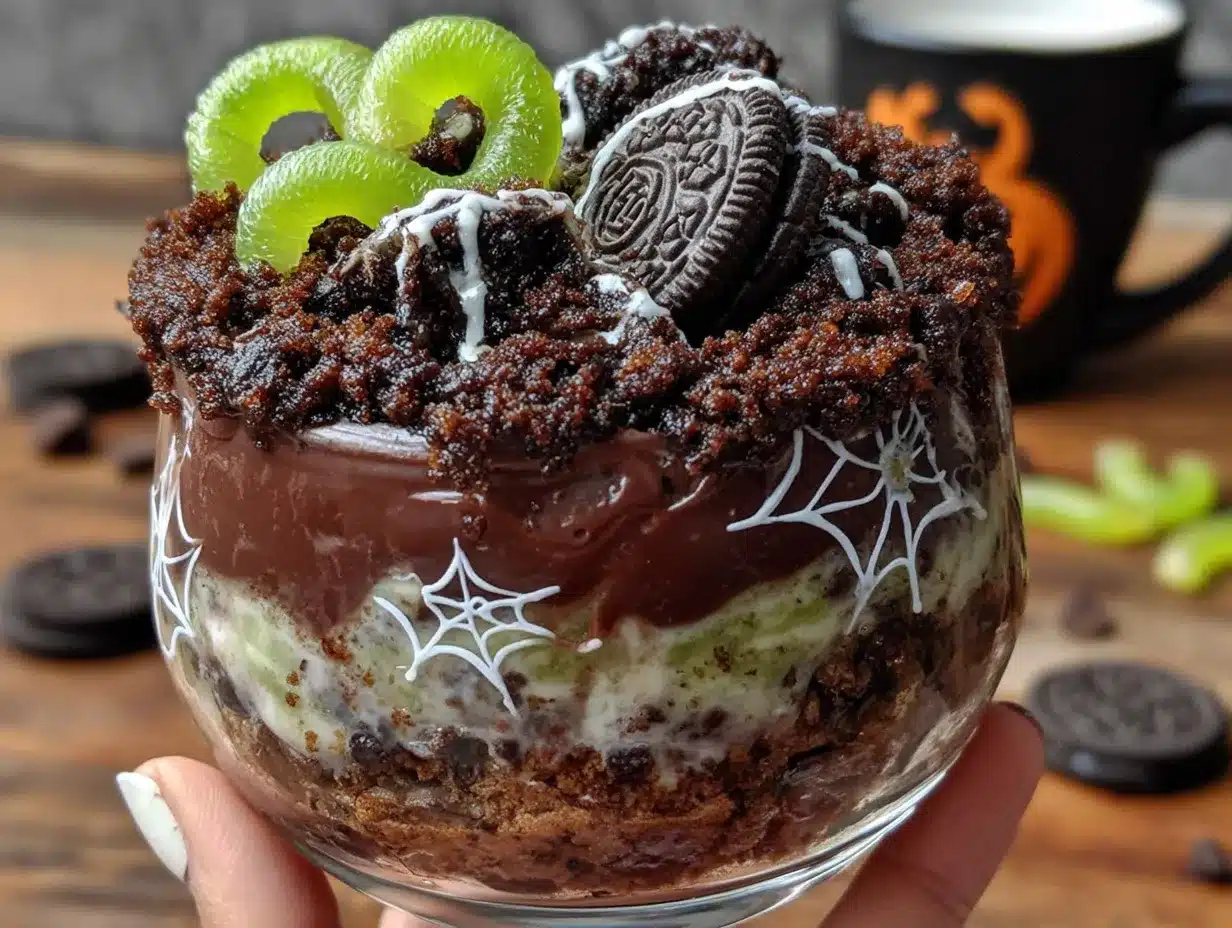
- 1 (14.3 oz) package Oreo cookies (regular, not double-stuf—you want that cookie-to-cream ratio to be right. The cream helps the crumbs stick together slightly)
- Optional: 2 tablespoons melted butter (this is my secret trick—it gives the crumbs a slightly sandy texture that feels more like real dirt. Skip it if you want, but try it once)
For the Decoration
- 1 (4.5 oz) bag gummy worms (get the colorful sour ones if you can—the bright colors pop against the dark “dirt.” I’ve tried the all-red ones and they don’t stand out as well)
- Optional: 8-10 gummy spiders or other Halloween candy (for extra visual fun. I found these at Target in the seasonal aisle)
For the Garnish (Optional but Recommended)
- Green food coloring (for tinting shredded coconut to look like grass—this takes them from cute to “wow”)
- ½ cup shredded coconut (unsweetened, so it doesn’t add extra sugar)
- Piping gel or corn syrup (for making the “grass” stick to the sides of the cups)
One thing I learned the hard way—don’t use sugar-free pudding mix. The texture comes out thin and never sets properly. Trust me on this one. Also, if you’re making these for a classroom party, check the ingredients on the Oreos. They’re surprisingly vegan-friendly if you use plant-based milk, which makes these work for a lot of dietary restrictions.
Equipment Needed
- 8 (7-8 oz) clear plastic cups or glass dessert cups (clear cups are non-negotiable here—you need to see the layers. I got a pack of 50 at the dollar store for three bucks)
- Electric hand mixer or whisk (hand mixer makes the pudding come together in about 2 minutes. A whisk works but your arm will get tired)
- Large mixing bowl (for the pudding)
- Food processor or zip-top bag and rolling pin (food processor gives you the finest crumbs. But honestly, I’ve used a rolling pin on a bag of Oreos more times than I can count, and it works fine)
- Small bowl (for the crushed cookies)
- Measuring cups and spoons
- Spatula (for scraping every bit of pudding out of the bowl—waste not)
- Optional: Piping bag or zip-top bag with corner snipped (for neat layering, but a spoon works perfectly well)
My food processor bit the dust halfway through making these for a party once, and I finished crushing the Oreos with a meat tenderizer. It was not elegant, but the kids didn’t notice. So don’t stress if you don’t have fancy equipment.
Preparation Method
- Make the pudding. In a large mixing bowl, combine the two boxes of instant chocolate pudding mix with the 4 cups of cold milk. Whisk or beat with an electric mixer for about 2 minutes until the mixture thickens. It should look glossy and start to hold soft peaks when you lift the whisk. Let it sit for 5 minutes to fully set while you prepare the other components.
- Crush the Oreos. Place all the Oreo cookies (cream filling and all) into your food processor. Pulse about 15-20 times until you get fine crumbs that look like potting soil. If you’re using the bag method, put the cookies in a zip-top bag, seal it, and go at it with a rolling pin until you get the same texture. The crumbs should be uniform—no big chunks. If you’re using the melted butter trick, transfer the crumbs to a bowl and stir in the melted butter with a fork until it’s evenly distributed.
- Prepare the “grass” garnish (optional). Put the shredded coconut in a small bowl and add 2-3 drops of green food coloring. Stir with a fork until the color is evenly distributed. It’ll look pale at first, but it gets brighter as it sits. Set this aside.
- Layer the cups. Spoon about 2 tablespoons of crushed Oreos into the bottom of each clear cup. Press down lightly with the back of a spoon to create an even base layer. This gives the illusion of compacted dirt.
- Add the pudding. Spoon or pipe the chocolate pudding over the Oreo layer, filling each cup about two-thirds full. You want enough room for the top dirt layer and the decorations. Tap each cup gently on the counter to settle the pudding and remove any air bubbles.
- Top with “dirt.” Sprinkle a generous layer of crushed Oreos over the pudding, covering it completely. You want about 2-3 tablespoons per cup. The top should look like freshly turned soil, with no pudding peeking through.
- Add the worms. Here’s the fun part. Take 2-3 gummy worms per cup and gently push them into the “dirt” so they look like they’re crawling out. Angle them at different directions—some halfway in, some just poking their heads out, one maybe draped over the edge of the cup. This is where you get to be creative. I like to save one worm per cup to place on top of the dirt, like it’s just surfaced.
- Add the grass (if using). If you made the green coconut, brush a little piping gel or corn syrup around the inside rim of each cup, then sprinkle the green coconut so it sticks. This creates a ring of “grass” around the top edge. It’s an extra step that makes these look professionally done.
- Chill. Refrigerate the cups for at least 2 hours before serving. This allows the pudding to fully set and the flavors to meld. If you’re making these for a party, overnight is even better. The cookies soften slightly, which actually improves the texture.
- Serve cold. These are best straight from the fridge. The contrast between the cold, creamy pudding and the crunchy cookie crumbs is what makes them so satisfying.
One thing I want to mention—if you’re making these for a big Halloween party, double the recipe. I made 8 cups for a gathering of 12 people last year and they were gone in 20 minutes. People will eat two. Trust me.
Cooking Tips & Techniques
I’ve made these dirt cups at least a dozen times now, and I’ve learned a few things the hard way. Let me save you some trouble.
The gummy worm color bleeding problem. This drove me crazy the first time I made these. The red and green food coloring from the gummy worms would bleed into the pudding, turning it this weird brownish-purple color by morning. The fix? Don’t insert the worms until right before serving. If you’re making these ahead, assemble everything except the worms, then add them just before you set them out. Your pudding stays pristine, and the worms look brighter.
Getting the right crumb texture. You want the Oreo crumbs to be fine but not powdery. If you over-process them, they turn into a paste (especially if the food processor runs too long and heats up). Pulse in short bursts and check frequently. The crumbs should look like coarse sand, not dust.
Making sure the pudding sets. This is crucial. Use cold milk straight from the fridge. Warm milk won’t let the pudding thicken properly. Also, don’t skip the initial 5-minute rest before you start layering. The pudding needs that time to start setting up, or your layers will mix together.
The butter trick. I mentioned this earlier, but it deserves repeating. Adding melted butter to the crushed Oreos gives them a slightly clumpy, sandy texture that looks more like real dirt. Without it, the crumbs are drier and more powdery. It’s a small difference, but it makes them look more convincing.
Timing for parties. Here’s my strategy for hosting: I make the pudding and crush the Oreos the night before, storing them separately in the fridge. Then I assemble the cups about 2 hours before guests arrive. The worms go in right before people start eating. This way, everything is fresh and nothing gets soggy.
Variations & Adaptations
These dirt cups are surprisingly versatile. Here are some variations I’ve tried and loved:
The Peanut Butter Cup Version. Swap half the Oreos for crushed peanut butter cookies. Add a layer of peanut butter mousse (1 cup heavy cream whipped with ½ cup peanut butter and ¼ cup powdered sugar) between the pudding and the top dirt layer. My friend’s kids still talk about this version.
The Pumpkin Patch Twist. Use vanilla pudding instead of chocolate and add orange food coloring. Crush graham crackers instead of Oreos for the “dirt.” Top with candy pumpkins instead of worms. This is perfect for fall parties that aren’t specifically Halloween.
The Dairy-Free Option. Use oat milk for the pudding and dairy-free chocolate cookies (Oreos are actually vegan, so you’re good there). The texture is slightly less creamy but still delicious. I served these at a party with several vegan guests and nobody complained.
The “Spider’s Nest” Version. Instead of gummy worms, use black licorice strings to create a web pattern on top. Place a gummy spider in the center. This looks incredible but takes a bit more patience to arrange.
The Grown-Up Version. Add 2 tablespoons of coffee liqueur or bourbon to the pudding mixture. Use dark chocolate pudding mix for a richer flavor. Top with chocolate shavings instead of Oreos. These are dangerous—they taste like dessert but hit like a cocktail.
I’ve also tried using different cookie bases. Chocolate wafer cookies work great. So do gluten-free chocolate cookies if you’re accommodating allergies. Just make sure whatever you use crushes into a fine, dark crumb that looks like dirt.
Serving & Storage Suggestions
These dirt cups are best served cold, straight from the fridge. The temperature contrast between the chilled pudding and the room-temperature gummy worms is part of the experience.
Presentation tips for parties: Arrange the cups on a large platter or baking sheet lined with black or orange paper. Scatter a few extra gummy worms around the platter like they’re crawling out of the cups. If you’re feeling extra, add some plastic spiders or Halloween sprinkles to the table. For a potluck, I like to put the cups in a shallow cardboard box lined with festive napkins—easy to carry and looks intentional.
What to serve alongside: These pair beautifully with other Halloween treats like pumpkin-shaped sugar cookies, caramel apples, or a warm apple cider bar. If you’re doing a full Halloween spread, balance the sweetness with some savory options like mummy hot dogs or spiderweb pizza. For drinks, blackberry lemonade or a punch bowl with dry ice creates that spooky vibe.
Storage: Keep the assembled cups covered in the refrigerator for up to 3 days. The texture changes slightly after day one—the cookie crumbs soften and the pudding firms up more—but they’re still delicious. I actually prefer them on day two because the flavors have melded together.
Freezing: You can freeze these, but I don’t recommend it. The pudding gets icy and the texture becomes grainy when thawed. If you absolutely must freeze them, do it without the gummy worms and add those after thawing.
Reheating: Don’t. These are meant to be served cold. If you’ve refrigerated them and they seem too firm, let them sit at room temperature for 10-15 minutes before serving.
One thing I love about these is that the flavors actually improve over the first 24 hours. The Oreo crumbs release their chocolate flavor into the pudding, and the whole thing becomes more cohesive. So don’t stress about making them the day before—it’s actually better that way.
Nutritional Information & Benefits
Let’s be real—these are a treat, not a health food. But here’s what you’re looking at per serving (one cup, made with whole milk and regular Oreos):
| Nutrient | Amount Per Serving |
|---|---|
| Calories | 385 |
| Total Fat | 16g |
| Saturated Fat | 7g |
| Carbohydrates | 56g |
| Sugar | 42g |
| Protein | 7g |
| Calcium | 150mg |
| Iron | 3mg |
If you’re looking to lighten these up, use 2% milk and sugar-free pudding mix. That cuts the calories to about 290 per serving and drops the sugar to 28g. The texture won’t be quite as luxurious, but they’re still good.
On the plus side, these do provide some calcium from the milk and a small amount of iron from the chocolate. The gummy worms are made from gelatin, which contains some protein. But honestly? These are about fun and nostalgia, not nutrition. Halloween comes once a year, and a little indulgence is part of the celebration.
Allergen note: These contain dairy, wheat, and soy. For nut-free versions, double-check your Oreo packaging (they’re processed in facilities that handle nuts).
Frequently Asked Questions
Can I use homemade pudding instead of instant?
You can, but it changes the texture significantly. Homemade pudding is thinner and takes longer to set. If you go that route, cook it until it’s very thick, chill it completely before layering, and expect the layers to blend together more. The instant pudding gives you that clean, distinct layer look that makes these so visually appealing.
How far in advance can I make these?
You can assemble everything except the gummy worms up to 2 days ahead. Keep them covered in the refrigerator. Add the worms no more than 2 hours before serving to prevent color bleeding. If you’re making them for a party, I recommend assembling them the morning of the event.
Can I use different candy for the “bugs”?
Absolutely! Gummy spiders, candy eyeballs, plastic rings with bugs on top—I’ve seen all of these work. Just make sure whatever you use is food-safe and sturdy enough to stand up in the pudding. Gummy candies work best because they’re firm enough to poke into the dirt layer without falling over.
How do I keep the gummy worms from sinking into the pudding?
This happens if the pudding hasn’t set enough. Make sure your pudding has chilled for at least 2 hours before you add the worms. Another trick is to add a thicker layer of Oreo crumbs on top—about 3 tablespoons instead of 2. The extra crumbs create a barrier that supports the worms better.
Can I make these in a large dish instead of individual cups?
You can, but it changes the presentation. Use a 9×13 baking dish and layer it like a trifle: cookies, pudding, cookies, worms, cookies on top. Let it chill for at least 4 hours. When you serve it, scoop it out so everyone gets a bit of each layer. It’s less visually dramatic than individual cups but works great for a crowd.
Conclusion
These Halloween dirt cups have become my go-to for every October gathering, and I honestly don’t see that changing anytime soon. They’re the kind of recipe that makes you look like you put in way more effort than you actually did, which is my favorite kind of recipe to have in my back pocket.
What I love most about them is how they bring out the kid in everyone. I’ve watched grown adults light up when they see those gummy worms poking out of the “dirt.” There’s something about Halloween that makes us all want to be kids again, and these little cups tap right into that feeling.
So go ahead and make these for your Halloween party. Or your kid’s classroom celebration. Or just because it’s October and you want something fun. Customize them however you like—more worms, different candies, extra spooky decorations. That’s the beauty of a recipe this simple. It’s a canvas for your own Halloween creativity.
I’d love to hear how yours turn out! Drop a comment below and tell me what variations you tried, or tag me in your photos if you share them online. Happy Halloween, and happy eating!
Pin This Recipe!
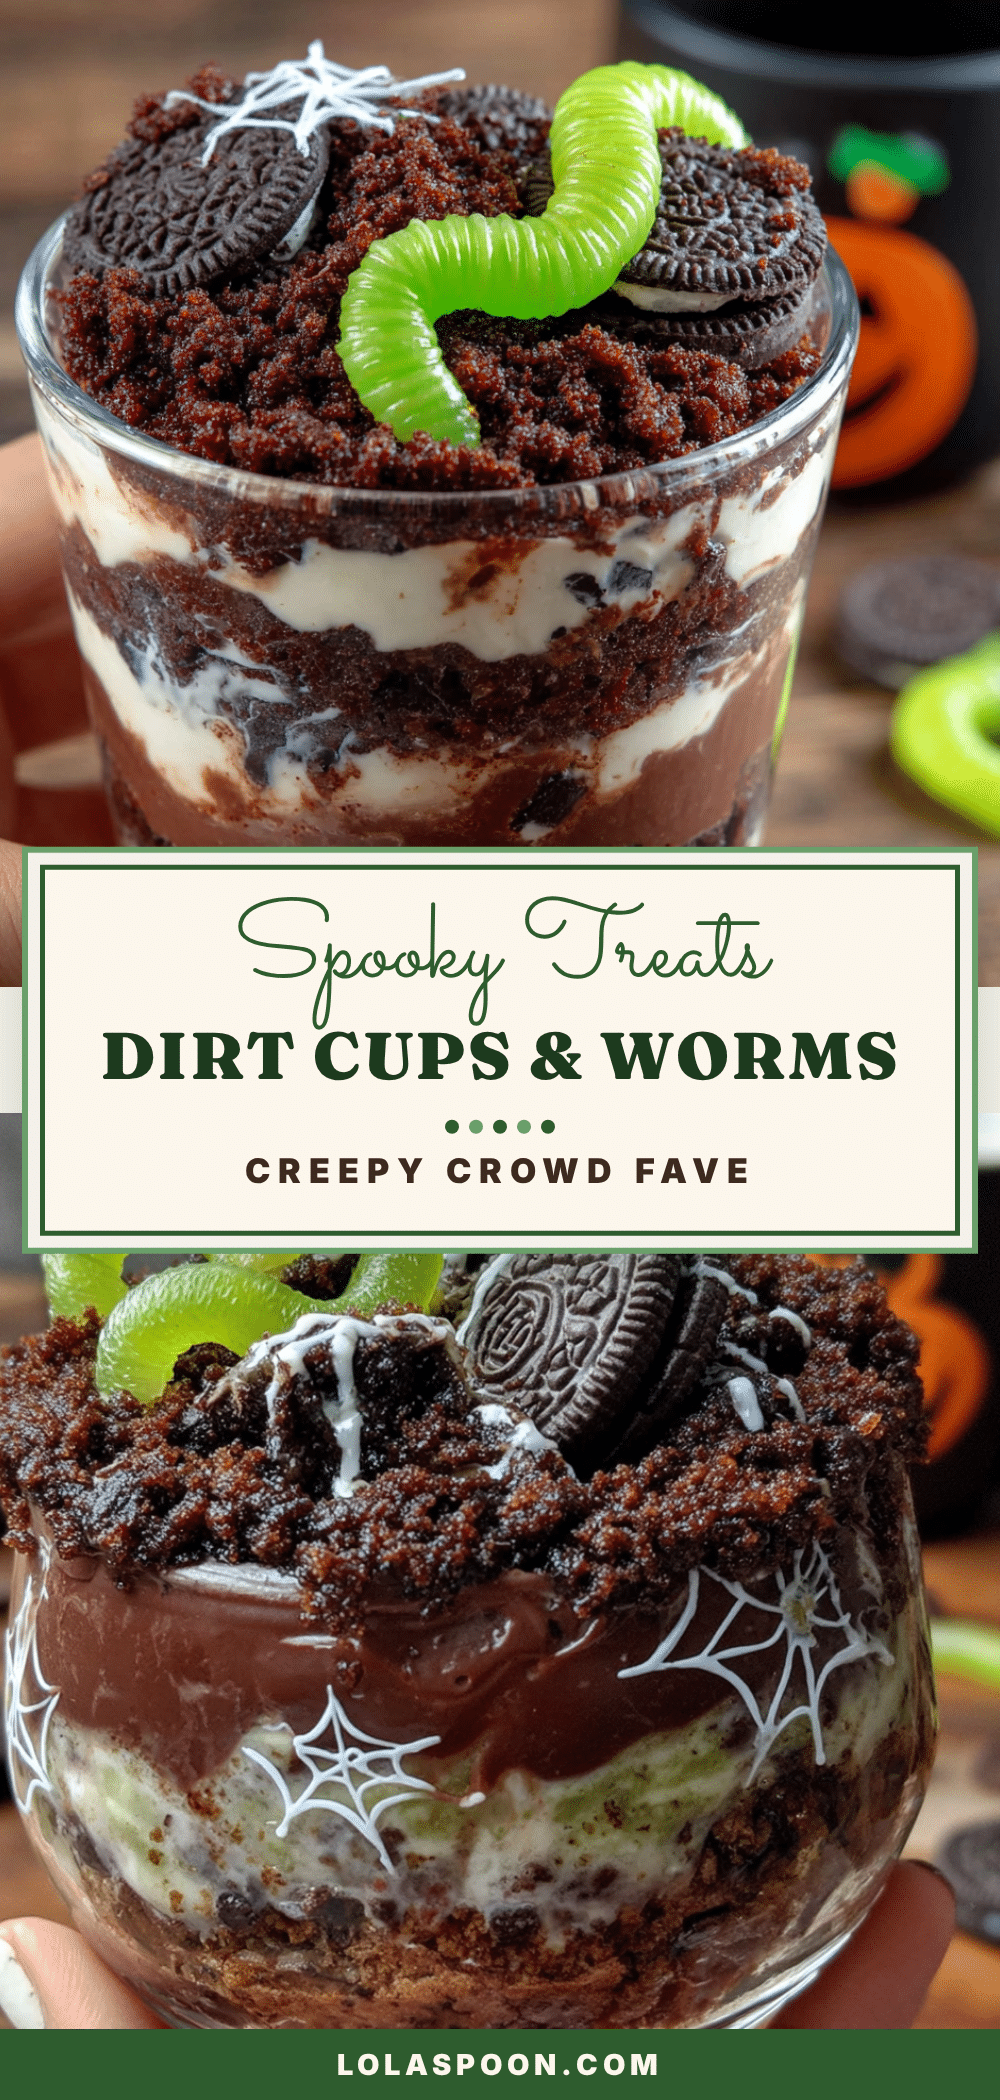
Best Halloween Dirt Cups with Gummy Worms Recipe
These Halloween dirt cups are the kind of dessert that makes you look like a hero without actually doing much work. They’re crazy easy, budget-friendly, and perfect for parties—individual servings that disappear faster than anything else on the table.
- Prep Time: 15 minutes
- Cook Time: 0 minutes
- Total Time: 2 hours 15 minutes (includes chilling time)
- Yield: 8 servings 1x
- Category: Dessert
- Cuisine: American
Ingredients
- 2 (3.9 oz) boxes instant chocolate pudding mix
- 4 cups cold whole milk
- 1 (14.3 oz) package Oreo cookies
- 2 tablespoons melted butter (optional)
- 1 (4.5 oz) bag gummy worms
- 8–10 gummy spiders or other Halloween candy (optional)
- Green food coloring (optional)
- ½ cup shredded coconut, unsweetened (optional)
- Piping gel or corn syrup (optional)
Instructions
- Make the pudding: In a large mixing bowl, combine the two boxes of instant chocolate pudding mix with the 4 cups of cold milk. Whisk or beat with an electric mixer for about 2 minutes until the mixture thickens. It should look glossy and start to hold soft peaks when you lift the whisk. Let it sit for 5 minutes to fully set while you prepare the other components.
- Crush the Oreos: Place all the Oreo cookies (cream filling and all) into your food processor. Pulse about 15-20 times until you get fine crumbs that look like potting soil. If you’re using the bag method, put the cookies in a zip-top bag, seal it, and go at it with a rolling pin until you get the same texture. The crumbs should be uniform—no big chunks. If you’re using the melted butter trick, transfer the crumbs to a bowl and stir in the melted butter with a fork until it’s evenly distributed.
- Prepare the ‘grass’ garnish (optional): Put the shredded coconut in a small bowl and add 2-3 drops of green food coloring. Stir with a fork until the color is evenly distributed. It’ll look pale at first, but it gets brighter as it sits. Set this aside.
- Layer the cups: Spoon about 2 tablespoons of crushed Oreos into the bottom of each clear cup. Press down lightly with the back of a spoon to create an even base layer. This gives the illusion of compacted dirt.
- Add the pudding: Spoon or pipe the chocolate pudding over the Oreo layer, filling each cup about two-thirds full. You want enough room for the top dirt layer and the decorations. Tap each cup gently on the counter to settle the pudding and remove any air bubbles.
- Top with ‘dirt’: Sprinkle a generous layer of crushed Oreos over the pudding, covering it completely. You want about 2-3 tablespoons per cup. The top should look like freshly turned soil, with no pudding peeking through.
- Add the worms: Take 2-3 gummy worms per cup and gently push them into the ‘dirt’ so they look like they’re crawling out. Angle them at different directions—some halfway in, some just poking their heads out, one maybe draped over the edge of the cup. This is where you get to be creative. I like to save one worm per cup to place on top of the dirt, like it’s just surfaced.
- Add the grass (if using): If you made the green coconut, brush a little piping gel or corn syrup around the inside rim of each cup, then sprinkle the green coconut so it sticks. This creates a ring of ‘grass’ around the top edge. It’s an extra step that makes these look professionally done.
- Chill: Refrigerate the cups for at least 2 hours before serving. This allows the pudding to fully set and the flavors to meld. If you’re making these for a party, overnight is even better. The cookies soften slightly, which actually improves the texture.
- Serve cold: These are best straight from the fridge. The contrast between the cold, creamy pudding and the crunchy cookie crumbs is what makes them so satisfying.
Notes
Don’t use sugar-free pudding mix—the texture comes out thin and never sets properly. For dairy-free, use oat milk. To prevent gummy worm color bleeding, don’t insert worms until right before serving. The butter trick (adding melted butter to crushed Oreos) gives a more realistic dirt texture. These can be assembled a day in advance; flavors improve overnight.
Nutrition
- Serving Size: 1 cup
- Calories: 385
- Sugar: 42
- Sodium: 380
- Fat: 16
- Saturated Fat: 7
- Carbohydrates: 56
- Fiber: 1
- Protein: 7
Keywords: Halloween dirt cups, gummy worms, Oreo dessert, chocolate pudding, no-bake dessert, Halloween treats, kid-friendly dessert, easy dessert