My neighbor’s kid, Leo, watched me fumbling with a piping bag one October afternoon, trying to make fancy ghost cupcakes for a school party. I was covered in buttercream, sweating, and honestly, about five seconds from throwing the whole thing in the trash. He didn’t say anything at first. Then he just pointed at the corner of my counter where a box of chocolate pudding mix was sitting and said, “Why don’t you just make dirt instead?”
That was it. No fancy recipe. No five-step decorating process. Just a kid who knew exactly what a Halloween party actually needed—something fun, something messy, and something that didn’t take all afternoon. I laughed, wiped the frosting off my forehead, and let me tell you, that was the moment everything clicked. I mean, I’d seen dirt cups before, sure. But I’d always overthought them, trying to make them “elegant” or “bakery-worthy.” Leo reminded me that Halloween isn’t about elegant. It’s about gummy worms crawling out of chocolate pudding and making kids (and let’s be honest, adults too) absolutely lose their minds with joy.
These Easy Halloween Dirt Cups with Gummy Worms take exactly ten minutes to put together. You heard that right. Ten minutes. No oven, no mixer, no complicated steps that require you to read a paragraph three times. You just layer, crumble, and decorate. It’s the kind of recipe you can make after work on Halloween night when you’re exhausted but still want to show up for the holiday. Maybe you’ve been there—staring at a Pinterest board full of elaborate desserts you’ll never have time to make, feeling like a failure before you’ve even started. This is the antidote to that feeling. These dirt cups are forgiving, foolproof, and honestly, they taste better than anything you’d spend hours on. The creamy chocolate pudding against the crunchy crushed cookies, with that chewy gummy worm surprise at the bottom—it’s a texture party in a cup.
I keep making this recipe because it reminds me that the best food doesn’t come from perfection. It comes from a neighbor kid who saw me struggling and offered the simplest solution. Every time I make these dirt cups, I think of Leo standing in my kitchen, covered in his own snack, grinning like he’d just solved world hunger. And honestly? For a Tuesday night in October, he kind of did.
Why You’ll Love This Recipe
Let’s be real for a second. Halloween is busy. Between costumes, school parties, and trying to figure out if you bought enough candy for trick-or-treaters, the last thing you need is a complicated dessert recipe. These Easy Halloween Dirt Cups with Gummy Worms solve that problem completely. Here’s why this recipe works so well for real people with real schedules:
- 10 Minutes Total: From start to finish, including cleanup. I timed myself. This is not a weekend project—this is a Tuesday night miracle.
- No Baking Required: Your oven can stay off. No preheating, no checking for doneness, no burnt edges. Just mix, layer, and go.
- 5 Simple Ingredients: Chocolate pudding, Oreo cookies, gummy worms, whipped topping, and a handful of candy pumpkins if you’re feeling fancy. That’s it. You probably already have most of these in your pantry.
- Kid-Friendly Assembly: My three-year-old niece can make these with minimal help. It’s the perfect recipe for little hands that want to “help” without causing a disaster.
- Make-Ahead Magic: These actually get better after a few hours in the fridge. You can prep them the night before your party and just pull them out when guests arrive.
- Always a Hit: I’ve brought these to potlucks, classroom parties, and family gatherings. Every single time, they’re the first thing to disappear. Kids love the worms. Adults love the nostalgia. Everyone wins.
What makes this version different from other dirt cup recipes I’ve tried? It’s the texture balance. A lot of recipes use instant pudding that gets gloppy or cookies that turn into complete mush. I’ve tested different ratios and chilling times to get that perfect contrast—creamy pudding, crunchy cookie crumbs, and chewy gummy worms. Plus, I’ve figured out a layering trick that keeps the worms looking like they’re actually crawling out of the dirt, not just sitting on top looking sad.
This recipe is the kind that makes you close your eyes after the first bite. It’s comfort food reimagined for a busy Halloween—faster, simpler, but with the same soul-soothing satisfaction. Perfect for impressing your kid’s classmates without stress, or turning a regular weeknight into something memorable.
What Ingredients You Will Need
This recipe uses simple, store-bought ingredients to deliver maximum Halloween fun without the fuss. Everything is designed to be easy to find and affordable—no specialty baking stores required.
For the Pudding Base
- 1 box (3.9 oz) instant chocolate pudding mix – I recommend Jell-O brand for consistent results, but any store brand works fine. Make sure it’s the instant kind, not cook-and-serve, or your texture will be off.
- 2 cups cold milk – Whole milk gives the creamiest texture, but 2% works perfectly too. For a dairy-free version, use oat milk or almond milk—just know the pudding might be slightly thinner.
For the “Dirt” Layer
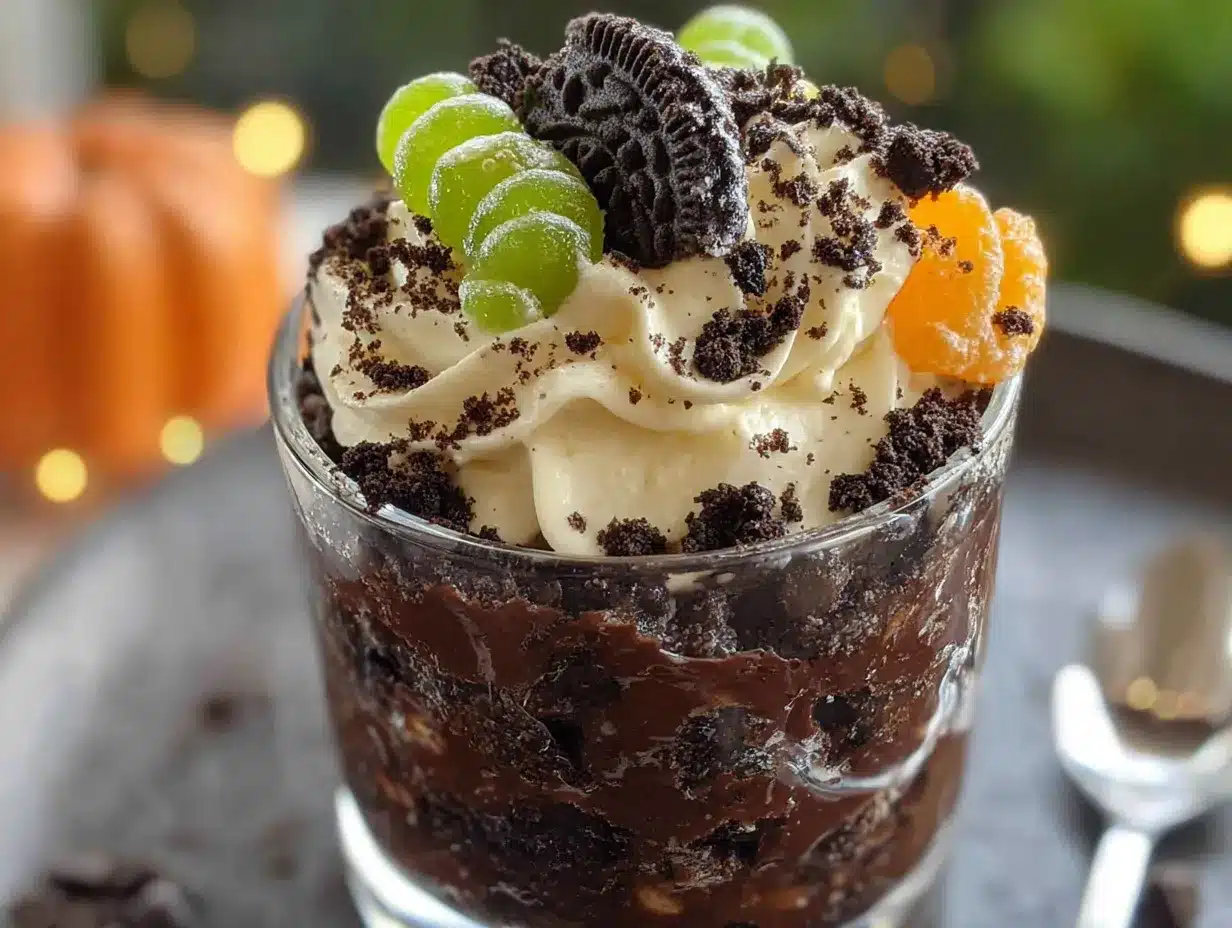
- 1 package (14.3 oz) Oreo cookies – Regular Oreos are best for that dark, earthy look. Double Stuf works but creates lighter-colored “dirt.” You’ll use about 20 cookies total. Don’t waste time separating the cream—just crush the whole thing.
For the Whipped Topping
- 1 container (8 oz) Cool Whip, thawed – This adds a light, creamy layer between the pudding and the cookie crumbs. You can use homemade whipped cream if you prefer, but Cool Whip holds up better if you’re making these ahead.
For Decoration
- 1 bag gummy worms – Look for sour or regular gummy worms. I prefer the sour ones for a flavor contrast against the sweet pudding. You’ll need about 2-3 worms per cup.
- Optional: candy pumpkins, candy corn, or Halloween sprinkles – These are totally optional but add a fun pop of color. I like adding a little candy pumpkin on top for a non-worm option for picky eaters.
Ingredient Selection Tips: For the best texture, use cold milk straight from the fridge. Warm milk will make the pudding set unevenly. If you’re making these gluten-free, look for gluten-free chocolate sandwich cookies—they work exactly the same way. And here’s a trick I learned the hard way: don’t crush your Oreos into a fine powder. You want some texture, some little chunks that look like real soil. A few bigger pieces add visual interest and crunch.
Substitution Guidance: If you can’t find Cool Whip, any stabilized whipped topping works. For a lower-sugar version, use sugar-free pudding mix and light Cool Whip. The taste is slightly different but still delicious. And if gummy worms aren’t your thing (no judgment), try gummy spiders or gummy bats for a different creepy-crawly vibe.
Equipment Needed
You don’t need fancy tools for this recipe. Here’s what you’ll need:
- 6-8 small clear cups or glasses – Clear cups are key for showing off the layers. I use 8-ounce plastic cups from the party supply store, but small mason jars or even clear tumblers work beautifully.
- Mixing bowl and whisk – For making the pudding. A hand whisk works fine, or use an electric mixer if you want to save 30 seconds.
- Ziploc bag or food processor – For crushing the Oreos. A Ziploc bag and a rolling pin is the easiest method, and it’s oddly satisfying to smash things after a long day.
- Measuring cups and spoons – For the milk and any optional decorations.
- Spatula or spoon – For layering the pudding and whipped topping.
- Small offset spatula (optional) – Helpful for smoothing the whipped topping layer, but a regular spoon works just fine.
Personal Experience: I’ve made these with everything from fancy glassware to disposable Solo cups. The disposable cups are actually my favorite for parties because there’s no cleanup and kids can grab them easily. Just make sure whatever you use is clear—half the fun is seeing those gummy worms suspended in the “dirt.”
Budget-Friendly Tip: Don’t buy special cups if you don’t have them. Ramekins, juice glasses, or even small bowls work. The presentation is different but the taste is exactly the same.
Preparation Method
Let’s get into the actual making of these Easy Halloween Dirt Cups with Gummy Worms. I’ve tested this method multiple times to make sure it’s foolproof. Follow these steps, and you’ll have perfect dirt cups every time.
- Make the chocolate pudding: In a medium mixing bowl, whisk together the instant pudding mix and 2 cups of cold milk. Whisk for about 2 minutes until the mixture starts to thicken. You’ll notice it going from liquid to a slightly thicker consistency—that’s exactly what you want. Let it sit for 5 minutes to fully set. (Pro tip: If your pudding seems too thin after 5 minutes, give it another minute or two. Different milk fat contents can affect setting time.)
- Crush the Oreos: While the pudding is setting, place all 20 Oreos in a large Ziploc bag. Seal it, making sure to push out as much air as possible. Now for the fun part—use a rolling pin, a heavy skillet, or just your fists to crush the cookies into small crumbs. You want a mix of fine crumbs and slightly larger pieces. Aim for the texture of potting soil—some powdery bits, some small chunks. Don’t go too fine, or you’ll lose that crunchy texture. (A note from experience: Do this on a cutting board or towel. The bag can leak if you get too aggressive.)
- Layer the cups: Start with a layer of crushed Oreos at the bottom of each cup. Use about 2 tablespoons per cup. This creates the “underground” layer where the worms will live. Press it down gently with the back of a spoon.
- Add the pudding: Spoon the chocolate pudding evenly among the cups, filling them about halfway. You want to leave room for the whipped topping and the top cookie layer. If you’re using a piping bag for a cleaner look, that works, but honestly, a spoon is just fine. Tap each cup gently on the counter to settle the pudding and remove any air bubbles.
- Insert the gummy worms: Here’s the trick that makes these look amazing. Take 2-3 gummy worms per cup and push them partway into the pudding, letting some of the worm stick out. Angle them so it looks like they’re crawling up from the “dirt.” Some should be completely submerged, some halfway out. This is where you can get creative—I like having one worm fully poking out and another just barely visible.
- Add the whipped topping: Spoon a layer of Cool Whip over the pudding, covering the gummy worms that are poking out. Smooth it gently with the back of a spoon or a small offset spatula. This layer should be about 1/2 inch thick.
- Top with cookie crumbs: Sprinkle the remaining crushed Oreos generously over the whipped topping. You want a thick, even layer that completely hides the white whipped topping. This is your “surface dirt.” Use about 2-3 tablespoons per cup.
- Final decoration: Add a few more gummy worms on top, letting them look like they’re crawling out of the dirt. If you’re using candy pumpkins or sprinkles, add them now. I like placing a candy pumpkin right in the center for a pop of orange.
- Chill (optional but recommended): Refrigerate the dirt cups for at least 30 minutes before serving. This helps the layers set and makes the texture even better. If you’re making them ahead, they’ll keep in the fridge for up to 2 days.
Sensory Cues: When you’re whisking the pudding, you’ll feel it suddenly thicken around the 2-minute mark—that’s your cue to stop. The Oreo crumbs should look like dark, rich soil with visible darker chunks. When you push a gummy worm into the pudding, it should slide in easily but stay upright. The final cups should look like a tiny garden of creepy-crawly deliciousness.
Cooking Tips & Techniques
After making these Easy Halloween Dirt Cups with Gummy Worms about a dozen times (for various parties, school events, and honestly, just because I wanted a snack), I’ve picked up some tricks that make the process smoother and the results better.
Don’t overmix the pudding. I made this mistake the first time. I kept whisking, thinking it needed to be thicker. Instead, I ended up with a pudding that was slightly grainy and too stiff. Stop whisking as soon as it thickens, usually around 2 minutes. Let it set on its own—patience is your friend here.
Crush cookies in batches. If you’re making a large batch for a party, don’t try to crush all the Oreos at once. The bag will burst, and you’ll be sweeping cookie dust off your floor for days. I learned this the hard way at a Halloween party. Crush in batches of 10-12 cookies, and you’ll have a much better time.
Keep the worms upright. Gummy worms are surprisingly flexible, and they’ll flop over if you don’t position them right. When inserting them into the pudding, push them in at a slight angle so they’re supported by the pudding. If they’re still falling over, add a little more pudding around the base to hold them steady.
Layer strategically. The order matters more than you think. If you put the whipped topping directly on the bottom, it gets lost in the pudding. If you skip the whipped topping entirely, the cookie crumbs get soggy from the pudding. The whipped topping acts as a barrier that keeps your “dirt” crunchy. Trust the process.
Make ahead for better flavor. These actually taste better after a few hours in the fridge. The flavors meld together, and the pudding gets even creamier. If you’re serving them at a party, make them the night before. Just wait to add the top layer of cookie crumbs until right before serving so they stay crunchy.
Common mistake alert: Don’t use regular (non-instant) pudding. It requires cooking and has a completely different texture. Instant pudding is non-negotiable for this recipe. Also, don’t skip the chilling step—warm dirt cups are just sad pudding cups with worms.
Variations & Adaptations
One of the best things about this recipe is how flexible it is. Here are some variations I’ve tried and loved:
Dietary Adaptations
- Gluten-Free Version: Use gluten-free chocolate sandwich cookies (Kinnikinnick makes a great one) and check your pudding mix label—most are gluten-free, but always verify.
- Dairy-Free Version: Use almond milk or oat milk for the pudding, and dairy-free whipped topping like CocoWhip. The texture is slightly different but still delicious.
- Lower Sugar Option: Sugar-free pudding mix, light Cool Whip, and reduced-fat Oreos cut the sugar significantly without sacrificing the fun.
Flavor Twists
- Peanut Butter Dirt Cups: Add a layer of melted peanut butter between the pudding and whipped topping. The salty-sweet combo is incredible.
- Mint Chocolate Version: Use mint-flavored Oreos and add a drop of peppermint extract to the pudding. Top with a small candy cane for a Christmas twist.
- Pumpkin Spice Dirt Cups: Swap chocolate pudding for vanilla, and mix in 1/4 cup pumpkin puree and 1 teaspoon pumpkin pie spice. Use ginger snaps instead of Oreos for the “dirt.”
Different Cooking Methods
- No-Bake Version: This recipe is already no-bake, but if you want to get even lazier, use pre-made chocolate pudding cups instead of making your own. Just layer the cups, add whipped topping, and top with crumbs.
- Individual vs. Large Format: Instead of individual cups, make one large “dirt patch” in a 9×13 dish. Layer everything the same way, and let guests scoop their own portion. Great for bigger parties.
Personal Variation: My favorite twist is the “Haunted Forest” version. I add a few pretzel sticks sticking out of the dirt like dead trees, and a sprinkle of crushed graham crackers for a sandy texture. It looks spooky and tastes amazing. My kids call it the “creepy graveyard” and request it every year.
Serving & Storage Suggestions
These Easy Halloween Dirt Cups with Gummy Worms are best served cold, right out of the fridge. The contrast between the cold, creamy pudding and the crunchy cookie crumbs is what makes them so satisfying. If you’re serving them at a party, arrange them on a tray with a few extra gummy worms scattered around for a dramatic effect.
Presentation Ideas:
- Serve in clear plastic cups with a spooky straw for a fun touch.
- Add a small plastic spider or bat decoration on top (washable, not edible—but kids love them).
- Label each cup with a name tag for a Halloween party favor.
- Arrange them on a black tablecloth with fake cobwebs for a full spooky vibe.
Storage Instructions:
- Refrigerator: Store covered in the fridge for up to 3 days. The cookie crumbs will soften over time, but they’ll still taste great.
- Freezer: I don’t recommend freezing these. The pudding gets icy and the texture is weird when thawed.
- Make-Ahead Tip: Assemble everything except the top layer of cookie crumbs. Store in the fridge, and add the crumbs just before serving for maximum crunch.
Reheating: These are meant to be eaten cold. No reheating needed. If they’ve been sitting out for a while, just pop them back in the fridge for 15 minutes before serving.
Flavor Development: The flavors actually get better after 24 hours in the fridge. The pudding sets completely, and the cookie crumbs start to soften just enough to create a brownie-like texture near the bottom. It’s a different experience from fresh, but equally delicious.
Nutritional Information & Benefits
Let’s be honest—these are a treat, not a health food. But that doesn’t mean they can’t fit into a balanced lifestyle. Here’s the estimated nutritional breakdown for one serving (based on 8 servings per recipe):
- Calories: Approximately 320-350 per cup
- Fat: 14g (mostly from the cookies and whipped topping)
- Carbohydrates: 48g
- Sugar: 34g
- Protein: 5g
- Calcium: 15% of daily value (from the milk)
Health Benefits of Key Ingredients:
- Milk: Provides calcium and vitamin D for bone health.
- Dark Cocoa: The cocoa in the pudding and Oreos contains antioxidants.
- Portion Control: Individual cups make it easy to enjoy a reasonable serving.
Dietary Considerations: This recipe contains gluten, dairy, and soy (from the Oreos). It can be adapted for gluten-free and dairy-free diets as mentioned in the variations section. It’s not suitable for nut-free diets unless you verify all ingredient labels.
Personal Wellness Perspective: I believe in enjoying treats without guilt. These dirt cups are a fun, occasional indulgence that brings joy to holidays and special occasions. The key is balance—enjoy one, savor it, and move on with your day. Food should be fun, especially on Halloween.
Conclusion
These Easy Halloween Dirt Cups with Gummy Worms are proof that the best recipes don’t have to be complicated. In just 10 minutes, with ingredients you probably already have, you can create a dessert that brings pure joy to kids and adults alike. They’re fun, they’re fast, and they’re absolutely delicious.
I love this recipe because it reminds me that cooking doesn’t have to be perfect to be meaningful. It’s about the laughter in the kitchen, the messy fingers, and the way a simple treat can turn an ordinary Tuesday into something special. Whether you’re making these for a classroom party, a Halloween gathering, or just because you want a fun snack with your kids, they deliver every time.
So go ahead—customize them, make them your own, and don’t forget to hide a few extra gummy worms for yourself. I won’t tell anyone. And when you make them, come back and let me know how they turned out. Did your kids love them? Did you try a fun variation? I’d love to hear about it in the comments below. Happy Halloween, and happy eating!
Frequently Asked Questions
Can I make these dirt cups ahead of time?
Yes! You can assemble them up to 2 days in advance. Just wait to add the top layer of cookie crumbs until right before serving to keep them crunchy. Store covered in the refrigerator.
Can I use homemade whipped cream instead of Cool Whip?
Absolutely. Homemade whipped cream works well, but it’s less stable and may deflate after a day in the fridge. If you’re making these ahead, stick with Cool Whip or another stabilized whipped topping.
What if I don’t have clear cups?
No problem at all. Any small bowl, ramekin, or even a mason jar works. The presentation won’t show the layers as clearly, but the taste is exactly the same. You can also make one large dish instead of individual cups.
How do I keep the gummy worms from falling over?
Push them into the pudding at a slight angle so the pudding supports them. If they’re still falling, add a little more pudding around the base. You can also let the pudding set for an extra 5 minutes before adding the worms.
Can I use a different type of cookie for the dirt?
Definitely. Chocolate wafer cookies, gluten-free chocolate cookies, or even crushed chocolate graham crackers all work. Just avoid anything too soft, as it won’t create that “dirt” texture. Ginger snaps are a fun alternative for a different flavor profile.
PrintEasy Halloween Dirt Cups with Gummy Worms (Best 10-Minute Dessert)

These Easy Halloween Dirt Cups with Gummy Worms take exactly ten minutes to put together. No oven, no mixer, no complicated steps—just layer, crumble, and decorate for a fun, foolproof Halloween treat.
- Prep Time: 10 minutes
- Cook Time: 0 minutes
- Total Time: 10 minutes (plus optional 30 minutes chilling)
- Yield: 6-8 servings 1x
- Category: Dessert
- Cuisine: American
Ingredients
- 1 box (3.9 oz) instant chocolate pudding mix
- 2 cups cold milk
- 1 package (14.3 oz) Oreo cookies (about 20 cookies)
- 1 container (8 oz) Cool Whip, thawed
- 1 bag gummy worms (about 2–3 per cup)
- Optional: candy pumpkins, candy corn, or Halloween sprinkles
Instructions
- Make the chocolate pudding: In a medium mixing bowl, whisk together the instant pudding mix and 2 cups of cold milk. Whisk for about 2 minutes until the mixture starts to thicken. Let it sit for 5 minutes to fully set.
- Crush the Oreos: While the pudding is setting, place all 20 Oreos in a large Ziploc bag. Seal it, pushing out as much air as possible. Use a rolling pin, heavy skillet, or your fists to crush the cookies into small crumbs (mix of fine crumbs and slightly larger pieces).
- Layer the cups: Start with a layer of crushed Oreos at the bottom of each cup (about 2 tablespoons per cup). Press it down gently with the back of a spoon.
- Add the pudding: Spoon the chocolate pudding evenly among the cups, filling them about halfway. Tap each cup gently on the counter to settle the pudding and remove air bubbles.
- Insert the gummy worms: Take 2-3 gummy worms per cup and push them partway into the pudding, letting some of the worm stick out. Angle them so it looks like they’re crawling up from the ‘dirt.’
- Add the whipped topping: Spoon a layer of Cool Whip over the pudding, covering the gummy worms that are poking out. Smooth it gently with the back of a spoon or a small offset spatula. This layer should be about 1/2 inch thick.
- Top with cookie crumbs: Sprinkle the remaining crushed Oreos generously over the whipped topping (about 2-3 tablespoons per cup) to completely hide the white topping.
- Final decoration: Add a few more gummy worms on top, letting them look like they’re crawling out of the dirt. Add candy pumpkins or sprinkles if desired.
- Chill (optional but recommended): Refrigerate the dirt cups for at least 30 minutes before serving. They can be made ahead and kept in the fridge for up to 2 days.
Notes
For best texture, use cold milk straight from the fridge. Don’t crush Oreos into a fine powder; leave some chunks for crunch. If making ahead, wait to add the top layer of cookie crumbs until just before serving to keep them crunchy. These actually taste better after a few hours in the fridge.
Nutrition
- Serving Size: 1 cup
- Calories: 335
- Sugar: 34
- Sodium: 380
- Fat: 14
- Saturated Fat: 6
- Carbohydrates: 48
- Fiber: 1
- Protein: 5
Keywords: Halloween dessert, dirt cups, gummy worms, no-bake dessert, easy dessert, kid-friendly, chocolate pudding, Oreo, 10-minute recipe