My older brother claimed to hate truffles for a solid decade. Truffles, cheesecake, anything that required rolling into a ball—he’d wave his hand and say, “Too fussy. Not my thing.” Ten years. Then, last December, I caught him standing alone in my kitchen, elbow-deep in a bowl of crushed Oreos and cream cheese, sneaking fingerfuls of the mixture before I could even get it chilled. He didn’t even try to look guilty. He just mumbled something about “quality control” and went back for another scoop.
That’s the thing about these Easy No-Bake Christmas Oreo Truffle Balls. They sneak up on you. Honestly, I wasn’t trying to convert anyone that day—I was just trying to use up the leftover holiday baking supplies cluttering my counter. A half-empty pack of Oreos, a block of cream cheese that needed using, and the lingering question of what to bring to my neighbor Carol’s cookie swap. I mean, I’d made truffles before, but they always felt a little precious. These? These are the opposite of precious. They’re messy, they’re forgiving, and they’re the kind of thing you can make while half-watching a Christmas movie and answering texts.
Maybe you’ve been there. You want to bring something homemade to a holiday party, but the thought of rolling out dough or tempering chocolate makes you want to take a nap. These truffles are the answer. No oven, no stand mixer, no fancy techniques. Just three main ingredients, a little patience for chilling, and the satisfaction of watching people’s eyes go wide when they take that first bite. I’ve been making them every year since that caught-in-the-act moment, and honestly? They’ve become the thing I’m most asked to bring. Not bad for a recipe that started as a pantry clean-out.
Why You’ll Love This Recipe
Let me tell you why these truffles have earned a permanent spot in my holiday rotation. I tested this recipe four times before I got the texture exactly right—the first batch was too sticky, the second too crumbly, and the third taught me that room-temperature cream cheese is non-negotiable. By batch four, I had that perfect, fudge-like consistency that holds together without being heavy. Here’s what makes them special:
- Quick & Easy: Active prep time is about 15 minutes. The hardest part is waiting for them to chill. Seriously, you can make these while your coffee brews.
- Simple Ingredients: Oreos, cream cheese, and melting chocolate. That’s it. No hunting down specialty stores or spending forty dollars on ingredients you’ll never use again.
- Perfect for Holiday Gatherings: Cookie swaps, office parties, neighbor gifts, or just keeping a stash in the fridge for when you need a little something sweet. They travel well, too.
- Crowd-Pleaser: I’ve watched kids and adults alike polish off a whole plate in minutes. There’s something about that crunchy Oreo coating and creamy center that hits everyone’s sweet spot.
- Unbelievably Delicious: The texture is what gets people. It’s not too dense, not too soft—just this perfect, melt-in-your-mouth truffle that tastes way more complicated than it is.
What makes this version different from the dozens of truffle recipes out there? It’s the ratio. After trial and error, I landed on a balance that gives you a sturdy truffle that still feels luxurious. And the coating? I use a simple trick—crushing a few extra Oreos into fine crumbs and rolling the dipped truffles in them. It adds texture and makes them look like they came from a fancy bakery. This isn’t just another truffle recipe; it’s the one you’ll come back to year after year.
What Ingredients You Will Need
This recipe uses simple, humble ingredients to create something that feels surprisingly indulgent. The magic is in how they come together—no complicated techniques, just a few pantry staples that transform into something special. Here’s what you’ll need:
For the Truffle Filling
- 1 (14.3-ounce) package Oreo cookies (about 36 cookies, regular not double-stuf) – You’ll use the whole cookie, filling and all. I prefer the classic Oreo for this, but any chocolate sandwich cookie works. I’ve even used the generic store brand in a pinch, and it still turned out great.
- 8 ounces cream cheese, softened to room temperature – This is crucial. Cold cream cheese won’t blend smoothly, and you’ll end up with lumpy truffles. Let it sit on the counter for at least 30 minutes before starting. I use full-fat cream cheese for the best texture, but reduced-fat works in a pinch (just expect a slightly softer truffle).
- 1/4 teaspoon vanilla extract (optional, but recommended) – It rounds out the flavor and makes the truffles taste a little more “baked” even though there’s no oven involved.
For the Coating
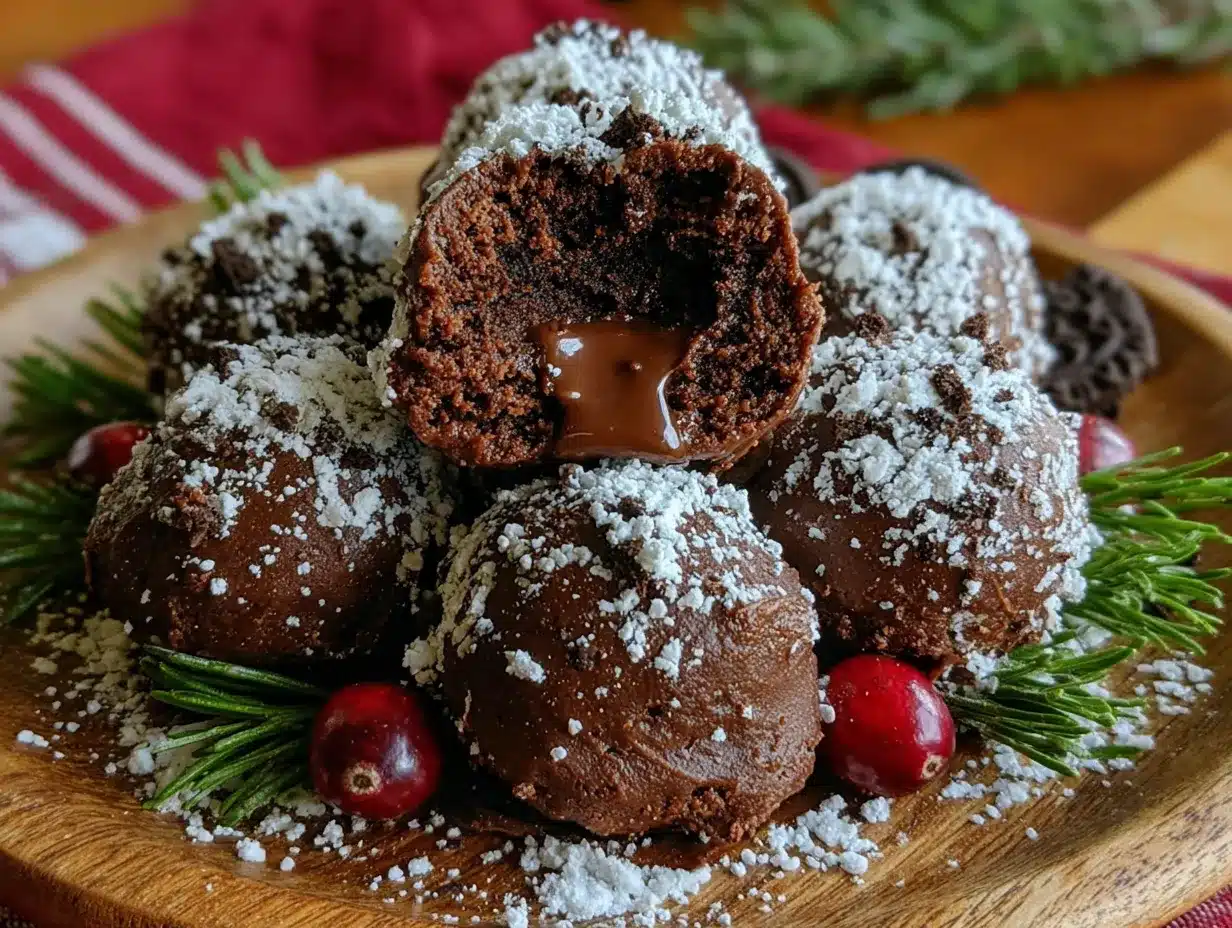
- 12 ounces melting chocolate or candy melts (white, dark, or milk chocolate) – I like Ghirardelli melting wafers for their smooth texture, but any brand works. You can also use almond bark or good-quality chocolate chips mixed with a teaspoon of coconut oil to help them melt smoothly.
- 2-3 Oreo cookies, finely crushed (for garnish) – This gives the truffles that classic Oreo truffle look and adds a little crunch to the outside. You can also skip this and use sprinkles, crushed candy canes, or a dusting of powdered sugar.
Optional Variations
- Peppermint version: Add 1/4 teaspoon peppermint extract to the truffle mixture and top with crushed candy canes instead of Oreo crumbs.
- Chocolate drizzle: If you’re using white chocolate coating, drizzle melted dark chocolate over the top for a pretty contrast.
- Seasonal sprinkles: Roll the dipped truffles in holiday sprinkles for a festive touch that kids especially love.
Ingredient tip: Look for Oreos that are fresh—stale cookies won’t crush as evenly and can make the texture off. And if you’re using a food processor to crush them, pulse rather than running it continuously to avoid turning them into dust too quickly.
Equipment Needed
You don’t need a fancy kitchen to make these truffles. Here’s what you’ll need:
- Food processor or blender – For crushing the Oreos into fine crumbs. A food processor works best, but you can also put the cookies in a zip-top bag and crush them with a rolling pin. It’s a little more work, but it gets the job done. I’ve done both, and honestly, the bag-and-rolling-pin method is oddly satisfying when you’re feeling stressed.
- Large mixing bowl – For combining the Oreo crumbs with the cream cheese.
- Hand mixer or sturdy spatula – A hand mixer makes blending the cream cheese and crumbs effortless, but a good spatula and some elbow grease work fine too.
- Baking sheet lined with parchment paper – For chilling the truffle balls before dipping.
- Small cookie scoop or melon baller – For portioning the truffles evenly. This isn’t essential, but it makes the process much faster and gives you uniform balls. I use a 1-tablespoon scoop.
- Microwave-safe bowl or double boiler – For melting the chocolate. I prefer the microwave for speed—just heat in 30-second bursts, stirring between each.
- Fork or dipping tool – For coating the truffles in chocolate. A regular dinner fork works perfectly; just let the excess chocolate drip off through the tines.
- Piping bag or small zip-top bag (optional) – For drizzling decorative chocolate on top.
If you don’t have a food processor, don’t let that stop you. A rolling pin and a sturdy bag will get you there—it just takes a little more time and a bit of upper body effort. Consider it a mini workout before the sugar rush.
Preparation Method
Alright, let’s get rolling—literally. Here’s how to make these truffles from start to finish. Set aside about 15 minutes of active time, plus at least 1 hour for chilling.
- Crush the Oreos: Place the entire package of Oreos (filling and all) in your food processor. Pulse until you have fine, uniform crumbs. You should have about 2 1/2 to 3 cups of crumbs. If you’re using the bag-and-rolling-pin method, put the cookies in a gallon-sized zip-top bag, squeeze out the air, and crush them with a rolling pin until no large pieces remain. Set aside 2 tablespoons of the crumbs for garnish if you’d like.
- Soften the cream cheese: Make sure your cream cheese is truly at room temperature. If you forgot to take it out of the fridge, you can microwave it in 10-second bursts until it’s soft but not warm—about 20-30 seconds total. Cut it into cubes before microwaving for even softening.
- Mix the filling: In a large bowl, combine the crushed Oreos, softened cream cheese, and vanilla extract (if using). Use a hand mixer on low speed or a sturdy spatula to mix until everything is fully combined. The mixture should be thick, slightly sticky, and hold together when pressed. If it seems too dry, add another tablespoon of cream cheese. If it’s too sticky, add a few more crushed Oreos.
- Chill the mixture: Cover the bowl and refrigerate for at least 30 minutes. This step is non-negotiable—the mixture needs to firm up so you can roll it into balls without it sticking to your hands. I’ve skipped this step before, and let me tell you, it was a sticky mess. Learn from my mistake.
- Roll into balls: Using a small cookie scoop or your hands (lightly greased with a touch of coconut oil or butter), roll the mixture into 1-inch balls. Place them on a parchment-lined baking sheet. You should get about 24-28 truffles, depending on size. Pop the baking sheet into the refrigerator for another 30 minutes to firm up the balls before dipping.
- Melt the chocolate: While the truffles are chilling, melt your coating chocolate. Place the chocolate wafers or chopped chocolate in a microwave-safe bowl. Microwave in 30-second intervals, stirring well after each, until smooth and fully melted. Be careful not to overheat—chocolate seizes up if it gets too hot. If you’re using a double boiler, keep the water at a gentle simmer and stir constantly.
- Dip the truffles: Remove the chilled truffle balls from the fridge. Using a fork, gently lower one ball into the melted chocolate. Spoon chocolate over the top to coat completely, then lift it out with the fork, tapping gently on the edge of the bowl to let excess chocolate drip off. Transfer the coated truffle back to the parchment-lined baking sheet. Repeat with the remaining truffles.
- Add garnish: While the chocolate is still wet, sprinkle the tops with reserved Oreo crumbs, sprinkles, or crushed candy canes. If you’re using a drizzle, let the chocolate coating set first (about 10 minutes), then drizzle with contrasting melted chocolate.
- Set completely: Place the baking sheet in the refrigerator for at least 20 minutes to let the chocolate fully harden. Once set, the truffles are ready to serve or store.
Sensory cues: The truffle mixture should feel like a soft, pliable dough—similar to playdough. When you roll it, it should hold its shape without cracking. The melted chocolate should be glossy and smooth, flowing like thick syrup. When you tap the fork, the chocolate should drip in a steady ribbon, not in clumps.
Cooking Tips & Techniques
After making these truffles more times than I can count, I’ve collected a few tricks that make the process smoother. Let me share what I’ve learned the hard way.
Temperature is everything. Cold truffle mixture is your best friend. If the mixture gets too warm while you’re rolling, pop it back in the fridge for 10 minutes. Warm mixture sticks to your hands and makes uneven balls. I once tried to rush this step and ended up with misshapen, melty blobs that looked more like abstract art than truffles. Not my finest moment.
Work in batches. Don’t take all the truffle balls out of the fridge at once. Keep them chilled until you’re ready to dip each one. If they warm up, they can fall apart in the chocolate. I usually work with 6-8 balls at a time, leaving the rest in the fridge.
Thin your chocolate if needed. If your melted chocolate is too thick for dipping, stir in a teaspoon of coconut oil or vegetable shortening. This makes the coating smoother and easier to work with. It also gives the finished truffles a nicer shine.
Use a deep bowl for dipping. A narrow, deep bowl (like a small glass measuring cup) works better than a wide, shallow one. You can submerge the truffle completely without using excessive chocolate, and it’s easier to get a clean coat.
Don’t skip the chill between steps. I know it’s tempting to push through, but each chilling period serves a purpose. The first chill firms up the mixture so you can roll clean balls. The second chill sets the balls so they don’t fall apart in the warm chocolate. The final chill sets the coating. Trust the process—it’s only about an hour of total chill time.
If your coating cracks: This usually happens if the truffle balls are too cold when you dip them. Let them sit at room temperature for 5 minutes before dipping. If cracks appear after setting, a quick drizzle of contrasting chocolate can hide them beautifully.
Variations & Adaptations
One of the best things about this recipe is how easy it is to change up. Here are some variations I’ve tried and loved:
Flavor Twists
- Peppermint Bark Truffles: Add 1/4 teaspoon peppermint extract to the truffle mixture. After dipping in dark or white chocolate, top with crushed candy canes. The cool mint against the rich chocolate is pure holiday magic.
- Cookies and Cream Deluxe: Fold 1/2 cup of white chocolate chips or chopped white chocolate into the truffle mixture before rolling. It adds little pockets of creamy sweetness throughout.
- Mocha Truffles: Dissolve 1 teaspoon of instant espresso powder in 1/2 teaspoon of water and mix it into the cream cheese before combining with the Oreos. The coffee flavor deepens the chocolate without making it taste like coffee.
Dietary Adaptations
- Gluten-Free: Use gluten-free sandwich cookies (like Glutino or Kinnikinnick brand). The rest of the ingredients are naturally gluten-free, so it’s an easy swap.
- Dairy-Free: Use dairy-free cream cheese (I like Kite Hill or Tofutti) and dairy-free chocolate for coating. The texture will be slightly softer, so chill them well before serving.
- Lower Sugar: Use reduced-fat Oreos or the “Thin” version, and opt for dark chocolate coating with no added sugar. The truffles will still be sweet, just a little less intense.
Seasonal Variations
- Easter: Use pastel-colored candy melts and top with pastel sprinkles or mini chocolate eggs.
- Valentine’s Day: Use pink or red candy melts and heart-shaped sprinkles. You can even add a drop of strawberry flavoring to the truffle mixture.
- Halloween: Use orange and black sprinkles, or dip in orange-colored white chocolate and top with crushed chocolate cookies.
I once made a batch with crushed golden Oreos instead of classic ones for a friend who claimed to dislike chocolate (I know, I don’t understand her either). They turned out surprisingly well—lighter, with a vanilla-forward flavor. So don’t be afraid to experiment.
Serving & Storage Suggestions
These truffles are wonderfully versatile when it comes to serving. Here’s how to get the most out of them.
Serving temperature: Serve them cold or at room temperature. Straight from the fridge, they’re firm and fudge-like. At room temperature, they soften slightly and become almost creamy. I prefer them cold for their cleaner bite, but my husband likes them at room temperature for the softer texture. Try both and see which you prefer.
Presentation ideas: Arrange the truffles on a festive platter or in mini paper liners (the ones used for candies). For a gift, layer them in a decorative tin or a glass jar with a ribbon tied around the lid. They look beautiful nestled in a bed of shredded parchment paper or tissue paper. I’ve given these as neighbor gifts for years, and they’re always a hit.
Complementary dishes: Serve these truffles alongside a cup of hot cocoa, coffee, or a glass of cold milk. They also pair beautifully with a cheese board—the sweetness balances sharp cheddar or creamy brie. For a dessert spread, include them with sugar cookies, gingerbread, and peppermint bark.
Storage instructions: Store the truffles in an airtight container in the refrigerator for up to 2 weeks. They actually get better after a day or two as the flavors meld. For longer storage, freeze them in a single layer on a baking sheet, then transfer to a freezer-safe container or bag. They’ll keep for up to 3 months. Thaw in the refrigerator overnight before serving.
Reheating note: You don’t need to reheat these truffles, but if you want a slightly softer texture, let them sit at room temperature for 10-15 minutes before serving. If you’ve frozen them, thaw them in the fridge—never at room temperature, as condensation can make the coating sticky.
Flavor development: I’ve noticed the truffles taste even better on day two. The Oreo crumbs absorb some moisture from the cream cheese, making the texture more uniform and the flavor more cohesive. So if you can resist eating them all on day one, you’re in for a treat.
Nutritional Information & Benefits
While these truffles are definitely a treat, they’re not without their redeeming qualities. Here’s a rough estimate per truffle (based on 24 truffles):
- Calories: Approximately 150-180 per truffle
- Fat: 9-11g (mostly from cream cheese and chocolate)
- Carbohydrates: 16-20g
- Protein: 2-3g
- Sugar: 12-15g
These numbers will vary based on the specific brands and chocolate you use. Dark chocolate coating will lower the sugar content slightly, while white chocolate will increase it.
Health highlights: The cream cheese provides a small amount of calcium and protein. Dark chocolate (if you choose it) contains antioxidants and flavonoids that support heart health. And let’s be honest—sometimes a little indulgence is good for the soul. I believe in balance, and these truffles fit perfectly into a lifestyle that includes plenty of veggies, whole foods, and the occasional sweet treat.
Dietary considerations: This recipe can be made gluten-free and dairy-free with the substitutions mentioned above. It contains dairy and gluten in its standard form, and the chocolate may contain traces of soy and nuts depending on the brand. Always check labels if you’re serving someone with allergies.
Portion control tip: Because these truffles are rich, one or two is usually enough to satisfy a sweet craving. I like to keep a small container in the fridge for when that post-dinner sugar urge hits—it’s easier to resist a whole slice of cake when I can grab one little truffle.
Conclusion
These Easy No-Bake Christmas Oreo Truffle Balls have become a staple in my holiday kitchen for good reason. They’re simple enough to make on a busy December evening, impressive enough to bring to any gathering, and delicious enough to convert even the most stubborn truffle skeptics (yes, I’m looking at you, big brother).
What I love most about this recipe is how forgiving it is. You can tweak the flavors, change up the coatings, and adjust the sweetness to your liking. It’s a recipe that invites experimentation rather than demanding precision. And honestly? That’s the kind of cooking I love most—the kind that leaves room for your own touch.
I’d love to hear how these turn out for you. Did you try a fun variation? Did you catch someone sneaking a taste before they were done? Drop a comment below and share your truffle adventures. And if you’re looking for more no-bake holiday treats, you might enjoy my easy peppermint bark or these no-bake chocolate coconut cookies. Happy holidays, and happy rolling!
Frequently Asked Questions
Can I use double-stuf Oreos for this recipe?
Yes, you can, but the truffles will be slightly sweeter and a bit softer because of the extra filling. You may need to add a few more crushed cookies to balance the texture. I’d start with the same amount and adjust if the mixture feels too sticky.
How do I prevent the truffle balls from sticking to my hands?
Chill the mixture thoroughly before rolling, and lightly grease your hands with a tiny bit of coconut oil, butter, or even a spritz of non-stick spray. Working quickly also helps—if your hands start to warm the mixture, wash and dry them before continuing.
Can I use milk chocolate instead of dark or white for coating?
Absolutely. Milk chocolate will make the truffles sweeter and creamier. Just be careful when melting, as milk chocolate can be more prone to seizing. Heat it gently and stir often.
How far in advance can I make these truffles?
You can make them up to 2 weeks ahead and store them in the refrigerator. They actually taste better after a day or two as the flavors meld. You can also freeze them for up to 3 months—just thaw in the fridge before serving.
My chocolate coating is cracking. What went wrong?
This usually happens when the truffle balls are too cold when dipped. Let them sit at room temperature for 5-10 minutes before dipping. If the coating cracks after setting, you can hide the cracks with a drizzle of contrasting chocolate or a dusting of cocoa powder.
Pin This Recipe!
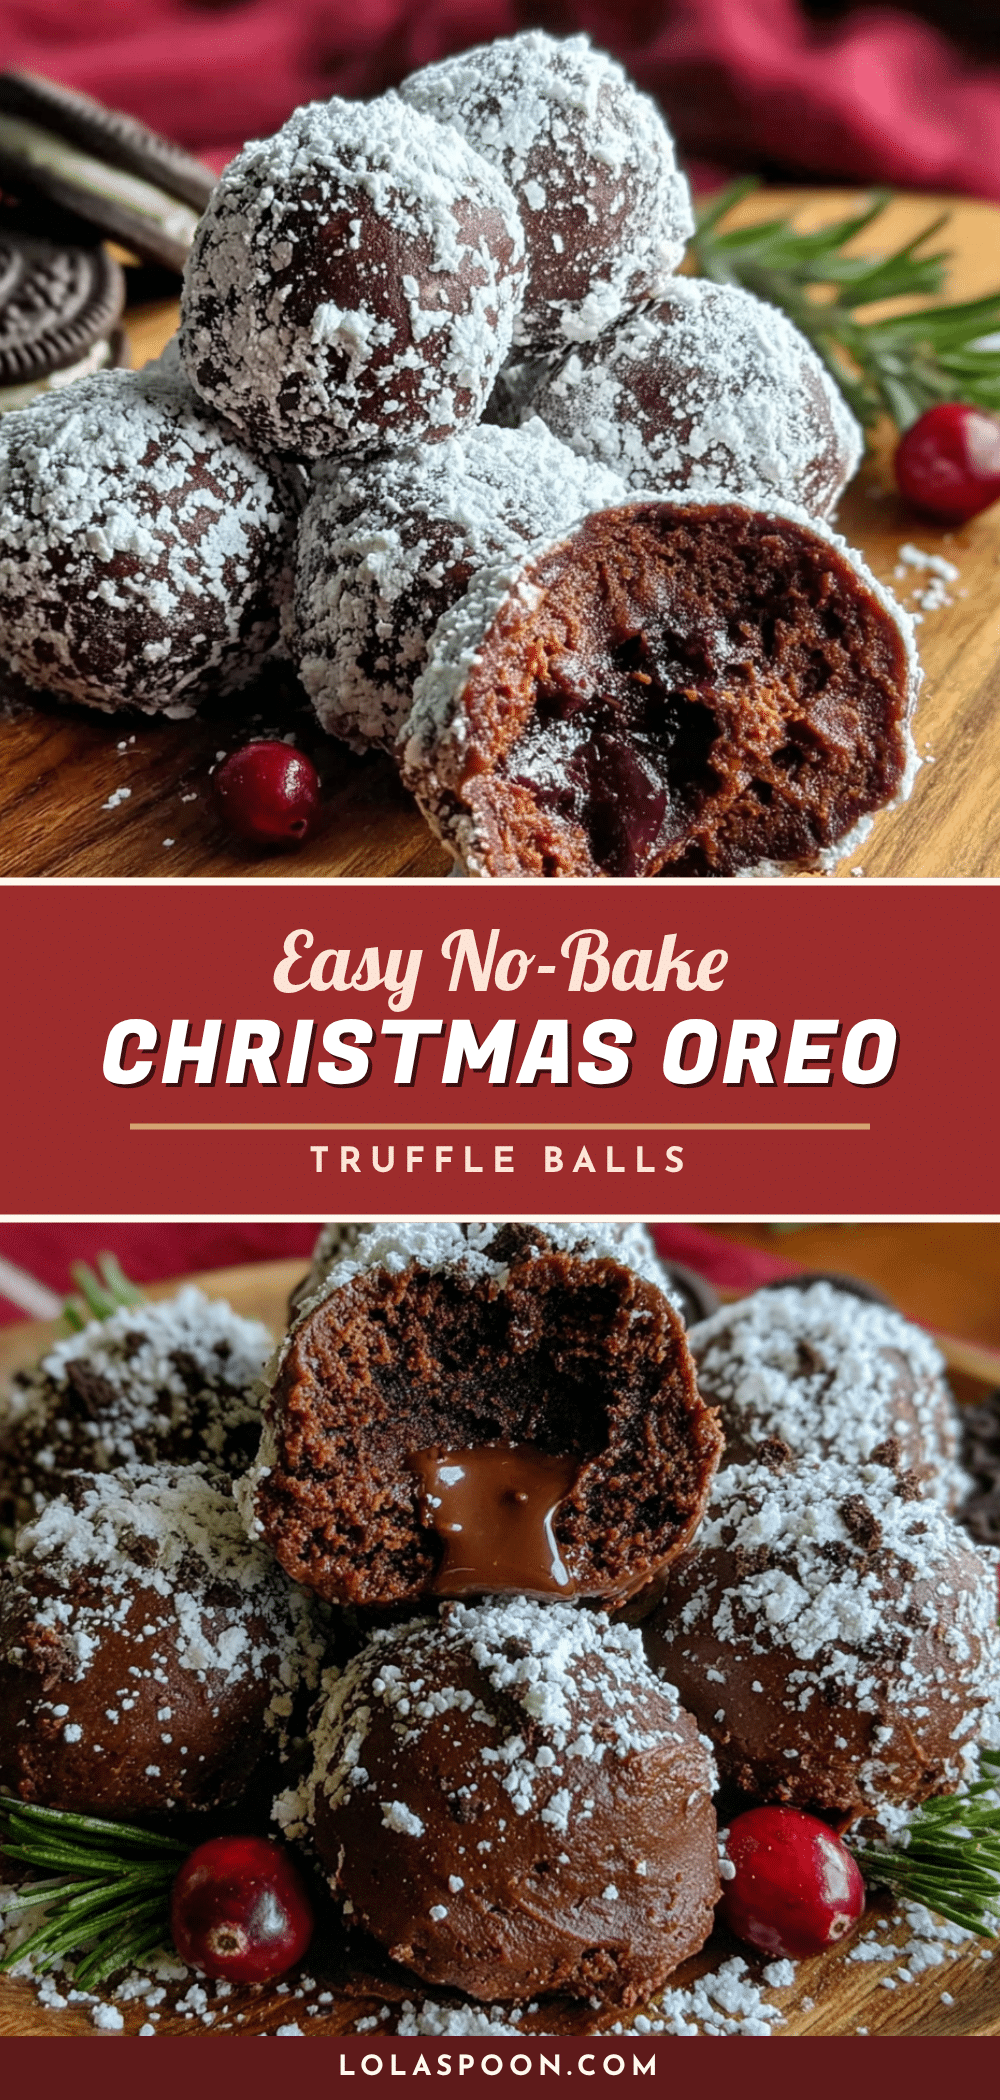
Easy No-Bake Christmas Oreo Truffle Balls Recipe

These Easy No-Bake Christmas Oreo Truffle Balls are a simple, crowd-pleasing holiday treat made with just Oreos, cream cheese, and melting chocolate. Perfect for cookie swaps, parties, or gifting, they require no oven and come together in minutes.
- Prep Time: 15 minutes
- Cook Time: 0 minutes
- Total Time: 1 hour 15 minutes (includes chilling time)
- Yield: 24-28 truffles 1x
- Category: Dessert
- Cuisine: American
Ingredients
- 1 (14.3-ounce) package Oreo cookies (about 36 cookies, regular not double-stuf)
- 8 ounces cream cheese, softened to room temperature
- 1/4 teaspoon vanilla extract (optional, but recommended)
- 12 ounces melting chocolate or candy melts (white, dark, or milk chocolate)
- 2–3 Oreo cookies, finely crushed (for garnish)
Instructions
- Crush the Oreos: Place the entire package of Oreos (filling and all) in your food processor. Pulse until you have fine, uniform crumbs. Set aside 2 tablespoons of the crumbs for garnish if desired.
- Soften the cream cheese: Ensure cream cheese is at room temperature. If needed, microwave in 10-second bursts until soft but not warm.
- Mix the filling: In a large bowl, combine crushed Oreos, softened cream cheese, and vanilla extract (if using). Mix with a hand mixer on low speed or a sturdy spatula until fully combined. The mixture should be thick, slightly sticky, and hold together when pressed.
- Chill the mixture: Cover the bowl and refrigerate for at least 30 minutes until firm.
- Roll into balls: Using a small cookie scoop or lightly greased hands, roll the mixture into 1-inch balls. Place on a parchment-lined baking sheet. Refrigerate for another 30 minutes to firm up.
- Melt the chocolate: Place chocolate wafers or chopped chocolate in a microwave-safe bowl. Microwave in 30-second intervals, stirring well after each, until smooth and fully melted.
- Dip the truffles: Remove chilled truffle balls from the fridge. Using a fork, gently lower one ball into the melted chocolate. Spoon chocolate over the top to coat completely, then lift out, tapping gently to let excess drip off. Transfer to parchment-lined baking sheet. Repeat with remaining truffles.
- Add garnish: While chocolate is still wet, sprinkle tops with reserved Oreo crumbs, sprinkles, or crushed candy canes. If using a drizzle, let chocolate coating set first (about 10 minutes), then drizzle with contrasting melted chocolate.
- Set completely: Place baking sheet in the refrigerator for at least 20 minutes to let chocolate fully harden. Serve or store.
Notes
Chill the mixture thoroughly before rolling to prevent sticking. Work in batches, keeping unused truffle balls in the fridge. If chocolate is too thick, stir in a teaspoon of coconut oil. For best results, let truffles sit at room temperature for 5-10 minutes before dipping to prevent coating from cracking. Truffles taste even better on day two as flavors meld.
Nutrition
- Serving Size: 1 truffle
- Calories: 165
- Sugar: 13
- Sodium: 120
- Fat: 10
- Saturated Fat: 5
- Carbohydrates: 18
- Fiber: 1
- Protein: 2.5
Keywords: Oreo truffles, no-bake Christmas dessert, easy holiday treats, Oreo balls, cookie truffles


