Our neighborhood book club was in six hours and I’d completely forgotten I was hosting. Everyone else would be bringing their signature dishes—Meredith’s famous lemon bars, Sarah’s elaborate charcuterie board, and James’s award-winning chili. I had three overripe bananas on the counter and a stick of butter that was dangerously close to its expiration date. Honestly, I almost called the whole thing off and ordered pizza. But then I remembered this trick I’d stumbled upon last winter when I was experimenting with browning butter for a cookie recipe, and I figured—why not? The worst that could happen was a kitchen fire, and at that point, I was ready for the excitement.
The bananas got mashed, the butter started bubbling in the pan, and suddenly my kitchen smelled like something between a toffee factory and a warm hug. I threw the batter together in about fifteen minutes, spilled flour on my favorite sweater, and shoved the loaf in the oven with ten minutes to spare before people arrived. When I pulled it out, the top had this gorgeous, crackled golden crust that made me actually gasp a little. I set it on the counter to cool, and by the time everyone was deep into discussing the book (which, between us, nobody had finished), the loaf had mysteriously disappeared—half of it eaten by guests who kept slicing off “just one more piece.”
Meredith asked for the recipe. Twice. And that’s how a panicked, last-minute banana bread became the thing I’m now known for. Maybe you’ve been there—scrambling for something good with almost nothing to work with. This is that recipe. It’s the one that proves you don’t need a whole day or a fancy ingredient list to make something that tastes like you spent hours on it.
Why You’ll Love This Recipe
Let me tell you, I’ve tested a lot of banana bread recipes over the years. Some were too dense, some were too sweet, and some just tasted like… well, banana-flavored cardboard. This one is different. After about twelve test batches (my neighbors were very patient), I landed on a version that hits that perfect sweet spot between light and satisfying. It’s the kind of bread that makes you close your eyes after the first bite, and honestly, I’m not being dramatic.
- Quick & Easy: From start to oven in under 20 minutes. The browning butter adds maybe 5 extra minutes, but it’s absolutely worth it.
- Simple Ingredients: You probably have everything already. Bananas, butter, flour, sugar, eggs—nothing fancy here.
- Perfect for Hosting: This bread saves you when you need something impressive fast. Book club, brunch, last-minute dinner guest—it delivers every time.
- Crowd-Pleaser: Kids love it, adults love it, even people who “don’t really like banana bread” love it. I’ve seen it happen.
- Unbelievably Delicious: The brown butter adds this nutty, caramel-like depth that regular banana bread just doesn’t have. It’s next-level comfort food.
What makes this recipe different? It’s the technique. Browning the butter changes everything—it adds complexity without extra sugar or fat. The texture is lighter than traditional banana bread because I’ve tweaked the flour-to-banana ratio just right. No more dense, gummy slices that weigh you down. This bread is fluffy, tender, and somehow feels both indulgent and light at the same time. It’s comfort food reimagined—healthier in spirit, faster in practice, but with the same soul-soothing satisfaction that makes you reach for a second slice before you’ve finished the first.
What Ingredients You Will Need
This recipe uses simple, wholesome ingredients to deliver bold flavor and satisfying texture without the fuss. Most of these are pantry staples, which is exactly what you want when you’re staring at those sad, spotty bananas on your counter.
For the Banana Bread
- Unsalted butter, ½ cup (1 stick, 113g) (for browning—this is where the magic happens)
- Ripe bananas, 3 medium (about 1½ cups mashed) (the spottier, the better; really brown bananas = more sweetness)
- Granulated sugar, ¾ cup (150g) (adds sweetness and helps create that crackly top)
- Large eggs, 2 (room temperature if you remember, but cold works too)
- Vanilla extract, 1 teaspoon (pure is better, but imitation works in a pinch)
- All-purpose flour, 1½ cups (180g) (I use King Arthur Flour for consistent results)
- Baking soda, 1 teaspoon (make sure it’s fresh—test it by dropping a pinch in vinegar; it should fizz)
- Salt, ½ teaspoon (fine sea salt or table salt; it balances the sweetness)
- Plain Greek yogurt, ¼ cup (60g) (adds moisture without extra fat; use dairy-free coconut yogurt if needed)
For the Topping (Optional but Recommended)
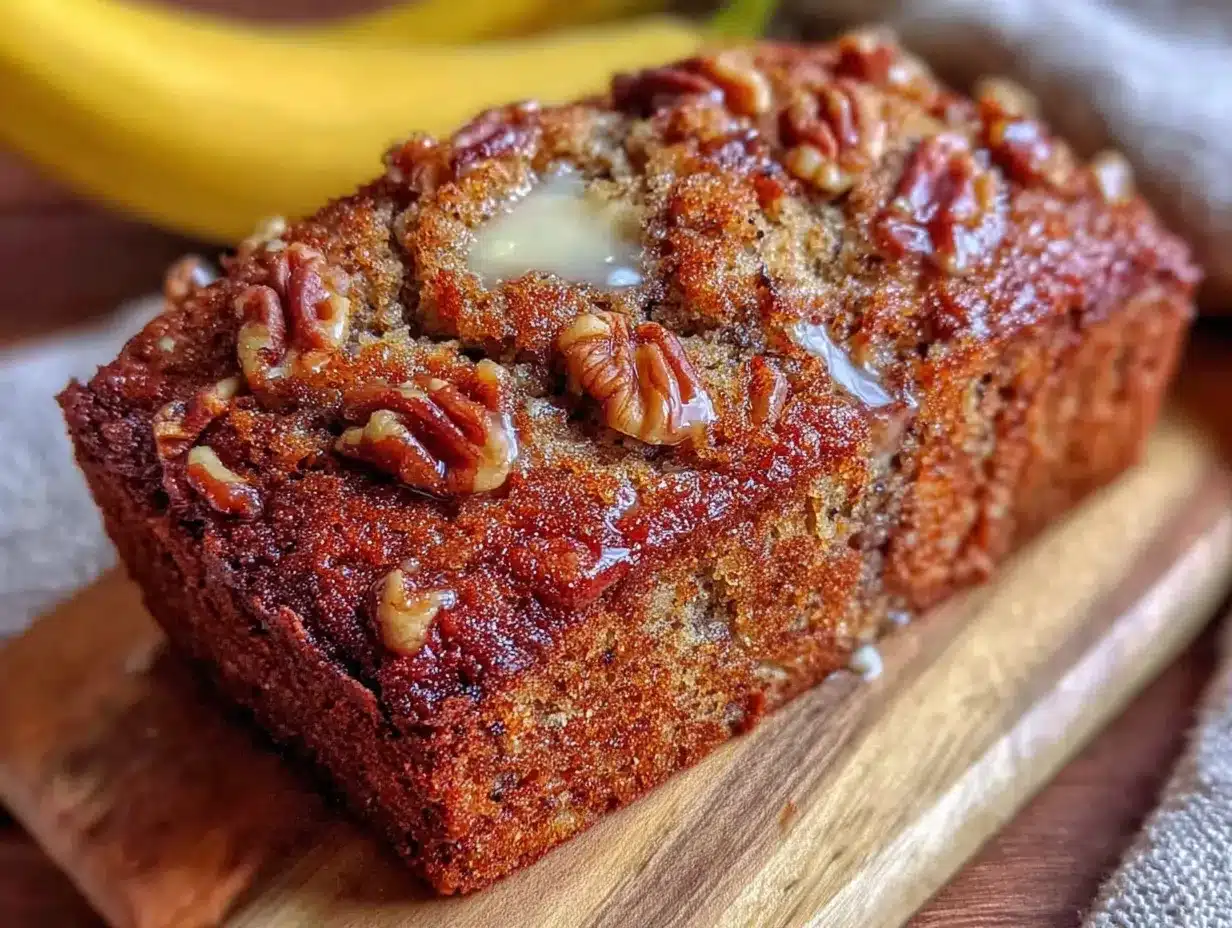
- Turbinado sugar, 1 tablespoon (sprinkle on top before baking for a crunchy, sparkly crust)
- Chopped walnuts or pecans, ¼ cup (30g) (adds texture and complements the nutty brown butter)
A quick note on the bananas—I know it’s tempting to use slightly yellow ones, but really ripe bananas are non-negotiable here. They’re sweeter, softer, and mash more easily. If your bananas aren’t ripe enough, you can roast them in a 300°F oven for 15-20 minutes until the skins darken. I’ve done this more times than I’d like to admit, and it works like a charm. For the yogurt, I’ve tested this with both full-fat and non-fat Greek yogurt, and both work well. The full-fat version gives a slightly richer crumb, but the non-fat keeps it lighter—your call.
Equipment Needed
You don’t need a fancy kitchen to make this bread. Here’s what you’ll actually use:
- 9×5-inch loaf pan (standard size; if using an 8×4-inch pan, increase baking time by 5-10 minutes)
- Light-colored saucepan (essential for browning butter—dark pans make it hard to see the color change)
- Large mixing bowl (for the wet ingredients)
- Medium mixing bowl (for the dry ingredients)
- Whisk and rubber spatula (a wooden spoon works too, but the spatula helps get every last bit of batter)
- Parchment paper (for lining the pan; this makes removal so much easier)
- Cooling rack (wire rack lets air circulate so the bottom doesn’t get soggy)
- Fork or potato masher (for mashing bananas—I prefer a fork because I like some small chunks)
If you don’t have a light-colored saucepan, just keep a close eye on the butter as it browns. I’ve ruined a batch by using a dark pan and not noticing the butter went from golden to burnt in about 30 seconds. Also, if you don’t have parchment paper, you can grease the pan thoroughly with butter and dust it with flour—just make sure you tap out the excess.
Preparation Method
Alright, let’s make this bread. I’ve broken this down step by step so you don’t miss anything important. Trust me, I’ve made every mistake possible so you don’t have to.
- Preheat your oven to 350°F (175°C). Position the rack in the center of the oven. Line your 9×5-inch loaf pan with parchment paper, leaving some overhang on the long sides—this creates “handles” for lifting the bread out later. Lightly grease the parchment with cooking spray or a dab of butter.
- Brown the butter. Place the ½ cup (1 stick) of unsalted butter in your light-colored saucepan over medium heat. Let it melt completely, then keep cooking. Swirl the pan occasionally. You’ll see the butter foam up, then subside, then foam again. Watch for small brown specks forming at the bottom—that’s the milk solids toasting. The butter will smell nutty and amazing. This takes about 5-7 minutes. Once it’s golden-brown and smells like toasted hazelnuts, immediately pour it into a heat-safe bowl to stop the cooking. Don’t walk away during this step—butter goes from perfect to burnt in seconds.
- Mash the bananas. In your large mixing bowl, mash the three ripe bananas with a fork until mostly smooth with some small lumps. You want about 1½ cups of mashed banana. If you have more, that’s fine—just reduce the yogurt slightly. If you have less, add a splash of milk to compensate.
- Mix the wet ingredients. To the mashed bananas, add the cooled brown butter (it should be warm but not hot), ¾ cup granulated sugar, 2 eggs, 1 teaspoon vanilla extract, and ¼ cup Greek yogurt. Whisk everything together until smooth and well-combined. The mixture should look glossy and smell incredible already.
- Combine the dry ingredients. In your medium bowl, whisk together 1½ cups all-purpose flour, 1 teaspoon baking soda, and ½ teaspoon salt. Make sure there are no lumps. I like to use a fork for this—it aerates the flour nicely.
- Fold the dry into the wet. Pour the dry ingredients into the wet mixture. Using your rubber spatula, fold gently—just until no streaks of flour remain. Do not overmix! Overmixing develops gluten and makes the bread tough. A few small lumps are totally fine. The batter should be thick but scoopable.
- Pour into the pan. Scrape the batter into your prepared loaf pan and spread it evenly. If you’re using the turbinado sugar and nuts, sprinkle them on top now. Gently press the nuts into the batter slightly so they stick.
- Bake for 50-60 minutes. Place the pan in the preheated oven. Bake until a toothpick inserted into the center comes out clean or with just a few moist crumbs. The top should be deep golden brown and cracked. If the top is browning too quickly (around the 40-minute mark), tent loosely with aluminum foil.
- Cool properly. Let the bread cool in the pan for 10 minutes. Then use the parchment handles to lift it out and transfer to a wire rack to cool completely. I know it’s tempting to slice into it immediately, but warm banana bread is gummy and falls apart. Patience, friend. Let it cool for at least 30 minutes before slicing.
One more thing—if your bread sinks in the middle after baking, don’t panic. It usually means the oven temperature was slightly off or the bread was underbaked. It’ll still taste amazing. Just call it “rustic” and move on.
Cooking Tips & Techniques
After making this bread more times than I can count, I’ve learned a few things the hard way. Here’s what I wish someone had told me:
Don’t skip browning the butter. I know it’s an extra step, but it’s what makes this bread special. Brown butter adds a nutty, toffee-like flavor that regular butter simply can’t match. The first time I made this without browning the butter (because I was lazy), the bread was fine—but it wasn’t this bread. It was just regular banana bread. The brown butter is the star here.
Measure your flour correctly. This is the most common mistake I see. Spoon the flour into your measuring cup and level it off with a knife. Don’t scoop directly with the cup—that packs the flour and gives you too much, resulting in dry, dense bread. If you have a kitchen scale, 180 grams is the sweet spot.
Check your baking soda. Old baking soda won’t give your bread the lift it needs. If your baking soda has been sitting in the back of your cabinet for two years, toss it and buy fresh. The difference is noticeable.
Room temperature eggs matter. Cold eggs can seize the brown butter and make the batter lumpy. If you forgot to take them out of the fridge, place them in a bowl of warm water for 5 minutes before using. This small step makes a big difference in the final texture.
Let it cool completely. I know I said this already, but I’m saying it again because I’ve ruined so many slices by cutting too early. The bread continues to set as it cools. Cutting into it while it’s warm gives you a gummy, crumbly mess. I speak from experience—and tears.
Variations & Adaptations
One of the best things about this recipe is how flexible it is. Here are some variations I’ve tried and loved:
Gluten-Free Version: Substitute the all-purpose flour with a 1:1 gluten-free baking flour blend (I like Bob’s Red Mill). Add 1 teaspoon of xanthan gum if your blend doesn’t include it. The texture will be slightly more delicate, but it’s still delicious. I tested this for a friend with celiac disease, and she asked for the recipe before I even told her it was gluten-free.
Chocolate Chip Banana Bread: Fold in ½ cup of dark chocolate chips right before pouring the batter into the pan. The chocolate pairs beautifully with the nutty brown butter. I’ve also tried white chocolate chips, and honestly, that might be even better. Use mini chips for more even distribution.
Vegan Adaptation: Replace the eggs with 2 flax eggs (2 tablespoons ground flaxseed + 6 tablespoons water, let sit for 5 minutes). Use coconut oil instead of butter (though you won’t get the brown butter flavor—try vegan butter for a closer match). Swap the Greek yogurt for a plant-based yogurt. The texture will be slightly denser, but it’s still very good.
Spiced Version: Add 1 teaspoon of cinnamon, ½ teaspoon of nutmeg, and ¼ teaspoon of ground ginger to the dry ingredients. This gives the bread a cozy, fall-inspired warmth. I made this version for Thanksgiving brunch, and it disappeared faster than the turkey.
Lower-Sugar Option: Reduce the granulated sugar to ½ cup and add 2 tablespoons of maple syrup or honey. The bread will be slightly less sweet, but the natural banana sweetness and brown butter richness carry the flavor. I’ve also used coconut sugar, which adds a deeper caramel note.
Serving & Storage Suggestions
This bread is versatile enough for any time of day. Here’s how I like to serve and store it:
Serving: Slice it thick—about 1-inch slices. Serve at room temperature or lightly toasted. Toasting brings out the brown butter flavor even more and gives the edges a lovely crispness. Spread a little salted butter on top if you’re feeling indulgent, or a drizzle of honey for extra sweetness. For a breakfast treat, serve with a dollop of Greek yogurt and fresh berries.
Pairings: This bread pairs beautifully with a hot cup of coffee or chai tea. For a more decadent experience, serve with a scoop of vanilla ice cream and a drizzle of caramel sauce. It also makes an excellent French toast—just slice it a day old, dip in egg mixture, and pan-fry. Trust me on this one.
Storage: Store the bread in an airtight container at room temperature for up to 3 days. Wrap it in parchment paper then foil for best results—plastic wrap can make the crust soggy. If your kitchen is humid, the bread may spoil faster, so keep an eye on it.
Freezing: This bread freezes beautifully. Wrap the cooled loaf tightly in plastic wrap, then in aluminum foil, and freeze for up to 3 months. You can also freeze individual slices—perfect for grabbing a quick breakfast. To thaw, leave at room temperature for about an hour, or pop a frozen slice in the toaster for a quick treat.
Flavor Development: Honestly, this bread tastes even better on day two. The flavors meld together and the brown butter nuttiness becomes more pronounced. If you can resist eating it all on day one, you’re in for a treat.
Nutritional Information & Benefits
While I wouldn’t call this bread health food, it’s certainly a better choice than many baked goods. Here’s the breakdown per slice (assuming 10 slices):
| Nutrient | Amount per Slice |
|---|---|
| Calories | 245 |
| Total Fat | 11g |
| Saturated Fat | 6g |
| Carbohydrates | 34g |
| Fiber | 2g |
| Sugar | 16g |
| Protein | 5g |
Bananas are a great source of potassium and vitamin B6, and the Greek yogurt adds protein and calcium. The brown butter, while not exactly a health food, adds a depth of flavor that lets you use less sugar overall. This recipe is also lower in sugar than many banana bread recipes—most call for a full cup or more. If you’re watching your sugar intake, the lower-sugar variation works well here.
For those with dietary concerns, this recipe can be made gluten-free, dairy-free, or vegan with the substitutions mentioned above. It’s also nut-free if you skip the walnut topping, making it safe for school lunches or parties.
Conclusion
This Light & Nutty Brown Butter Banana Bread has become my go-to recipe for so many reasons. It’s the one I make when I need something impressive without the stress. It’s the one that saves me when I’ve forgotten about a gathering. And honestly, it’s the one I make just because I want something cozy and delicious on a quiet afternoon.
The brown butter makes it special. The simple ingredients make it easy. And the way it fills your kitchen with that warm, nutty, banana-sweet aroma? That’s the kind of thing that makes a house feel like a home.
I’d love to hear how yours turns out. Did you add chocolate chips? Try the gluten-free version? Burn the butter and start over like I did that one time? Drop a comment below and let me know—I read every single one. And if you share a photo on social media, tag me so I can see your beautiful loaf. Happy baking, friend!
Frequently Asked Questions
Can I use salted butter instead of unsalted?
Yes, you can. Just reduce the added salt in the recipe to ¼ teaspoon. The salted butter will add enough saltiness on its own. I’ve done this when I ran out of unsalted butter, and it worked perfectly fine.
Why did my banana bread sink in the middle?
This usually happens for three reasons: the bread was underbaked, the oven temperature was too low, or you overmixed the batter. Make sure your oven is properly preheated and use an oven thermometer to check accuracy. Also, resist the urge to open the oven door during the first 30 minutes of baking.
Can I make this into muffins instead of a loaf?
Absolutely! Grease a 12-cup muffin tin or line with paper liners. Fill each cup about ¾ full. Bake at 350°F for 18-22 minutes, or until a toothpick comes out clean. You’ll get about 12-14 muffins. The baking time is much shorter, so keep an eye on them.
How do I know when the butter is properly browned?
You’re looking for two signs: color and smell. The butter will turn from yellow to golden to a warm amber-brown. You’ll see brown specks at the bottom of the pan. And the smell will change from buttery to nutty and toasty—like toasted hazelnuts or caramel. The whole process takes about 5-7 minutes over medium heat.
Can I add other mix-ins like blueberries or raspberries?
Yes, but be careful with the moisture content. Fresh berries can add too much liquid and make the bread soggy. If you want to add berries, toss them in a tablespoon of flour before folding them into the batter. Frozen berries should be added straight from the freezer (don’t thaw them first). I’ve made a blueberry version that was absolutely lovely.
Pin This Recipe!
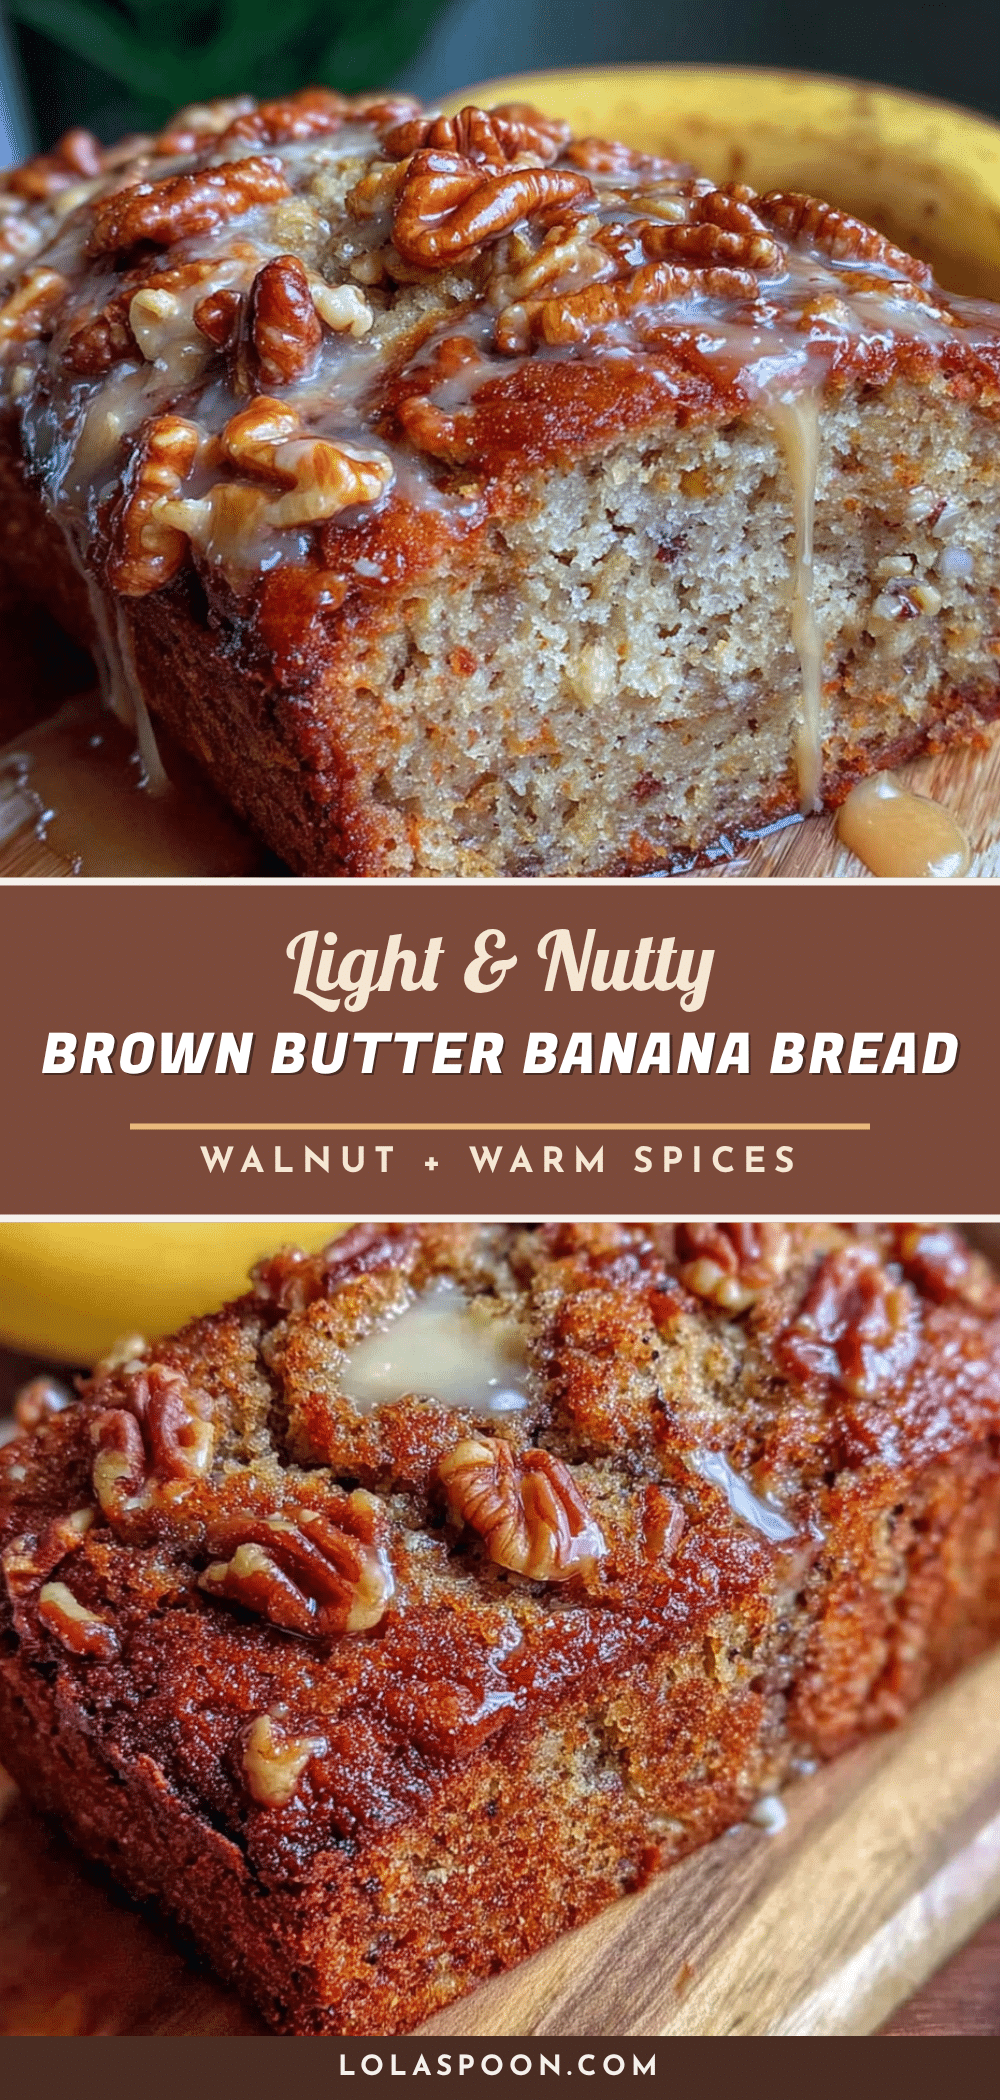
Light & Nutty Brown Butter Banana Bread: Easy Homemade Recipe
This brown butter banana bread is quick, easy, and made with simple ingredients. The nutty, caramel-like depth from browned butter elevates this classic comfort food into a crowd-pleasing treat perfect for any occasion.
- Prep Time: 15 minutes
- Cook Time: 55 minutes
- Total Time: 1 hour 10 minutes
- Yield: 10 servings 1x
- Category: Dessert
- Cuisine: American
Ingredients
- ½ cup (1 stick, 113g) unsalted butter
- 3 medium ripe bananas (about 1½ cups mashed)
- ¾ cup (150g) granulated sugar
- 2 large eggs
- 1 teaspoon vanilla extract
- 1½ cups (180g) all-purpose flour
- 1 teaspoon baking soda
- ½ teaspoon fine sea salt or table salt
- ¼ cup (60g) plain Greek yogurt
- 1 tablespoon turbinado sugar (optional, for topping)
- ¼ cup (30g) chopped walnuts or pecans (optional, for topping)
Instructions
- Preheat your oven to 350°F (175°C). Position the rack in the center of the oven. Line a 9×5-inch loaf pan with parchment paper, leaving overhang on the long sides. Lightly grease the parchment with cooking spray or butter.
- Brown the butter: Place ½ cup unsalted butter in a light-colored saucepan over medium heat. Melt completely, then continue cooking, swirling occasionally, until the butter foams, subsides, and foams again. Watch for small brown specks forming at the bottom and a nutty aroma. This takes about 5-7 minutes. Immediately pour into a heat-safe bowl to stop cooking.
- Mash the bananas: In a large mixing bowl, mash the ripe bananas with a fork until mostly smooth with some small lumps (about 1½ cups).
- Mix the wet ingredients: To the mashed bananas, add the cooled brown butter, ¾ cup granulated sugar, 2 eggs, 1 teaspoon vanilla extract, and ¼ cup Greek yogurt. Whisk until smooth and glossy.
- Combine the dry ingredients: In a medium bowl, whisk together 1½ cups all-purpose flour, 1 teaspoon baking soda, and ½ teaspoon salt.
- Fold the dry into the wet: Pour the dry ingredients into the wet mixture. Fold gently with a rubber spatula until just combined—do not overmix. A few small lumps are fine.
- Pour into the pan: Scrape the batter into the prepared loaf pan and spread evenly. If using, sprinkle turbinado sugar and chopped nuts on top, gently pressing nuts into the batter.
- Bake for 50-60 minutes, until a toothpick inserted into the center comes out clean or with a few moist crumbs. The top should be deep golden brown and cracked. If browning too quickly, tent loosely with foil after 40 minutes.
- Cool in the pan for 10 minutes, then use the parchment handles to lift the bread out and transfer to a wire rack to cool completely. Let cool at least 30 minutes before slicing.
Notes
Don’t skip browning the butter—it adds a nutty, toffee-like flavor. Measure flour correctly by spooning into the cup and leveling off. Use room temperature eggs to prevent the brown butter from seizing. Let the bread cool completely before slicing to avoid a gummy texture. For variations, try adding chocolate chips, spices, or making it gluten-free or vegan.
Nutrition
- Serving Size: 1 slice (1/10 of loa
- Calories: 245
- Sugar: 16
- Sodium: 220
- Fat: 11
- Saturated Fat: 6
- Carbohydrates: 34
- Fiber: 2
- Protein: 5
Keywords: brown butter banana bread, easy banana bread, homemade banana bread, nutty banana bread, quick banana bread