My brother had sworn off chocolate chip cookies for three years. Three years! He claimed they were all the same—too crispy, too flat, too sweet, or just plain disappointing. Every bakery trip ended with him walking past the cookie display like it didn’t exist. Honestly, I thought he was being dramatic. But then last Tuesday, I pulled a batch out of the oven just as he walked through my back door. The smell of browned butter and melting chocolate hit him before he even got his coat off. I turned around to grab a spatula, and when I looked back, there he was—mid-chew, eyes wide, holding a cookie that was still practically too hot to touch. “Okay,” he said with his mouth full, crumbs falling everywhere. “These are different.” And that, my friends, is how this recipe became the only one he’ll eat.
You know that feeling when you bite into a bakery cookie and wonder why yours never turn out the same? I spent a solid year testing batches—some came out like hockey pucks, others spread into one giant cookie mess. I mean, my kitchen looked like a flour bomb went off more times than I’d like to admit. But this version? It’s the one that finally made my brother a believer. And maybe you’ve been there too, chasing that perfect chewy center with slightly crisp edges. Let me tell you, once you get this method down, you’ll never look at a tube of pre-made dough the same way again.
Why You’ll Love This Recipe
These aren’t just any chocolate chip cookies. They’re the kind that make people close their eyes after the first bite—I’ve seen it happen at least a dozen times. Here’s what makes them stand out from the hundreds of other recipes floating around:
- Perfectly Chewy Texture : The secret is a combination of melted butter and an extra egg yolk, which gives you that dense, soft center without making the cookies cakey.
- Simple Pantry Ingredients : No weird specialty flours or hard-to-find extracts. If you’ve got butter, sugar, eggs, and flour, you’re basically already there.
- Ready in Under 30 Minutes : From mixing bowl to cooling rack in about 25 minutes. Perfect for when that cookie craving hits hard and fast.
- Better Than Bakery Quality : These stay soft for days—which is honestly rare for homemade cookies. They actually get better on day two.
- Crowd-Pleasing Guaranteed : I’ve brought these to potlucks, family dinners, and even a book club meeting. They disappear every single time.
What makes this recipe different is the technique. Most recipes either use all melted butter (which makes cookies too flat) or all cold butter (which makes them too puffy). This one strikes the perfect balance by browning the butter first, then chilling the dough just long enough to develop that bakery-style thickness. It’s comfort food reimagined—familiar, but somehow better than you remembered.
What Ingredients You Will Need
This recipe uses simple, wholesome ingredients to deliver that signature chewy texture and rich flavor. Most of these are probably sitting in your kitchen right now, which makes this perfect for spontaneous baking sessions.
For the Cookie Dough
- 1 cup (226g) unsalted butter — I prefer using European-style butter like Kerrygold for a richer flavor, but standard unsalted works beautifully too.
- 1 cup (200g) packed light brown sugar — This is non-negotiable for chewiness. The molasses content keeps cookies soft and adds that deep caramel note.
- ½ cup (100g) granulated sugar — Helps with spreading and gives those crispy edges.
- 2 large eggs, room temperature — Cold eggs will seize the butter mixture. Leave them on the counter for 30 minutes, or place them in warm water for 5 minutes.
- 1 large egg yolk — The extra yolk adds richness and tenderness. Trust me on this one.
- 2 teaspoons vanilla extract — Pure vanilla, not imitation. It makes a noticeable difference.
- 2 ¼ cups (280g) all-purpose flour — Spoon and level your flour; scooping directly from the bag packs in too much.
- 1 teaspoon baking soda — Helps the cookies spread just enough while keeping them thick.
- ½ teaspoon salt — Use fine sea salt for even distribution.
- 2 cups (340g) semi-sweet chocolate chips — I use Ghirardelli 60% cacao chips for that balanced sweetness. You can also chop up a dark chocolate bar for more rustic chunks.
- Flaky sea salt for topping — Optional but highly recommended. It elevates the whole experience.
For substitutions, you can swap the all-purpose flour with a gluten-free 1:1 blend if needed. Use dairy-free butter and a flax egg (1 tablespoon ground flaxseed mixed with 3 tablespoons water) for a vegan version—though the texture will be slightly different. If you’re out of brown sugar, mix 1 cup white sugar with 2 tablespoons molasses as a quick fix.
Equipment Needed
- Large mixing bowl — A stainless steel or glass bowl works best for holding the browned butter mixture.
- Whisk — For combining wet ingredients smoothly.
- Rubber spatula — For folding in the chocolate chips without overmixing.
- Medium saucepan — For browning the butter. Light-colored pans help you see the color change.
- Cookie scoop (2-tablespoon size) — Ensures uniform cookies that bake evenly. A 1.5-tablespoon scoop works for smaller cookies.
- Baking sheets (2) — Rimmed sheets prevent butter from dripping off.
- Parchment paper or silicone baking mats — Silpat mats give slightly softer bottoms; parchment gives crispier edges.
- Cooling rack — Essential for stopping the carryover cooking process.
If you don’t have a cookie scoop, use two spoons to portion the dough. And honestly, if you don’t have a cooling rack, just let the cookies rest on the baking sheet for 5 minutes before transferring them to a plate. I’ve done it plenty of times when mine was in the dishwasher.
Preparation Method
- Brown the butter : Place the butter in a medium saucepan over medium heat. Stir occasionally as it melts, then continuously once it starts foaming. You’ll see brown specks form at the bottom after about 5-7 minutes. The butter should smell nutty and be a golden amber color. Pour it into a large mixing bowl immediately to stop the cooking process. Let it cool for 10 minutes—don’t skip this, or you’ll end up with scrambled eggs in the next step.
- Mix the sugars : Add both brown sugar and granulated sugar to the cooled browned butter. Whisk vigorously for about 2 minutes until the mixture looks like wet sand and no lumps remain. The sugar should feel slightly warm to the touch, which helps it dissolve better.
- Add the eggs and vanilla : Whisk in the eggs and egg yolk one at a time, mixing well after each addition. Then add the vanilla extract. The mixture should look thick, glossy, and almost like caramel. If it looks separated, you probably added the eggs while the butter was still too hot—but don’t panic, just whisk harder to bring it back together.
- Combine dry ingredients : In a separate medium bowl, whisk together the flour, baking soda, and salt. Make sure there are no baking soda clumps—I’ve learned this the hard way when someone got a bitter bite of pure baking soda.
- Fold in the dry ingredients : Gradually add the flour mixture to the wet ingredients, folding with a rubber spatula. Mix just until no streaks of flour remain. Overmixing develops gluten, which makes cookies tough. The dough should be soft and slightly sticky but hold together when pressed.
- Add the chocolate chips : Gently fold in the chocolate chips until evenly distributed. Reserve about ¼ cup of chips to press onto the tops of the dough balls before baking—this makes them look bakery-perfect.
- Chill the dough : Cover the bowl with plastic wrap and refrigerate for at least 30 minutes, or up to 72 hours. This step is crucial for chewy cookies. Chilling solidifies the butter, preventing excessive spreading, and allows the flavors to meld. If you’re impatient like I sometimes am, 30 minutes is the absolute minimum.
- Preheat the oven : Set your oven to 375°F (190°C). Line two baking sheets with parchment paper or silicone mats.
- Portion the dough : Use a 2-tablespoon cookie scoop to portion the dough into balls. Place them 2 inches apart on the prepared baking sheets—these cookies spread. Press a few extra chocolate chips onto the tops of each dough ball for that bakery look.
- Bake : Bake one sheet at a time in the center rack for 10-12 minutes. The edges should be golden brown, but the centers will still look slightly underdone and puffy. That’s exactly what you want. They’ll continue cooking on the hot sheet pan after you pull them out.
- Cool : Let the cookies rest on the baking sheet for exactly 5 minutes. During this time, they’ll set up perfectly while staying soft in the middle. Transfer to a wire rack to cool completely—or eat one warm. Honestly, warm cookies with a glass of cold milk is the whole point of baking, right?
Cooking Tips & Techniques
Here’s where I’ve made every mistake so you don’t have to. First, don’t overbake. I cannot stress this enough. The first time I made these, I left them in for 14 minutes because I wanted them “golden all over.” They came out crunchy, not chewy. Pull them when the edges are set but the middle still looks soft and slightly puffy. They’ll finish cooking on the pan.
Second, measure your flour correctly. Scooping directly from the bag can add up to 30% more flour than the recipe intends. Use the spoon-and-level method: fluff the flour with a spoon, spoon it into your measuring cup, and level it off with a knife. Your cookies will thank you.
Third, don’t skip the chilling step. I know it’s tempting to skip ahead when you’re craving cookies, but chilled dough spreads less and bakes thicker. I once made two batches side by side—one chilled, one not—and the unchilled batch spread into flat, sad discs. The chilled batch was thick, chewy, and beautiful. Lesson learned.
One more thing: if your cookies come out too flat, your butter was too warm when you mixed it. Let it cool properly after browning. If they’re too puffy, you might have added too much flour or your baking soda is old. Test your baking soda by dropping a pinch into vinegar—if it fizzes vigorously, it’s good.
Variations & Adaptations
These cookies are super adaptable, so feel free to play around. Here are some variations I’ve tried and loved:
- Double Chocolate Chip : Replace ¼ cup of flour with ¼ cup of unsweetened cocoa powder. Use white chocolate chips or dark chocolate chunks for a stunning contrast.
- Nutty Delight : Add ¾ cup of toasted pecans or walnuts along with the chocolate chips. Toast them first at 350°F for 5-7 minutes—it brings out their natural oils and makes them crunchier.
- Sea Salt Caramel : Press a soft caramel candy into the center of each dough ball before baking. Top with flaky sea salt right out of the oven. The caramel gets all gooey and amazing.
- Gluten-Free Option : Substitute the all-purpose flour with a 1:1 gluten-free baking blend that contains xanthan gum. Bob’s Red Mill works great. The texture will be slightly more tender, but still chewy.
- Vegan Version : Use vegan butter (I like Miyoko’s) and replace each egg with a flax egg (1 tablespoon ground flaxseed + 3 tablespoons water per egg). The cookies won’t be as thick, but they’ll still be delicious.
My personal favorite variation is adding orange zest—about 1 tablespoon from one large orange. It brightens the chocolate flavor and tastes amazing with the browned butter. I discovered this accidentally when I was baking with a friend and we ran out of vanilla. Now it’s my go-to.
Serving & Storage Suggestions
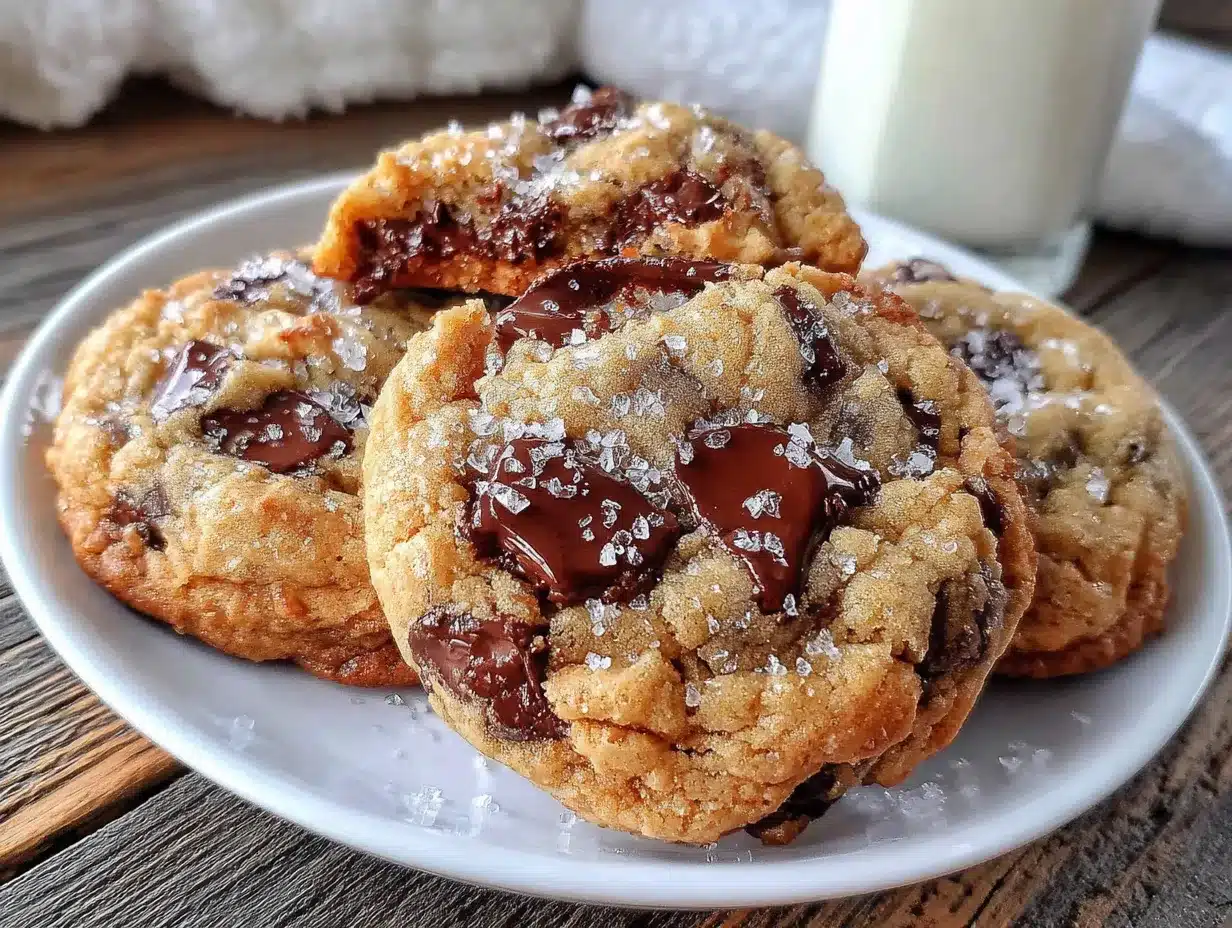
These cookies are best served warm, about 10 minutes after they come out of the oven. The chocolate is still melty, the edges are crisp, and the center is soft and pillowy. Pair them with a cold glass of oat milk or a hot cup of coffee for the ultimate experience.
For storage, keep the cookies in an airtight container at room temperature for up to 5 days. Place a slice of bread in the container—it absorbs excess moisture and keeps the cookies soft. Replace the bread slice every other day. Honestly, this trick has saved many batches from going stale too quickly.
You can also freeze the baked cookies for up to 3 months. Layer them between sheets of parchment paper in a freezer-safe container. Thaw at room temperature for 15 minutes, then warm them in a 300°F oven for 5 minutes to revive that fresh-baked texture.
For freezing the dough, portion the dough balls onto a baking sheet and freeze until solid (about 2 hours). Transfer them to a freezer bag. Bake from frozen at 375°F for 12-14 minutes—no need to thaw. This is my secret weapon for having fresh cookies ready in under 20 minutes when guests show up unexpectedly.
The flavors actually deepen after 24 hours. The browned butter notes become more pronounced, and the texture evens out. So if you can resist eating them all on day one, day two cookies are even better.
Nutritional Information & Benefits
Per cookie (based on 24 cookies): approximately 210 calories, 11g fat, 28g carbohydrates, 3g protein, 18g sugar, 1g fiber. These are estimates and will vary based on exact ingredients used.
While these are definitely a treat, there are a few redeeming qualities. Dark chocolate contains antioxidants called flavonoids, which can support heart health. The brown sugar provides molasses, which contains small amounts of minerals like calcium and potassium. And hey, baking itself is a form of stress relief—so there’s a mental health benefit too.
This recipe is vegetarian-friendly and can be made gluten-free or vegan with the substitutions mentioned above. It contains dairy, eggs, gluten, and soy (in the chocolate chips), so keep that in mind for allergies.
My personal take? Life is about balance. These cookies are worth every single calorie, and I’d rather enjoy one really good cookie than three mediocre ones. Make them for a special occasion, a tough Tuesday, or just because you deserve something delicious.
Conclusion
These Perfect Chewy Bakery Style Chocolate Chip Cookies are the real deal—thick, soft, loaded with chocolate, and just crisp enough around the edges. They’ve converted my cookie-skeptic brother, impressed my pickiest friends, and become my most-requested recipe for gatherings. And honestly, they’re so simple that you’ll memorize the method after two batches.
I’d love to hear how yours turn out! Did you try any of the variations? Did you manage to resist eating the dough (I never do)? Drop a comment below and let me know. And if you share a photo on Pinterest or Instagram, tag me—I love seeing your baking adventures. Happy baking, friends!
Frequently Asked Questions
Why did my cookies turn out flat?
Flat cookies usually mean the butter was too warm when you mixed it, or the dough wasn’t chilled long enough. Make sure the browned butter cools for at least 10 minutes before adding the eggs, and chill the dough for a minimum of 30 minutes. Also check that your baking soda is fresh—old baking soda loses its leavening power.
Can I use margarine instead of butter?
I don’t recommend it. Margarine has a higher water content than butter, which throws off the fat-to-flour ratio and makes cookies spread too much. If you need a dairy-free option, use a high-quality vegan butter stick (not the spreadable tub kind).
How do I get that bakery-style look?
Two tricks: First, reserve about ¼ cup of chocolate chips and press them into the tops of the dough balls right before baking. Second, sprinkle a tiny pinch of flaky sea salt on each cookie immediately after they come out of the oven. It makes them look professional and tastes amazing.
Can I make these cookies ahead of time?
Absolutely! You can make the dough up to 72 hours in advance and keep it covered in the fridge. The flavor actually improves over time. You can also freeze the dough balls for up to 3 months—just bake them from frozen, adding 2 extra minutes to the bake time.
Why do my cookies get hard the next day?
They’re likely overbaked. Pull them from the oven when the centers still look slightly underdone—they’ll set up as they cool. Also, store them in an airtight container with a slice of bread to maintain moisture. If they do get hard, microwave them for 10 seconds to soften them up again.
Pin This Recipe!
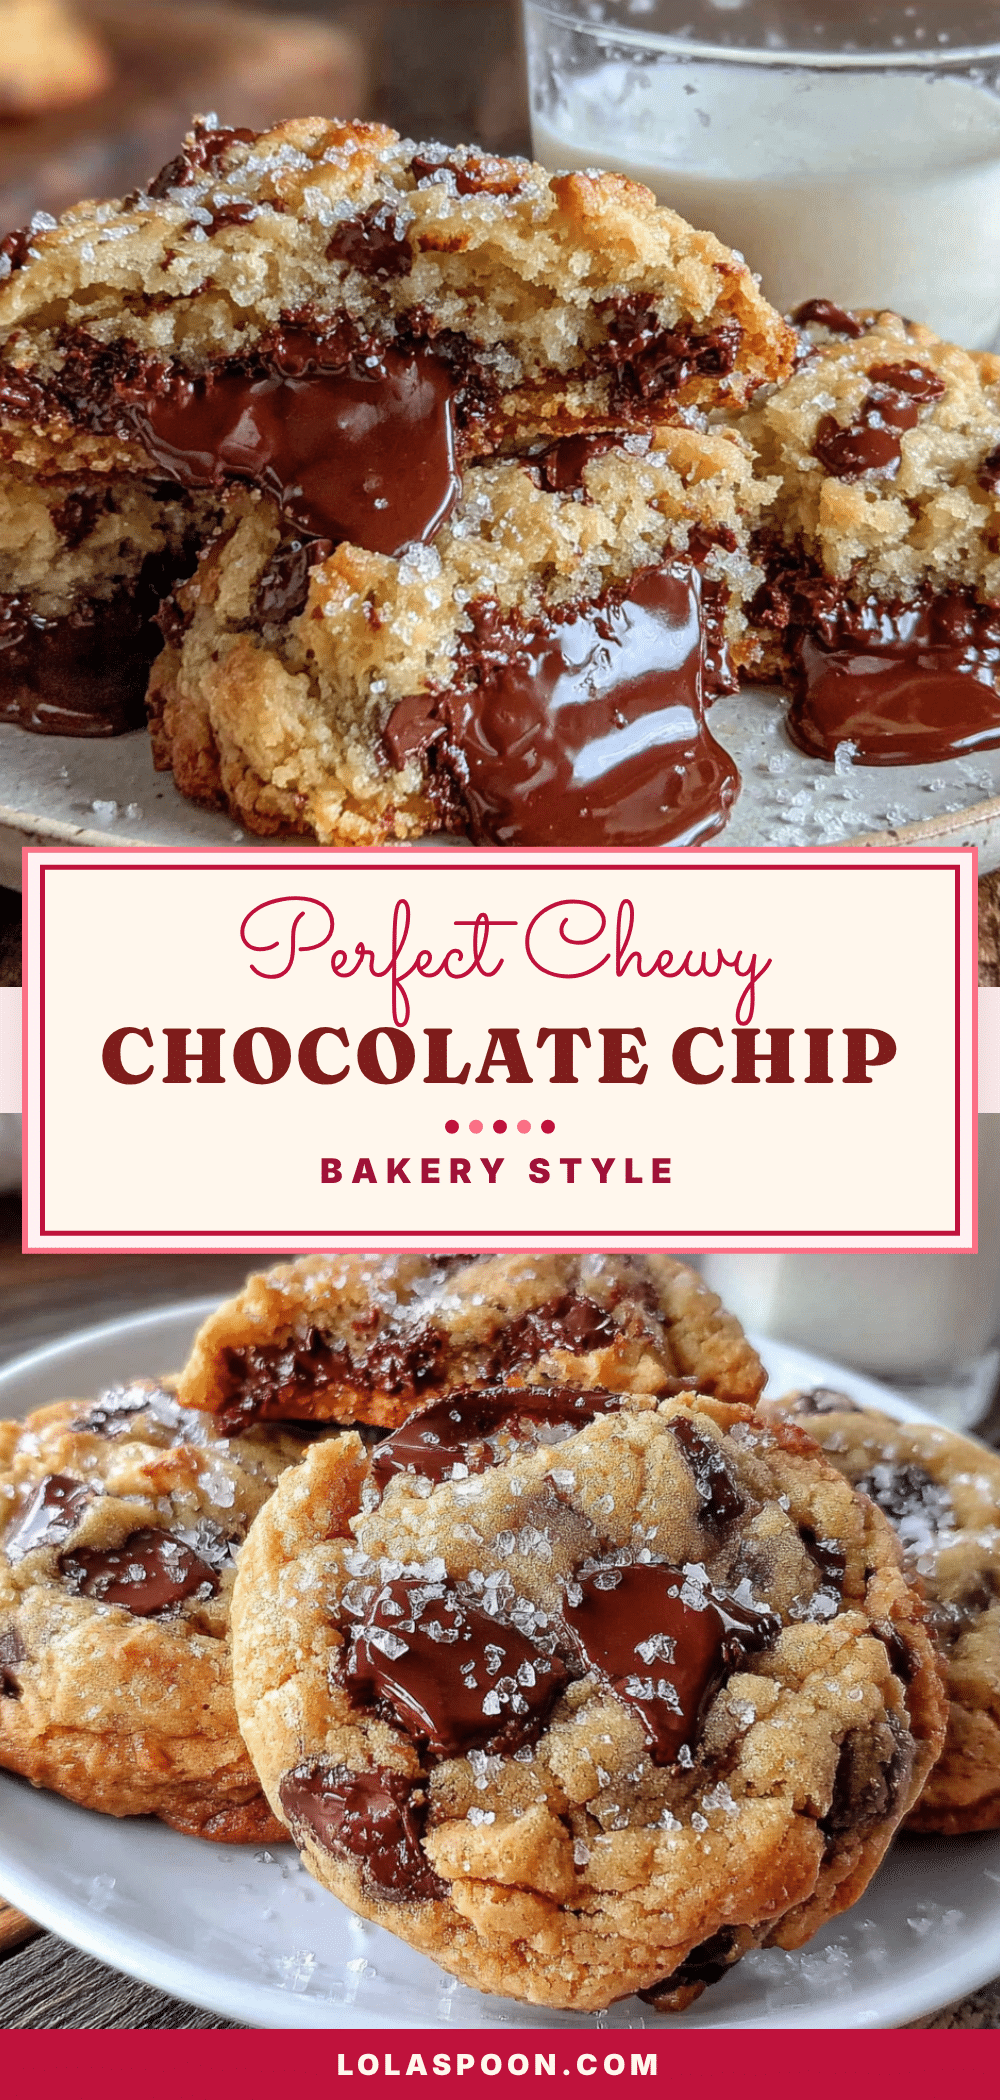
Perfect Chewy Bakery Style Chocolate Chip Cookies
These thick, soft, and chewy chocolate chip cookies with crisp edges are made with browned butter and an extra egg yolk for a bakery-quality texture. Ready in under 30 minutes, they stay soft for days and are guaranteed to impress.
- Prep Time: 15 minutes
- Cook Time: 12 minutes
- Total Time: 27 minutes
- Yield: 24 cookies 1x
- Category: Dessert
- Cuisine: American
Ingredients
- 1 cup (226g) unsalted butter
- 1 cup (200g) packed light brown sugar
- ½ cup (100g) granulated sugar
- 2 large eggs, room temperature
- 1 large egg yolk
- 2 teaspoons vanilla extract
- 2 ¼ cups (280g) all-purpose flour
- 1 teaspoon baking soda
- ½ teaspoon salt
- 2 cups (340g) semi-sweet chocolate chips
- Flaky sea salt for topping (optional)
Instructions
- Brown the butter: Place the butter in a medium saucepan over medium heat. Stir occasionally as it melts, then continuously once it starts foaming. After about 5-7 minutes, brown specks will form and the butter will smell nutty and be a golden amber color. Pour into a large mixing bowl immediately and let cool for 10 minutes.
- Mix the sugars: Add both brown sugar and granulated sugar to the cooled browned butter. Whisk vigorously for about 2 minutes until the mixture looks like wet sand and no lumps remain.
- Add the eggs and vanilla: Whisk in the eggs and egg yolk one at a time, mixing well after each addition. Add the vanilla extract. The mixture should look thick, glossy, and like caramel.
- Combine dry ingredients: In a separate medium bowl, whisk together the flour, baking soda, and salt until no clumps remain.
- Fold in the dry ingredients: Gradually add the flour mixture to the wet ingredients, folding with a rubber spatula just until no streaks of flour remain. Do not overmix.
- Add the chocolate chips: Gently fold in the chocolate chips until evenly distributed. Reserve about ¼ cup of chips to press onto the tops of the dough balls before baking.
- Chill the dough: Cover the bowl with plastic wrap and refrigerate for at least 30 minutes, or up to 72 hours.
- Preheat the oven: Set your oven to 375°F (190°C). Line two baking sheets with parchment paper or silicone mats.
- Portion the dough: Use a 2-tablespoon cookie scoop to portion the dough into balls. Place them 2 inches apart on the prepared baking sheets. Press a few extra chocolate chips onto the tops of each dough ball.
- Bake: Bake one sheet at a time in the center rack for 10-12 minutes. The edges should be golden brown, but the centers will still look slightly underdone and puffy.
- Cool: Let the cookies rest on the baking sheet for exactly 5 minutes. Transfer to a wire rack to cool completely or enjoy warm.
Notes
Do not overbake; pull cookies when edges are set but centers still look soft. Measure flour using the spoon-and-level method. Chilling the dough is crucial for chewy cookies. For best results, let the dough chill for at least 30 minutes. Store cookies in an airtight container with a slice of bread to keep them soft.
Nutrition
- Serving Size: 1 cookie
- Calories: 210
- Sugar: 18
- Sodium: 120
- Fat: 11
- Saturated Fat: 7
- Carbohydrates: 28
- Fiber: 1
- Protein: 3
Keywords: chocolate chip cookies, chewy cookies, bakery style cookies, browned butter cookies, easy cookie recipe