My neighbor asked why I couldn’t just skip the mixer and stir everything by hand. I started to explain why that wouldn’t work—then stopped. I had no good reason, honestly. I just assumed cookie dough needed that electric beater workout. So I shut my mouth, grabbed a wooden spoon, and let her talk me into it.
The kitchen was a mess that Tuesday night. I had butter on my elbow, flour dusted across my jeans, and my three-year-old was “helping” by licking the spoon before I even got the sugar in. I was already mentally preparing for dense, tough cookies. But let me tell you—I was wrong. Dead wrong. Those cookies came out soft, chewy, and perfectly golden around the edges. No mixer required. Not even a little bit.
Maybe you have been there. You think a recipe needs all this fancy equipment and technique, when really, the simplest way works best. That night taught me something I still think about every time I bake. Sometimes the shortcut is actually the secret. These small-batch cookies prove it. You get six perfect cookies, zero mixer cleanup, and about twenty minutes from start to finish. I have made them every week since, and I am still a little sheepish about how long it took me to listen.
Why You Will Love This Recipe
Let me be honest with you. I have tested this recipe about fifteen times to get it just right. Not because it is complicated—but because I wanted to prove you do not need a stand mixer or a whole afternoon to get bakery-quality cookies. Here is what makes these cookies special:
- No mixer needed. One bowl, one spoon, ten minutes of stirring. That is it.
- Just six cookies. Perfect for when you want fresh-baked cookies without a dozen leftovers tempting you all week.
- Pantry staples only. Butter, sugar, flour, egg, vanilla, chocolate chips. You probably have everything right now.
- Ready in 20 minutes. From craving to cookie in less time than it takes to watch a sitcom.
- Foolproof texture. Crispy edges, soft centers, and that perfect chewy bite every time.
I have made these for late-night cravings, quick dessert emergencies, and even packed them in lunchboxes. They disappear fast. The best part? You do not have to plan ahead. No softening butter for hours, no chilling dough overnight. Just mix, scoop, bake, and eat. Honestly, this is the kind of recipe that makes you wonder why you ever bothered with complicated cookie recipes in the first place.
These cookies have that soul-soothing satisfaction you want after a long day. They are comfort food reimagined—simpler, faster, but every bit as good as your grandmother’s recipe. Maybe better, because you can have them on the table before she even finds her mixer.
What Ingredients You Will Need
This recipe uses simple ingredients you probably already have in your kitchen. No special trips to the store, no obscure baking supplies. Just real, basic stuff that works together beautifully.
For the Cookie Dough
- Unsalted butter, melted (4 tablespoons, or 57 grams) — Melting the butter is the key here. It gives the cookies that chewy texture without needing a mixer. I use Kerrygold when I have it, but any good unsalted butter works fine.
- Granulated sugar (3 tablespoons, or 38 grams) — Adds sweetness and helps create those crispy edges. Regular white sugar is perfect.
- Light brown sugar, packed (3 tablespoons, or 38 grams) — This is where the chewiness comes from. The molasses in brown sugar keeps the centers soft. Make sure you pack it firmly into the measuring spoon.
- One large egg yolk — Just the yolk, not the whole egg. This gives you richness and tenderness without making the dough too wet. Save the white for scrambled eggs tomorrow morning.
- Vanilla extract (1/2 teaspoon) — Pure vanilla makes a difference here. I use Nielsen-Massey, but any pure vanilla extract works. Skip the imitation stuff if you can.
- All-purpose flour (1/2 cup, or 60 grams) — Regular AP flour is perfect. Spoon it into your measuring cup and level it off with a knife. Do not scoop directly—you will pack too much flour and end up with dry cookies.
- Baking soda (1/4 teaspoon) — Helps the cookies spread just enough and gives them that slight lift.
- Salt (1/4 teaspoon) — Do not skip this. Salt balances the sweetness and makes the chocolate taste more chocolatey. I use fine sea salt.
- Semi-sweet chocolate chips (1/3 cup, or 60 grams) — You can use dark, milk, or even chopped chocolate bars. I like Ghirardelli semi-sweet chips for that classic cookie flavor. If you prefer bigger chocolate chunks, just chop up a chocolate bar instead.
That is it. Seven dry ingredients plus butter and vanilla. You probably have all of this right now. If you are out of brown sugar, you can use all white sugar—the cookies will be a little crisper but still delicious. For a dairy-free version, use vegan butter sticks. Just make sure they are the stick kind, not the spreadable tub.
Equipment Needed
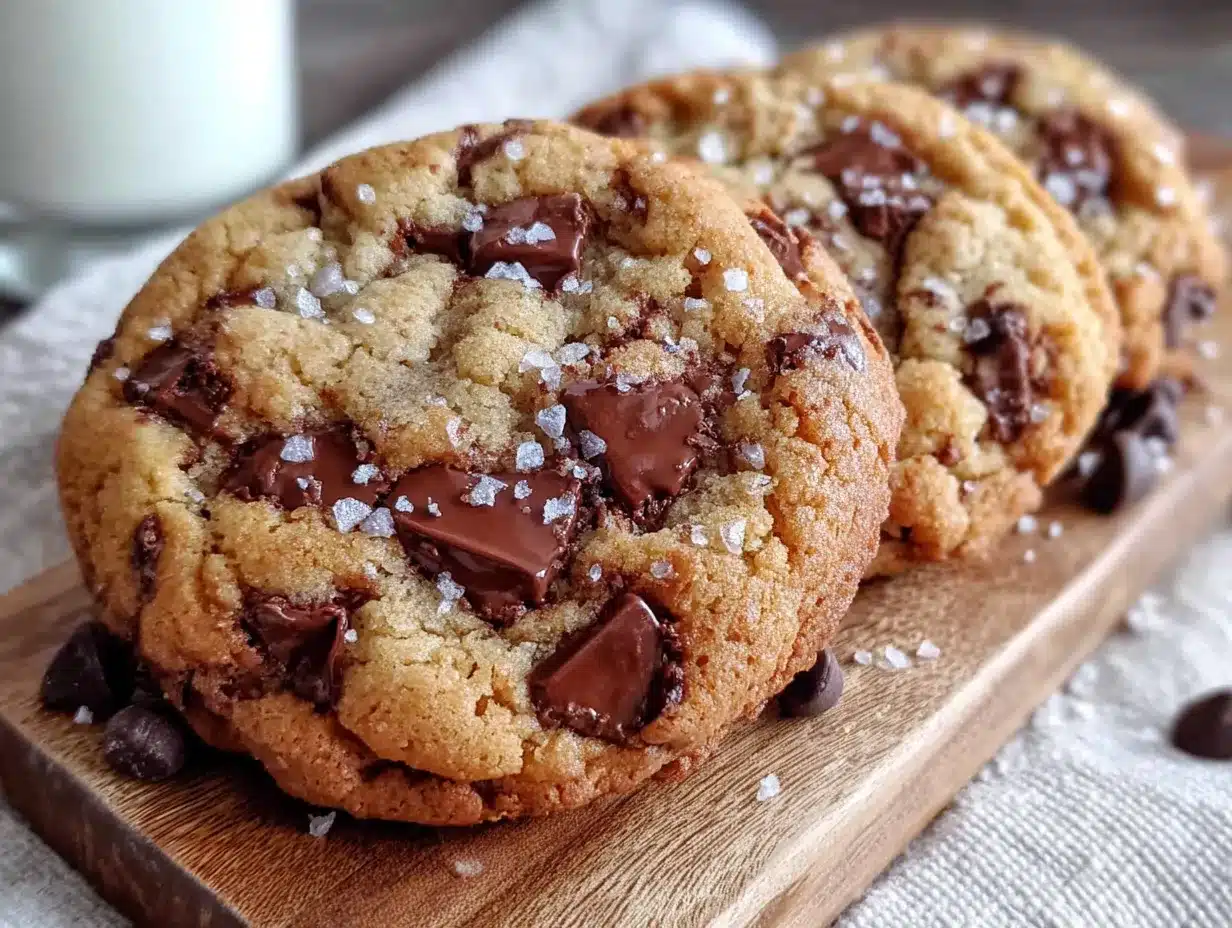
You do not need much for this recipe. That is the whole point, really.
- One medium mixing bowl — Any bowl works. I use a ceramic one because it feels nice, but glass or metal is fine too.
- A wooden spoon or silicone spatula — Something sturdy enough to mix thick dough. A whisk will not cut it here.
- Measuring cups and spoons — For accuracy. I have learned the hard way that eyeballing ingredients leads to sad cookies.
- A baking sheet — Any standard half-sheet pan works. No need for fancy non-stick.
- Parchment paper or a silicone baking mat — This prevents sticking and makes cleanup almost nonexistent. I prefer parchment because it is cheap and disposable.
- A cookie scoop or tablespoon — For evenly sized cookies. I use a #40 scoop, about 1.5 tablespoons. If you do not have one, just use a regular spoon and try to make them uniform.
- A cooling rack — Optional but helpful. Lets the cookies cool evenly so the bottoms do not get soggy.
That is literally everything. No mixer, no sifter, no stand mixer attachment you will never use again. I bought my cookie scoop for three dollars at a kitchen supply store, and it has paid for itself a hundred times over. If you bake cookies even occasionally, grab one—it makes portioning so much faster.
Preparation Method
Preheat your oven to 350°F (175°C). Line your baking sheet with parchment paper. This takes two minutes and saves you from scrubbing later.
- Melt the butter. Put 4 tablespoons of butter in a microwave-safe bowl and heat for 30 seconds. Stir, then heat another 15 seconds if needed. You want it fully melted but not boiling. Set it aside to cool for a minute—you do not want it hot enough to cook the egg.
- Mix the sugars and butter. In your medium bowl, combine the melted butter, 3 tablespoons granulated sugar, and 3 tablespoons packed brown sugar. Stir with your wooden spoon for about 30 seconds. The mixture should look like wet sand. Make sure there are no lumps of brown sugar hiding at the bottom.
- Add the egg yolk and vanilla. Drop in the egg yolk and 1/2 teaspoon vanilla. Stir vigorously for about a minute. The mixture will get lighter in color and look a bit glossy. This is good—you are incorporating air since we are not using a mixer. Do not rush this step.
- Mix the dry ingredients separately. In a small bowl, whisk together 1/2 cup flour, 1/4 teaspoon baking soda, and 1/4 teaspoon salt. This ensures the baking soda is evenly distributed. Nobody wants a pocket of baking soda in their cookie.
- Combine wet and dry. Add the flour mixture to the butter mixture. Stir gently with your spoon until just combined. A few streaks of flour are okay. Overmixing at this stage makes cookies tough. Stop when you cannot see dry flour anymore.
- Fold in the chocolate chips. Add 1/3 cup chocolate chips. Fold them in with a few strokes. Make sure they are evenly distributed, but do not overwork the dough. The dough will be thick and a little sticky—that is normal.
- Scoop the cookies. Use your cookie scoop or a tablespoon to portion the dough into 6 equal balls. Place them on the prepared baking sheet, spaced about 2 inches apart. They will spread, so give them room. If you want thicker cookies, chill the dough balls for 15 minutes while the oven finishes preheating.
- Bake. Place the baking sheet on the center rack. Bake for 8 to 10 minutes. At 8 minutes, the edges should be golden and the centers should look slightly puffy and underdone. That is exactly what you want. They will continue cooking on the hot sheet after you pull them out.
- Cool on the baking sheet. Let the cookies sit on the hot baking sheet for 5 minutes. This step is crucial—moving them too early will cause them to fall apart. After 5 minutes, transfer them to a cooling rack. Or just eat one warm. I will not judge.
A few things to watch for: If your cookies spread too much, your butter was too warm. If they are too cakey, you overmixed the dough. If they are flat and greasy, your baking soda might be old. These things happen. Even my “ugly” batches taste amazing.
Cooking Tips & Techniques
I have made this recipe about twenty times now. Here is what I have learned the hard way so you do not have to.
Weigh your flour if you can. I know, I know—we are keeping it simple. But flour is tricky. Scooping directly from the bag can pack in 30% more flour than spooning it in. That extra flour makes dry, crumbly cookies. If you do not have a scale, spoon the flour into your measuring cup and level it with a knife. Trust me on this one.
Let the butter cool before adding the egg. I made this mistake once. Poured the egg into hot butter and ended up with scrambled egg bits in my cookie dough. Not great. Let the melted butter sit for a minute or two before adding the yolk.
Do not skip the mixing time after adding the egg. That minute of vigorous stirring is what gives you lift without a mixer. I set a timer on my phone because I always think I have stirred enough when I have not. Set a timer. Stir until the mixture looks pale and shiny.
Bake one test cookie first. If you are unsure about your oven or your ingredients, bake a single cookie on a small pan. Check it at 8 minutes. Adjust the next batch based on how it looks. This saves you from ruining all six at once.
Underbake slightly. I pull my cookies out when the centers still look a little wet and puffy. They set up perfectly as they cool. If you wait until the centers look fully baked, you will have crispy cookies instead of chewy ones. Unless you like crispy cookies—then bake for the full 10 minutes.
Use room temperature egg yolk. Cold egg yolk can seize the butter and make the dough stiff. If your egg is straight from the fridge, let it sit in warm water for 5 minutes before cracking it. Or just plan ahead and set it out while you gather your ingredients.
Variations & Adaptations
This recipe is a great starting point. Here are some ways to change it up depending on your mood or what you have in the pantry.
Double chocolate chip. Replace 1 tablespoon of flour with 1 tablespoon of unsweetened cocoa powder. Use dark chocolate chips instead of semi-sweet. You get a rich, fudgy cookie that feels way more indulgent than the effort suggests.
Add nuts. Throw in 2 tablespoons of chopped walnuts or pecans along with the chocolate chips. Toast them first in a dry pan for 3 minutes for extra flavor. I did this last week and my husband ate three before they even cooled.
Sea salt finish. Sprinkle a tiny pinch of flaky sea salt on each cookie right after they come out of the oven. That salty-sweet combination is addictive. I use Maldon salt, but any flaky sea salt works.
Gluten-free option. Swap the all-purpose flour for a 1-to-1 gluten-free baking flour. I like King Arthur Measure for Measure. The texture will be slightly different—a little more tender—but still delicious. Add an extra tablespoon of flour if the dough seems too sticky.
Vegan version. Use vegan butter sticks and replace the egg yolk with 1 tablespoon of aquafaba (the liquid from a can of chickpeas) mixed with 1/2 teaspoon of cornstarch. It sounds weird, I know, but it works surprisingly well. The cookies will be a bit more delicate, so handle them gently.
Different chips. Try white chocolate and dried cranberries, or butterscotch chips, or chopped peanut butter cups. Pretty much any mix-in works. Just keep the total amount around 1/3 cup so the dough structure stays intact.
Serving & Storage Suggestions
These cookies are best served warm, about 10 minutes after they come out of the oven. The chocolate is still melty, the edges are crisp, and the centers are soft. That is the sweet spot.
For a full dessert, serve them with a scoop of vanilla ice cream. The temperature contrast is wonderful. Or dunk them in a cold glass of milk—classic for a reason. If you are feeling fancy, drizzle a little melted chocolate on top and add a pinch of flaky salt.
These cookies keep well at room temperature for up to 3 days. Store them in an airtight container with a slice of bread. The bread releases moisture and keeps the cookies soft. Replace the bread slice every day if you are storing them longer. Sounds strange, but it works like magic.
To freeze the baked cookies, let them cool completely, then place them in a freezer bag. They will keep for up to 3 months. Thaw at room temperature for about 15 minutes, or microwave for 10 seconds for that fresh-baked feel.
You can also freeze the raw dough. Scoop the dough balls onto a parchment-lined baking sheet and freeze until solid, about 1 hour. Transfer the frozen dough balls to a freezer bag. Bake from frozen, adding 2 minutes to the baking time. This is my favorite trick for having fresh cookies on demand without any cleanup.
Honestly, the flavor actually improves after the first day. Something about the flavors melding together makes them taste even better. If you can resist eating them all right away, you will be rewarded.
Nutritional Information & Benefits
Here is the approximate nutritional breakdown for one cookie (based on 6 cookies per batch):
| Nutrient | Amount per Cookie |
|---|---|
| Calories | 185 |
| Total Fat | 11g |
| Saturated Fat | 7g |
| Carbohydrates | 22g |
| Sugar | 14g |
| Protein | 2g |
| Sodium | 125mg |
These numbers are estimates. They will vary based on the specific brands and ingredients you use.
While these are definitely a treat, there are a few bright spots. The butter provides vitamin A and healthy fats. The egg yolk adds choline, which is good for brain health. And dark chocolate contains antioxidants and magnesium. Plus, since this is a small batch, portion control is built right in. You get six cookies, not three dozen. That makes it easier to enjoy them without overdoing it.
If you are watching your sugar intake, you can reduce the granulated sugar to 2 tablespoons. The cookies will be less sweet but still tasty. For a lower-fat option, substitute 2 tablespoons of the butter with unsweetened applesauce. The texture will be more cake-like, but it works in a pinch.
Conclusion
These small-batch chocolate chip cookies have become my go-to for a reason. They are simple, fast, and reliably delicious. No mixer, no fuss, no giant batch that sits around tempting you for days. Just six perfect cookies whenever the craving hits.
I love that this recipe taught me something about cooking—that sometimes the easiest way is actually the best way. I spent years thinking I needed all this equipment and technique, when really, a wooden spoon and some patience were all I needed. Maybe you will find the same thing. Maybe you will make these cookies and realize you do not need half the stuff in your kitchen drawer.
Try these cookies this week. Swap in your favorite chocolate, add some nuts, sprinkle on salt—make them yours. And when you do, come back and tell me how they turned out. I genuinely want to know. Drop a comment below and share your version. Or tag me in your photos. Nothing makes my day like seeing someone else enjoy a recipe I love.
Now go preheat your oven. You have cookies to make.
Frequently Asked Questions
Can I use salted butter instead of unsalted?
Yes, you can. Just reduce the added salt to 1/8 teaspoon. Salted butter usually has about 1/4 teaspoon of salt per stick, so you need to account for that. The cookies might be slightly saltier, but plenty of people actually prefer them that way.
Why did my cookies turn out flat?
Flat cookies usually mean the butter was too warm or the dough was not mixed enough. Make sure your melted butter has cooled slightly before adding the egg. Also, stir the butter and sugar mixture for a full minute to incorporate air. If your baking soda is old, that can also cause flat cookies—test it by dropping a little in vinegar; it should fizz vigorously.
Can I double this recipe?
Absolutely. Just double all the ingredients. The method stays exactly the same. You will get 12 cookies instead of 6. If your oven is small, bake in two batches rather than crowding the baking sheet. The cookies need space to spread properly.
Do I really need to use an egg yolk instead of a whole egg?
Yes, for the best texture. A whole egg adds too much moisture and makes the cookies cakey instead of chewy. The yolk gives you richness and tenderness without the extra liquid. Save the egg white for omelets or add it to scrambled eggs the next morning.
How do I know when the cookies are done baking?
Look for golden brown edges with centers that still look slightly puffy and underdone. The centers should look set but not fully baked. They will continue cooking on the hot baking sheet for the 5 minutes you let them rest. If you wait until the centers look fully baked, they will be overdone and crispy.
Pin This Recipe!
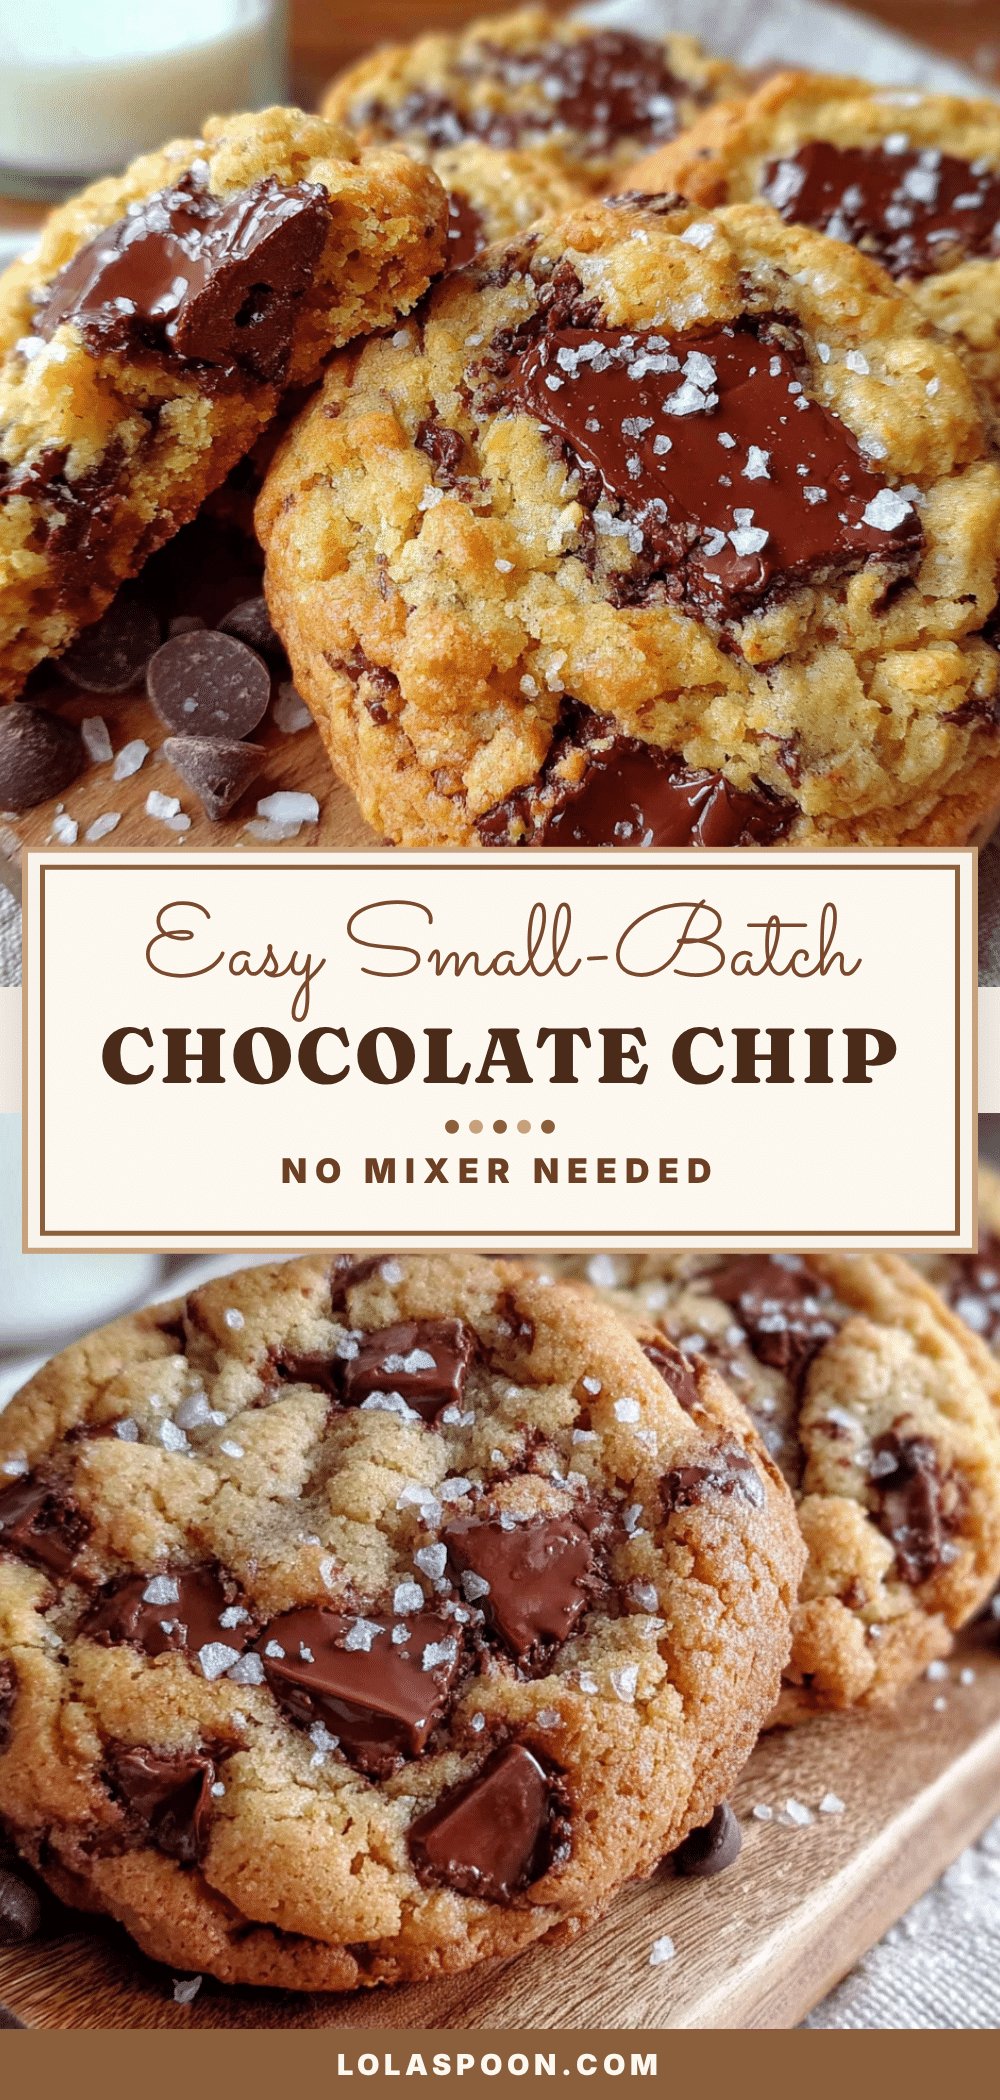
The Best Easy Small-Batch Chocolate Chip Cookies Recipe
These small-batch chocolate chip cookies are soft, chewy, and perfectly golden around the edges. No mixer required, just one bowl and a spoon, ready in about 20 minutes.
- Prep Time: 10 minutes
- Cook Time: 10 minutes
- Total Time: 20 minutes
- Yield: 6 cookies 1x
- Category: Dessert
- Cuisine: American
Ingredients
- 4 tablespoons unsalted butter, melted (57 grams)
- 3 tablespoons granulated sugar (38 grams)
- 3 tablespoons light brown sugar, packed (38 grams)
- 1 large egg yolk
- 1/2 teaspoon vanilla extract
- 1/2 cup all-purpose flour (60 grams)
- 1/4 teaspoon baking soda
- 1/4 teaspoon salt
- 1/3 cup semi-sweet chocolate chips (60 grams)
Instructions
- Preheat oven to 350°F (175°C). Line a baking sheet with parchment paper.
- Melt the butter in a microwave-safe bowl (30 seconds, then 15 seconds if needed). Let cool for a minute.
- In a medium bowl, combine melted butter, granulated sugar, and brown sugar. Stir for about 30 seconds until it looks like wet sand.
- Add egg yolk and vanilla. Stir vigorously for about a minute until the mixture is lighter and glossy.
- In a small bowl, whisk together flour, baking soda, and salt.
- Add dry ingredients to wet ingredients. Stir gently until just combined (a few streaks of flour are okay).
- Fold in chocolate chips until evenly distributed.
- Scoop dough into 6 equal balls (about 1.5 tablespoons each). Place on prepared baking sheet, spaced 2 inches apart.
- Bake for 8 to 10 minutes, until edges are golden and centers look slightly puffy and underdone.
- Let cookies cool on the baking sheet for 5 minutes, then transfer to a cooling rack.
Notes
For thicker cookies, chill dough balls for 15 minutes before baking. Underbake slightly for chewier cookies. Store in an airtight container with a slice of bread to keep soft.
Nutrition
- Serving Size: 1 cookie
- Calories: 185
- Sugar: 14
- Sodium: 125
- Fat: 11
- Saturated Fat: 7
- Carbohydrates: 22
- Fiber: 1
- Protein: 2
Keywords: small-batch cookies, chocolate chip cookies, easy cookies, no mixer cookies, quick cookies


