I was standing in the baking aisle of our local grocery store last December, staring at a bag of powdered sugar like it held the secrets to the universe. The fluorescent lights were humming that particular hum they do, and somewhere a cart had a wobbly wheel. Then this woman walked past me, and I caught it—the faintest whiff of vanilla and toasted nuts, mixed with something buttery and almost floral. And just like that, I was nine years old again, standing on a step stool in Mrs. Kowalski’s kitchen, my small hands dusted white to the wrists.
Mrs. K was our next-door neighbor, a tiny Polish woman with silver hair and the kind of quiet warmth that made you want to sit on her floor and just listen. Every December, she’d invite me over to “help” bake her Christmas cookies, which mostly meant I ate more dough than I shaped and got powdered sugar absolutely everywhere. She never seemed to mind, honestly. She’d just hand me a damp cloth and say, “The mess means we’re making memories, little one.” I didn’t get it then. I was just a kid who loved sugar.
She’s been gone almost fifteen years now, and I still can’t walk past that specific grocery store aisle without feeling that ache—that almost-but-not-quite-there memory of her kitchen. So last year, I finally decided to stop chasing the ghost of that smell and actually try to make her Russian tea cakes myself. It took me three batches to get them right. The first one was too dry, the second one fell apart completely, and the third one—the third one made me stop mid-bite and just sit down at my kitchen table. Maybe you’ve been there, chasing a taste from your childhood that feels impossible to recreate. Let me tell you, it’s not impossible. You just need the right recipe.
Why You’ll Love This Recipe
These aren’t just cookies, okay? They’re little clouds of buttery, nutty perfection that literally dissolve on your tongue. I’ve tested this recipe more times than I care to admit, and I can tell you with complete confidence—this is the version that works. Every. Single. Time.
- Quick & Easy: From start to finish, you’re looking at about 35 minutes. The dough comes together in one bowl, no electric mixer required if your arm is feeling strong.
- Simple Ingredients: You probably have most of this in your pantry right now. Butter, flour, sugar, vanilla, nuts. That’s it. No weird specialty items.
- Perfect for the Holidays: These are the cookies that disappear first at every cookie swap, every family gathering, every “just drop by” visit. They look fancy but they’re secretly the easiest thing you’ll make all season.
- Crowd-Pleaser: I’ve watched toddlers, teenagers, and grandparents all go quiet after one bite. That’s the sign of a truly great cookie.
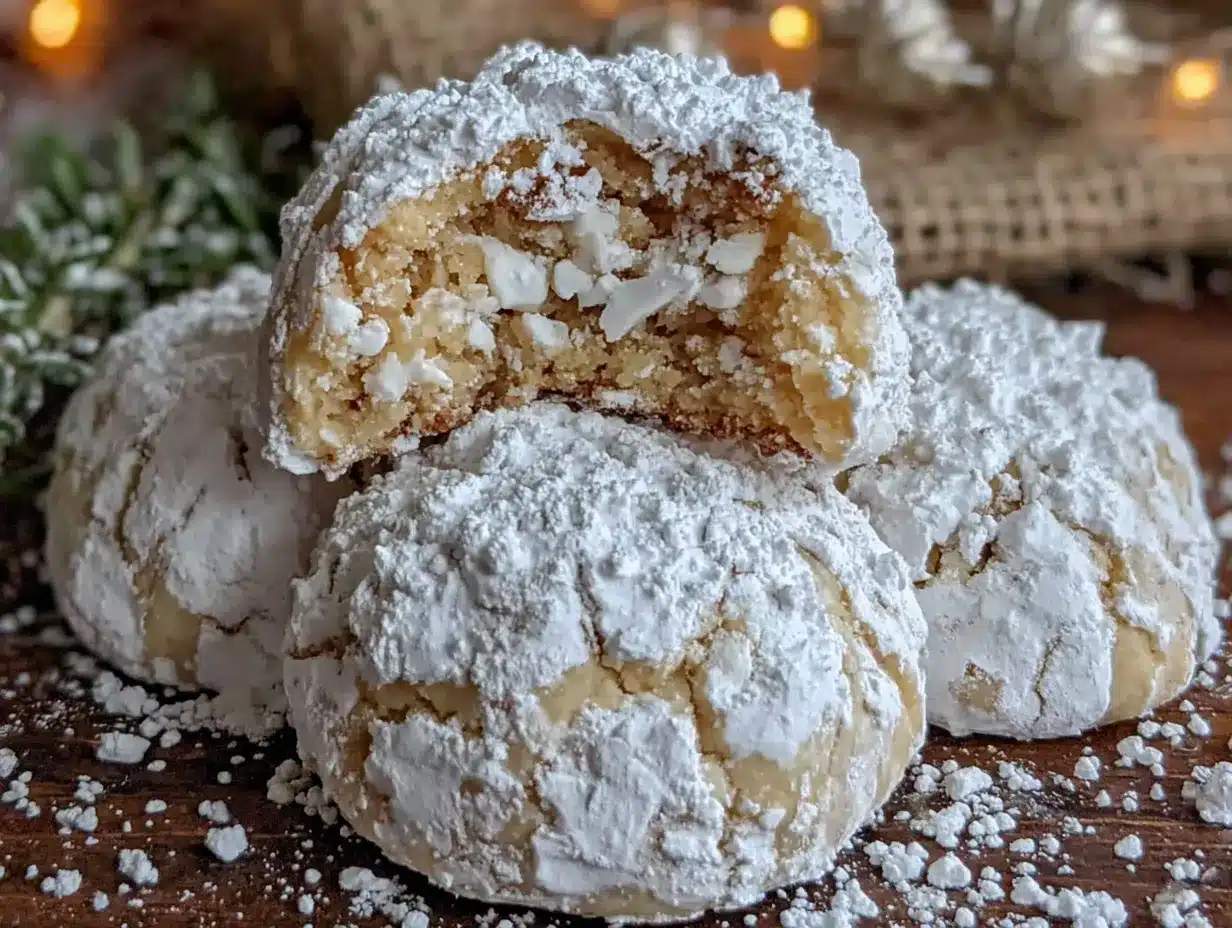
- Unbelievably Delicious: The texture is what gets you. They’re tender but not crumbly, rich but not heavy, and that double coating of powdered sugar gives them this snowy, magical look.
What makes these different from every other Russian tea cake recipe out there? It’s the technique. Most recipes tell you to just mix everything together and hope for the best. I figured out that chilling the dough for exactly 30 minutes—not 20, not 45—makes all the difference. And toasting the pecans first? Game changer. It brings out this deep, warm flavor that you just can’t get any other way. This is comfort food at its finest, the kind that makes you close your eyes after the first bite. Trust me on this one.
What Ingredients You Will Need
This recipe uses simple, wholesome ingredients to create something truly special. Everything here is easy to find and probably already in your kitchen. Here’s what you’ll need:
For the Cookie Dough
- 1 cup (226g) unsalted butter, softened — I use Land O’Lakes or Kerrygold for the best flavor. Make sure it’s truly soft, not melted. You want it to give when you press it with your finger.
- ½ cup (60g) powdered sugar — Plus more for coating. Don’t substitute granulated sugar here, it changes the texture completely.
- 1 teaspoon vanilla extract — Pure vanilla, not imitation. Trust me, you’ll taste the difference.
- 2¼ cups (280g) all-purpose flour — Spoon and level it. Scooping directly from the bag packs the flour down and gives you dry cookies.
- ¼ teaspoon salt — Just a pinch to balance the sweetness.
- 1 cup (120g) pecans, finely chopped — Walnuts work too, but pecans give that buttery, sweet flavor that’s just perfect here. Toast them first at 350°F for 5-7 minutes for extra depth.
For Coating
- 1 cup (120g) powdered sugar — You’ll need more than you think. I usually go through about 1½ cups total for a generous coating.
Ingredient Tips: If you’re using salted butter, skip the added salt. For a nut-free version, you can leave the nuts out entirely, but the texture will be slightly different. I’ve also made these with almond flour instead of pecans for a different flavor profile, and they turned out lovely.
Equipment Needed
Nothing fancy here—that’s the beauty of this recipe. Here’s what you’ll need:
- Large mixing bowl — Any bowl works, but I prefer ceramic or glass. Metal can sometimes leave a slight taste if you’re mixing by hand.
- Electric hand mixer or stand mixer — You can do this by hand with a wooden spoon, but your arm will get a workout. I’ve done both and honestly, the mixer is easier.
- Measuring cups and spoons — The dry measuring cups for flour, liquid cups for nothing here, and spoons for vanilla and salt.
- Baking sheet — A light-colored metal sheet works best. Dark sheets can over-brown the bottoms.
- Parchment paper or silicone baking mat — Silpat is my go-to, but parchment is perfectly fine.
- Cooling rack — Essential for getting that even coating of powdered sugar.
- Small bowl for powdered sugar — For rolling the warm cookies.
- Food processor (optional) — If you want super finely chopped nuts. I use a knife because I like a little texture.
That’s it. If you don’t have a cooling rack, you can use a clean kitchen towel laid flat. And if you don’t have parchment, lightly greased foil works in a pinch. I’ve been there, and it’s fine.
Preparation Method
Alright, let’s make some magic happen. I’ve broken this down into clear steps with all the little details I wish someone had told me the first time.
Step 1: Preheat and Prep
Preheat your oven to 350°F (175°C). Line your baking sheet with parchment paper or a silicone mat. If you’re toasting your pecans, spread them on a separate baking sheet and pop them in for 5-7 minutes while the oven heats up. Watch them carefully—they go from toasted to burnt in about 30 seconds. You want them fragrant and slightly darker, not black.
Step 2: Toast the Nuts (Optional but Highly Recommended)
Let the pecans cool completely after toasting, then chop them very finely. I mean really fine—you want pieces no bigger than a pea. Big chunks will make your cookies crumble and fall apart. I learned this the hard way after my first batch turned into pecan-studded rubble. Let them cool completely before adding to the dough, or they’ll melt the butter.
Step 3: Cream the Butter and Sugar
In your large mixing bowl, beat the softened butter and ½ cup powdered sugar together until light and fluffy. This takes about 2-3 minutes with an electric mixer on medium speed. You’re looking for a pale, creamy mixture that looks almost like whipped butter. Scrape down the sides of the bowl halfway through. Add the vanilla extract and beat until combined, about 30 seconds.
Step 4: Add the Dry Ingredients
In a separate bowl, whisk together the flour and salt. Gradually add this to the butter mixture, mixing on low speed until just combined. Don’t overmix! Stop as soon as you don’t see any more white streaks of flour. Overworking the dough develops gluten, and that makes tough cookies. We want tender, melt-in-your-mouth cookies.
Step 5: Fold in the Nuts
Add the finely chopped pecans and fold them in with a spatula until evenly distributed. The dough will be soft and slightly crumbly—that’s normal. It should hold together when you squeeze a small amount in your hand. If it feels too dry, add a teaspoon of cold water. If it feels too sticky, add a tablespoon of flour.
Step 6: Chill the Dough
Cover the bowl with plastic wrap and refrigerate for exactly 30 minutes. This is non-negotiable. Chilling firms up the butter so the cookies hold their shape while baking. Skip this step and you’ll get flat, spread-out cookies instead of those perfect little domes. I’ve tested it both ways, and the chilled version wins every time.
Step 7: Shape the Cookies
Preheat your oven again if you turned it off. Using a tablespoon or a small cookie scoop, portion out the dough and roll it between your palms into 1-inch balls. Place them about 2 inches apart on your prepared baking sheet. They don’t spread much, so you can fit about 12-15 on a standard sheet.
Step 8: Bake
Bake at 350°F (175°C) for 10-12 minutes. The bottoms should be lightly golden, and the tops should look set but not brown. They’ll look pale and almost underdone—that’s exactly what you want. Overbaking makes them dry. Your kitchen should smell like toasted nuts and vanilla when they’re ready.
Step 9: The Double Coating
Here’s where the magic happens. Let the cookies cool on the baking sheet for exactly 5 minutes. Then, while they’re still warm, roll each one gently in a bowl of powdered sugar. Place them on a cooling rack. Wait until they’re completely cool—about 20 minutes—then roll them in powdered sugar again. That second coat gives them that beautiful snowy look and that extra sweetness. Don’t skip it.
Cooking Tips & Techniques
I’ve made these cookies probably thirty times by now, and I’ve messed up more batches than I’d like to admit. Here’s everything I’ve learned so you don’t have to repeat my mistakes.
Don’t overbake, seriously. The first time I made these, I left them in the oven an extra two minutes because I thought they looked too pale. They came out dry and crumbly, nothing like the tender cookies I remembered. Take them out when the bottoms are just barely golden. They’ll continue cooking on the hot baking sheet for those 5 minutes before you move them.
Chop your nuts really fine. I cannot stress this enough. Big chunks of nuts create weak spots in the dough, and your cookies will fall apart when you try to roll them in sugar. I use a chef’s knife and go over the pile a few times until everything is uniformly small. If you’re using a food processor, pulse don’t run—you want chopped nuts, not nut flour.
Roll gently. These cookies are tender, so handle them with care. When you’re rolling them in powdered sugar, use a light touch. I cradle each cookie in my palm and use my other hand to dust sugar over it. If you squeeze too hard, they’ll crack.
Use a timer for everything. Set a timer for the mixing, the chilling, the baking, and the cooling. Each step has an ideal window, and trust me, your phone timer is your best friend here. I once got distracted by a phone call and left the dough in the fridge for two hours. The cookies were still good, but they were denser and not as tender.
Work in batches. If you’re making a double batch, only take out as much dough as you can shape in one go. Keep the rest in the fridge. Warm dough is sticky dough, and sticky dough makes messy cookies.
Variations & Adaptations
One of the best things about this recipe is how flexible it is. Here are some ways I’ve adapted it over the years:
Nut-Free Version: My friend’s daughter has a nut allergy, so I tested these without pecans. They’re still delicious—just a simple butter cookie with that amazing melt-in-your-mouth texture. You can add mini chocolate chips or dried cranberries instead for a different flavor.
Chocolate Twist: Replace ¼ cup of the flour with unsweetened cocoa powder. You get these gorgeous chocolatey cookies that still have that delicate texture. I drizzle a little melted white chocolate on top for a fancy look.
Spiced Version: Add ½ teaspoon of cinnamon and ¼ teaspoon of nutmeg to the flour mixture. This gives them a warm, holiday-spiced flavor that’s perfect for Christmas cookie boxes. I made these for a cookie swap last year and they were gone in ten minutes.
Lemon Variation: Replace the vanilla with lemon extract and add 1 tablespoon of lemon zest. The bright citrus flavor cuts through the richness beautifully. These are my go-to for spring gatherings.
Gluten-Free Adaptation: Use a 1:1 gluten-free flour blend. I’ve tested this with Bob’s Red Mill and King Arthur Measure for Measure, and both work well. The texture is slightly more delicate, so handle them even more gently.
Serving & Storage Suggestions
These cookies are best served at room temperature, which is when that melt-in-your-mouth magic really happens. I like to arrange them on a pretty plate with a light dusting of extra powdered sugar—it makes them look like little snowballs.
They pair beautifully with a hot cup of tea (hence the name!), coffee, or even a glass of cold milk. For holiday gatherings, I serve them alongside spiced apple cider or hot chocolate. The contrast between the delicate cookie and the warm drink is pure comfort.
Storage: Keep them in an airtight container at room temperature for up to 2 weeks. Layer them between sheets of wax paper so they don’t stick together. Honestly, they rarely last that long in my house.
Freezing: You can freeze the baked cookies for up to 3 months. Place them in a single layer on a baking sheet, freeze until solid, then transfer to a freezer bag. Thaw at room temperature and re-roll in powdered sugar before serving. You can also freeze the unbaked dough balls on a baking sheet, then transfer to a bag. Bake directly from frozen, adding 2-3 minutes to the baking time.
Reheating: These are best at room temperature, so no reheating needed. If you like them slightly warm, pop them in a 300°F oven for 3-4 minutes, then re-dust with sugar.
The flavors actually develop over time—they’re even better on day two or three. Something about the butter and sugar melding together makes them taste more complex. So don’t be afraid to make them a few days ahead of your event.
Nutritional Information & Benefits
Let’s be real—these are cookies, not health food. But they’re made with simple, real ingredients, and that counts for something. Here’s the approximate nutrition per cookie (based on 24 cookies):
- Calories: 145
- Fat: 10g
- Carbohydrates: 13g
- Protein: 2g
- Fiber: 1g
- Sugar: 6g
Pecans are a good source of healthy fats and antioxidants, and butter provides vitamin A. The powdered sugar is mostly for the coating, so you can use less if you’re watching your sugar intake.
These cookies are naturally vegetarian and can be made gluten-free with a simple flour swap. They do contain dairy and nuts, so keep that in mind for allergies. I personally love that they’re made from pantry staples—no weird preservatives or artificial ingredients.
Frequently Asked Questions
Why are my Russian tea cakes falling apart?
This usually happens for one of three reasons: the nuts are chopped too coarsely, the dough wasn’t chilled long enough, or the cookies were overbaked. Make sure your pecans are finely chopped and chill the dough for the full 30 minutes. Take the cookies out when the bottoms are just golden, even if the tops look pale.
Can I use walnuts instead of pecans?
Absolutely! Walnuts are a classic substitute. They have a slightly more bitter, earthy flavor compared to the sweetness of pecans, but they work beautifully. Toast them first for the best flavor. Almonds or hazelnuts also work well in a pinch.
How do I get that perfect snowy coating?
The secret is the double coating. Roll the cookies in powdered sugar while they’re still warm—that first coat melts slightly and creates a base layer. Then wait until they’re completely cool and roll them again. The second coat sticks to the first one and gives you that beautiful snowy look. Don’t rush this step.
Can I make these ahead of time for a party?
Yes, and honestly, they taste even better the next day. Bake them up to three days in advance and store them in an airtight container. Wait to do the final powdered sugar coating until just before serving for the prettiest presentation. They also freeze beautifully for up to three months.
Why did my cookies spread out flat?
This usually means the butter was too soft or the dough wasn’t chilled enough. Make sure your butter is softened but not melted, and don’t skip the 30-minute chill time. If your kitchen is warm, you can even chill the shaped dough balls on the baking sheet for 10 minutes before baking. That extra step helps them hold their shape.
Conclusion
These Russian tea cakes are more than just a cookie recipe to me. They’re a connection to Mrs. Kowalski’s warm kitchen, to the smell of vanilla and toasted nuts, to that feeling of being nine years old and covered in powdered sugar. Every time I make them, I remember that she was right—the mess really does mean we’re making memories.
And now you get to make your own memories with them. Maybe you’ll bake them with your kids on a snowy afternoon, or bring them to a holiday party where they’ll disappear in minutes, or just make a batch for yourself on a quiet Tuesday because you deserve something beautiful. That’s the thing about this recipe—it works for all of it.
I’d love to hear how yours turn out. Did you try a variation? Did your family love them? Drop a comment below and tell me all about it. And if you’re looking for more cozy holiday recipes, don’t miss my classic sugar cookies or these chewy ginger molasses cookies. Happy baking, friend. I hope these little snowball cookies bring you as much joy as they’ve brought me.
Pin This Recipe!

Russian Tea Cakes

These buttery, nutty cookies literally dissolve on your tongue. With a double coating of powdered sugar, they are the perfect melt-in-your-mouth holiday treat.
- Prep Time: 15 minutes
- Cook Time: 12 minutes
- Total Time: 35 minutes
- Yield: 24 servings 1x
- Category: Dessert
- Cuisine: Russian
Ingredients
- 1 cup (226g) unsalted butter, softened
- ½ cup (60g) powdered sugar
- 1 teaspoon vanilla extract
- 2¼ cups (280g) all-purpose flour
- ¼ teaspoon salt
- 1 cup (120g) pecans, finely chopped
- 1 cup (120g) powdered sugar (for coating)
Instructions
- Preheat oven to 350°F (175°C). Line a baking sheet with parchment paper or a silicone mat.
- Toast pecans on a separate baking sheet for 5-7 minutes until fragrant. Let cool completely, then chop very finely.
- In a large bowl, beat softened butter and ½ cup powdered sugar until light and fluffy (2-3 minutes). Add vanilla and beat until combined.
- In a separate bowl, whisk together flour and salt. Gradually add to butter mixture, mixing on low until just combined.
- Fold in finely chopped pecans until evenly distributed. Dough should be soft and slightly crumbly.
- Cover bowl with plastic wrap and refrigerate for exactly 30 minutes.
- Preheat oven again if needed. Roll dough into 1-inch balls and place 2 inches apart on prepared baking sheet.
- Bake for 10-12 minutes until bottoms are lightly golden and tops are set but not brown.
- Let cookies cool on baking sheet for 5 minutes. While still warm, roll each cookie in powdered sugar. Place on cooling rack.
- Once completely cool (about 20 minutes), roll cookies in powdered sugar again for a snowy coating.
Notes
Chill the dough for exactly 30 minutes to prevent spreading. Toast pecans for deeper flavor. Double coat with powdered sugar for the best snowy look. Cookies taste even better on day two or three.
Nutrition
- Serving Size: 1 cookie
- Calories: 145
- Sugar: 6
- Sodium: 30
- Fat: 10
- Saturated Fat: 5
- Carbohydrates: 13
- Fiber: 1
- Protein: 2
Keywords: Russian tea cakes, snowball cookies, holiday cookies, butter cookies, pecan cookies, melt-in-your-mouth cookies


