The church bake sale was in six hours and I’d completely forgotten. Everyone else would be bringing their grandmother’s famous pecan pies, those perfectly layered seven-layer bars, and the kind of elaborate French pastries that make you wonder if they actually sleep. I had a half-stick of butter, some pumpkin puree from a can I’d bought on a whim, and a pantry full of baking staples. Oh, and a serious case of panic. I mean, you know that feeling when you’re staring at your kitchen counter like it’s going to magically produce something impressive? Yeah, that was me.
I’d been meaning to test a new cookie recipe for weeks—something that screamed fall without being the same old pumpkin bread everyone brings. But life got in the way, as it always does. So there I was, frantically scrolling through my saved recipes, looking for something that used what I had and didn’t require a trip to the store. That’s when I remembered the brown butter trick my friend Sarah had mentioned last month. She swore it made everything taste like a warm hug from a professional chef. I had nothing to lose, honestly.
So I browned that sad little half-stick of butter, crossed my fingers, and threw together a batch of what I’m now calling the best brown butter pumpkin snickerdoodle cookies. Let me tell you—when I walked into that church hall with a simple tin of cookies, I expected to be outshined by the fancy stuff. Instead, I was the one people kept coming back to, asking for the recipe. The tin was empty in twenty minutes. I stood there, slightly sheepish, with butter still under my fingernails, thinking, “I guess I accidentally won this one.” And honestly? I’ve been making them ever since. Maybe you’ve been in a similar spot—needing to bring something good with barely any time to spare. These cookies are your answer.
Why You’ll Love This Recipe
Let me be real with you—I’ve tested a lot of pumpkin cookie recipes over the years. Some are too cakey, some are bland, and some just don’t have that wow factor you want when you’re serving guests. These brown butter pumpkin snickerdoodle cookies? They’re different. They’re the kind of cookie that makes people close their eyes after the first bite. And as someone who’s brought them to more potlucks and dinner parties than I can count, I can tell you they never disappoint.
- Quick & Easy: From start to finish, these come together in under 30 minutes. Perfect for those moments when you realize you need to bring something to a gathering and you’re short on time.
- Simple Ingredients: No fancy grocery trips needed. You probably have most of these in your kitchen right now—flour, sugar, butter, eggs, and pumpkin puree.
- Perfect for Hosting: These cookies are made for sharing. They’re great for fall gatherings, Thanksgiving potlucks, Halloween parties, or just a cozy night in with friends.
- Crowd-Pleaser: Kids love them, adults love them, even people who say they don’t like pumpkin desserts ask for seconds. I’ve seen it happen more times than I can count.
- Unbelievably Delicious: The brown butter adds this nutty, toasty depth that regular butter just can’t match. Combined with the warm pumpkin spices and that classic snickerdoodle cinnamon-sugar coating, it’s next-level comfort food.
What makes this recipe different from the rest? It’s the brown butter, honestly. That simple step of browning the butter before mixing it in transforms the entire cookie. It adds a richness and complexity that makes these taste like they came from a fancy bakery. Plus, the texture is just right—soft and chewy in the middle with slightly crispy edges. It’s not another dry, cakey pumpkin cookie. It’s the best version.
These cookies are comfort food reimagined—faster, more flavorful, but with the same soul-soothing satisfaction. Perfect for impressing your guests without stress, or turning a simple fall evening into something memorable.
What Ingredients You Will Need
This recipe uses simple, wholesome ingredients to deliver that incredible brown butter flavor and soft, chewy texture. Most of these are pantry staples, which makes these cookies perfect for last-minute baking.
For the Cookies
- 1 cup (226g) unsalted butter — This is the star of the show. You’ll be browning it, so don’t skip this step. I recommend using a good quality butter like Kerrygold for the best flavor, but any unsalted butter works.
- 1 cup (200g) granulated sugar — Adds sweetness and helps create that slightly crispy edge.
- 1/2 cup (100g) packed light brown sugar — Adds moisture and a deeper, caramel-like flavor that pairs beautifully with the brown butter.
- 1 large egg — At room temperature for better incorporation. (Take it out of the fridge about 30 minutes before starting.)
- 1 teaspoon vanilla extract — Use pure vanilla extract if you have it. It makes a difference.
- 3/4 cup (180g) pumpkin puree — Not pumpkin pie filling! Make sure you’re getting 100% pure pumpkin puree. I like Libby’s brand for consistent results.
- 2 1/2 cups (315g) all-purpose flour — Spoon and level it for the most accurate measurement. Too much flour will make the cookies dry.
- 1 teaspoon baking soda — Helps the cookies spread and rise just the right amount.
- 1/2 teaspoon baking powder — Adds a little extra lift for a softer texture.
- 1/2 teaspoon salt — Balances the sweetness and enhances all the flavors.
- 2 teaspoons pumpkin pie spice — You can use store-bought or make your own with cinnamon, nutmeg, ginger, and cloves. I prefer making my own blend—it’s fresher and you can adjust it to your taste.
- 1 teaspoon ground cinnamon — Because you can never have too much cinnamon in a snickerdoodle.
For the Cinnamon-Sugar Coating
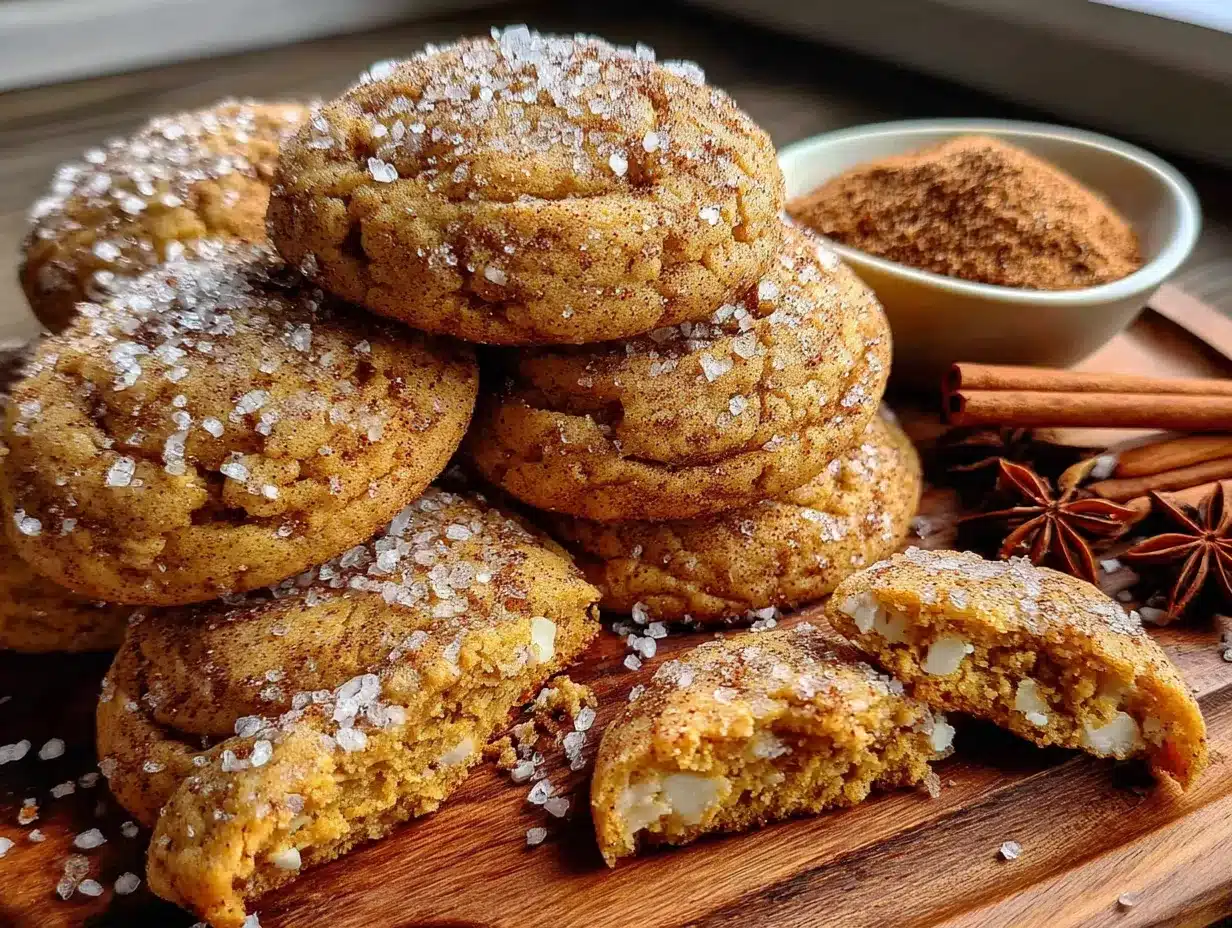
- 1/4 cup (50g) granulated sugar — For that classic snickerdoodle coating.
- 1 tablespoon ground cinnamon — This is what makes them snickerdoodles! The coating adds a lovely crunch and warmth.
Ingredient Selection Tips: When choosing pumpkin puree, look for cans that say “100% pure pumpkin” and avoid anything labeled “pumpkin pie filling” which has added sugar and spices. For the butter, since we’re browning it, using a lighter-colored pan helps you see the color change more easily. And if you’re out of pumpkin pie spice, just mix together 1 teaspoon cinnamon, 1/2 teaspoon ginger, 1/4 teaspoon nutmeg, and 1/4 teaspoon cloves—that’s my go-to blend.
Substitution Guidance: Need to make these dairy-free? You can use a plant-based butter, though the browning step might work slightly differently. For a gluten-free version, swap the all-purpose flour with a good 1:1 gluten-free baking flour blend. I’ve tested this with Bob’s Red Mill and it works beautifully. And if you don’t have pumpkin puree on hand, sweet potato puree makes a great substitute—just make sure it’s unsweetened.
Equipment Needed
You don’t need any fancy equipment for these cookies, which is part of what makes them so great for last-minute baking. Here’s what you’ll need:
- Large mixing bowl — For combining your wet and dry ingredients.
- Medium mixing bowl — For whisking the dry ingredients together.
- Small saucepan — For browning the butter. A light-colored saucepan is best so you can see the butter change color.
- Whisk — For mixing the dry ingredients and for stirring the brown butter.
- Wooden spoon or rubber spatula — For folding everything together. I prefer a rubber spatula—it gets every last bit of dough.
- Baking sheets — Two large baking sheets work best so you can bake multiple batches at once. I use Nordic Ware sheets—they’re sturdy and bake evenly.
- Parchment paper or silicone baking mats — Parchment paper is my go-to because it’s easy to clean up and helps the cookies bake evenly. Silicone mats work great too.
- Cookie scoop — A 1.5-tablespoon scoop gives you perfectly uniform cookies every time. If you don’t have one, just use a spoon and your hands.
- Cooling rack — For letting the cookies cool completely. This helps them set properly.
- Small bowl — For the cinnamon-sugar coating mixture.
Budget-Friendly Options: If you don’t have a cookie scoop, just use two spoons to portion the dough. No cooling rack? You can cool the cookies on a clean kitchen towel placed on the counter. And if you don’t have parchment paper, lightly greasing the baking sheet works too—though the bottoms might brown a bit more.
Preparation Method
Alright, let’s get baking! Here’s how to make these brown butter pumpkin snickerdoodle cookies step by step. Trust me, the brown butter step is worth every extra minute.
- Brown the butter: Place the 1 cup of unsalted butter in a small saucepan over medium heat. Let it melt completely, then continue cooking, stirring occasionally with a whisk or rubber spatula. The butter will start to foam and bubble—that’s normal. After about 5-7 minutes, you’ll notice the butter turning a golden brown color and smelling nutty and toasty. Small brown specks will appear at the bottom of the pan. That’s exactly what you want! Once it reaches a deep amber color, remove it from the heat immediately and pour it into a heat-safe bowl to stop the cooking process. Let it cool for about 10 minutes. (Pro tip: Don’t walk away during this step—brown butter can go from perfect to burnt in seconds!)
- Preheat and prepare: Preheat your oven to 350°F (175°C). Line two baking sheets with parchment paper or silicone baking mats. This ensures your cookies won’t stick and they’ll bake evenly.
- Mix the wet ingredients: In a large mixing bowl, combine the cooled brown butter, 1 cup granulated sugar, and 1/2 cup packed light brown sugar. Whisk until well combined—it should look like a thick, glossy paste. Add the 1 large egg and 1 teaspoon vanilla extract, and whisk until smooth. Then add the 3/4 cup pumpkin puree and stir until everything is fully incorporated. The mixture will look a bit separated at first, but keep stirring—it will come together.
- Combine the dry ingredients: In a separate medium bowl, whisk together 2 1/2 cups all-purpose flour, 1 teaspoon baking soda, 1/2 teaspoon baking powder, 1/2 teaspoon salt, 2 teaspoons pumpkin pie spice, and 1 teaspoon ground cinnamon. Make sure everything is evenly distributed—you don’t want a pocket of baking soda in one cookie!
- Combine wet and dry: Gradually add the dry ingredients to the wet mixture, stirring with a wooden spoon or rubber spatula until just combined. Be careful not to overmix—stop as soon as you don’t see any more streaks of flour. Overmixing will make the cookies tough. The dough will be soft and slightly sticky, which is perfect.
- Make the cinnamon-sugar coating: In a small bowl, mix together 1/4 cup granulated sugar and 1 tablespoon ground cinnamon. Set aside.
- Shape the cookies: Using a 1.5-tablespoon cookie scoop or a spoon, portion out the dough and roll it into balls about 1.5 inches in diameter. Roll each ball in the cinnamon-sugar mixture until fully coated. Place them on the prepared baking sheets, spacing them about 2 inches apart. These cookies will spread a bit, so give them room.
- Bake: Bake in the preheated oven for 10-12 minutes, or until the edges are set and lightly golden. The centers will still look slightly soft and puffy—that’s okay! They’ll continue to set as they cool. For softer, chewier cookies, bake for 10 minutes. For slightly crispier edges, go for 12 minutes. (I usually go with 11 minutes for that perfect middle ground.)
- Cool: Let the cookies cool on the baking sheet for 5 minutes. This is important—they’re fragile when they first come out of the oven. After 5 minutes, transfer them to a wire cooling rack to cool completely. If you try to move them too soon, they might fall apart.
- Repeat: If you have more dough to bake, let the baking sheets cool completely before placing the next batch on them. Warm sheets will cause the cookies to spread too much.
Sensory Cues: When the butter is browning, you’ll smell a nutty, toasty aroma that’s absolutely intoxicating. The dough should be soft and slightly sticky—if it’s too dry, add a teaspoon of milk. When the cookies are done, the edges should be lightly golden and the tops should look set but still soft. The kitchen will smell like fall in the best possible way.
Cooking Tips & Techniques
I’ve made these cookies more times than I can count, and let me tell you—I’ve learned a few things along the way. Here are my best tips for getting them perfect every time.
Don’t skip browning the butter. I know it’s an extra step, but it’s what makes these cookies special. The nutty, toasty flavor from brown butter is completely different from regular melted butter. Just watch it carefully—brown butter can go from perfect to burnt in about 30 seconds. I’ve definitely had to start over a time or two. (Or three. Let’s not talk about it.)
Let the brown butter cool properly. If you add the sugars to hot brown butter, it will melt the sugar too much and change the texture of the cookies. Let it cool for at least 10 minutes before mixing. I usually set it aside while I measure out the rest of the ingredients—that gives it plenty of time to cool down.
Measure your flour correctly. This is probably the most common mistake people make with cookie recipes. Scooping directly into the flour bag packs it down and gives you too much flour, which leads to dry, cakey cookies. Instead, use a spoon to fluff the flour, then spoon it into your measuring cup and level it off with a knife. It takes an extra 10 seconds and makes a huge difference.
Chill the dough if you have time. While you can bake these right away, chilling the dough for 30 minutes to an hour helps the flavors meld together and prevents the cookies from spreading too much. If you’re in a rush, no worries—they’ll still be delicious. But if you have the time, it’s worth it.
Use a cookie scoop for uniform cookies. Uniform size means uniform baking. Some cookies won’t be done at the same time as others if they’re different sizes. A cookie scoop is a small investment that pays off in consistent results. Plus, it’s faster than rolling by hand.
Don’t overbake. This is my number one tip for soft, chewy cookies. Take them out when the edges are set but the centers still look slightly underdone. They’ll continue to bake on the hot baking sheet as they cool. Overbaked cookies are dry and crumbly—and nobody wants that.
One mistake I made early on: I once used pumpkin pie filling instead of pure pumpkin puree. The cookies were way too sweet and had a weird texture. Always check the label! Pure pumpkin puree should only have one ingredient: pumpkin.
Variations & Adaptations
One of the best things about this recipe is how versatile it is. Here are some variations I’ve tried and loved:
Gluten-Free Version
Swap the all-purpose flour with a 1:1 gluten-free baking flour blend. I’ve tested this with Bob’s Red Mill and King Arthur Flour blends, and both work great. The texture might be slightly more delicate, but the flavor is just as amazing.
Dairy-Free Version
Use a plant-based butter for the browning step. Keep in mind that different brands behave differently—some brown beautifully, while others don’t brown as well. I’ve had good luck with Miyoko’s European Style Cultured Vegan Butter. The cookies won’t be quite as rich, but they’re still delicious.
Spice It Up
If you love warm spices, add an extra 1/2 teaspoon of ginger or a pinch of cloves to the dough. For a little heat, try adding 1/4 teaspoon of cayenne pepper to the cinnamon-sugar coating. It sounds weird, but the slight kick pairs beautifully with the sweet pumpkin flavor.
Add Mix-Ins
Fold in 1/2 cup of white chocolate chips, chopped pecans, or dried cranberries after mixing the dough. White chocolate and pumpkin is a classic combination, and the pecans add a lovely crunch. I made a batch with white chocolate chips for a holiday party once, and they disappeared faster than anything else on the table.
Pumpkin Spice Latte Twist
Add 1 tablespoon of instant espresso powder to the dry ingredients for a coffee-infused version. It deepens the flavor and gives the cookies a subtle mocha note that’s absolutely addictive. Perfect for your coffee-loving friends.
Serving & Storage Suggestions
These cookies are best served slightly warm, when the brown butter flavor is at its peak and the edges are still a little soft. If you’re serving them at a party, you can bake them a few hours ahead and keep them at room temperature. Just pop them in a 300°F (150°C) oven for 2-3 minutes before serving to warm them up.
What to serve alongside: These cookies pair beautifully with a hot cup of coffee, a chai latte, or a glass of cold milk. For a dessert spread, serve them with vanilla ice cream, whipped cream, or a drizzle of caramel sauce. They’re also great on a fall-themed dessert table alongside apple cider donuts, pumpkin bread, and pecan pie bars.
Storage instructions: Store the cookies in an airtight container at room temperature for up to 5 days. To keep them soft, add a slice of bread to the container—it will absorb excess moisture and keep the cookies from drying out. (Just replace the bread every day or two.)
Freezer instructions: These cookies freeze beautifully. You can freeze the baked cookies for up to 3 months—just place them in a single layer in a freezer-safe container with parchment paper between layers. Thaw at room temperature for about 30 minutes before serving. You can also freeze the unbaked dough balls for up to 3 months. Just roll them in the cinnamon-sugar coating before freezing, then bake directly from frozen, adding 2-3 minutes to the baking time.
How flavors develop: Honestly, these cookies are even better the next day. The flavors meld together overnight, and the texture becomes even softer and more tender. So if you’re making them for a party, baking them a day ahead is actually a great idea.
Nutritional Information & Benefits
Here’s the estimated nutritional information for one cookie (based on a batch of 24 cookies):
- Calories: 185
- Total Fat: 9g
- Saturated Fat: 5g
- Cholesterol: 30mg
- Sodium: 115mg
- Total Carbohydrates: 26g
- Dietary Fiber: 1g
- Sugars: 15g
- Protein: 2g
These numbers are estimates and will vary based on the specific ingredients you use.
Health benefits: Pumpkin is packed with vitamin A, which is great for eye health and immune function. It’s also a good source of fiber and antioxidants. And while these cookies are definitely a treat, the pumpkin adds a little nutritional boost you won’t get from regular snickerdoodles. Plus, using brown butter means you get more flavor with less butter overall—so you can enjoy a cookie or two without feeling guilty.
Dietary considerations: This recipe contains dairy (butter), eggs, and gluten (flour). For dairy-free or gluten-free options, see the variations section above. These cookies are nut-free as written, making them a good option for school events or parties where allergies might be a concern.
From a wellness perspective, I believe in balance. These cookies are a celebration—they’re meant to be enjoyed with friends and family, not stressed over. So go ahead, have a cookie (or two). Life’s too short not to.
Conclusion
These brown butter pumpkin snickerdoodle cookies are everything you want in a fall dessert—warm, spiced, comforting, and just a little bit special. The brown butter adds a depth of flavor that makes them taste like you spent hours in the kitchen, even though they come together in under 30 minutes. They’re perfect for sharing, easy to make, and absolutely impossible to resist.
I love these cookies because they remind me of that chaotic bake sale where I accidentally impressed everyone. They’re proof that you don’t need fancy ingredients or hours of prep to make something truly memorable. Sometimes the best recipes come from a moment of panic and a little bit of creativity. And honestly? That’s what makes them so special.
So go ahead—give these cookies a try. Customize them with your favorite mix-ins, serve them at your next gathering, and watch them disappear. I’d love to hear how they turn out! Leave a comment below and let me know if you tried any variations, or share a photo of your cookies on Pinterest. Happy baking, friends!
Frequently Asked Questions
Can I use pumpkin pie filling instead of pumpkin puree?
No, I wouldn’t recommend it. Pumpkin pie filling has added sugar and spices, which will throw off the sweetness and texture of the cookies. Stick with 100% pure pumpkin puree for the best results.
Why did my cookies turn out cakey?
This usually happens from overmixing the dough or using too much flour. Make sure you’re spooning and leveling your flour, and stop mixing as soon as the dry ingredients are incorporated. Also, avoid overbaking—take them out when the edges are set but the centers still look soft.
Can I make these cookies ahead of time?
Absolutely! You can bake them a day ahead and store them in an airtight container—they actually taste even better the next day. You can also freeze the unbaked dough balls for up to 3 months and bake them straight from the freezer.
Do I have to brown the butter?
Technically no, but I really recommend it. Browning the butter adds a nutty, toasty flavor that takes these cookies from good to unforgettable. If you’re short on time, you can use melted butter, but you’ll be missing out on that special something.
How do I keep my cookies soft?
Store them in an airtight container with a slice of bread—the bread absorbs excess moisture and keeps the cookies soft. Also, make sure you’re not overbaking them. Slightly underbaked cookies stay softer longer.
Pin This Recipe!
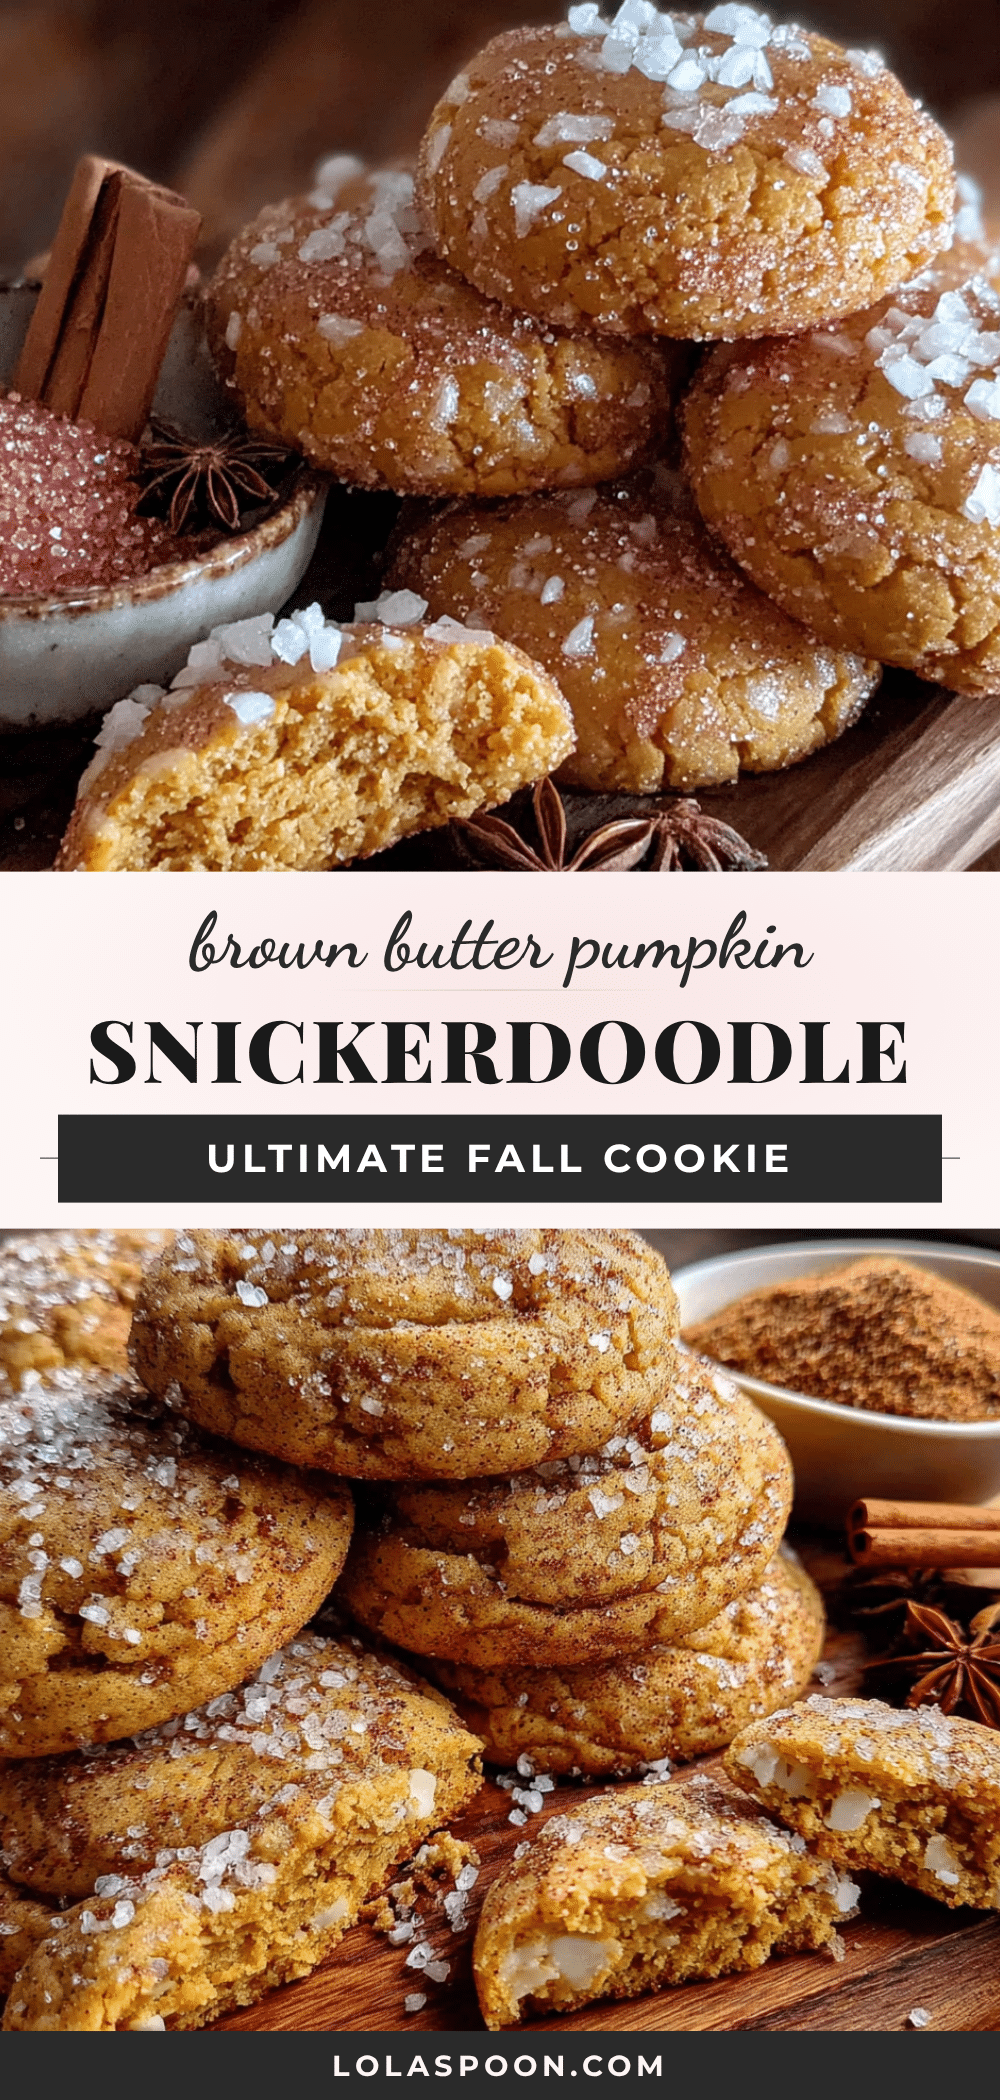
Best Brown Butter Pumpkin Snickerdoodle Cookies Recipe (Easy)
These brown butter pumpkin snickerdoodle cookies are soft, chewy, and packed with warm fall spices. The nutty brown butter and pumpkin puree create an unforgettable cookie that’s perfect for any gathering.
- Prep Time: 15 minutes
- Cook Time: 11 minutes
- Total Time: 26 minutes
- Yield: 24 servings 1x
- Category: Dessert
- Cuisine: American
Ingredients
- 1 cup (226g) unsalted butter
- 1 cup (200g) granulated sugar
- 1/2 cup (100g) packed light brown sugar
- 1 large egg, at room temperature
- 1 teaspoon vanilla extract
- 3/4 cup (180g) pumpkin puree (not pumpkin pie filling)
- 2 1/2 cups (315g) all-purpose flour
- 1 teaspoon baking soda
- 1/2 teaspoon baking powder
- 1/2 teaspoon salt
- 2 teaspoons pumpkin pie spice
- 1 teaspoon ground cinnamon
- 1/4 cup (50g) granulated sugar (for coating)
- 1 tablespoon ground cinnamon (for coating)
Instructions
- Brown the butter: Place 1 cup unsalted butter in a small saucepan over medium heat. Melt completely, then continue cooking, stirring occasionally, until it turns golden brown and smells nutty (about 5-7 minutes). Remove from heat immediately and pour into a heat-safe bowl. Let cool for 10 minutes.
- Preheat oven to 350°F (175°C). Line two baking sheets with parchment paper or silicone baking mats.
- In a large mixing bowl, combine cooled brown butter, 1 cup granulated sugar, and 1/2 cup packed light brown sugar. Whisk until well combined. Add 1 large egg and 1 teaspoon vanilla extract, whisk until smooth. Add 3/4 cup pumpkin puree and stir until fully incorporated.
- In a separate medium bowl, whisk together 2 1/2 cups all-purpose flour, 1 teaspoon baking soda, 1/2 teaspoon baking powder, 1/2 teaspoon salt, 2 teaspoons pumpkin pie spice, and 1 teaspoon ground cinnamon.
- Gradually add dry ingredients to wet mixture, stirring with a wooden spoon or rubber spatula until just combined. Do not overmix.
- In a small bowl, mix together 1/4 cup granulated sugar and 1 tablespoon ground cinnamon for the coating.
- Using a 1.5-tablespoon cookie scoop or spoon, portion dough into balls about 1.5 inches in diameter. Roll each ball in the cinnamon-sugar mixture until fully coated. Place on prepared baking sheets, spacing 2 inches apart.
- Bake for 10-12 minutes, until edges are set and lightly golden. Centers will still look soft. For softer cookies, bake 10 minutes; for crispier edges, bake 12 minutes.
- Let cookies cool on baking sheet for 5 minutes, then transfer to a wire cooling rack to cool completely.
- Repeat with remaining dough, letting baking sheets cool completely between batches.
Notes
For best results, use 100% pure pumpkin puree, not pumpkin pie filling. Let brown butter cool for at least 10 minutes before mixing. For softer cookies, slightly underbake. Cookies taste even better the next day. Store in an airtight container at room temperature for up to 5 days; freeze for up to 3 months.
Nutrition
- Serving Size: 1 cookie
- Calories: 185
- Sugar: 15
- Sodium: 115
- Fat: 9
- Saturated Fat: 5
- Carbohydrates: 26
- Fiber: 1
- Protein: 2
Keywords: brown butter, pumpkin, snickerdoodle, cookies, fall, easy, quick